
By Linda
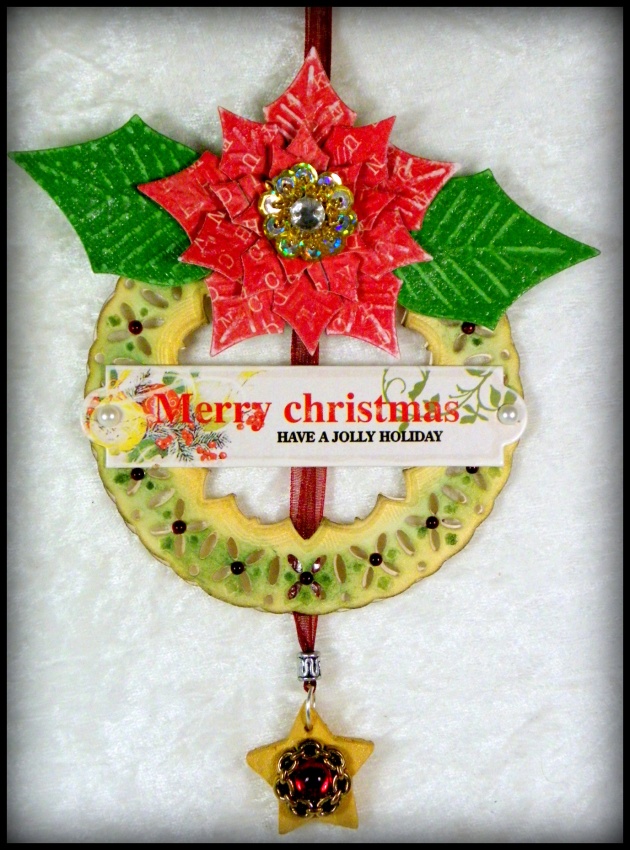
Supplies:
- Imagine Crafts/ Tsukineko: Delicata Pigment Ink Golden Glitz, StazOn Solvent Ink Olive Green, Brilliance Pigment Ink Galaxy Gold, GooseBumps Texture Spray, Sponge Daubers, Jumbo Daubers, Monterey Pine Star
- Spellbinders: Decorative Elements Nestabilities Delightful Circles S4-415, Shapeabilities Layered Poinsettia S5-055, Grand Calibur Cutting Machine
- Authentique Paper: Joyous Collection 12×12
- Want2Scrap: Baby Bling red
- Miscellaneous: liquid glue, jump ring, sanding block, vintage button, white and green cardstock, narrow ribbon, power drill
Directions:
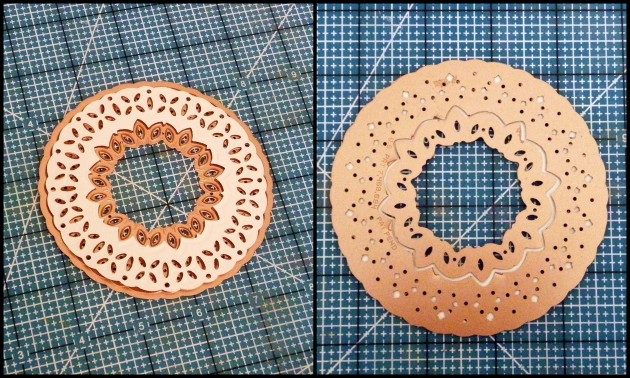
1. Cut/emboss two Delightful Circles using white cardstock.

2. Sponge around the inside and outside edges of both circles using Delicata Golden Glitz and a Jumbo Dauber.
3. Sponge the lace pattern using StazOn Olive Green using a Sponge Dauber. Repeat the layers until you get the depth of green you are wanting.
4. Add Baby Bling as shown in the photo.
5. Repeat for the second circle.
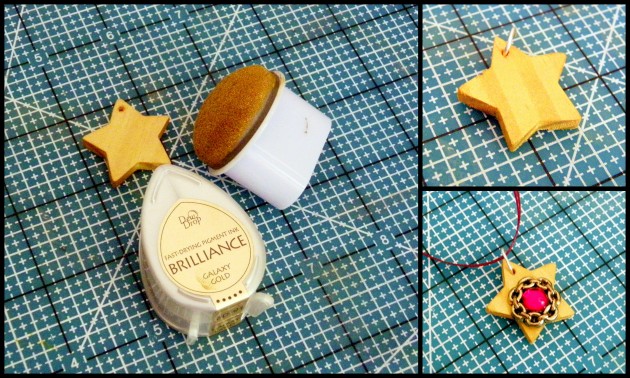
6. With a Jumbo Dauber, sponge Monterey Pine Star using Brilliance Galaxy Gold.
7. Drill a small hole in the top point of the star.
8. Add a jump ring through the hole.
9. Thread through narrow ribbon
10. Remove shank off the back of a recycled button and adhere to the front of the star.
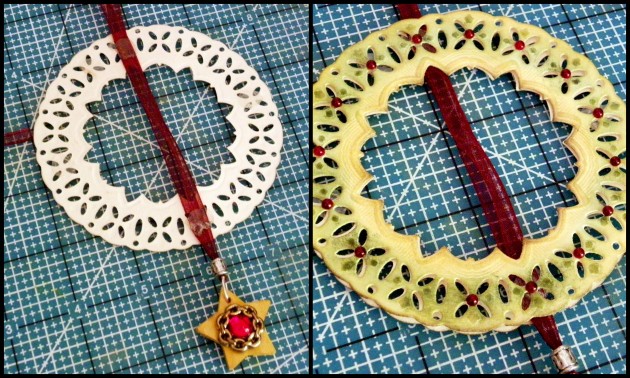
11. Adhere the ribbon across the center of one of the circles.
12. Line up and adhere the second circle on the top.
13. Cut/emboss one each of the layered Layered Poinsettia flower petals (using dies #1, #2, #3, and #4) from Authentique Paper.
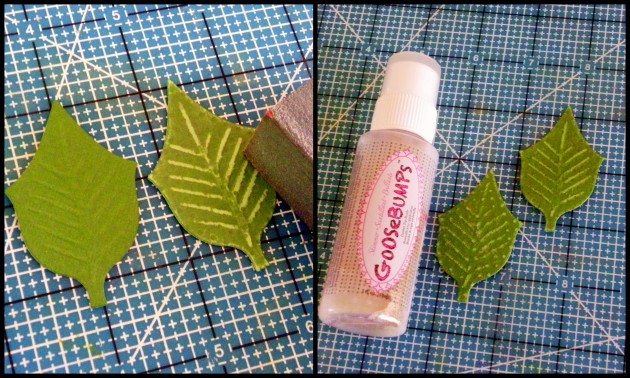
14. Cut/emboss two leaves in green card.
15. Lightly sand the leaves using a sanding block and apply Goosebumps.
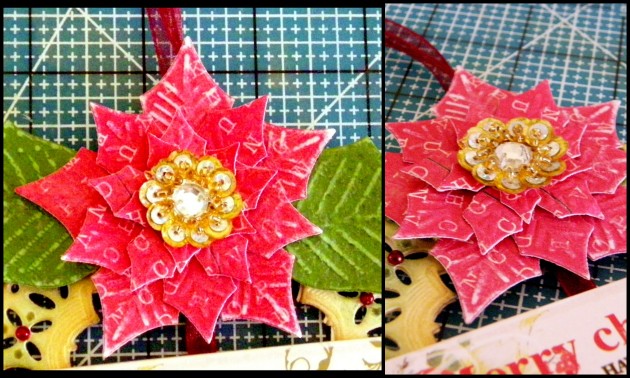
16. Lightly sand the poinsettia flower petals and layer the flower using liquid glue.
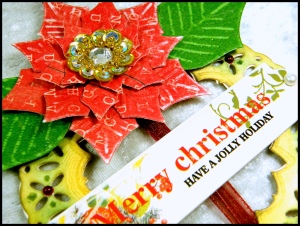
17. Adhere to the top of the ‘wreath’.
18. Adhere bling to the center of the flower
19. Place leaves under the Layered Poinsettia and adhere.

Beautiful ornament!!! You did a lovely job Linda!! TFS!
Lovely ornament Linda