
Believe in Magic
by Roni Johnson

Coming from northern Indiana ideas started swirling around winter and snowflakes since it is getting to be that time of the year. I thought it would be fun to use a variety of techniques to create this layered sparkly snowflake filled card complete with a paper pieced, dimensional fluffy snowman.
Skill: Advanced
Time: 1 hour + dry time
Directions

Step 1
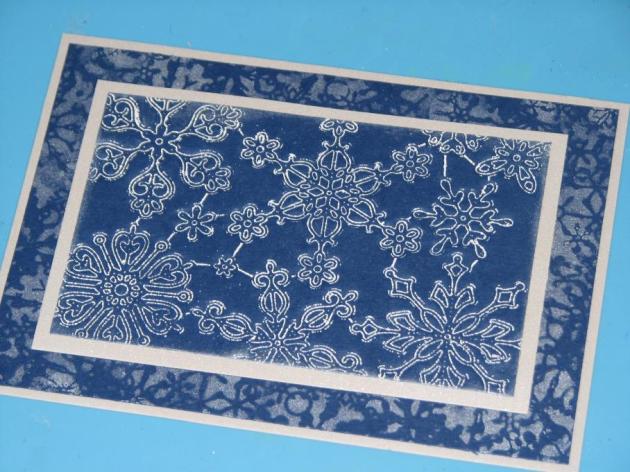
Cut a blue cardstock panel 4.75” x 6.75”. Sponge Shimmer White Delicata ink through the snowflake frame stencil along all edges of the panel.

Step 2
Cut a second blue cardstock panel 3 3/8” x 5 3/8”. Rub the VersaMark ink pad over the cutting surface of the snowflake die. Carefully place snowflake dies over the blue cardstock panel. If desired, use a piece of washi tape to hold the die in place.

Step 3
Sandwich the paper between cutting plate and embossing plate and run through the die cut machine. This will emboss the image onto the paper instead of cutting the paper. Carefully remove the die.

Step 4
Sprinkle white embossing powder over the cardstock panel, shake off excess and return it to the jar. Heat the embossing powder to melt.
Step 5
Cut a 5×7 card base and 3.75” x 5.75” panel from white cardstock. Spray both the card base and panel with Frost Sheer Shimmer Spritz; let dry. Mount the stenciled card panel onto the card base; mount the embossed blue panel onto the white panel; affix this panel to the card base.

Step 6
Stamp the snowman image twice on white cardstock using VersaMark ink; emboss the images using black embossing powder.

Step 7
Apply White Radiant Neon Amplify! to the snowman’s arm and hand on the first image; apply the white medium to the face and body on the second image. Apply Black Amplify! for the eyes and buttons and Electric Orange for the nose. Heat to activate the Amplify!.
Step 8
Cover the heart with a layer of Lady Bug irRESISTible Pico Embellisher and let dry.

Step 9
Cut apart the images as shown so that they may be paper pieced back together to create a dimensional image.

Step 10
Color the scarf and hat using Memento Dual Tip markers.

Step 11
Re assemble the snowman using double stick foam to pop the arm and hat off of the body.

Step 12
Stamp sentiment on vellum using VersaMark ink; emboss with white embossing powder and heat to melt. Die cut the sentiment using oval die.

Step 13
Die cut oval scallop frame and cover with Wedding Dress irRESISTible Pico Embellisher for texture, shine and dimension.

Step 14
Die cut several snowflakes out of white cardstock. Spray the snowflake die cuts with Sparkle Sheer Shimmer Mist.

Step 15
Assemble the various pieces on the card.
Supplies
Imagine
- Delicata – White Shimmer
- Memento Dual Tip Markers – Bahama Blue, Sky Blue, Paris Night
- VersaMark
- Embossing Powder – Black, White
- Sheer Shimmer Spritz – Frost, Sparkle
- irRESISTible Pico Embellisher – Wedding Dress, Lady Bug
- Radiant Neon Amplify! – White, Black, Electric Orange
- Sponge dauber
Other
- My Favorite Things – HH Snowman Stamp Set; Snowflake, Oval, Scallop Oval Frame Dies
- Memory Box – Snowflake Stencil
- Die cut machine
- Embossing mat
- Cardstock – White, Blue
- Acrylic block
- Foam adhesive
- Adhesive
