Create a Beautiful Kraft Paper Notebook with Walnut Inks

Create a Beautiful Kraft Notebook with Walnut Inks

By Kyriakos Pachadiroglou

Beyond staining paper with Walnut inks, use them to stamp with foam stamps and as a drawing medium with the Fantastix brush tips for free hand designs on kraft wrapping paper. Seal the result and make the paper resistant with a layer of Creative MEDIUM.  Celebrate the new year and create some awesome goals.

Skill: Intermediate
Time: 1 ½ hour

Directions

Step 1

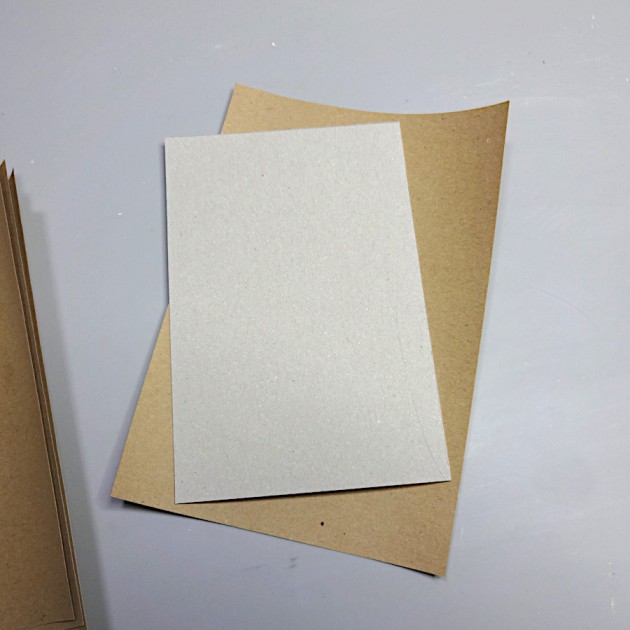
Cut 4x6in pieces of the carton paper and 5x7in of the kraft paper. 4 of each to make 2 notepads.

Step 2

Pour some Walnut Ink Lilac Posies on the craft mat and press the foam leaf stamp on it and stamp in a scattered pattern on the kraft paper. Try not to over soak the foam. (If you don’t have a leaf stamp, cut a simple, almond like, leaf shape from a piece of foam).

Step 3

Continue with smaller size leaves using the Cherry Blossom and Willow Walnut inks. Make two kraft paper pieces as above.

Step 4

Dip three Fantastix brush tips in the Walnut Inks colors above and draw brunches with the Willow one.

Step 5

Add flowers (small dots can work to decorate) with the Cherry Bloom and the Lilac Posies. Make two of the kraft paper pieces as above.

Step 6

Decorate the leaves with the MEMENTO dual tips markers.

Step 7

Add the number 21 using the number stencil and the MEMENTO dual tips markers.

Step 8

Cover the kraft papers with a long palette knife and Creative MEDIUM Shimmer and let them dry.

Step 9

Place Tear It Tape on the carton pieces and set in the middle the kraft papers. (½ in should be left on every side).

Step 10

Add Tear It Tape to the edge of the ½ in kraft paper, cut the corners and fold to secure on the back of the carton paper. This step creates the book cover. Repeat process with the rest pieces.

Step 11

Cut 3 ¾ x 5 ¾ in pieces of kraft paper, place Tear It Tape and set to the back (inner) side of the book covers.

Step 12

Cut blank pages in 3 ¾ x 5 ¾ in size. Use a book binding machine or book binding tools to bind the notepads. Alternate punch holes with hole punch tool and add book binding rings to hold the pages.

Art Supplies

Imagine

Other

  • Kraft wrapping paper
  • Carton paper
  • Foam stamps (or foam sheet)
  • Blank A4 pages
  • Numbers stencil
  • Book binding machine and wires (or hole punch tool)

Beginner Guide: Kaleidacolor Ink Variety of Colors for Any Time of the Year


kaleidacolor swatching video

by LeeAnn McKinney

Greetings crafty friends! In this quick ink swatching video, I used the Waffle Flower Swatch Stamp and Die set for Kaleidacolor Ink Pads to show how these multicolor inks can be used throughout the year. These dye, water-based inkpads are a favorite of mine for fun quick backgrounds, easy stamp pad storage, keeping colors organized and the 5 colors in one ink pad make it even better.

Kaleidacolor in Baby Powder has a light pastel variety — perfect for baby shower invitations with light pinks, blues, and yellows. Kaleidacolor in Autumn Leaves and Vineyard – perfect for Fall themed cards – Halloween + Thanksgiving. My favorite for Winter Christmas Cards or Holiday Cards is Blue Breeze which is an all-blue palette giving that icy winter wonderland mood.

Other 

Make this Mini Circle Art Journal with StazOn Pigment Ink

by Lori Warren

Art journals are wonderful in any size.  Take this mini- circle journal, for example, it is pocket-sized and perfect for your summer travels. 

Skill: Beginner
Time: 20 minutes

Directions

Supplies

Imagine
  • StazOn Pigment – Mariner Blue, Shamrock Green, Piano Black, Koala Grey, Peacock Feathers 
  • GlazOn 
Other
  • Art Minds – 2 5/8” wooden tags
  • Mixed Media Paper for inner pages.
  • Book ring
  • We R Memory Keepers – Nesting Circle Dies
  • We R Memory Keepers – Crop-A- Dile
  • Bo Bunny Stamps – It is Written, Painted Circles
  • Stamper Anonymous, Tim Holtz Collection – Phrases

Create an Artsy Book Cover with All Purpose Inks

by Lori Warren

Creating an Artsy book cover is easy with All-Purpose Ink and Ink Droppers. This project will walk you through the step by step process of creating a unique background paired with a large word stamped (with StazOn Pigment Ink) as a focal point. 

Skill: Intermediate
Time: 20 minutes

Directions

Part 1: Create an Artsy book cover with All-Purpose Inks.

Part 2: Color Scheme Tag Journal

  1. Start with a blank hardcover book.
  2. Place a piece of paper under the book cover to protect the pages below.
  3. Using ink droppers, draw up a small amount of All-Purpose Ink into the dropper and release (splatter) the ink onto the cover. Repeat with different colors.
  4. After the ink has dried, stamp “ART” onto the cover using StazOn Pigment ink.
  5. Apply StazOn Ink directly to each edge of the book cover.
  6. Step two – Create Color Swatch Tag
  7. Cut a tag using the Waffle Flower Tag Die.

Supplies

Imagine

Other

Hope & Strength Call for Art

Call for Hope & Strength Art

In tough times we all need to focus on being strong and supporting each other. Submit a photo of an Inspiration-themed project. Some of the themes can include: Hope, Love, Faith, Prayers, Be Strong, Hang in There, Stay Strong, Brighter Days are Ahead, Journal pages, At-home crafts, etc.

Submit an attractive 600 x 600 pixel square or 900 x 900 pixel square photo of your project, a short description and a link to your Instagram profile or blog to marketing@imaginecrafts.com. Submissions are due by Monday, March 30th, 2020

We will review all submissions and post a collection in one blog post and will share it on our social media platforms. Potential reach = 10,000 followers.

Call for Spring Time Art

Call for Spring Time Art

Be published on the Imagine Blog! Submit a photo of a Spring related project using (mostly) Imagine or Tsukineko products. Some of the spring themes can include: Spring is Coming, Happy Spring, Happy Birthday, Baby Shower, St Patricks’s Day, Easter, Spring Cleaning, Organize the Home, Mason Jar Crafts, Wedding Preparation, Earth Theme crafts, Floral Wreaths on cards or large Paper flower wreaths.

Submit an attractive 600 x 600-pixel square or 900 x 900-pixel square photo of your project, a short description and a link to your Instagram profile or blog to marketing@imaginecrafts.com.

We will review all submissions and post a collection in one blog post and share it on our social media platforms. Potential reach = 10,000 followers.

Submission Deadline is Tuesday, March 10th, 2020