Let’s Create a Thank You Card for Your Teacher

By Von Marie

– Hello everyone! Von Marie here with my latest video. Teacher thank you cards are always wonderful to have on hand, so I thought it would be fun to create one using the beautiful new VersaFine Clair colors. I love how bright and cheerful these inks make this card! Watch the video to see how it all comes together. Thank you for watching!

Skill Beginner Intermediate
Time 45 Mins.

Craft Supplies:

Imagine:

VersaFine Clair Inks-Lemoncello, Dahlia Purple, Wisteria Purple, Melon Soda, and Carrot Orange.
VersaFine Onyx Black ink
Fantastix
Craft Mat
Memento Dew Drop Onyx Black

Other Supplies:
Simon Says Stamp Stitched Rectangles Dies
Hero Arts Flower and Bees Floral Cling background Stamp with Coord. Dies and Coloring Layering Roses stencils.
Hero Arts Retired Amazing Word Fancy Die and Shadow Die
White cardstock
Stamping Platform
Paper Trimmer
Die-cutting Machine
Blending brushes
A2 Card Base

Using background stamps, stencils,and inks are a fun way to mass produce a lot of the same card too. Have fun and hope you make some Thank you cards.

Christmas in July Gift Card Holder 

By Jessica Lin

Skill: Intermediate 
Time: 45 minutes 

Hi everyone! It’s Jessica here. I want to share one of my favorite ways to create a gift card holder today. It’s super simple and quick to put together. I picked a Christmas theme but you could easily change it to a birthday or wedding gift card holder. 

Step 1:
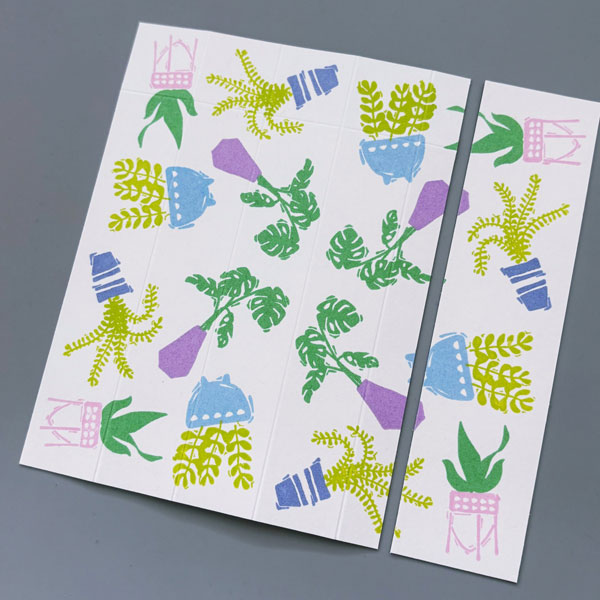
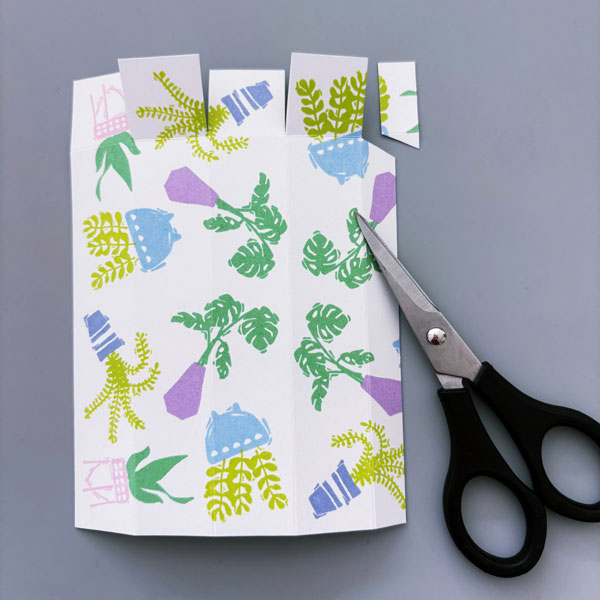
Let’s start by creating the base of the gift card holder. Using Environment Desert Storm cardstock, cut it in half to create a standard A2 card base (4 ¼’’ x 5 ½’’), and score at 4 ½’’, 5 ½’’ and 6 ½’’. Fold along the crease to create a peak just like the one in the photo. 

Step 2:
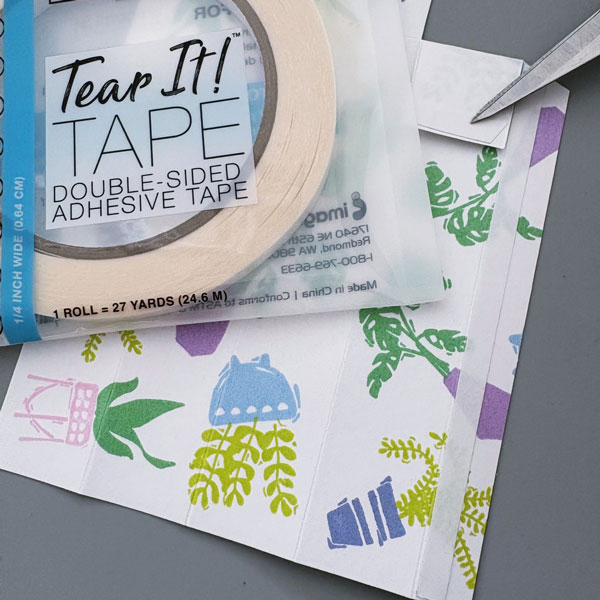
Next, flip the card base around and apply Tear-It! Tape to the top edge of the scored line. Notice how the “peak” from earlier has turned into a “valley”. You want to avoid adding adhesive to the center of the “valley” since that will become the opening for the gift card holder. 

Step 3:
Once the middle portion of the card base is adhered together, you will have a new card base that is 4 ¼’’ x 5’’ with an inner flap. Now, we are ready to create the opening for the gift card. Place the largest frame die from Spellbinders Labels Seventeen set to die cut the gift card opening. The trick is to die cut as little cardstock as possible so that there is a large flap area to hold your gift card. 

Step 4:
Let’s decorate the front of the gift card holder next. I stamped this Christmas tree image on Classic Crest Solar White cardstock with VersaColor Evergreen ink pad and die cut the image with the coordinating die. 

Step 5:
Then, I stamped another Christmas tree design with VersaMagic Tea Leaves ink pad. Both of these stamps are from Stampin Up’s Peaceful Pines set. 

Step 6:
I decided to add an embossed panel to add some interest to the background. I trimmed a piece of Environment Desert Storm cardstock to 3 ¾’’ x 4 ½’’ and embossed it with Stampin’ Up’s Tin Tile embossing folder. The details really pop on this kraft colored cardstock, don’t you think? 

Step 7:
For the sentiment, I picked this scripty “Christmas” die from Ellen Hutson’s Merry & Bright set and die cut it with DCS Gold Glitter Heavyweight 12 x 12. This gold glitter cardstock is becoming a staple in my craft room – it’s easy to die cut with and does not shed any glitter (no glitter mess!). 

Step 8:
Finally, I stamped “Merry” with Encore! Gold ink pad to complete the sentiment. I picked this color since it matches the DCS Gold Glitter Heavyweight cardstock really well. 

Step 9:
This is what the gift card holder looks like with a gift card inserted. I really like this gift card holder since it’s super easy to assemble and there’s space to write a personal message as well. I hope you enjoyed today’s tutorial, and thanks for stopping by! 

Products Used

Imagine Supplies: 

● VersaMagic – Tea Leaves 
● VersaColor – Evergreen 
● Encore! – Gold 
● StazOn Cleaner 
● Tear-It! Tape 
● Craft Mat 

Other Supplies: 

● Spellbinders – Dies – Labels Seventeen 
● Stampin’ Up! – Stamps – Peaceful Pines 
● Stampin’ Up! – Dies – Perfect Pines 
● Ellen Hutson’s – Dies – Merry & Bright 
● Winnie & Walter – Stamps – In a Word: Grand Merry 
● Stampin’ Up – Embossing Folder – Tin Tile 
● Neenah – Cardstock – Environment Desert Storm, Classic Crest Solar White 
● DCS – Cardstock – Gold Glitter Heavyweight 

Create a Star Wars Inspired Mixed Media Card

By Anna Escalada York

I always love when I can share my love for pop culture in the cards that I make. This card gave me the perfect opportunity to create a colorful galaxy background using the new VersaFine Clair ink colors, along with shimmer sprays and layered stamping for a fun mixed media look.
Skill: Intermediate 

Time: 1.5 hours 
Directions: 

Step 1: 
Die cut a watercolor panel with a mid-sized die from an A2-sized die set. Stamp the smaller android image in the lower-center part of the watercolor panel with Nocturne VersaFine Clair Ink and heat emboss with clear embossing powder. 

Stamp the image a second time on masking paper and fussy cut out the image. Then place the fussy cut masking paper over the android image. 

Step 2: 
Stamp the taller android image to the left of the first droid with more Nocturne VersaFine Clair Ink and heat emboss with more clear embossing powder. (Since the first android was masked, it will appear like the second droid is behind him since his right hand will not be seen in the final image.) Stamp the same image a second time with more masking paper and fussy cut the masking paper. Then place the masking paper over this android so that both of them are protected for the next few steps. 

Step 3: 
Stamp a circuit image stamp twice on the watercolor panel with Dahlia Purple VersaFine Clair Ink by stamping once in the lower left corner and then rotating the watercolor panel 180 degrees and stamping the image a second time. Heat emboss both stamped corners with more clear embossing powder 

Step 4: 
Spray Rose Gold Sheer Shimmer Craft Spray generously through a scattered star stencil. Use the spray to add more clear embossing powder to the panel. The embossed stars will resist color that will be applied to the panel in the next few steps. 

Step 5: 
Spray the watercolor panel with London Fog Fireworks! Craft Spray. If desired, blot off some of the spray with a paper towel if it is too dark. Allow to dry. 

Step 6: 
Remove the masking paper. Color the androids and the area around them to help them look grounded. Use the following markers to color the scene: 

● The smaller android (on the right): Teal Zeal and Danube Blue Memento Dual Markers as well as Tropical Lagoon and Poppy Red Fabrico Dual Markers 

● The taller android (on the left): Cantaloupe and Dandelion Memento Dual Markers, Lemon Yellow Fabrico Dual Marker 

Watercolor the area around the androids with Rich Cocoa Memento Dual Marker mixed with water on acetate to create the ground around the two androids, and Ultramarine Fabrico Dual Marker mixed with water on acetate to color the sky/walls behind he androids. Allow to dry. 

Step 7: 
To add shimmer to the androids, watercolor both of them with Frost Sheer Shimmer Craft Spray. 

Step 8: 
Press the edges of the watercolor panel directly into the Nocturne VersaFine Clair Ink Pad. Then use a sponge dauber to blend additional Nocturne VersaFine Clair Ink around the edges. 

Step 9: 
Stamp the sentiment on a separate piece of watercolor paper with more Nocturne VersaFine Clair Ink and heat emboss with more clear embossing powder. Then trim the sentiment with a paper trimmer. 

Step 10: 
Die cut a matte layer of black watercolor paper (or black cardstock) with the next-largest die from the nesting die set used in step 1. Glue both panels together. Attach the sentiment on the lower right corner of the top watercolor panel with foam tape. Glue star-shaped and bronze sequins on the lower left and upper right corners of the card. To finish the card, glue the whole thing onto an A2-sized card base. 

Art Supplies 

Imagine 
• Fabrico Dual Markers
– Lemon Yellow 
– Poppy Red 
– Tropical Lagoon 
– Ultramarine 

• Fireworks! Craft Spray – London Fog

• Memento Dual Marker:
– Cantaloupe 
– Dandelion 
– Danube Blue 
– Rich Cocoa 
– Teal Zeal 

• Sheer Shimmer Craft Spray
– Frost 
– Rose Gold 

• VersaFine Clair Ink
– Dahlia Purple 
– Nocturne 

Other 

• AALL & Create – stencil -Lotza Starz 
• Altenew – foam tape – Instant Dimension Foam Tape 
• Catherine Pooler – sequin mix -Highland 
• Kindred Stamps – stamp set – Galactic Sidekicks 
• Visible Image – stamp set – Total Chaos 
• Waffle Flower – die set – A2 Layers 
• Clear Embossing Powder 
• Heat tool 
• Glue 
• Small paintbrush 
• Watercolor paper 
• Black watercolor paper 
• Water 
• Paper towel 


Let’s Make A Coffee Card Using The New VersaFine Clair Inks

By Von Marie Cervantes

Hello everyone! Today I’m sharing a fun coffee themed square card featuring stamping, stenciling, and the gorgeous new VersaFine Clair inks. I love how easy it is to mix these vibrant colors to create a bright, playful design. Be sure to watch the video for all the tips and techniques. Thanks so much for joining me!

Skill Level: Intermediate
Time: 45 Mins

Products Used

Imagine Products:
VersaFine Clair inks-Dahlia Purple, Wisteria Purple, Adriatic Sea, and Melon Soda
Memento Dew Drop Rich Cocoa
Jumbo Dauber
Craft Mat
IrRESTible Pico Embellisher Gold
Delicata Golden Glitz

Other Products:
• Spellbinders Retired Cup For Two Stamp
• White Cardstock
• 5×5 Brown Cardstock Square Card Base
• Stamping Platform Tool 
• Blending Brush
• Stencil Coffee Beans from A Colorful Life Designs
• Foam Squares
• Paper Trimmer
• Bone Folder

DIY Harry Potter Movie Night Invitation

By Katy Ingram

Hello Friends! Katy here with my latest video showcasing VersaFine Clair inks once again to create a Harry Potter theme invitation. Video has all the details. Thanks for watching.

Skill: intermediate, advanced
Time: 15 minutes

Art Supplies

Imagine Products

• VersaFine Clair inks https://www.imaginecrafts.com/versafine-clair

  • Strawberry
  • Cheerful
  • Golden Meadow
  • Chianti

VersaMark Ink

Other Products Used

• 100% Cotton or Watercolor Paper
• Striped Stencil
• Blending Brushes
• Black Cardstock
• Ivory Parchment Paper
• Mama Elephant Invitation Stamp Sets
• Gold Embossing Powder

Let’s Make a Mixed Media Butterfly Tag

By Ceal Pritchett

Hello crafty friends!

It’s Ceal, here. Today I am sharing this mixed media tag/bookmark with you. It’s a lot of fun to make and is fairly simple.

Skill: Intermediate 
Time: 45 minutes 

Directions: Gather your supplies, for this project you will need a tag made of water friendly paper, (I used Bristol cardstock), several colors of water based markers, and stamp sets to decorate.

Step 1:
Using a red rubber cling stamp and water based markers, ( I used Memento) color the stamp as desired. 

Step 2:
After you have finished coloring the stamp, spritz it with water and lay the tag on it and rub lightly.

Step 3:
Stamp the images you have chosen for and stamp them in black ink (VersaFine Clair used here).

Step 4:
Color and cut out the elements to decorate the bookmark. 

Step 5:
Add elements to bookmark ad add ribbon to finish it. 

Supply List:

Imagine Products

Memento Markers in the following colors 
– Angel Pink
– Lulu Lavender
– Rose Bud
– Lilac Posies
– Teal Zeal
– Grape Jelly
– Tangelo
– Pear Tart
– Dandelion
VersaFine Clair – Nocturne

Other Products

Abstract Butterfly Wing – Hero Arts
Made New Stamp set -Creative Worship Stamps