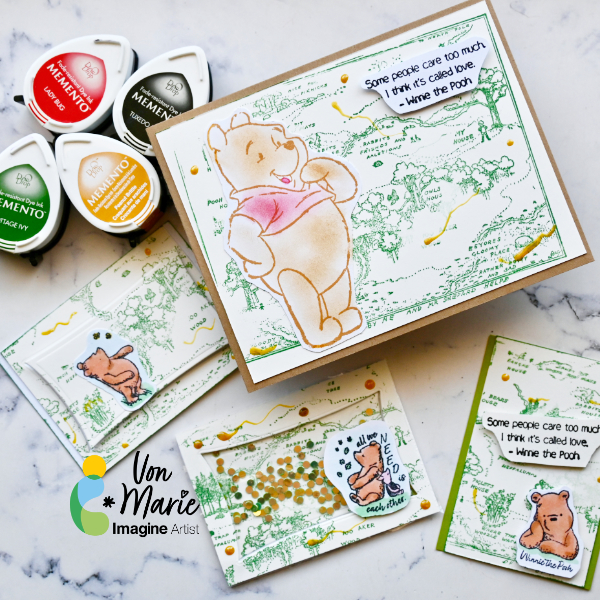
Hello everyone. Von Marie here with my latest Video. How about we make a cute Bear Card Fan Fiction Project for today and some matching ATC(Artist Trading Cards). I love this bear. He is a fan favorite for sure and of all ages. Memento Dew Drops make these projects so much fun. There will be more details in the video https://youtu.be/GA-L2Snz2L4
Other Supplies: • Cardstock • Bear Woodblock or any kind of stamp • Bear and Friends Clear Stamp • Background map Stamp or any Background • Scissors • Decorative die small for tag or tag dies • Kat Scrappiness Brilliant Emerald Confetti Dot Sequins • Clear Packaging or Acetate • Foam Tape • Die-cutting machine • Inks • Kat Scrappiness Blending Brushes • Prismacolor Colored Pencil Goldenrod • Unity Stamps Winnie The Pooh Hundred Acre Woods • Unity Stamps Winnie The Pooh I think it’s Called Love • Taylored expressions Box Top Stacklets Dies • OLO Markers Used: • OR 4.2, OR 4.4, OR 2.2, R5.1, G 0.1, G 0.4, BG 7.0
You can easily make this anytime using some of the similar products. Use a Fan Fiction Favorite for your next project. Use different colors and stamps and have fun.
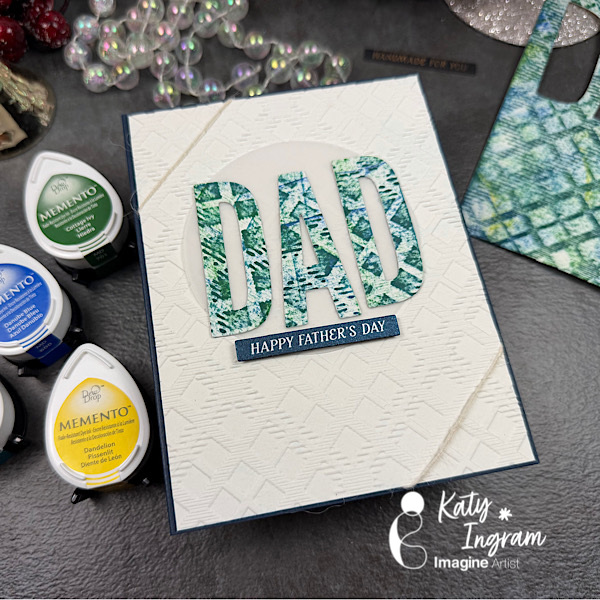
Hello Friends! Katy here with my latest video sharing a great way to use Memento Inks on textured paper. I used cold pressed watercolor paper, but you could use any type of textures paper you have.
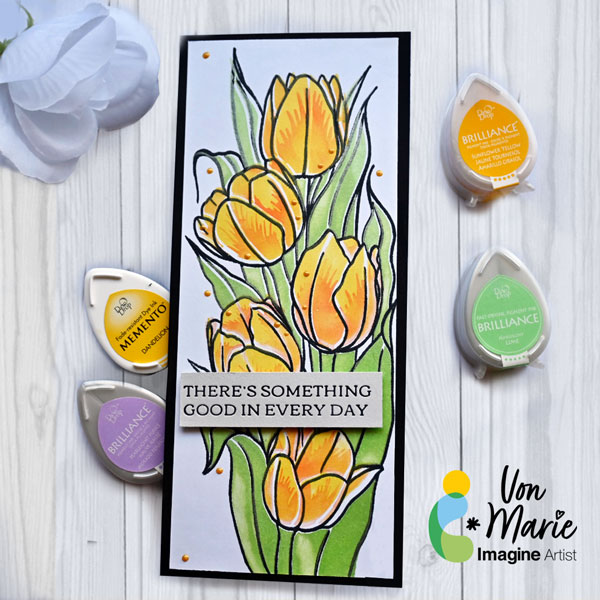
Hello everyone. Von Marie here with my latest video using some Beautiful inks to help with my project for a Spring Tulips Slimline Card. These Brilliance Dew Drops and VersaFine Clair inks are really nice and fun to use. I love the coverage they gave me for these Tulips and Leaves. I had so much fun making this card. Full Details are on my video.
Skill: Intermediate Time: 45 Mins
Craft Supplies
White Cardstock Paper 110 lb. Black Cardstock Paper 110 lb. Slimline Card Base 8 x 31/2 Glass Board and magnets Die-cutting Machine Betterpress Machine Glue Foam Tape
Other Products Used: Unity Stamps Co.Slimline Layering Tulips W/Coordinating Stencil Pinkfresh Studio Betterpress Favorite Things Sentiment Plates ALTERNATIVE PRODUCTS THAT CAN BE USED TO RECREATE SOMETHING SIMILAR Any inks, stencil, or flower stamp You can watch how to create this Spring Card Here
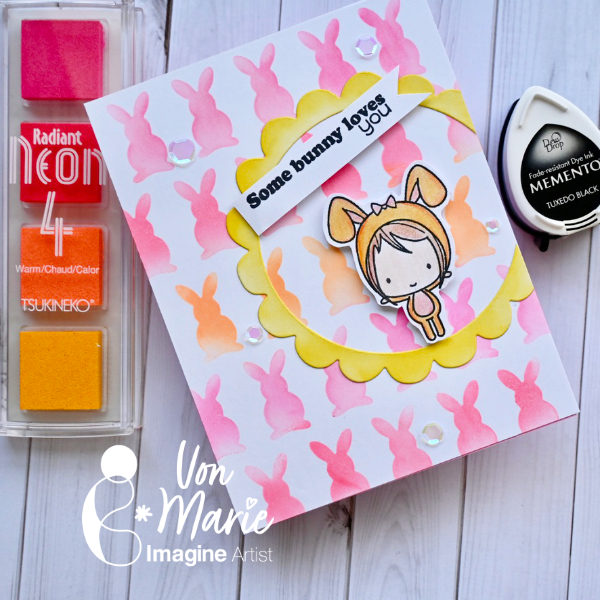
Hello everyone. Von Marie here and I have my latest video sharing an Easter card today. So much fun and we will use lots of fun TSUKINEKO inks to help us stencil and easily make this cute Easter Bunny Card. The video will have more details.
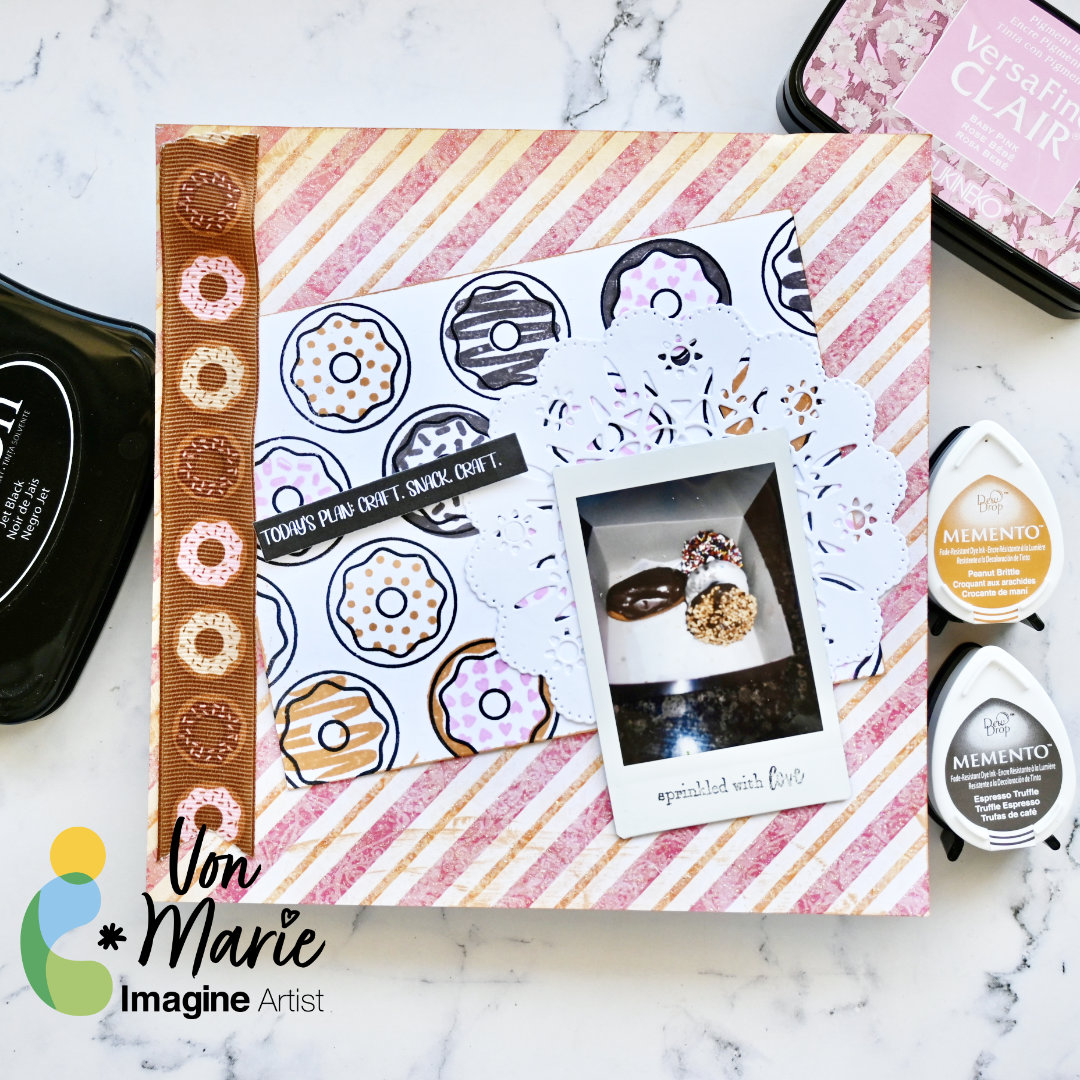
Hello everyone. Von Marie here and I have my newest video sharing an easy and fun Donuts Mini Layout Page perfect for hanging in your craft room. I love donuts and this page is so much fun to create using Memento inks. You can make any kind of page perfect to hang in your craft room. The video will have more details.
Skill: Beginner Beginner Time: 30 Minutes
Craft Supplies
• 100lb white Hammermill Paper • A2 Card Base Glue • Photo • Pattern Paper • Ribbon • Clips • Doily Die-cut • Stamping Block
• Taylored Expressions Donut Days Cling & Clear Combo • Stamps Of Life Doily 1 Die Set • LV Handcrafted Gnome Love Sentiment Printable • Donut Ribbon from my stash • Instax Mini SE
ALTERNATIVE PRODUCTS THAT CAN BE USED TO RECREATE SOMETHING SIMILAR Any stamps, inks, and or pattern paper
You can watch how to create this Donuts Mini Layout Click Here
Here’s an Autumn-themed card created with Memento and VersaMagic inks using a lovely stencil and a meaningful quote. This card is meant to encourage a friend who had an accident who is a bit patient for nature to take its course.
Skill Level: Intermediate Time: 1.5 hours
Directions:
Step 1: Use magnets and low-tack tape to secure a piece of mixed media cardstock to a magnetic page. Add a curvy piece of low-tack tape along the bottom as shown. Use a Sponge dauber to apply Danube Blue Memento Ink horizontally across the cardstock.
Step 2: Use another Sponge Dauber to apply Summer Sky Memento ink horizontally across the cardstock, filling in open spaces.
Step 3: Use another Sponge Dauber to add Angel Pink Memento Ink to add some warmth to the sky.
Step 4: Place the other side of the curvy low-tack tape over the bottom part of the sky area. Use a Sponge Dauber to apply Bamboo Leaves Memento ink over the tape horizontally to begin to create a grassy area.
Step 5: Tear a piece of cardstock and use the Sponge Dauber to continue applying Bamboo Leaves Memento ink. Use another Sponge Dauber to apply New Sprout Memento Ink to fill in the grassy area.
Step 6: Use low-tack tape and magnets to secure the Tree Stencil over the sponged paper and the magnetic page. Place low-tack tape over the leaves around the tree trunk and branches. Use a Sponge Dauber to apply Jumbo Java VersaMagic over the stencil onto the paper. Remove the tape to reveal the tree’s leaves. Use a paper towel to wipe the brown ink off of the stencil.
Steps 7A, 7B, 7C, and 7D: Use a Sponge Dauber to Apply Mango Madness VersaMagic Ink over some of the stencil’s leaves (7A). Use a dry paper towel to wipe the ink off the stencil. Use separate Sponge Daubers to apply Aloe Vera, Tea Leaves, Pink Grapefruit, Pumpkin Spice, Red Magic, and Perfect Plumeria VersaMagic Inks over the stencil’s leaves (7B, 7C). 7D shows the completed tree. Heat set.
Step 8: Use magnets to secure the image panel onto the base of the a stamping platform. Place the sentiment facedown where desired. Press the platform’s lid onto the back of the stamp, lift the lid, ink the stamp with Shady Lane VersaFine Clair Ink, and stamp. Re-ink and stamp again if necessary to attain a good impression. Remove the card front from the stamping platform. Heat set the sentiment.
Step 9: Cut a piece of white textured cardstock to 10” x 7”. Score at 5” and fold to form a 5” x 7” card. Place a piece of scrap paper inside the card to protect it. Use a Sponge Dauber to apply Shady Lane VersaFine Clair around the outer .5” perimeter of the card. Heat set.
Step 10: Use Tear It! Tape to adhere the card front to the inked 5” x 7” card.