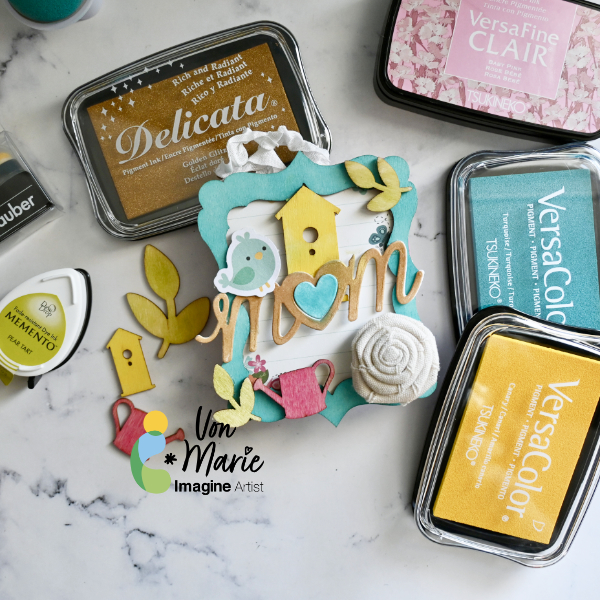
Hello everyone. Von Marie here with my latest project. I chose to make a Mother’s Day Home Decor project today. I used wood veneers and frame and some Beautiful VersaColor inks, and Delicata Golden Glitz to help me make this project fun and colorful. This project is great for a gift or for yourself as a decoration for your craft room. You can even switch it up and make it a Christmas project or anytime project. The video will have all the details. Thank you for watching.
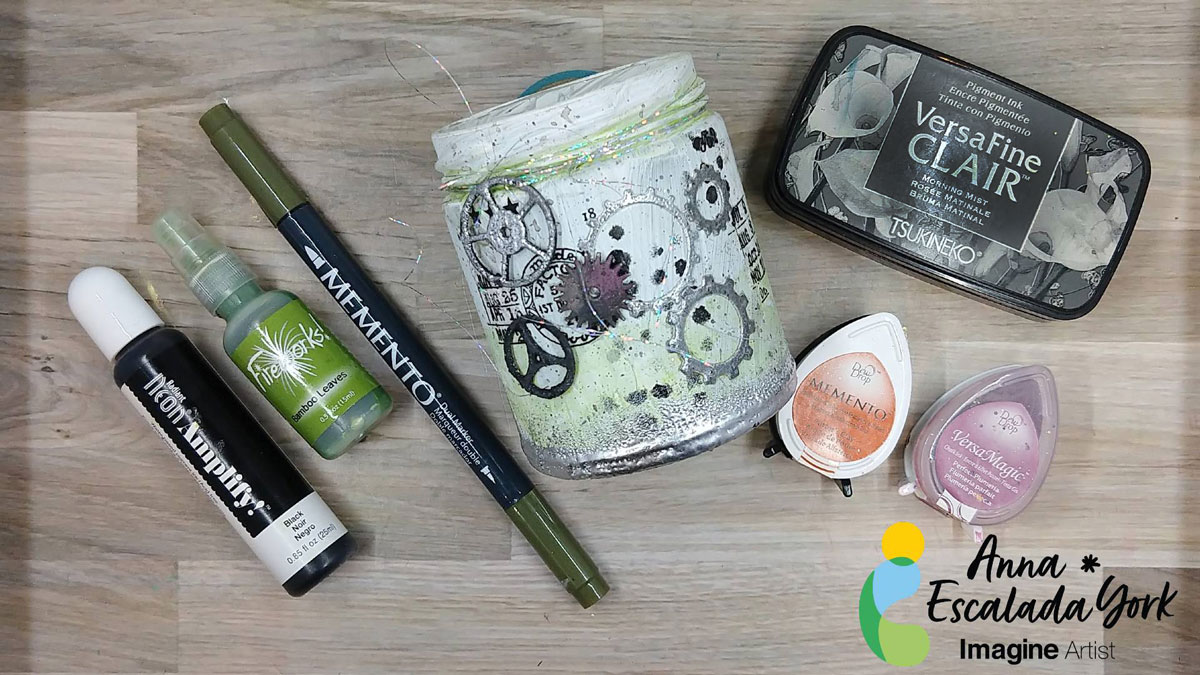
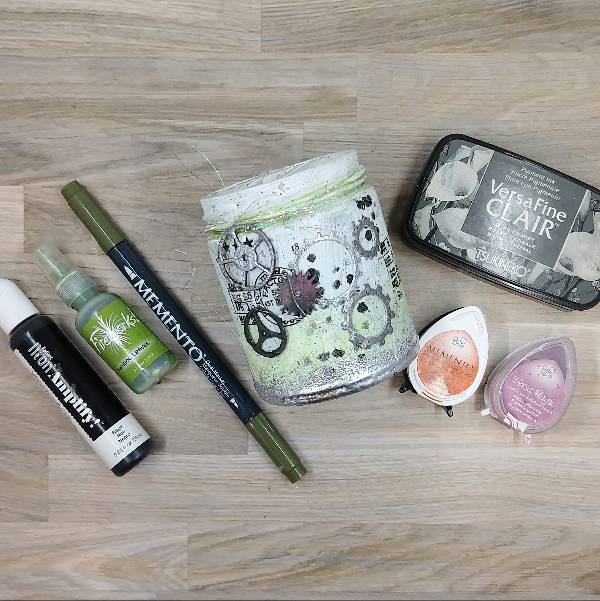
My teen is hard to please, but recently they expressed interest in having a small jar to use for candles. They really like a grungy steampunk vibe and their favorite color is green and so tried to personalize this for them.
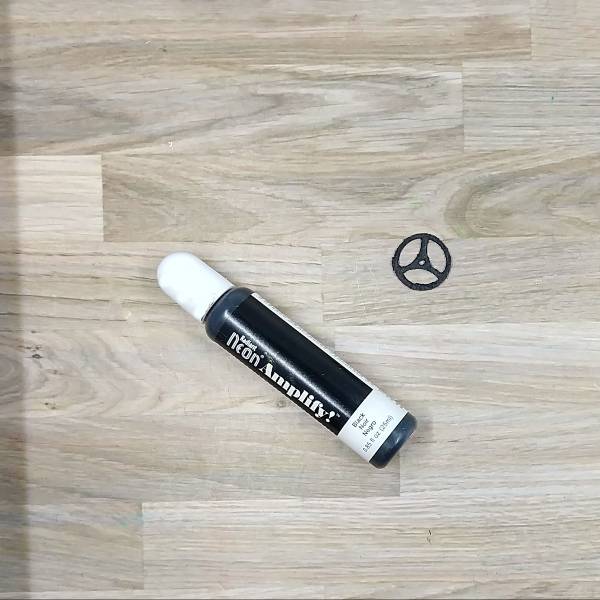
Add a dab of black Amplify! onto a brass metal gear and heat with a tool. Because I heated the Amplify!, it puffed out and made Amplify! gritty and puffy, which worked well for the jar’s gritty look.
Step 2:
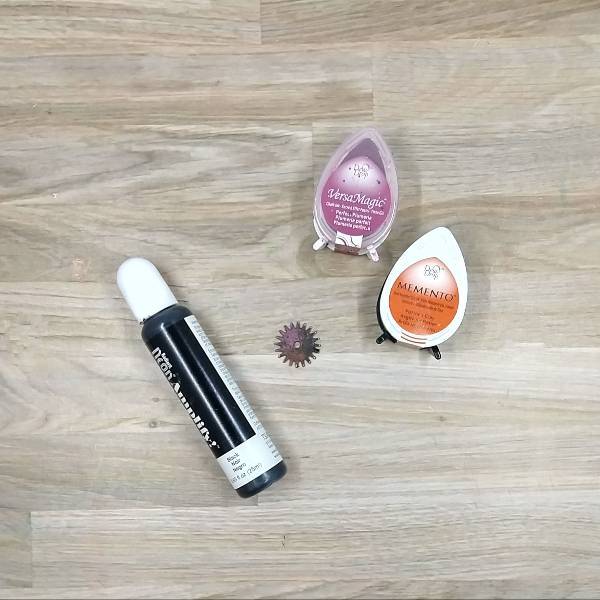
Repeat step one with a second gear. Then press another gear into both a Potter’s Clay Memento ink pad as well as Perfect Plumeria VersaMagic ink pad to make the gear look like it had rusted over.
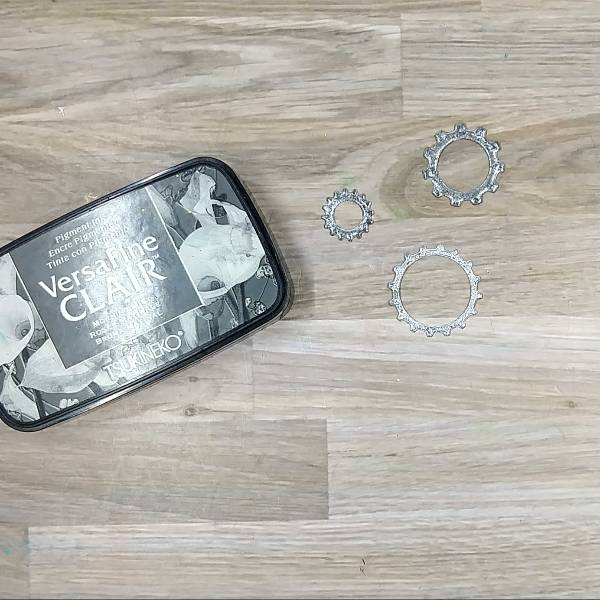
Step 3:
Die cut watercolor paper with gear dies. Then press each of the gears into Morning Mist VersaFine Clair ink. Heat emboss all three of them with silver embossing powder.
For the two top gears in the picture, press the gears back into the Morning Mist VersaFine Clair ink and then heat embossed them with clear embossing powder to create a darker or tarnished silver color on those two gears.
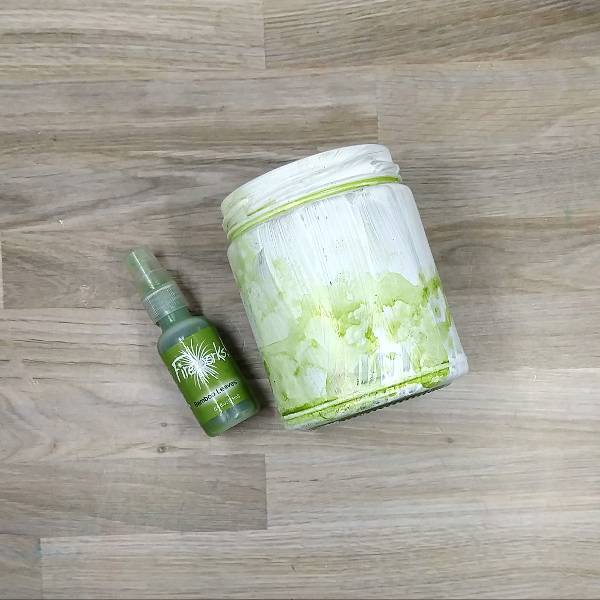
Step 4:
Paint a cleaned jar with gesso. Let it dry overnight. Then spray the jar with Bamboo Leaves Fireworks! Craft Spray and spin the jar to help move the spray around the jar. Repeat to color the whole bottom part of the jar and allow to dry.
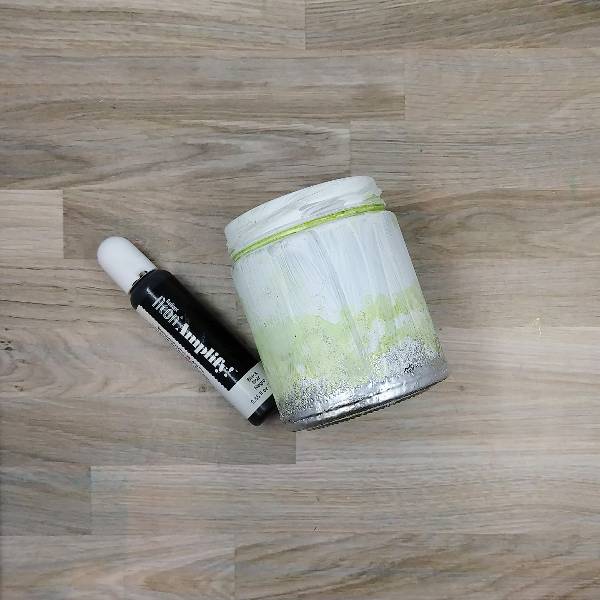
Step 5:
Using a sponge dauber, add a thin layer of black Amplify! To the bottom part of the jar and then used the wet Amplify! to adhere silver embossing powder and then heated the powder to create a silver bottom to the jar.
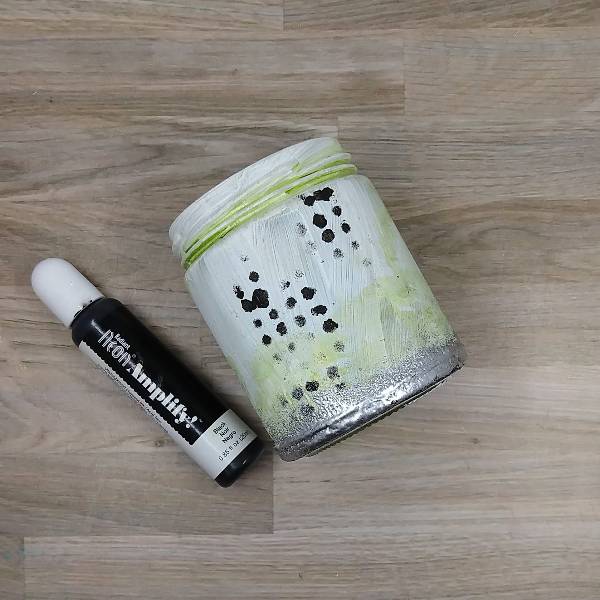
Step 6:
Use a circular stencil and the same sponge dauber to add more black Amplify! to the center of the jar (on one side) and use a heat tool to dry.
Step 7:
Add rub on stickers next to the black circles. Glue the watercolor die cut gears over the stenciled black circles and then glue the two smaller metal gears over the top of them. Attach the largest gear by tying it onto the neck of the jar with silver thread. Splatter the jar with Northern Pine Memento Dual Tip Marker to finish the project.
Other Products • Golden – Gesso Semi-Opaque Acrylic Primer • Tim Holtz and Idea-ology – Remnant Rubs • Tim Holtz and Idea-ology – Sprocket Gears • Sizzix – die set – Vault Industrial • Circle stencil in my stash • Clear Embossing Powder • Silver Embossing Powder • Silver thread • Glue • Watercolor paper
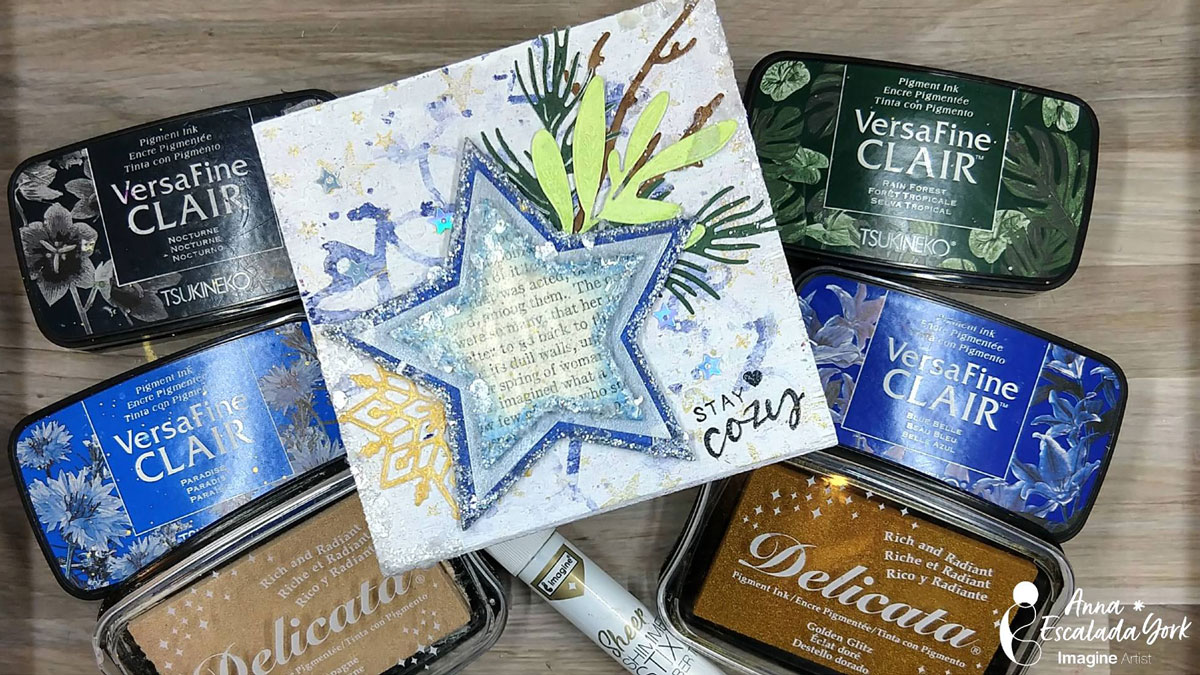
It was time to reuse a small piece of wood to create a small piece of winter decor to add a little fun to a bookshelf. The stars feature wintery colors (blues and white) surrounded by some winter greenery, a snowflake and sparkly elements.
Skill: Intermediate Time: 2 hours (active time) + dry time
Directions
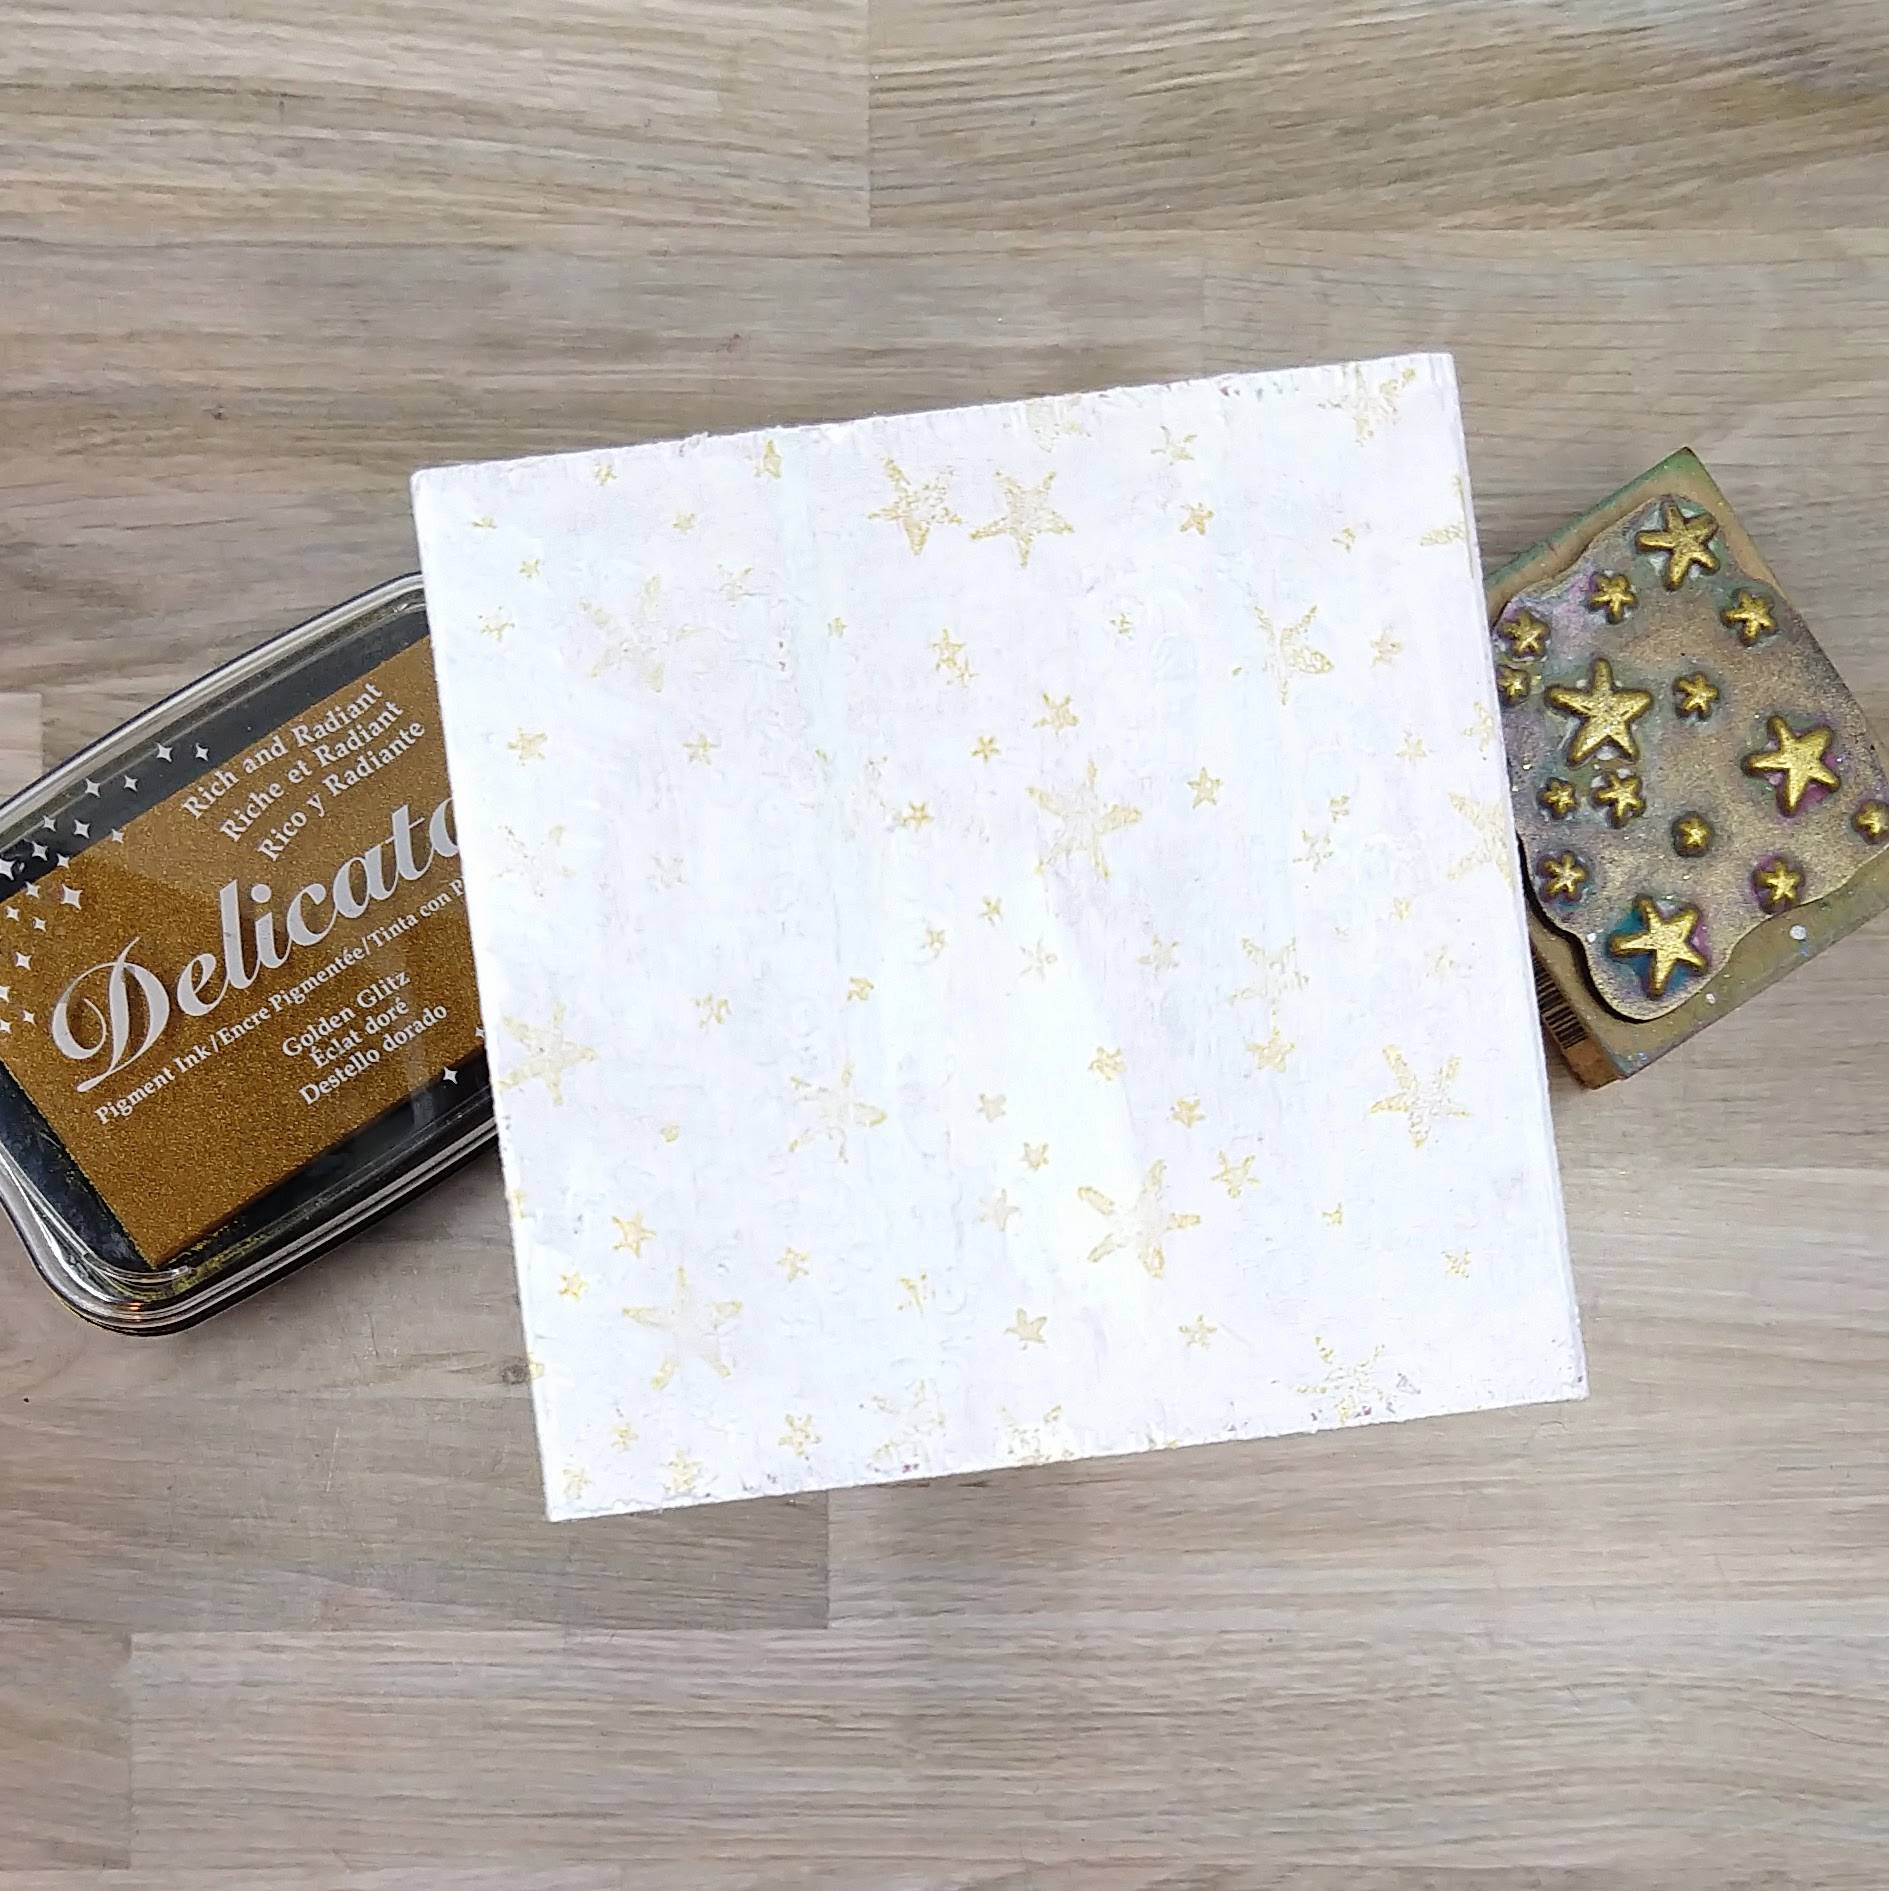
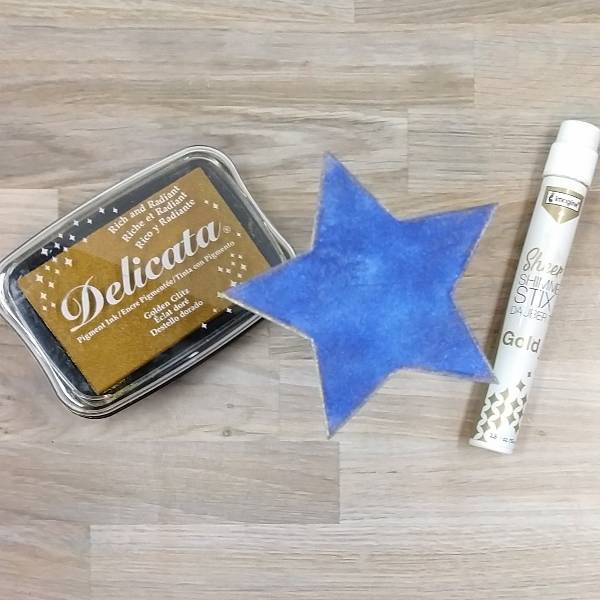
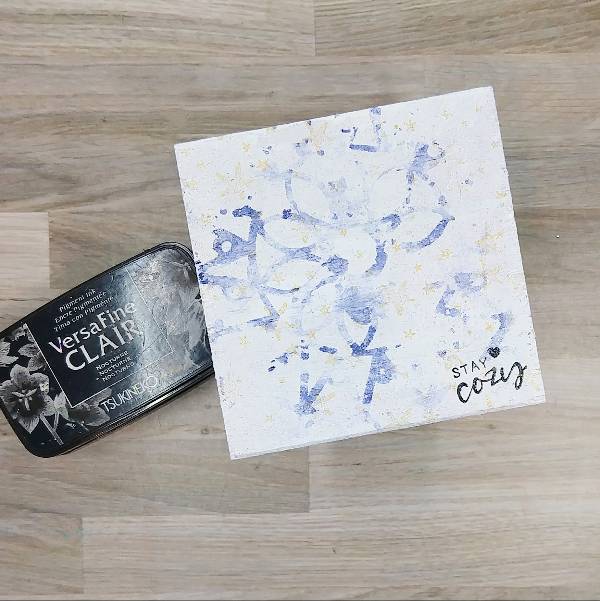
Step 1: Cover the wood block with a layer of Gesso. Allow to dry. Then stamp the block repeatedly with Golden Glitz Delicata Ink on a small woodblock star stamp.
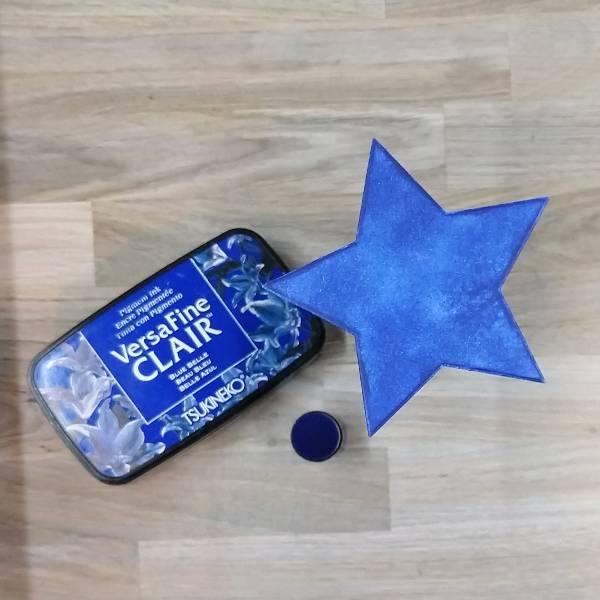
Step 2: Ink blend a piece of die cut watercolor paper with Blue Belle VersaFine Clair Ink using an ink dauber.
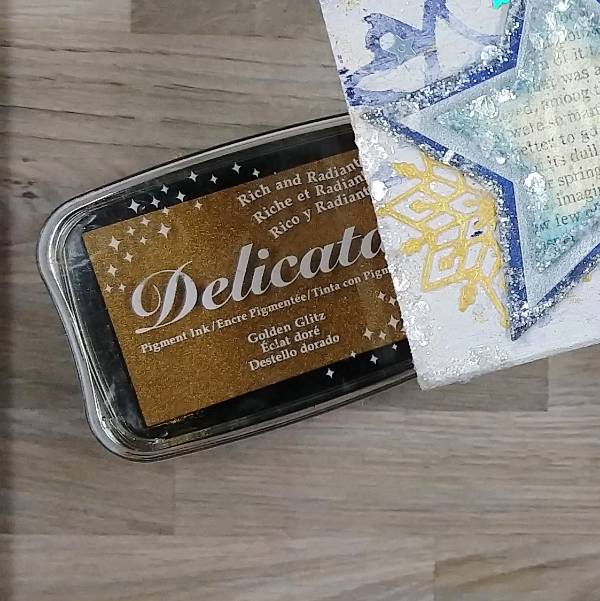
Step 3: Press the dauber of a Gold Sheer Shimmer Stix Dauber Top stick along the edges of the blue die cut star. After drying, press the edge of the Golden Glitz Delicata Ink pad along the edges to enhance the gold border of the star.
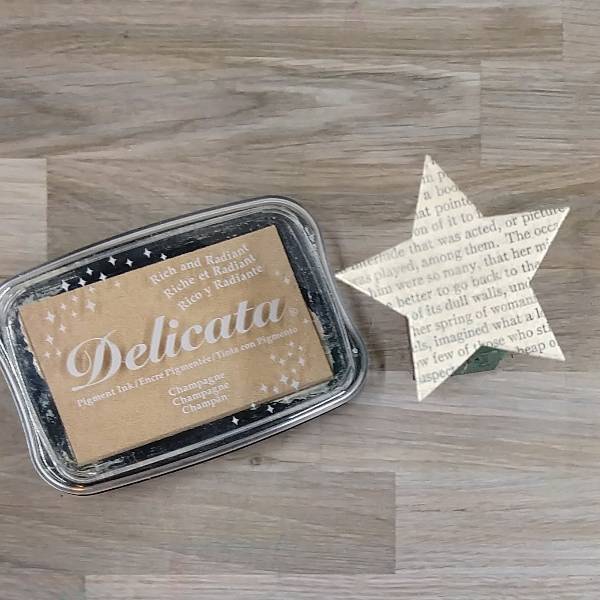
Step 4: Glue a book page onto a scrap of cardstock. After the glue has dried, die cut the glued page with a smaller star. Then press a Champagne Delicata ink pad directly onto the die cut book page to obscure some of the words on the page and add sparkle.
Not pictured: Die cut a piece of sparkly vellum. This die-cut star should be in between the other two in size.
Step 5: Ink blend the sides of the star with Paradise VersaFine Clair Ink with a sponge dauber.
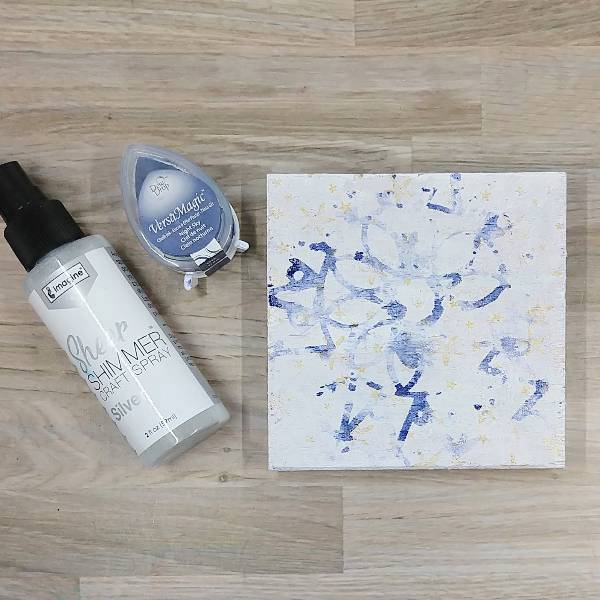
Step 6: Press a stencil into a Night Sky VersaMagic Chalk Ink pad. Then spray the stencil with Silver Sheer Shimmer Craft Spray. Press the inky side of the stencil onto the wood block. Keep the stencil in place by placing something heavy (such as a large wood stamp or book) on top of both and allow the ink to dry. Then remove the stencil.
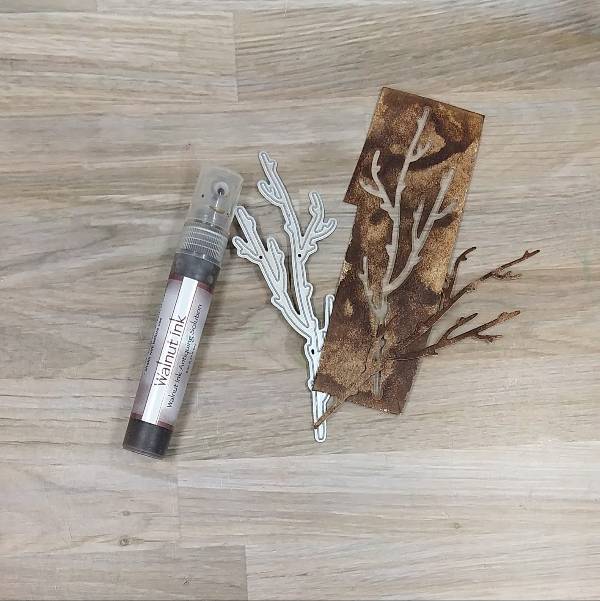
Step 7: Spray Walnut Ink Antiquing Solution (in Walnut Ink color) onto a small piece of watercolor paper. After it dried, die cut with a branch die cut.
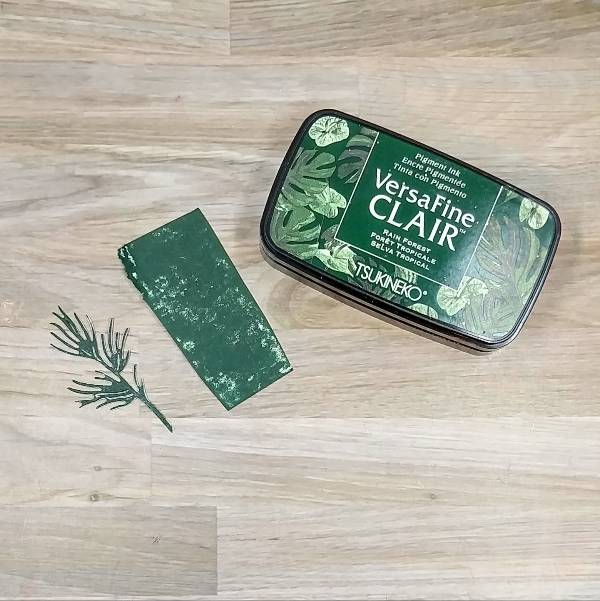
Step 8: Color the greenery. Press a Rain Forest VersaFine Clair Ink pad onto a piece of water color paper. After the ink dries, die cut two pieces of evergreen needles.
Not pictured: Spray New Sprout Fireworks! Craft Spray onto another piece of watercolor paper. After the spray dried, die cut the watercolor paper with a mistletoe die.
Step 9: Add a sentiment on the lower right corner of the block with Nocturne VersaFine Clair ink and heat emboss with clear embossing powder.
Step 10: (My camera lost the picture of this step. I wanted you to at least see the gold snowflake on the finished project.)
Press Golden Glitz Delicata Ink onto another piece of watercolor paper. Then heat emboss with clear embossing powder. Die cut the paper with a small snowflake die. (The whole snowflake was tucked behind the star in the next step.
Step 11: Assemble the project. Glue the die cut snowflake in the lower left corner of the block and the greenery (branch, mistletoe and pine needles) in the upper right corner. Add glue along the edges of both the large, dark blue and small book page stars and add glitter. Allow to dry. Then add glue along the upper right and lower left corner of the block and add more glitter. Allow the glue to dry.
Layer the three layers of star die cuts. Glue the medium onto the large dark blue star. Then attach the small book page layer onto the vellum layer with foam tape. After the glue dries, attach the layered star onto the block with more foam tape. Glue star embellishments in the upper left and lower right corners of the block to finish the project.
• Altenew – foam tape – Instant Dimension Foam Tape Golden – • Gesso Semi-Opaque Acrylic Primer • Simon Says Stamp – die set – Nested Stars Wafer Dies • Simon Says Stamp – embellishment mix – North Star • The Crafter’s Workshop – stencil – Stained Glass (TCW 462S) • Unity Stamp Company – stamp set – …shake your flakes (December Unity Sentiment Kit 2022) • Woodblock star stamp in my stash • Small branch die • Evergreen needles die • Mistletoe die • Small snowflake die • Clear Embossing Powder
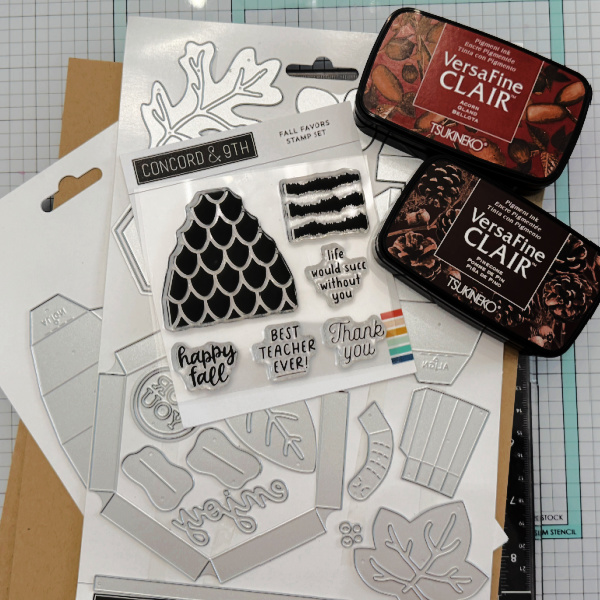
Hello crafty friends! I’s Ceal, here. Today I am sharing a tutorial on how to make this acorn gift box.
Skill: Intermediate to Advanced Time: 45 Minutes
Directions:
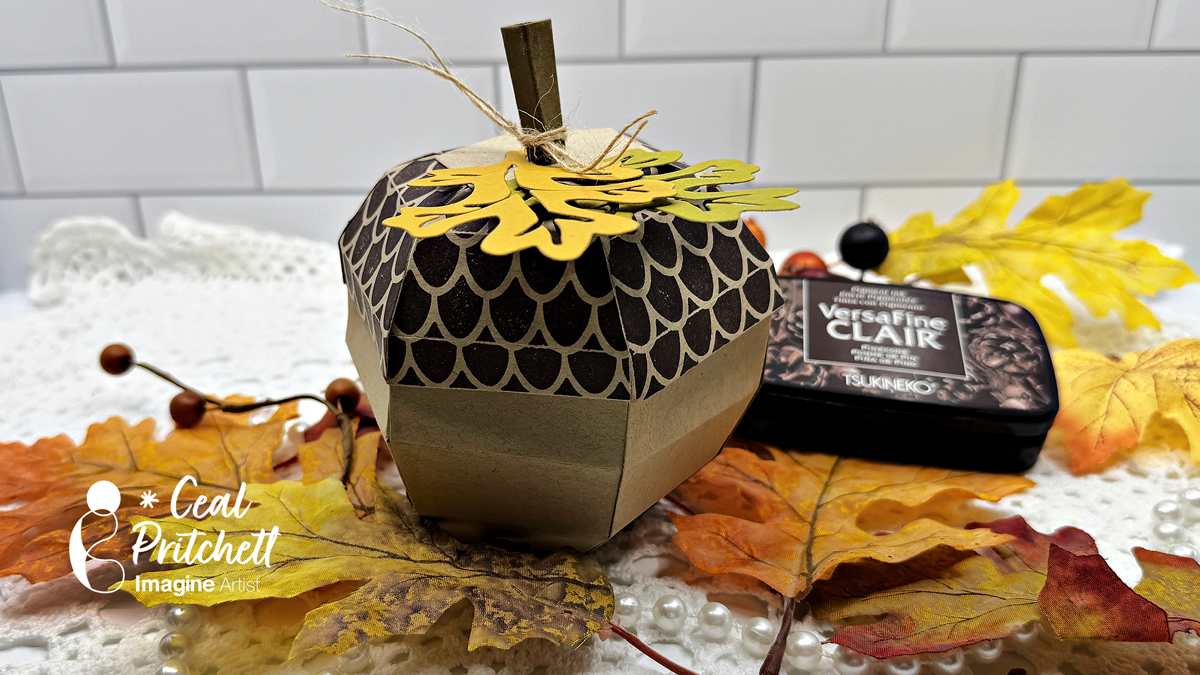
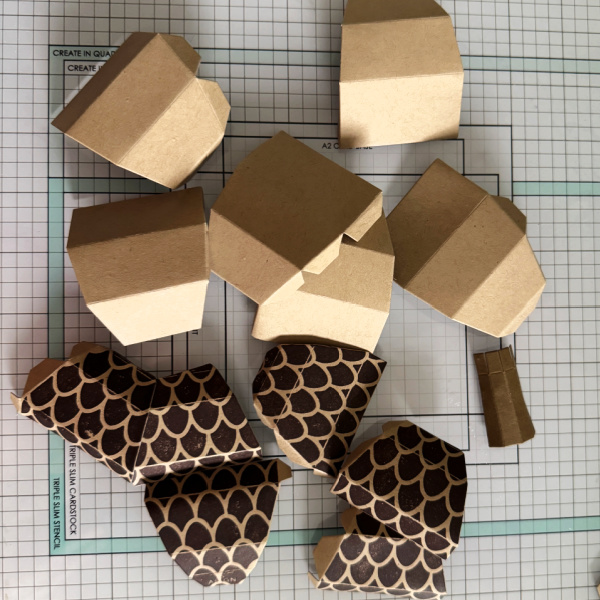
Gather your supplies. For this project you will need the Fall Favors Box die set and the coordinating stamp set. A dark brown ink (VersaFine Clair used here), Kraft and other colors of cardstock.
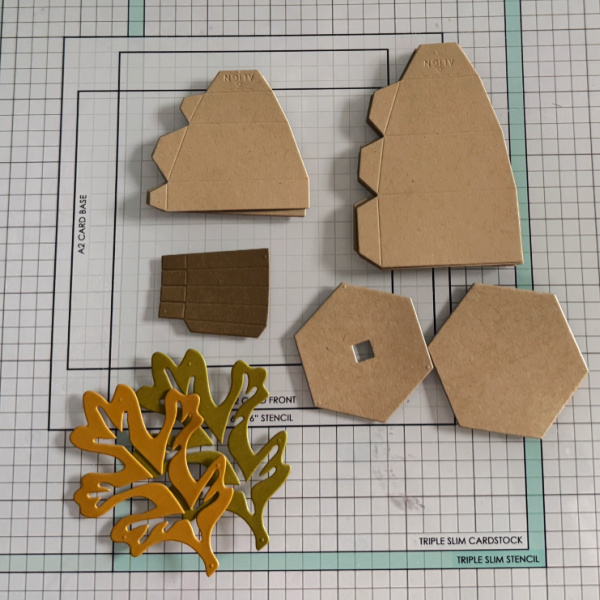
Step 1: Out of kraft cardstock, cut six pieces each of the small (top) and large (bottom) of the acorn, along with the top and bottom hexagon pieces. Cut the stem out of a dark brown cardstock and the leaves out of your color of choice.
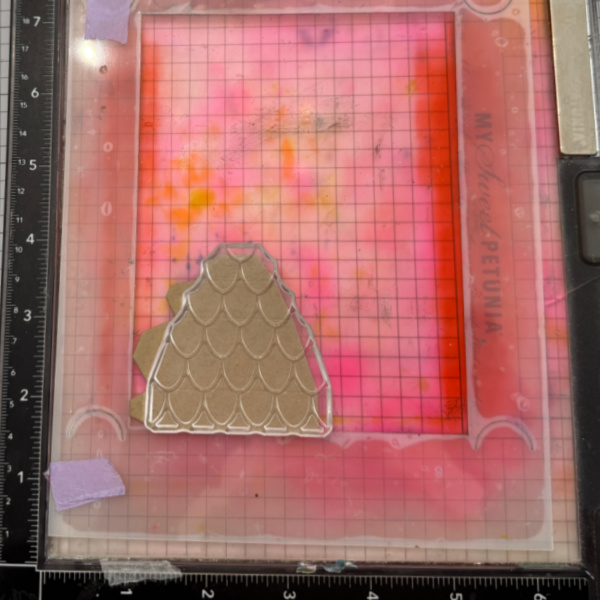
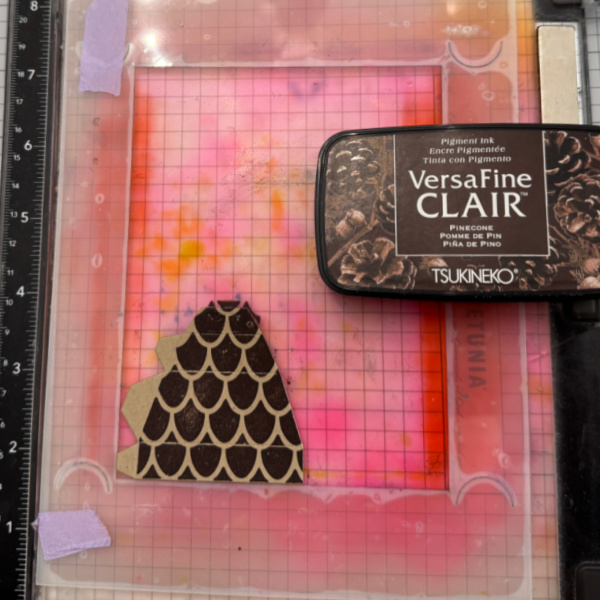
Step 2: Line up the stamp that adds the detail to the acorn top and then stamp all six pieces with a dark brown ink, VersaFine Clair Pinecone used here.
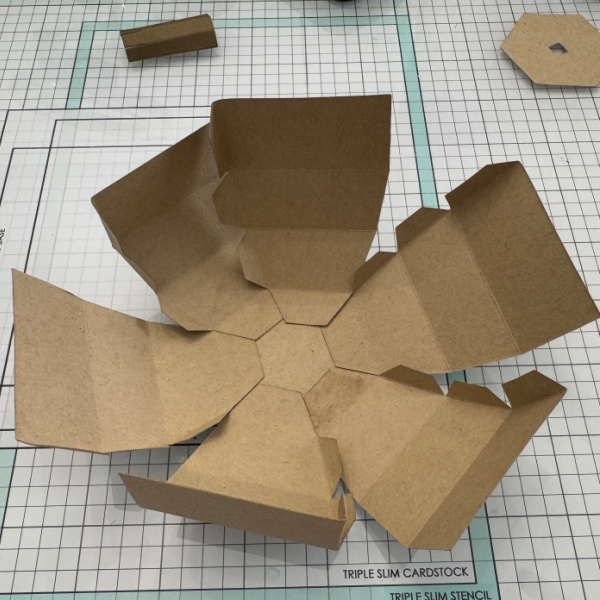
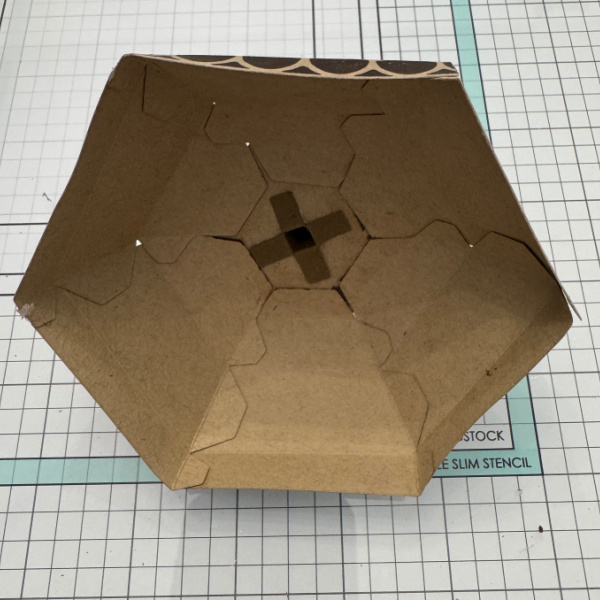
Step 3: Crease all of the score line on all the die cut pieces. Do not use a bone folder, just simply crease them on the score lines.
Step 4: Align the large (bottom) pieces of the acorn on the hexagon as shown. Tip: I used liquid glue to allow me to move them as needed.
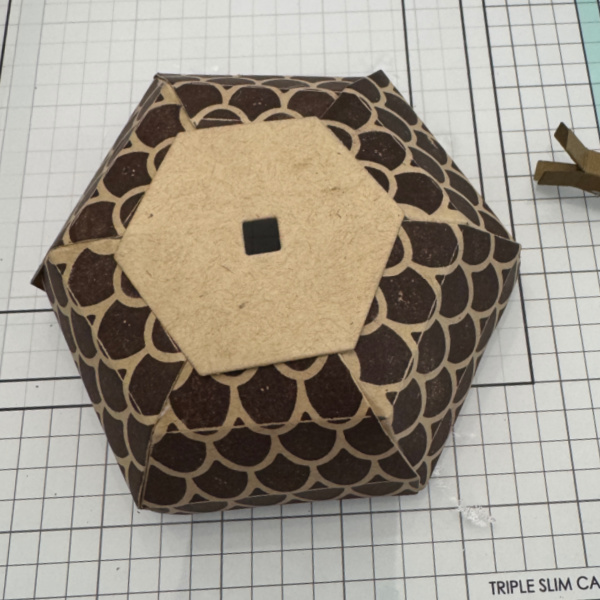
Step 5: Align the small (top) pieces of the acorn on the hexagon with the square hole in it.
Step 6: Fold the stem piece on the score lines and add h=glue to create the stem and then thread it through the square hole on the top. After threading it through the hole, fold back the tabs and glue down as shown.
Finish the project by adding the leaves and some twine.
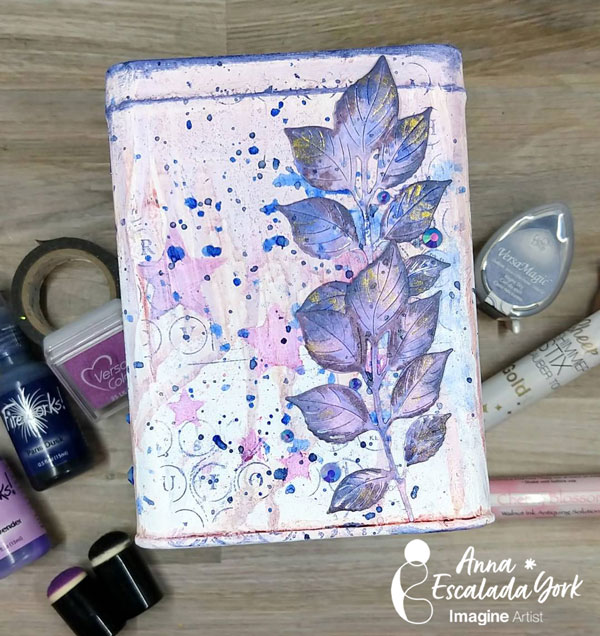
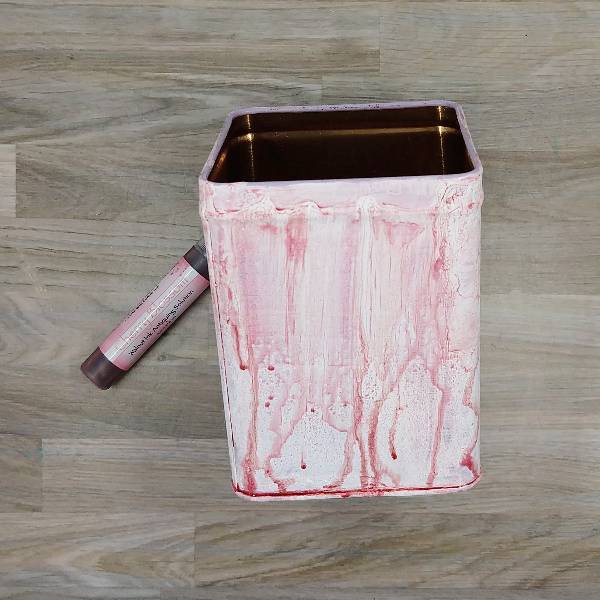
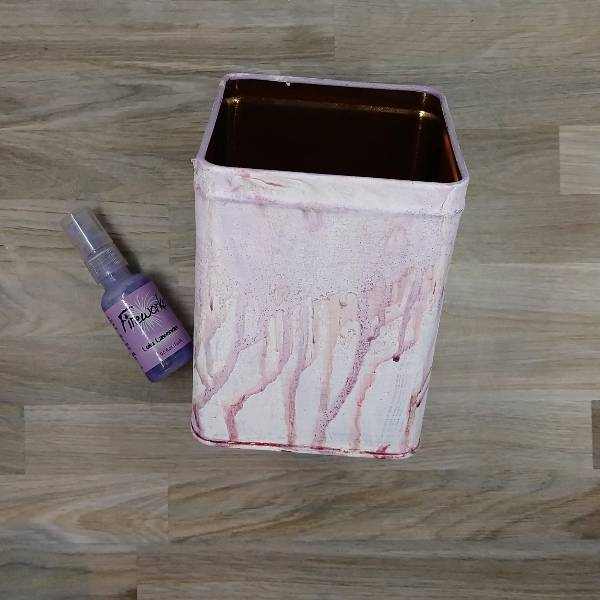
I’ve had a small metal tea box that I’ve wanted to repurpose into a mixed media piece for a while, so I took some time on a rainy day to make it happen.
Skill: Advanced Time: 1 hour active time, 6+ hours (drying between layers)
Directions:
Step 1:
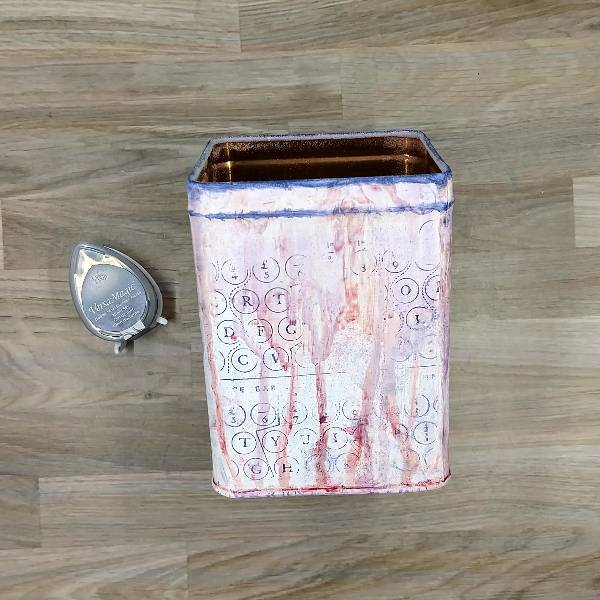
After applying two coats of gesso around all four sides of a tea tin, spray the top of the tin with Cherry Blossom Walnut Ink Antiquing Solution and allow it to drip down the sides of the tin. Set aside to dry.
Step 2:
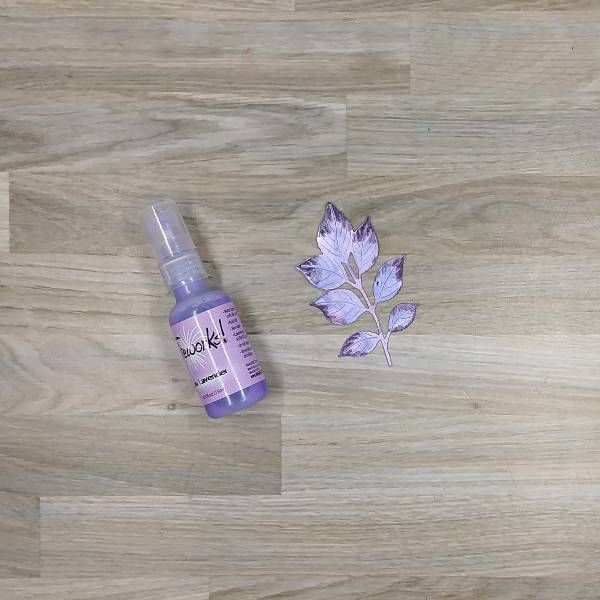
Spray all four sides of the tin with Lulu Lavender Fireworks! Craft Spray and allow to dry.
Step 3:
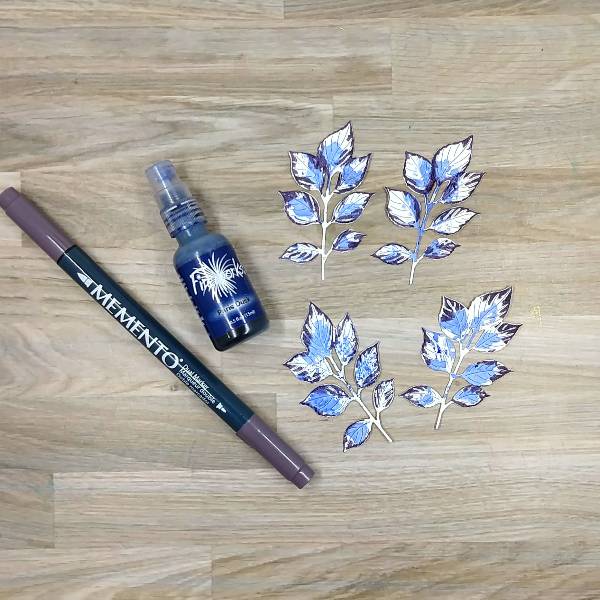
While the tin was drying, die cut four leaf clusters out of watercolor paper. Then randomly add Paris Dusk Fireworks! Craft Spray to the centers of each leaf with the stick of the spray nozzle and color the outsides of the leaves with Elderberry Memento Dual Marker.
Step 4:
Spray each of the 4 leaf clusters with Lulu Lavender Fireworks! Craft Spray and allow to dry.
Step 5:
Partially stamp each of the four sides of the tin with Night Sky VersaMagic ink on a background stamp. (I used an old woodblock typewriter stamp.) Then press the ink pad along the top edge of the tin and the raised rib as well. Heat emboss the top rim of ink with clear embossing powder.
Step 6:
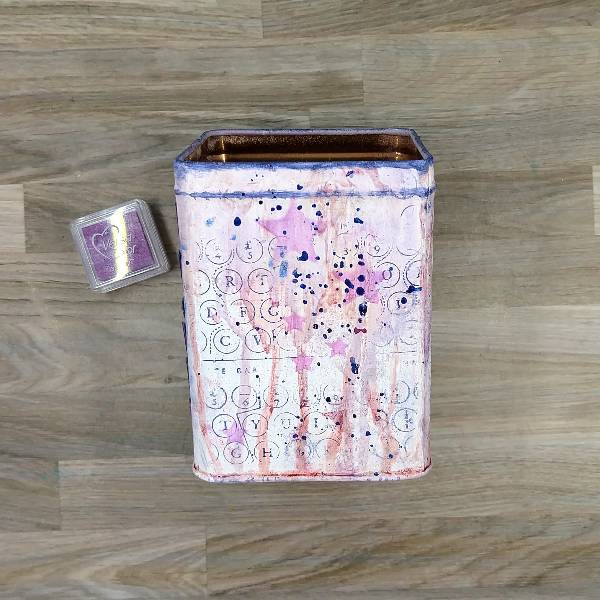
Ink blend Lilac VersaColor ink through a stencil on all four sides of the tin using a sponge dauber. (Not pictured was splattering more of the Paris Dusk Fireworks! Craft Spray onto each of the four sides as well.) Then allow everything to dry.
Step 7:
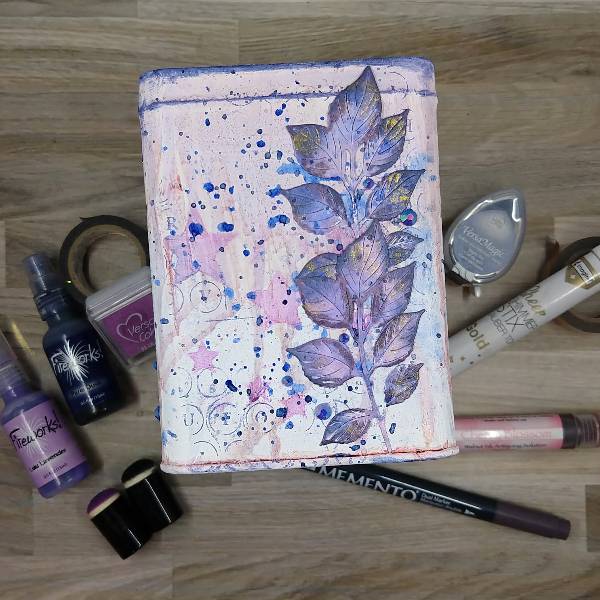
Glue two of the leaf cluster dies (one on top of the other) along the right edge of two of the sides of the tin.
Not pictured was the step after this where I decided to use my sponge daubers to ink blend some more of the Night Sky VersaMagic ink along some of the edges of the leaves while they were glued down, nor using my Gold Sheer Shimmer Stix Dauber Top to add some gold to the leaves as well.
Splatter the tin with more Paris Dusk Fireworks! Craft Spray. Allow it to dry. Then glue dark blue gems around the leaf clusters to finish the box on the two slides with leaves.
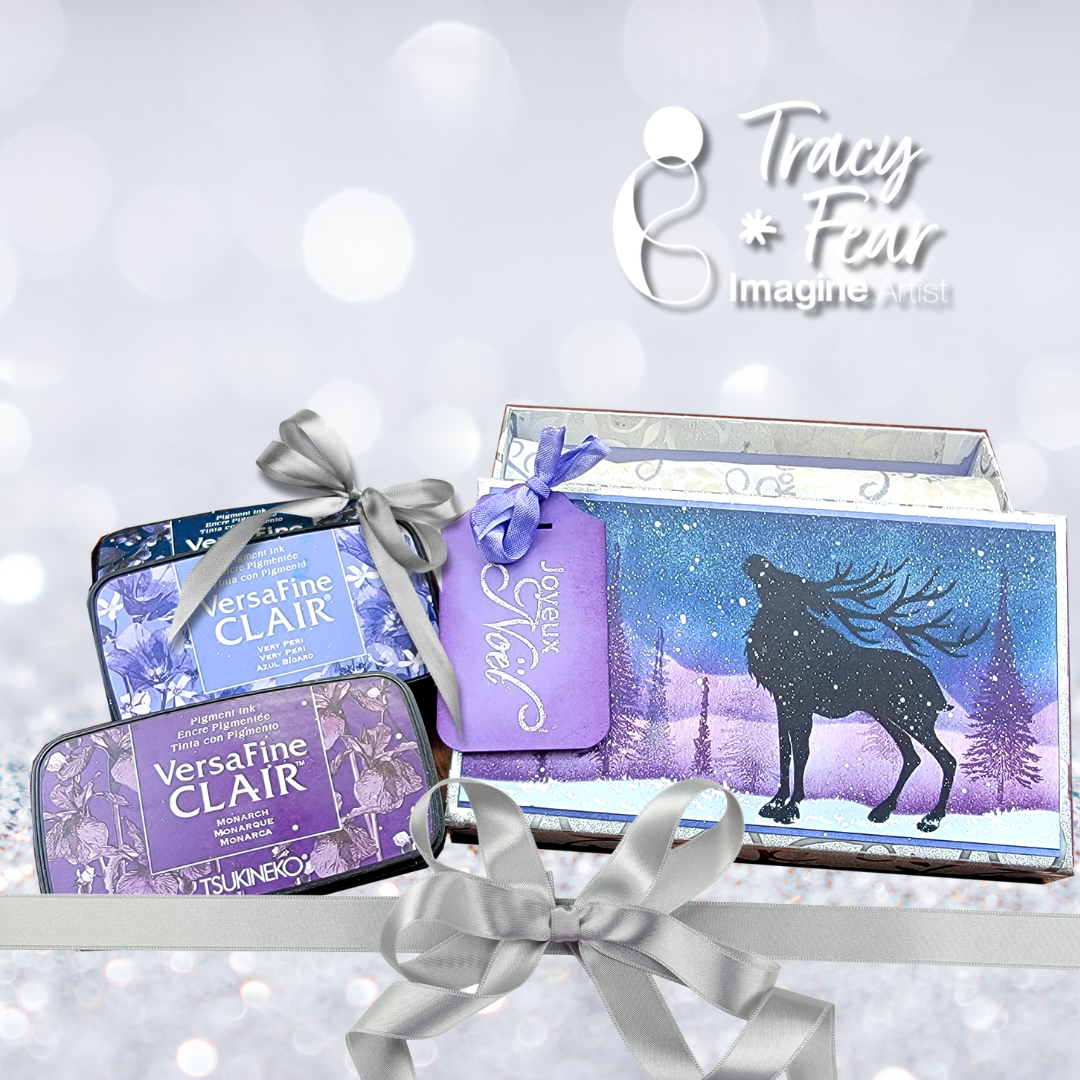
Hello Friends! Tracy here and today I am delighted to share this tutorial that helps you make gift giving even more spectacular by creating a custom gift box using your stamps and inks!
In today’s video tutorial I am sharing how I used some plain tissue paper and a Dollar Store box along with stamps and inks and a little paint to dress up a gift box!
Tracy
Skill: Intermediate Time: 30 Minutes to 90 Minutes
Art Supplies
Stamping Platform Glue Fan brush Your choice of stamps Ephemera of your choice Tissue paper Empty gift box Stencil Stencil Brush