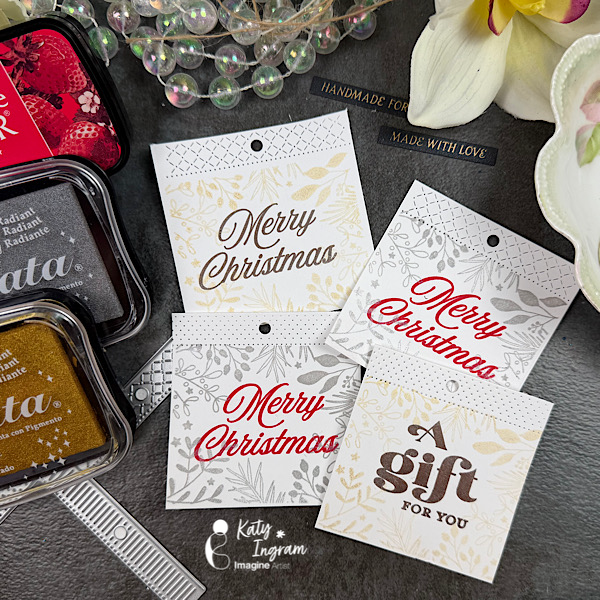
– Hello Friends! Katy here with my latest video showcasing Delicata Inks to create quick and easy gift tags. Video has all the details. Thanks for watching.
Hi everyone! It’s Jessica here. I want to share one of my favorite ways to create a gift card holder today. It’s super simple and quick to put together. I picked a Christmas theme but you could easily change it to a birthday or wedding gift card holder.
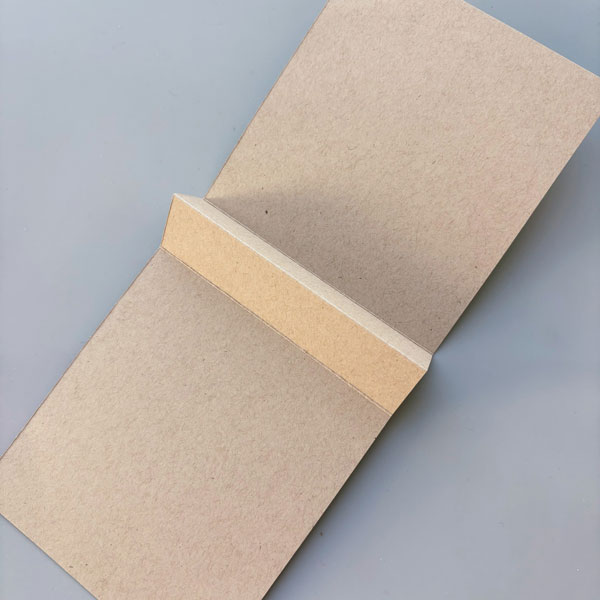
Step 1: Let’s start by creating the base of the gift card holder. Using Environment Desert Storm cardstock, cut it in half to create a standard A2 card base (4 ¼’’ x 5 ½’’), and score at 4 ½’’, 5 ½’’ and 6 ½’’. Fold along the crease to create a peak just like the one in the photo.
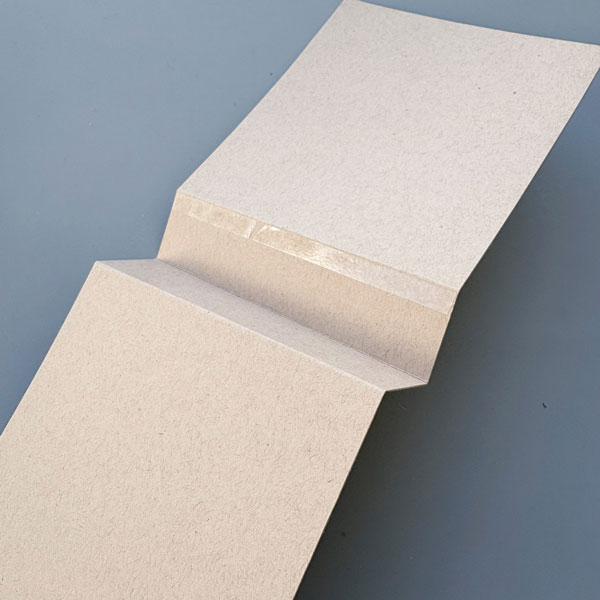
Step 2: Next, flip the card base around and apply Tear-It! Tape to the top edge of the scored line. Notice how the “peak” from earlier has turned into a “valley”. You want to avoid adding adhesive to the center of the “valley” since that will become the opening for the gift card holder.
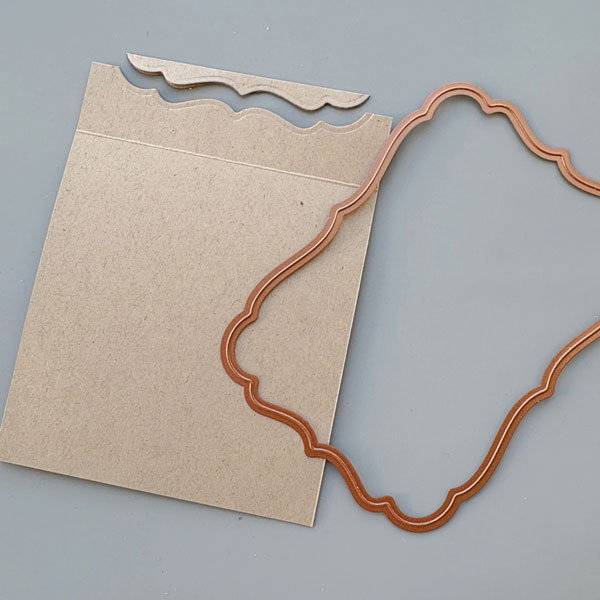
Step 3: Once the middle portion of the card base is adhered together, you will have a new card base that is 4 ¼’’ x 5’’ with an inner flap. Now, we are ready to create the opening for the gift card. Place the largest frame die from Spellbinders Labels Seventeen set to die cut the gift card opening. The trick is to die cut as little cardstock as possible so that there is a large flap area to hold your gift card.
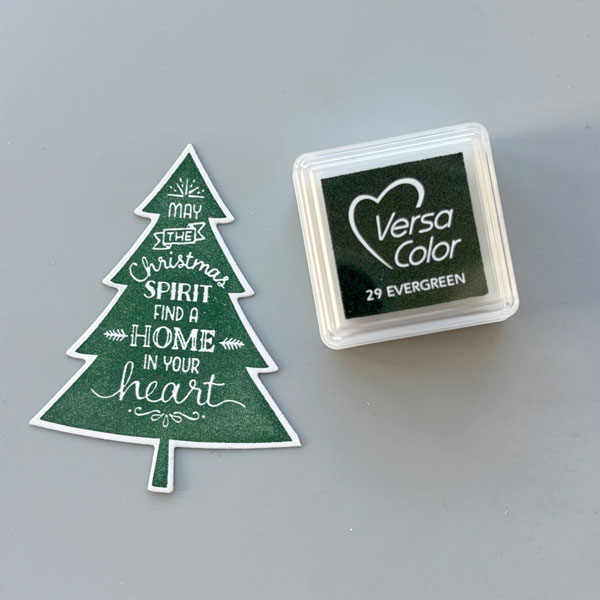
Step 4: Let’s decorate the front of the gift card holder next. I stamped this Christmas tree image on Classic Crest Solar White cardstock with VersaColor Evergreen ink pad and die cut the image with the coordinating die.
Step 5: Then, I stamped another Christmas tree design with VersaMagic Tea Leaves ink pad. Both of these stamps are from Stampin Up’s Peaceful Pines set.
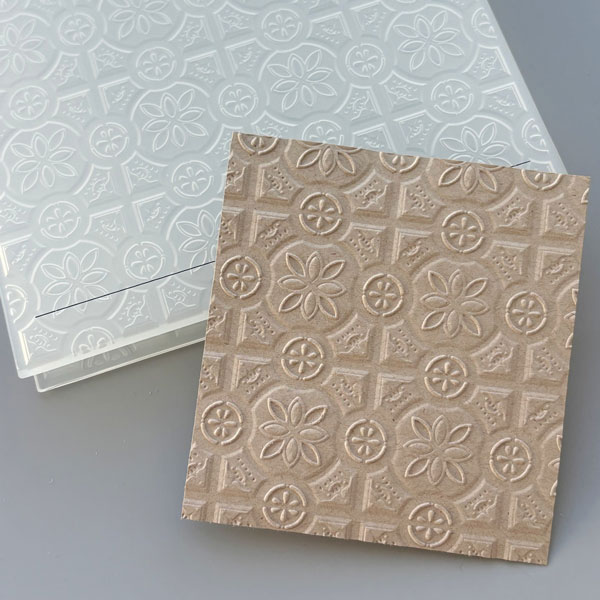
Step 6: I decided to add an embossed panel to add some interest to the background. I trimmed a piece of Environment Desert Storm cardstock to 3 ¾’’ x 4 ½’’ and embossed it with Stampin’ Up’s Tin Tile embossing folder. The details really pop on this kraft colored cardstock, don’t you think?
Step 7: For the sentiment, I picked this scripty “Christmas” die from Ellen Hutson’s Merry & Bright set and die cut it with DCS Gold Glitter Heavyweight 12 x 12. This gold glitter cardstock is becoming a staple in my craft room – it’s easy to die cut with and does not shed any glitter (no glitter mess!).
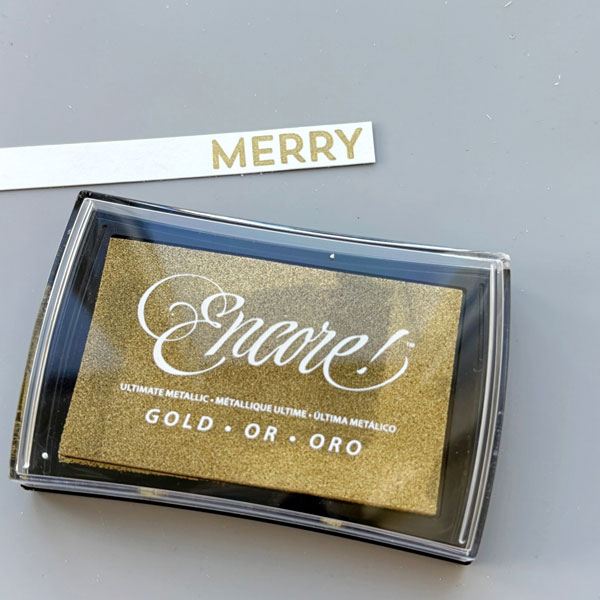
Step 8: Finally, I stamped “Merry” with Encore! Gold ink pad to complete the sentiment. I picked this color since it matches the DCS Gold Glitter Heavyweight cardstock really well.
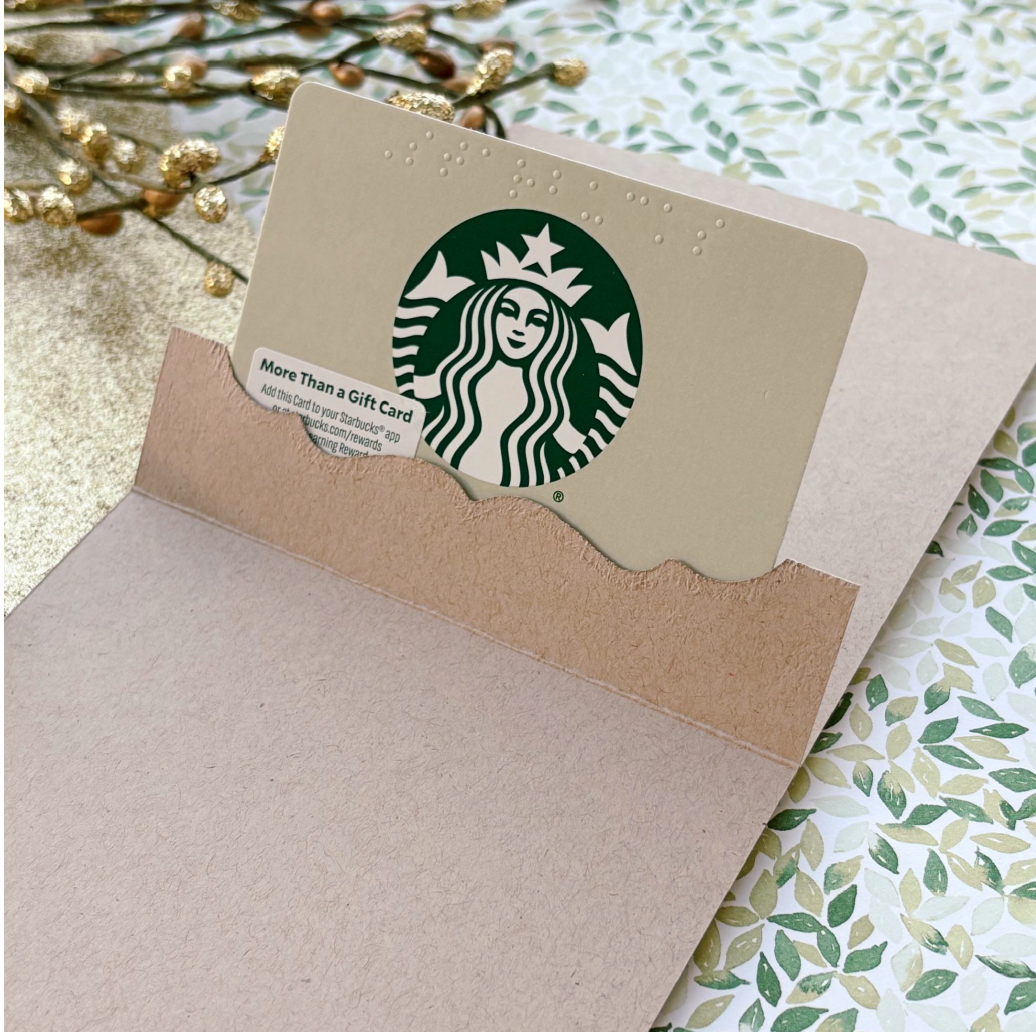
Step 9: This is what the gift card holder looks like with a gift card inserted. I really like this gift card holder since it’s super easy to assemble and there’s space to write a personal message as well. I hope you enjoyed today’s tutorial, and thanks for stopping by!
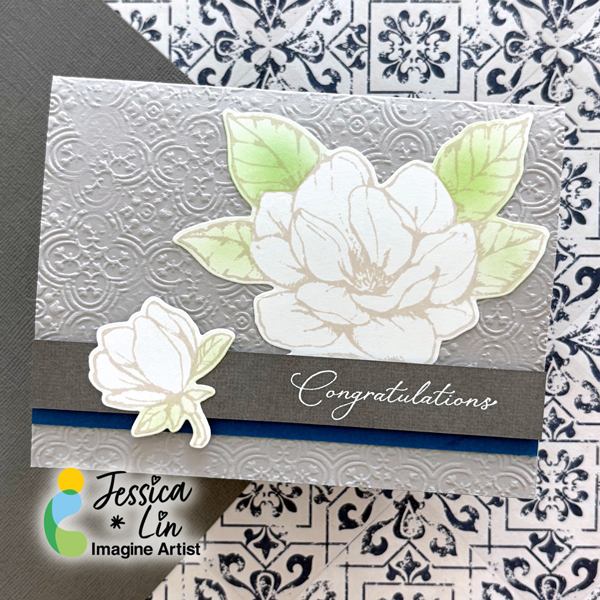
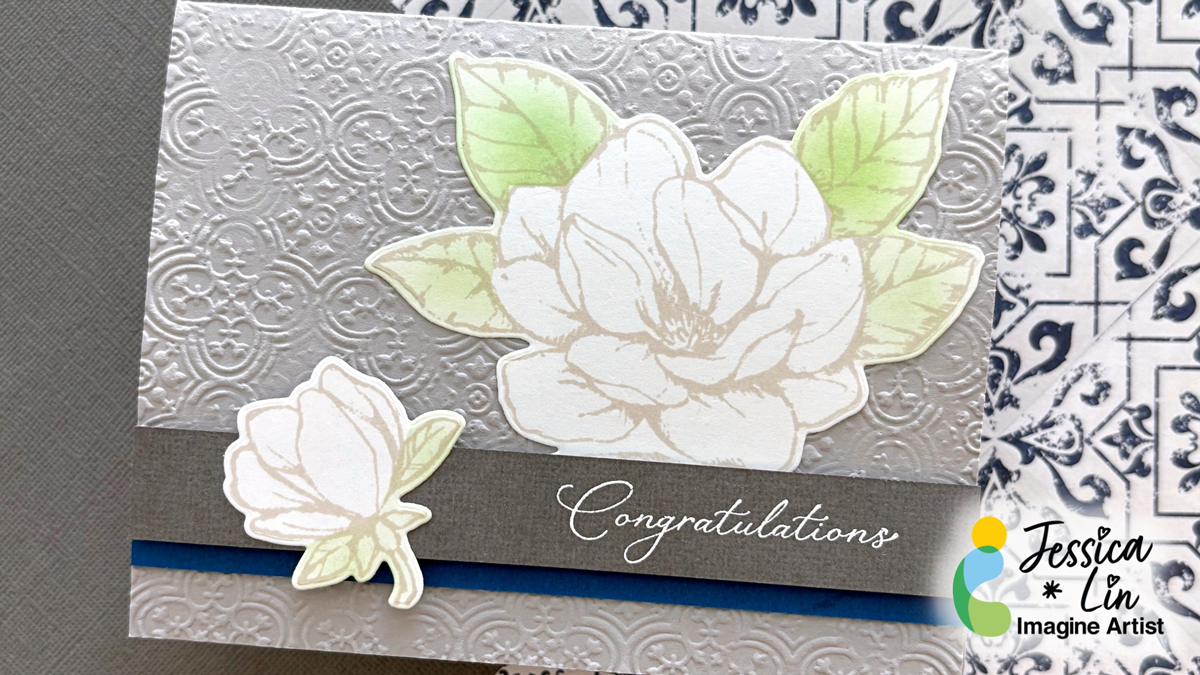
Hi everyone! It’s Jessica here. Wedding season is right around the corner, so I wanted to share a wedding card idea that features a gender-neutral palette. I often struggle with cards that are for male recipients, but this color combination I have in mind today is less-feminine and perfect for the groom.
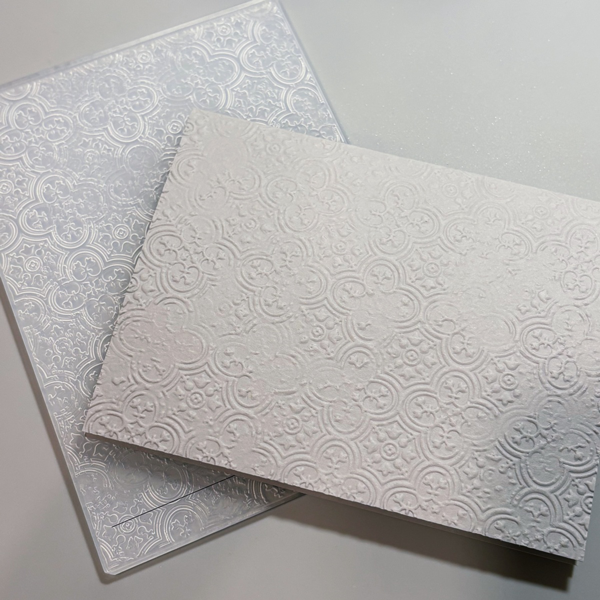
Step 1: Trim a piece of DCS Dolphin Gray cardstock to 5 ½’’ x 8 ½’’ and score in the middle at 4 ¼’’ to create the card base. Cut CardStock offers many beautiful shades of gray cardstock; I chose DCS Dolphin Gray because it is a nice weight of cardstock that can still be easily embossed. The embossing folder I used here is called Distressed Tile by Stampin’ Up.
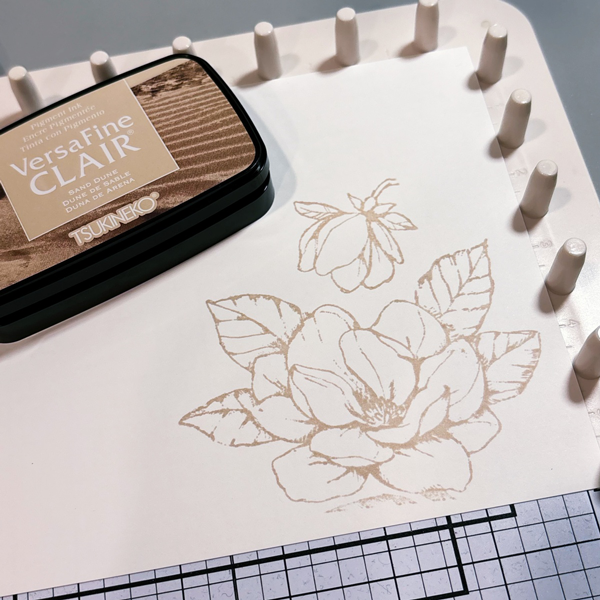
Step 2: Next, stamp the focal image with VersaFine Clair Sand Dune ink on Classic Crest Solar White cardstock. VersaFine Clair Sand Dune has been a new favorite ink of mine for outline images; I used to only stamp the outlines with VersaFine Clair Nocturne ink, but this Sand Dune color is such a great neutral alternative. This large and elegant flower is from the Good Morning Magnolia stamp set.
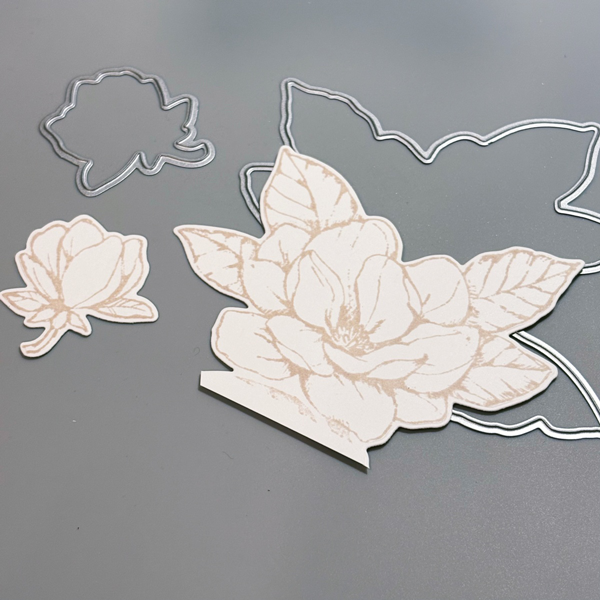
Step 3: After stamping, die cut the images with the coordinating dies.
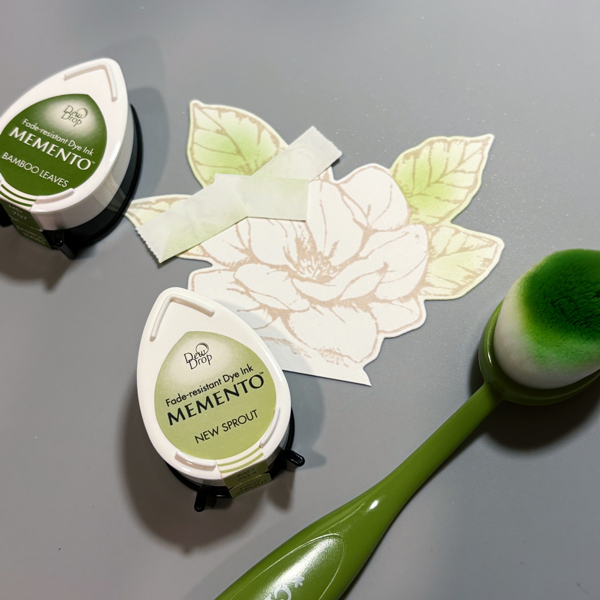
Step 4: I decided to ink blend on the leaves to add some color. Since the flower petals are large, they were easy to mask off. Classic Crest Solar White cardstock is ultra smooth and ink blends beautifully with Memento New Sprout and Bamboo Leaves inks.
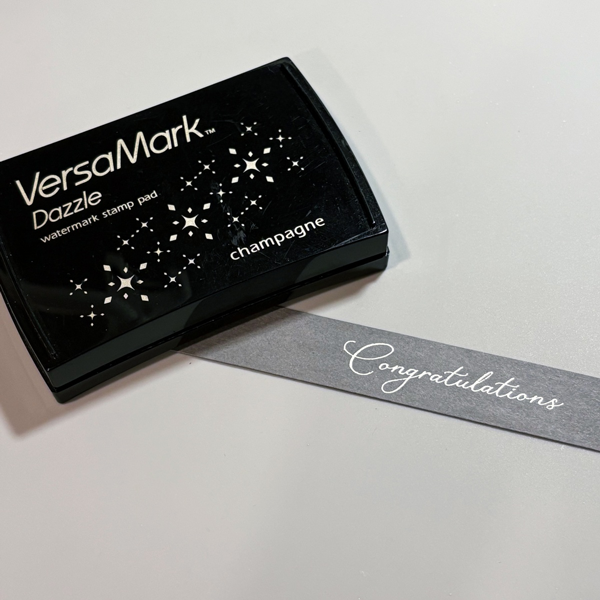
Step 5: Then, trim DCS Canvas Textured Lava Stone Gray cardstock to a ¾’’ x 5 ½’’ strip, and heat emboss on the smooth side. The darker shade of gray really makes the sentiment stand out.
Step 6: Finally, add a strip of DCS Indigo Blue for an additional pop of color. A dark green cardstock would actually look great, too. Adhere all of the layers to complete this gender-neutral wedding card.
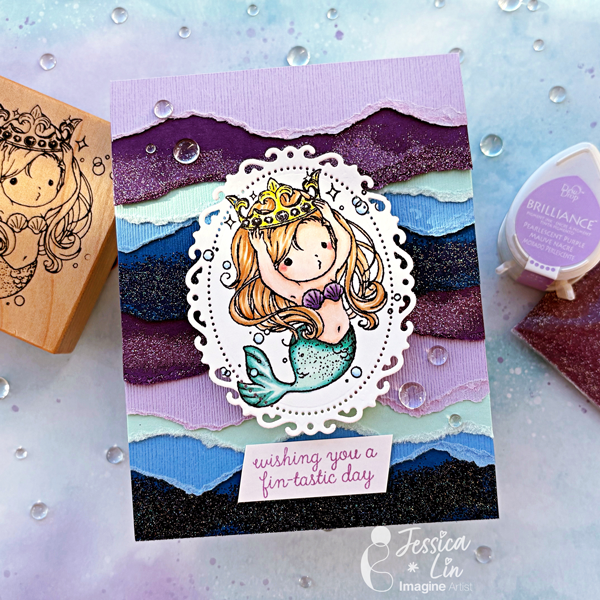
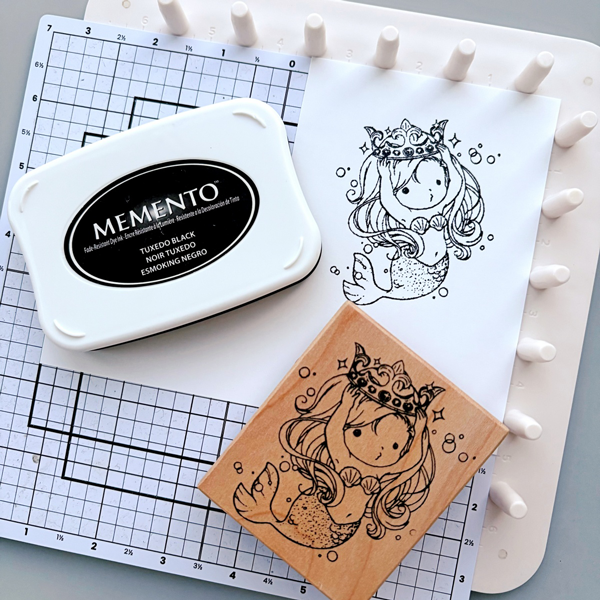
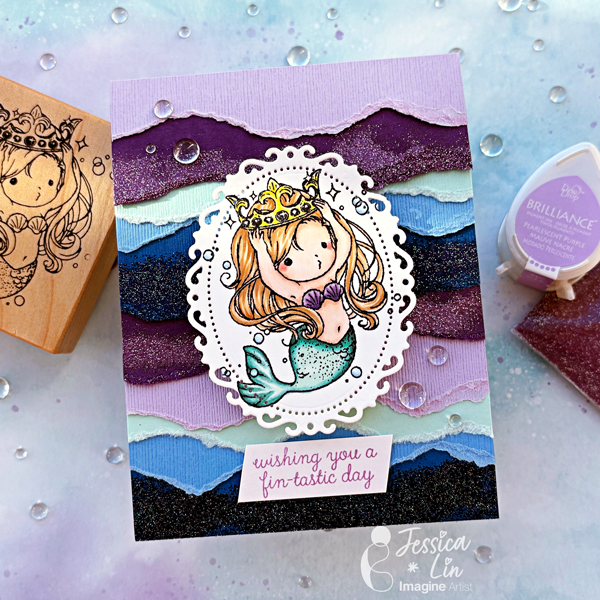
Hi everyone! It’s Jessica here. Do you like collecting certain stamp images? I am fond of mermaids and have a rather big collection. Today, I thought I would use this cute mermaid wooden stamp to create a card.
Step 1: When was the last time you used a wooden stamp? If I’m being honest, I bought this stamp around 10 years ago so it was nice to see that it still inked up nicely with Memento Tuxedo Black ink. I stamped it on Classic Crest Solar White cardstock since I will be coloring with Copic markers today.
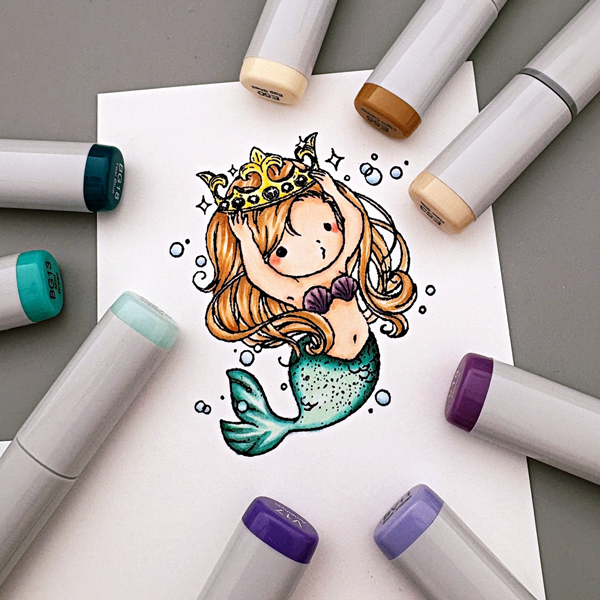
Step 2: This mermaid image is darling and easy to color. I started by drawing strands in her hair with E50 / E53 / E55. Then I colored her skin with E000 / E00 / E11. I also added blush with R20 / R24. For the seashells, I blended BV11 / V15 / V17. I used one of my favorite color combos on her tail: BG10 / BG13 / BG18. Lastly, I color her crown with Y00 / Y11 / Y06.
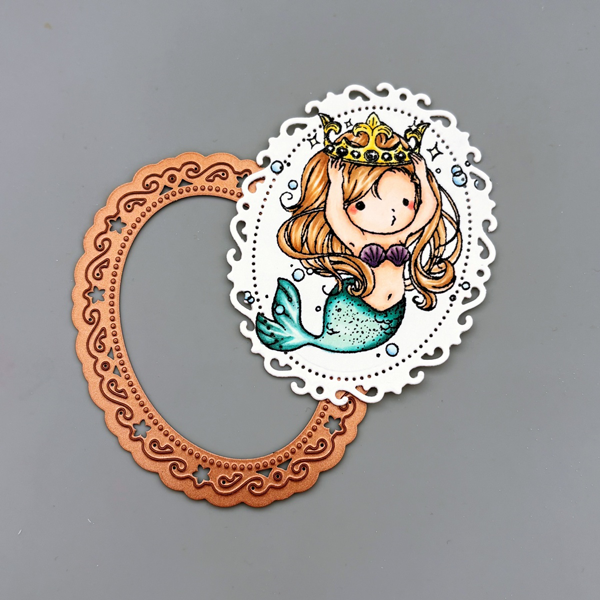
Step 3: Once I finished my coloring, I die cut the image with Spellbinders Nestabilities Floral Ovals die.
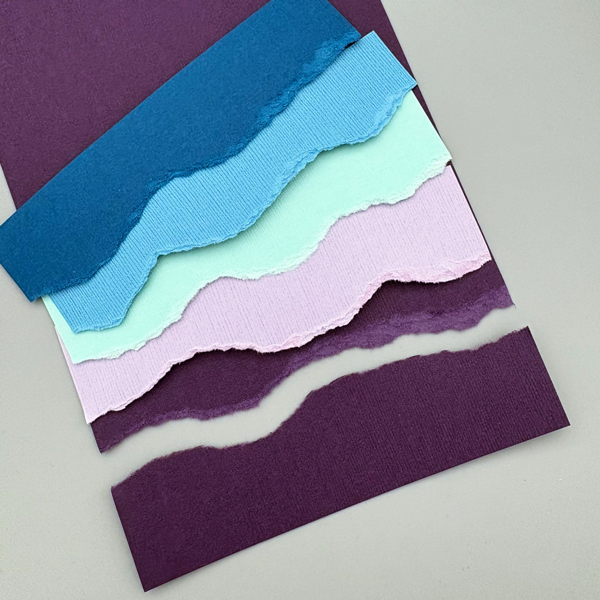
Step 4: I wanted to create a wavy background for today’s card. I picked out DCS Hydrangea Purple, Plum Purple, Seafoam Green, Blue Calico, and Indigo Blue to create an oceanic gradient that reminds me of an underwater palace. I hand-torn them to create wavy patterns; I just love the organic feel you get with the paper fiber edges. These cardstock pieces have texture on one side, and are smooth on the other. I like the variety of textures and ended up using both the smooth and textured sides.
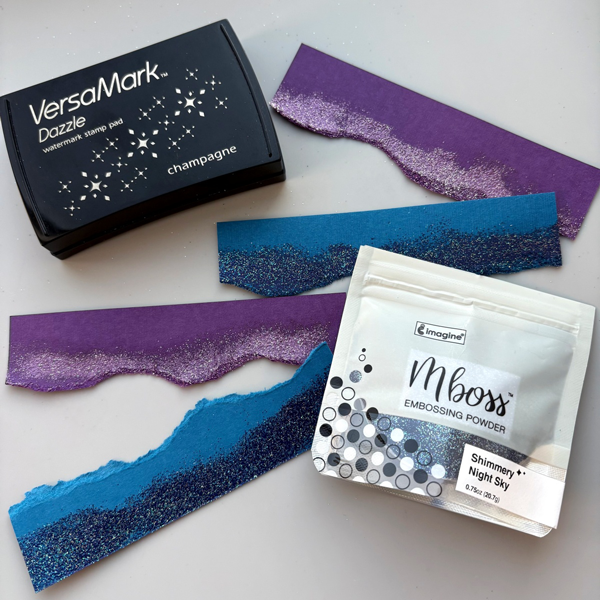
Step 5: To add even more texture to the background, I heat embossed Plum Purple strips with Mboss Princess Party embossing powder, and Indigo Blue strips with Mboss Shimmery Night Sky embossing powder. I swiped VersaMagic ink directly onto the cardstock and the embossing looks great without having to heat emboss a second round.
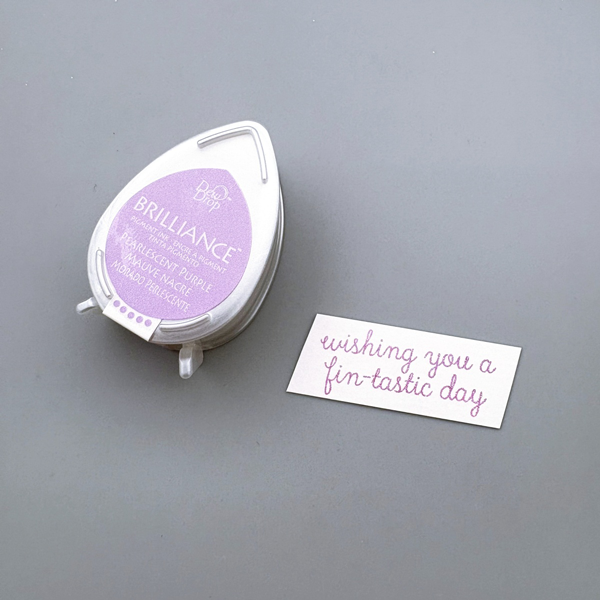
Step 6: Then, stamp the sentiment with Brilliance Pearlescent Purple ink pad.
Step 7: Now it is time to put the background pieces together. I applied Tear-It Tape to the straight edge of each cardstock strip, and adhered them to the cardbase from the bottom to the top. Once you are done, cut any overhang pieces on the sides. Finally, adhere the mermaid die cut piece and the sentiment to the wavy background, and the card is complete!
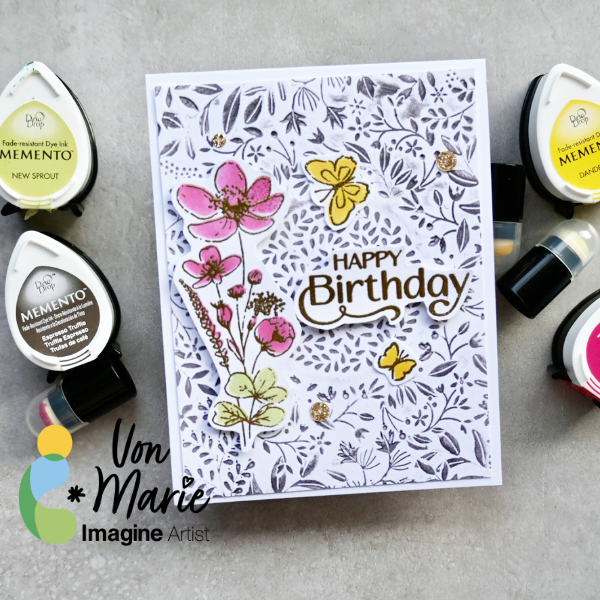
Hello everyone. Von Marie here with my newest video using colorful inks to use with stencils. Memento inks are really perfect for inking and stamping. I used Memento Dew inks to stencil some pretty florals and leaves. The video will have more details. I hope you enjoy. Thank you for watching.
Skill: Intermediate Time: 45 Mins.
Products Used:
• 100lb white Hammermill Paper • A2 Card Base • Glass Board and magnets • Glue • Die-cutting Machine • Heat Tool • Foam Tape • Scissors • Sequins
• Simon Says Stamp Butterfly Blossoms Stamp and Coordinating Stencils
• Simon Says Stamp Splendid Leaves Circle Frame Embossing Folder
• Kat Scrappiness Platinum Gold Glitter Sequins
ALTERNATIVE PRODUCTS THAT CAN BE USED TO RECREATE SOMETHING SIMILAR Any stamps, inks, and or Embossing Folder. You can watch how to create this Birthday Card Click Here
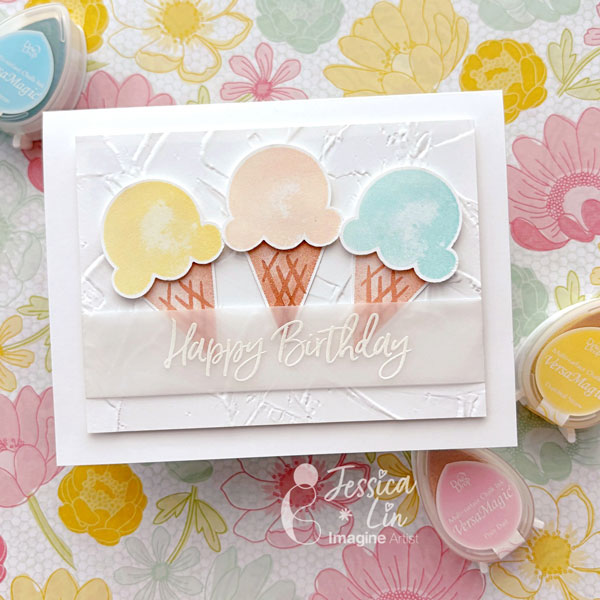
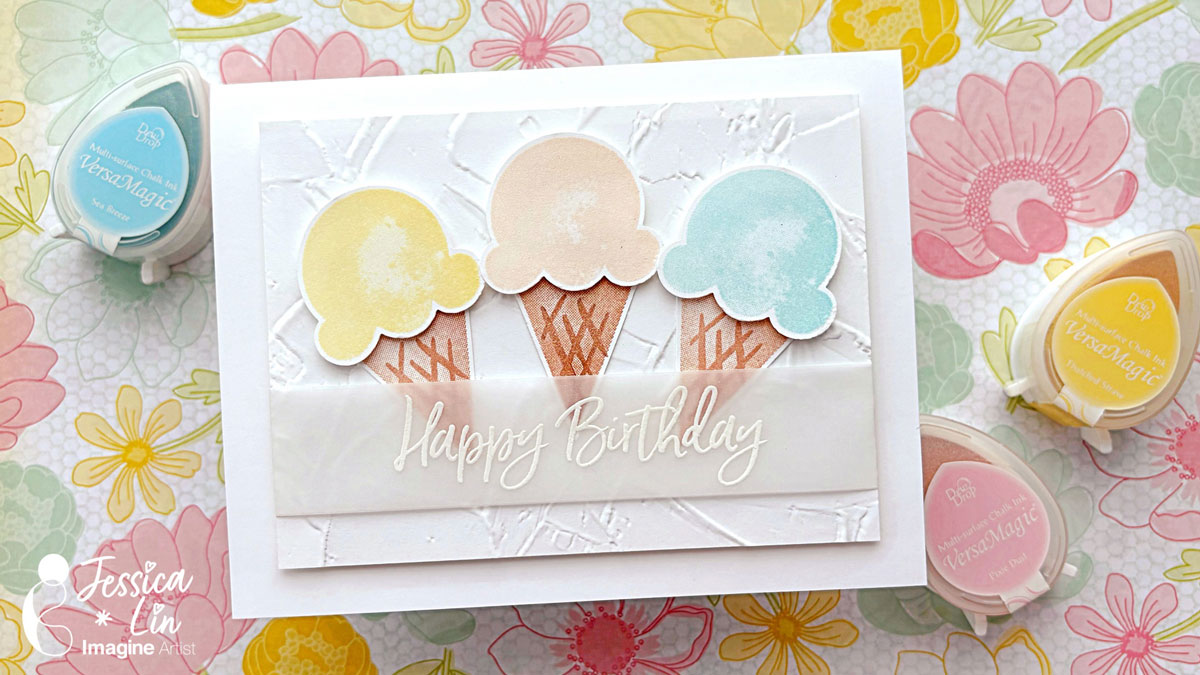
Hi everyone! It’s Jessica here. Today I am sharing a birthday card using one of my favorite ink pads – VersaMagic. They have great pastel colors that are just perfect for sorbet and ice cream images.
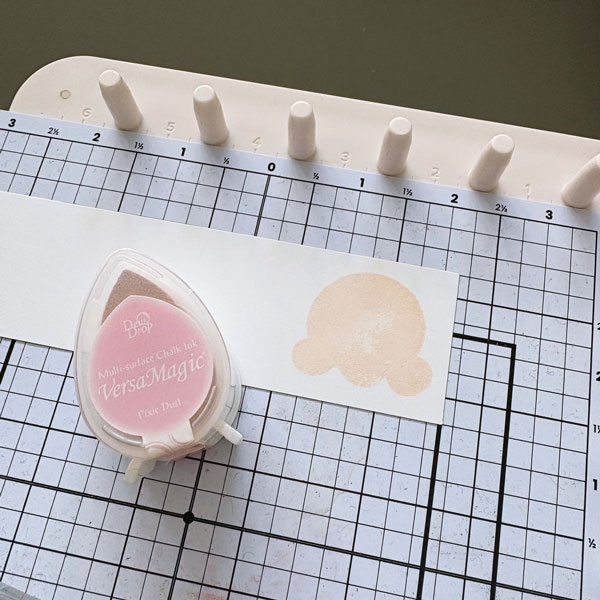
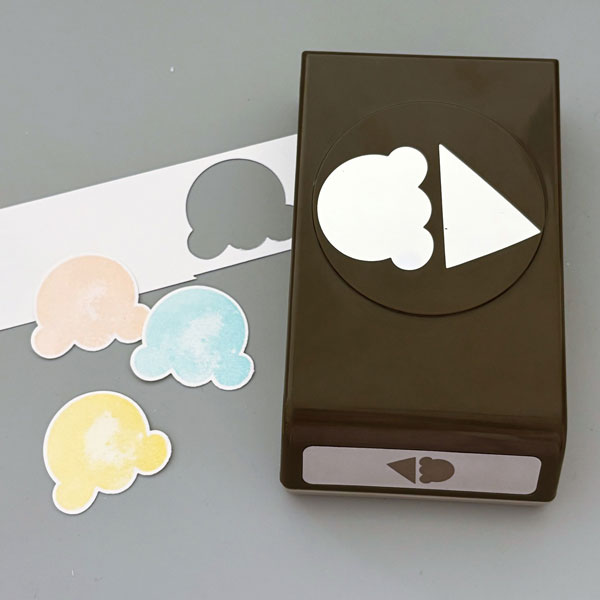
Step 1: The first color I chose is VersaMagic Pixie Dust – it reminds me of the classic strawberry ice cream. I used it to stamp the ice cream scoop image from Stampin’ Up’s Sweet Ice Cream set.
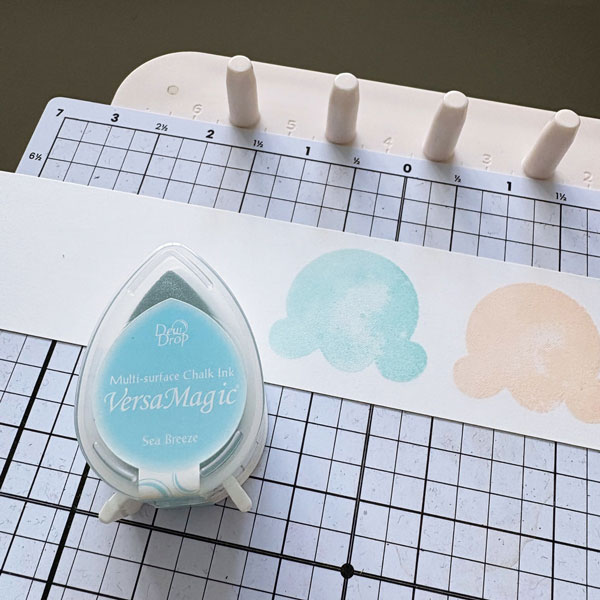
Step 2: Then I used VersaMagic Sea Breeze to stamp my second scoop of ice cream. You will notice that the ice cream image is not entirely solid. I really like the “watercolor” look it gives off.
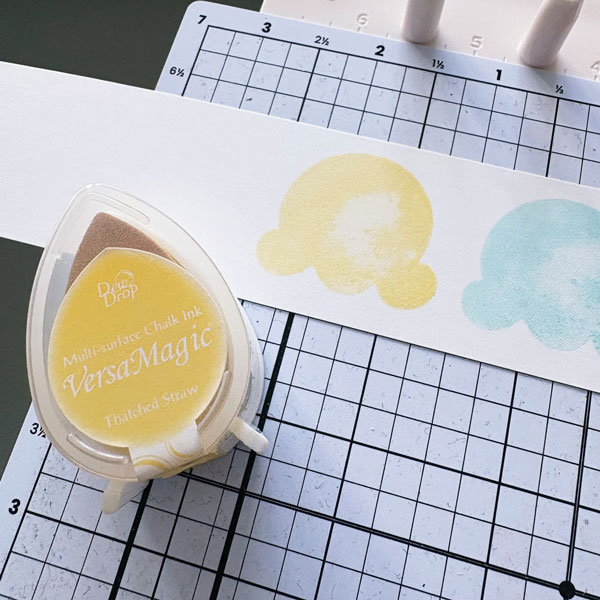
Step 3: For my last scoop of ice cream, I used VersaMagic Thatched Straw. A soft yellow like this is hard to find in the ink pad world. I have yet to find a similar hue as soft as this color.
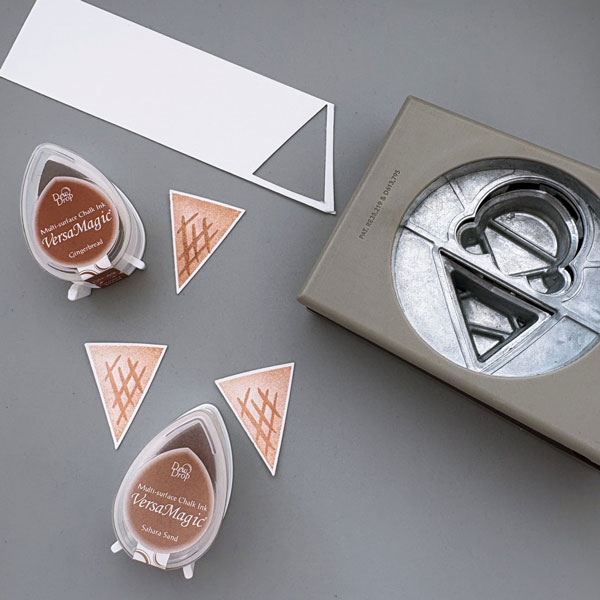
Step 4: Once the stamped images are left to dry for 5-10 minutes, I punched them out with the coordinating Ice Cream Cone Builder punch.
Step 5: For the ice cream cones, I used VersaMagic Gingerbread and Sahara Sand. The darker one on top is stamped with Gingerbread, and the two lighter ones on the bottom are stamped with Sahara Sand.
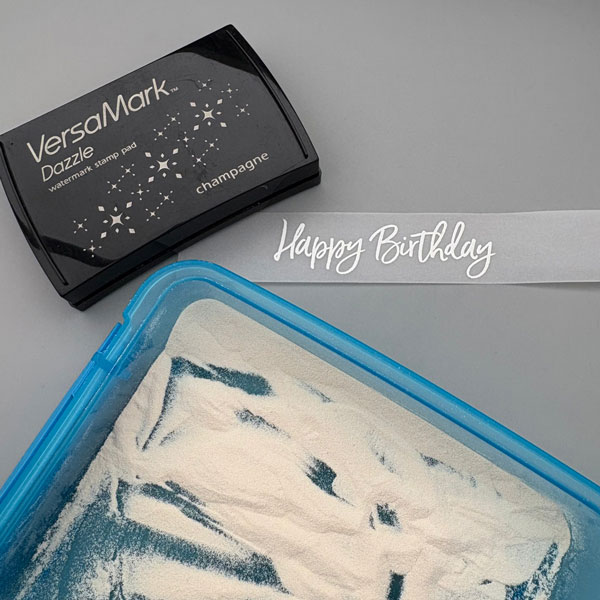
Step 6: I decided to heat emboss the sentiment on vellum to match the soft, pastel palette of the card. I stamped the “Happy Birthday” stamp with VersaMark Dazzle Champagne and heat embossed with white Mboss powder.
Step 7: To complete the card, I adhered all of the elements onto a card panel that I embossed with Stampin’ Up Painted Texture embossing folder. I hope you enjoyed today’s tutorial and have a sweet day!