Create a Cute Mermaid Card with a Heat-Embossed Ocean Background

By Jessica Lin

Skill: Intermediate 
Time: 2 hours 

Hi everyone! It’s Jessica here. Do you like collecting certain stamp images? I am fond of mermaids and have a rather big collection. Today, I thought I would use this cute mermaid wooden stamp to create a card. 
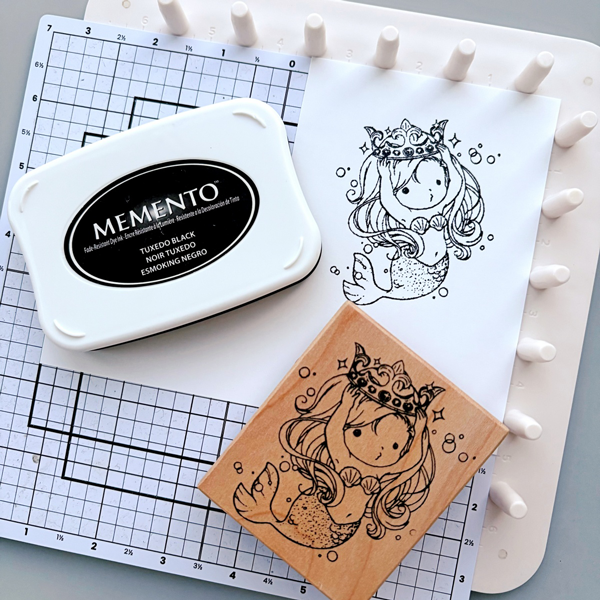
Step 1:
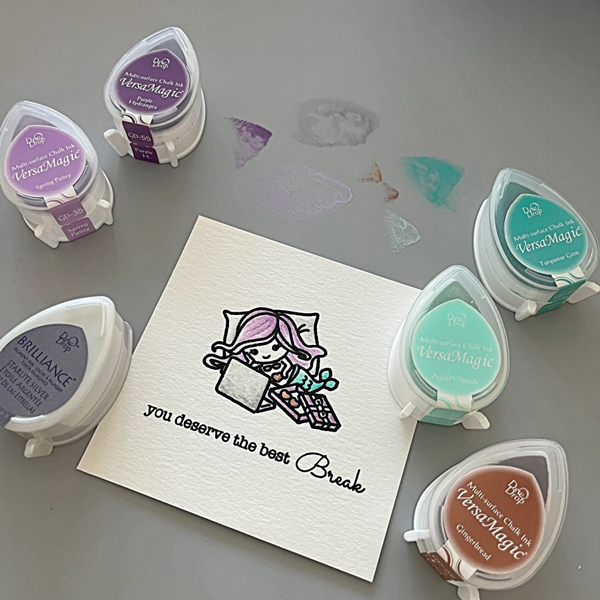
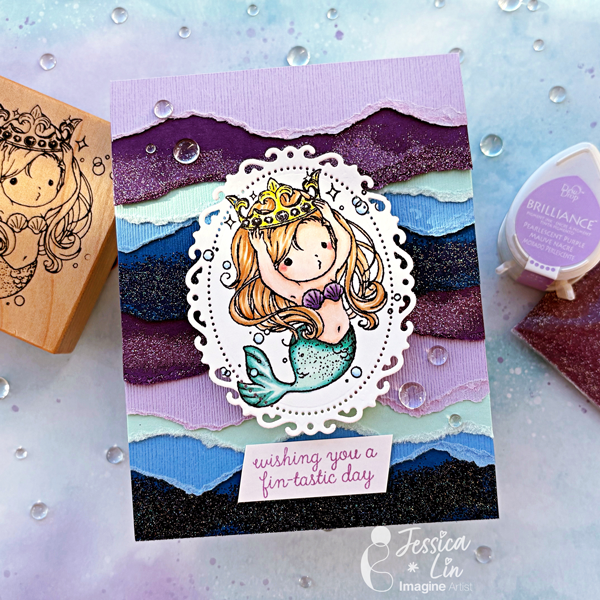
When was the last time you used a wooden stamp? If I’m being honest, I bought this stamp around 10 years ago so it was nice to see that it still inked up nicely with Memento Tuxedo Black ink. I stamped it on Classic Crest Solar White cardstock since I will be coloring with Copic markers today. 
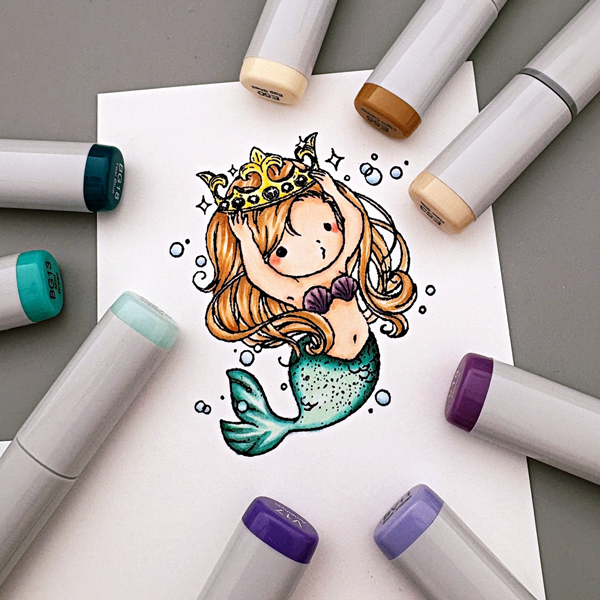
Step 2:
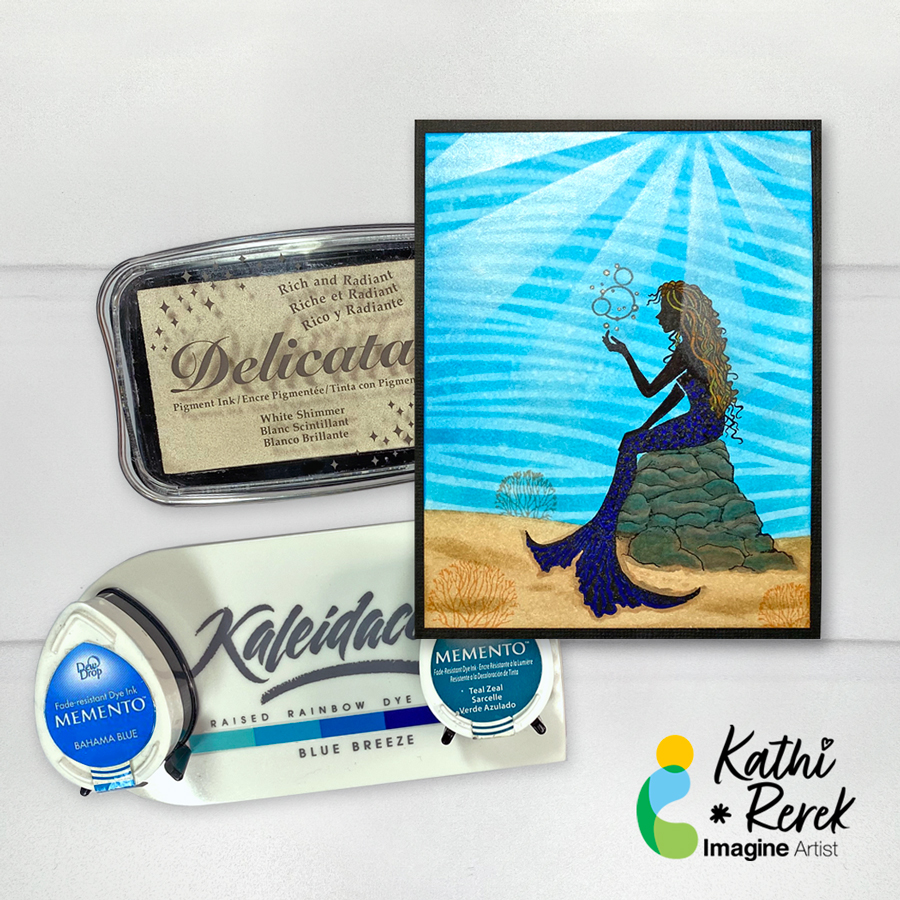
This mermaid image is darling and easy to color. I started by drawing strands in her hair with E50 / E53 / E55. Then I colored her skin with E000 / E00 / E11. I also added blush with R20 / R24. For the seashells, I blended BV11 / V15 / V17. I used one of my favorite color combos on her tail: BG10 / BG13 / BG18. Lastly, I color her crown with Y00 / Y11 / Y06. 
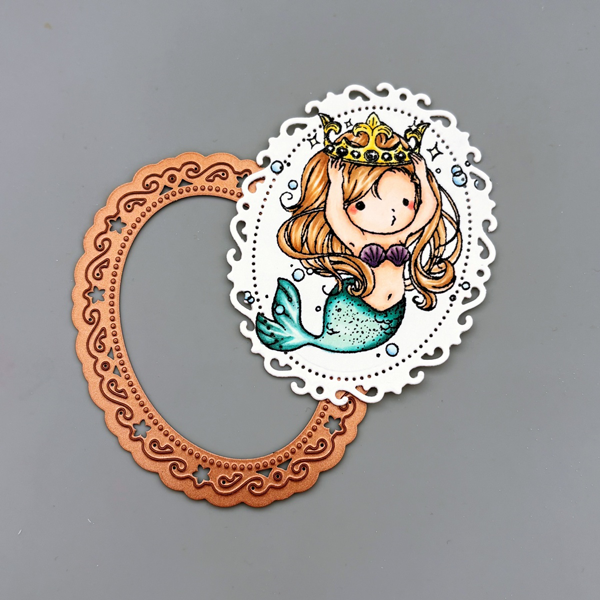
Step 3:
Once I finished my coloring, I die cut the image with Spellbinders Nestabilities Floral Ovals die. 
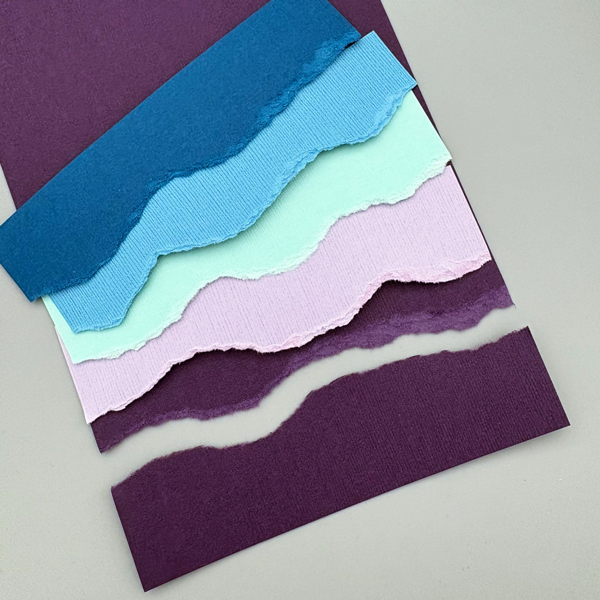
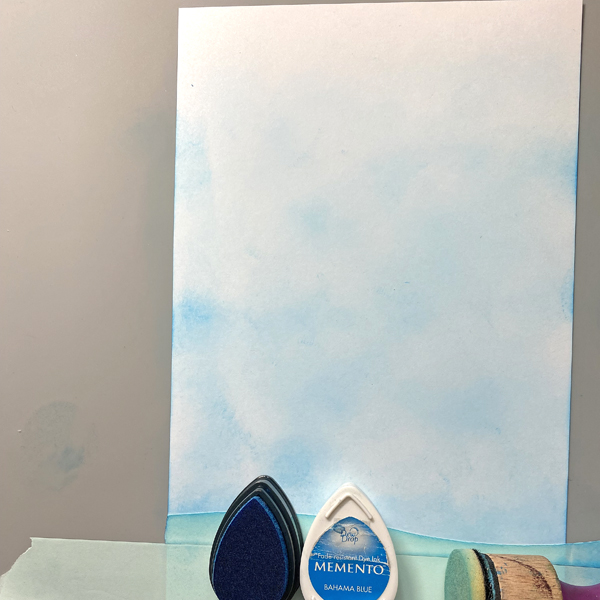
Step 4:
I wanted to create a wavy background for today’s card. I picked out DCS Hydrangea Purple, Plum Purple, Seafoam Green, Blue Calico, and Indigo Blue to create an oceanic gradient that reminds me of an underwater palace. I hand-torn them to create wavy patterns; I just love the organic feel you get with the paper fiber edges. These cardstock pieces have texture on one side, and are smooth on the other. I like the variety of textures and ended up using both the smooth and textured sides. 
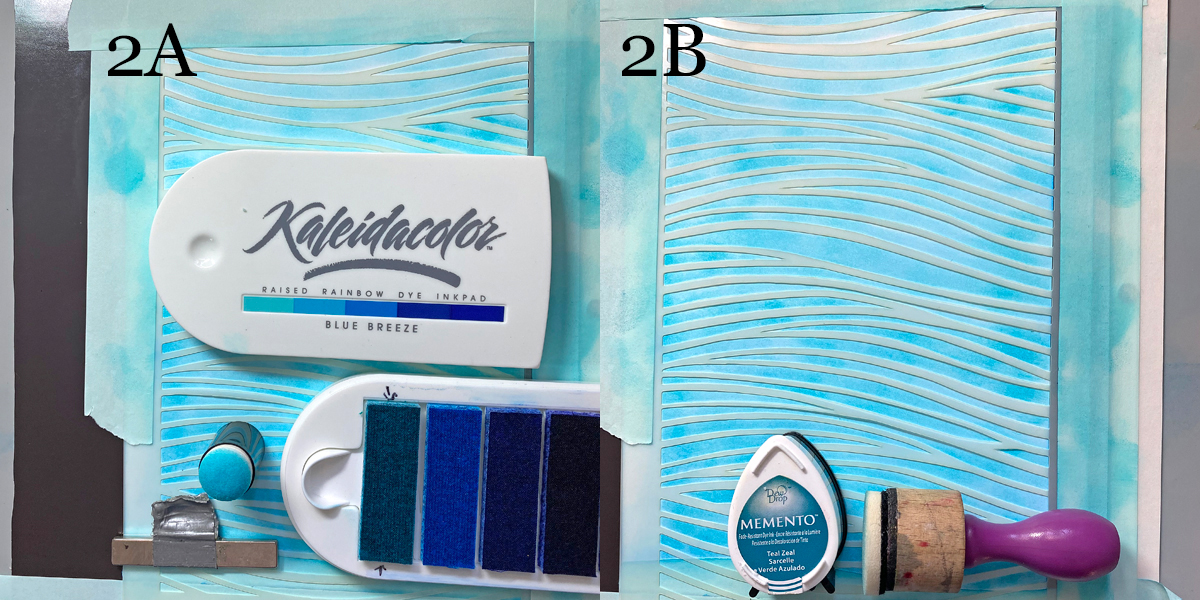
Step 5:
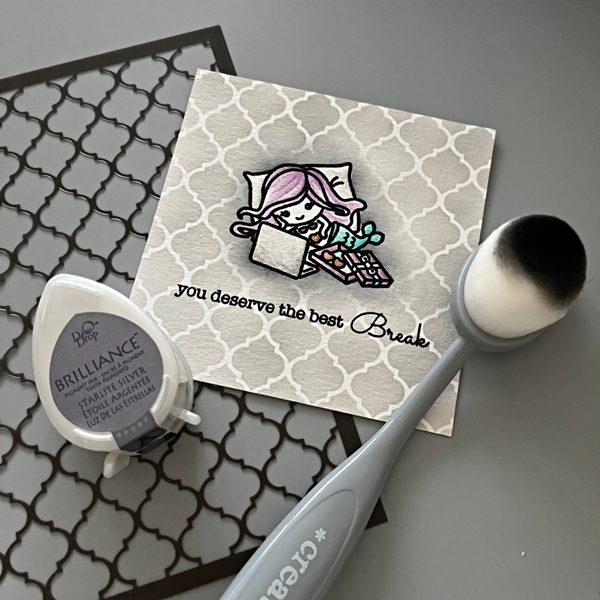
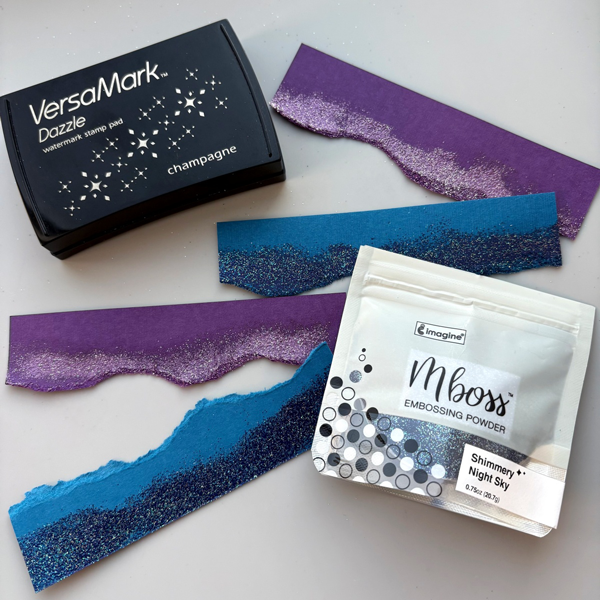
To add even more texture to the background, I heat embossed Plum Purple strips with Mboss Princess Party embossing powder, and Indigo Blue strips with Mboss Shimmery Night Sky embossing powder. I swiped VersaMagic ink directly onto the cardstock and the embossing looks great without having to heat emboss a second round. 

Step 6:
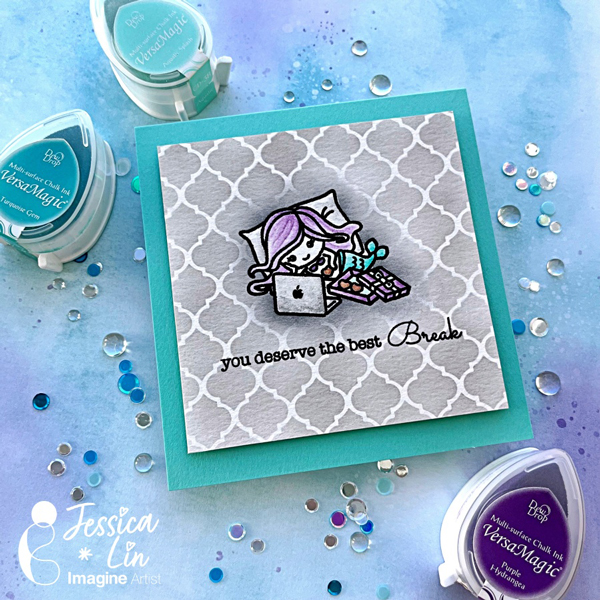
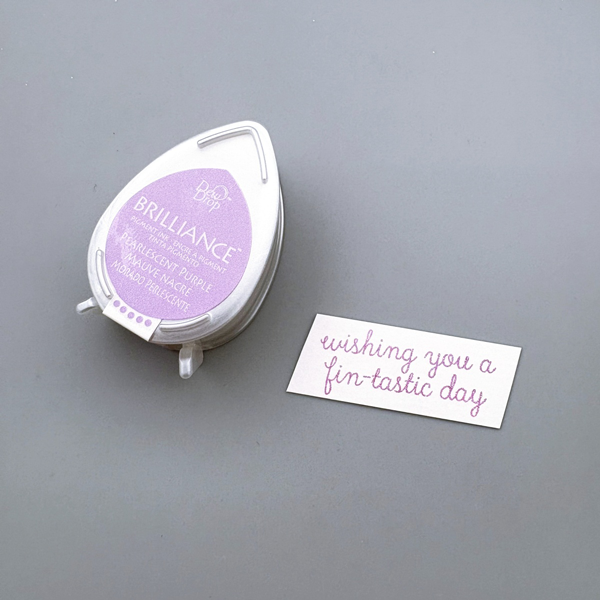
Then, stamp the sentiment with Brilliance Pearlescent Purple ink pad. 
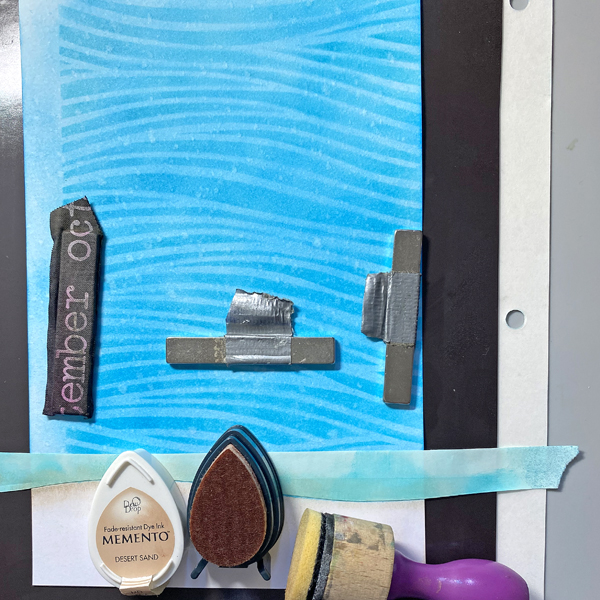
Step 7:
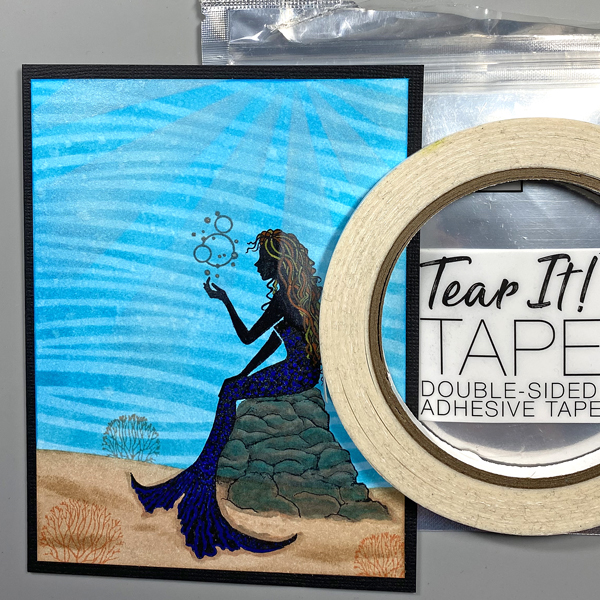
Now it is time to put the background pieces together. I applied Tear-It Tape to the straight edge of each cardstock strip, and adhered them to the cardbase from the bottom to the top. Once you are done, cut any overhang pieces on the sides. Finally, adhere the mermaid die cut piece and the sentiment to the wavy background, and the card is complete! 

Imagine Supplies: 

● Memento – Tuxedo Black 
● VersaMark – Dazzle Champagne 
● Mboss – Princess Party, Shimmery Night Sky (Retired- use any embossing powder)
● Brilliance – Pearlescent Purple 
● StazOn Cleaner 
● Tear-It! Tape 
● Craft Mat 

Other Supplies: 
● CutCardStock – Cardstock – Classic Crest Solar White 
● CutCardStock – Cardstock – DCS Hydrangea Purple, Plum Purple, Seafoam Green, Blue Calico, Indigo Blue 
● Spellbinders – Dies – Nestabilities Floral Ovals 

Watercolor with VersaMagic Inks for a Teacher’s Card

By Jessica Lin

Skill: Intermediate
Time: 45 hour

Hello hello! Back to school season is right around the corner, can you believe that summer flew by so quickly? Today I have a Teacher’s card to share with you and we are coloring with some of my favorite ink pads as well!

Step 1:
Stamp the mermaid image using VersaFine Clair Nocturne ink pad and heat emboss with clear Mboss powder. I also stamped 2 sentiments partially to create a new phrase.

Step 2:
Dab some ink on the Craft Mat and watercolor the image using a waterbrush.

Step 3:
Mask the image with masking tape and blend Starlite Silver ink across the moroccan stencil. I also blended Memento Tuxedo Black ink around the mermaid image to create a shadow-glow effect.

Step 4:
Adhere the front panel to a square cardbase with foam tape, and the card is complete!

Products Used

Imagine Supplies:

Other Supplies:

  • Penguin Palace – Stamps – Take a Break
  • Stampin’ Up! – Stencil – Artistic Mix Decorative Masks
  • We R – Tool – Precision Press
  • Foam Tape
  • Heat Tool
  • Stampin’ Up! – Cardstock – Coastal Cabana

Let’s Make A Mermaid Card

By Kathi Rerek

It’s summer, which makes me want to go to the beach to cool off in the ocean and pretend I’m a mermaid. Let’s make a card that fulfills those dreams using inks, stencils, and stamps!

Skill Level: Intermediate
Time: 1.5 hours

Instructions:

Step 1:
Use a craft knife to cut a piece of Low-tack tape in a curved pattern. Place the tape at the bottom of a 5.5” x 8.5” piece of white cardstock (no photo).

Lightly apply Bahama Blue Memento Ink to the white area of the cardstock.

Steps 2A & B:
Place a magnetic page onto the craft mat. Use low-tack tape to secure the cardstock panel to the magnetic page. Use magnets and low-tack tape to secure the Currents Stencil to the cardstock panel. Use a Sponge Dauber to apply the lightest blue ink from the Kaleidacolor Blue Breeze Ink pad over the stencil onto the cardstock panel (2A). Randomly apply Teal Zeal Memento Ink over the stencil onto the cardstock to deepen the colors.

Step 3:
Remove the stencil, then spritz the panel with 91% Isopropyl Alcohol to blend the inks and add white splatters and splotches.

Step 4:
Remove the low-tack tape and replace with the negative part of the tape cut in Step 1. Sponge Desert Sand Memento Ink over the tape onto the image panel to create the sea floor. Remove the tape.

Step 5:
Place the panel onto the base of a stamping platform and secure with magnets. Position the mermaid stamp from the Guinevere Clear Polymer Stamp Set so that it’s face down along the lower right side of the image panel. Press the platform’s lid onto the back of the stamp, lift, and ink the stamp with Nocturne VersaFine Clair Ink. Stamp. Re-ink and stamp again if necessary to attain a good impression.

Remove the panel and thoroughly heat set the ink.

Step 6:
Use Copic markers to color the mermaid’s rocky throne. Usually I don’t use Copic markers with any ink other than Memento, but since I had duplicate markers, I gave it a shot and it worked!  Sorry! No photos!

Step 7:
Use Triplus pens to color the mermaid’s hair. Use Marine and Black Stardust Glitter Gel Pens to add detail the mermaid’s scales. The ink of both pens work well with most inks. Sorry! No photos again!

Steps 8A & B:
Place the image panel back onto the base of the stamping platform and secure with magnets. Use low-tack tape to cover the top of the ocean floor to the left of the mermaid.

Position the mid-sized Skeleton Tree stamp from the Skeleton Tree Clear Stamp Set facedown on the top left. Press the lid of the platform onto the back of the stamp and lift. Ink the stamp with Summertime VersaFine Clair Ink and stamp (8A). Remove the tape.

Remove, clean and dry the stamp. Reposition the mid-sized Skeleton Tree stamp so that it’s facedown on the bottom left of the image panel. Position the smallest Skeleton Tree Stamp from the facedown on the bottom right of the image panel

Press the lid into the back of the stamps and lift. Ink both stamps with Summertime VersaFine Clair Ink and stamp (8B). Remove the stamps from the platform.

Step 9:
Position the bubbles stamp from the Faerie Clear Polymer Stamp Set facedown on the image panel slightly above the mermaid’s outstretched hand. Press the lid into the back of the stamps and lift. Ink the stamp with Morning Mist VersaFine Clair Ink and stamp. Remove the panel from the platform. Heat set the panel.

Step 10:
Place the image panel back onto the magnetic page. Use magnets and low-tack tape to secure the Sunshine Small Stencil over the image panel as shown. Sponge White Shimmer Delicata Ink over the stencil onto the image panel. Remove the panel and heat set.

Step 11:
Use Tear-It! Tape to adhere the image panel to a black A2 card.

Finished Card

Imagine Supplies:

Other Supplies:

  • Guinevere Clear Polymer Stamp by Lavinia Stamps
  • Skeleton Trees Clear Polymer Stamp Set by Lavinia Stamps
  • Faerie Clear Polymer Stamp Set by Visible Image
  • Small Sunshine Stencil by Darkroom Door
  • Currents Stencil by A Colorful Life Designs
  • W3, W4, W6, BG45, BG57, E93, E95 by Copic Markers
  • Ultramarine, Orange, Yellow Orange, Rusty Orange Triplus Pens by Staedtler
  • Marine and Black Stardust Gelly Roll Gel Pens by Sakura of America
  • Low-Tack Tape
  • Magnet Page used for die-cut storage
  • Misti  Stamping Platform by My Sweet Petunia

Hello Summer Mermaid Infinite Shaker Card

2022-Annie-June-Blog

By Annie Collins

– Hello Crafty Friends – Annie here with a fun infinite shaker card featuring a variety of Imagine Crafts Products.

Skill Level: Intermediate

Time to Complete: 30 Minutes + Drying Time

Art Supplies:

Imagine:

• Creative Medium: Metallic Gold

• VersaMagic Inks: Sea Breeze, Ocean Depth, Sage, Pink Grapefruit, Aspen Mist, Pretty Petunia, Mango, Turquoise Gem, Wheat & Thatched Straw

• Memento Markers: Angel Pink, Rose Bud, and Desert Sand

•Imagine Crafts Embossing Powder : Iridescent

Imagine Crafts Sheer Shimmer Spray: Frost

Imagine Crafts: Tear It! Tape

Imagine Crafts: On Point Glue

Imagine Crafts: Craft Mat

Other products:

• Recollections Brand Stamp & Stencil: Enchanted Collection- Mermaid & Friends Set

• Recollections Brand 110# Cardstock: White

• Recollections Brand 65# Cardstock: Dark Blue

• Accent Brand 80# Ultra Smooth Cardstock: Opaque White

• Tree House Studio Sequins: Mermaids & Tails

• Picket Fence Studios Sequins: Spike Ocean

• Packaging 


Ink Colors on images:

Background: Sea Breeze

Sentiment: Ocean Depth

Dolphin: Aspen Mist

Fish: Mongo

Mermaid: Turquoise Gem & Pretty Petunia

Sand Dollar: Wheat

Seahorse: Thatched Straw

Starfish: Pink Grapefruit

Seashells: Sage, Pretty Petunia, & Sea Breeze

How to Blend Different Stamps in the Same Mermaid Card Project

by Jennifer Vanderbeek

How to Blend Different Stamps in the Same Mermaid Card Project with VersaFine Clair

This Fintastic Mermaid card is one of those examples of how a color and a single image can inspire a whole project. This month’s color challenge is Sea Breeze, so I immediately reached for VersaFine Clair in Warm Breeze—a favorite from the first time I stamped it. That plus the Lovely Swirl background (which, when turned on its side, reminds me of waves) gave me a clear direction for this delightful little mermaid card.

One of my favorite parts of the process was mixing various stamps from different manufacturers but tying them together seamlessly by keeping the same non-traditional outline color throughout. Try it next time and see how it works for you!

Supplies

Imagine
Other
  • Cardstock – White, Blue
  • Joy Clair Stamps – Lovely Swirl Background Stamp
  • Santoro – No 31 Awashed Stamp
  • Waffle Flower – Little Mermaids Stamp Set
  • Darice – Heat Tool
  • Water Brush
  • Acrylic Blocks
  • Tweezers
  • American Crafts – Paper Trimmer
  • Fiskars – Scissors
  • Craft Knife
  • Helmar – Liquid Scrap Dots, Zap Dots