

By Helen Gullett
Hello crafty friends! Today, I want to share with you how to make these Spring themed bookmarks, using Imagine Crafts products and simple crafting tools. These bookmarks are a great gift for book lovers, or donating to your local library, or even just for you to use personally. You can make a batch of them in a short time!
Skill: Beginner
Time: 15-30 minutes
Directions:
Step 1
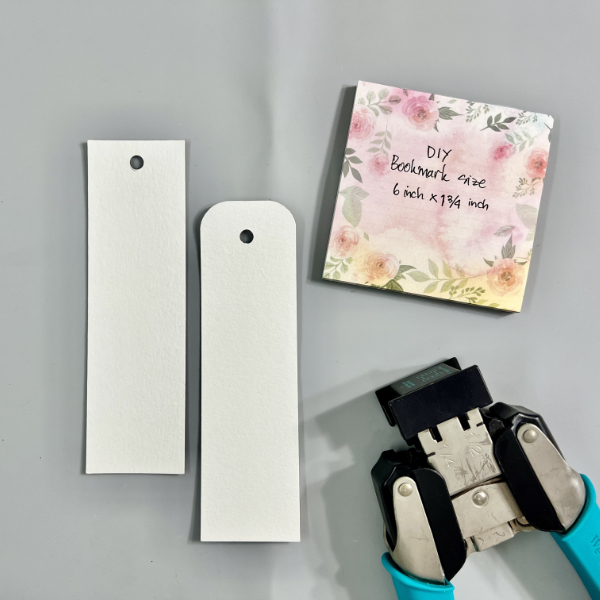
I find that Canson Watercolor Paper 140lb is the best to make bookmarks. They are not only thick and sturdy, but also you can use any craft techniques with this paper – either simply stamping, or watercoloring, or even mixed media.
Cut a piece of watercolor paper into 6 inch x 1 ¾ inch size. One piece of this 9 x 12 watercolor paper, you can get 10 bookmarks.
You can leave it as a rectangle or you can round the corner with the corner rounder punch. Next, use a ¼ inch hole punch to punch a hole at the center top of the bookmark for ribbon or teasel.

Step 2
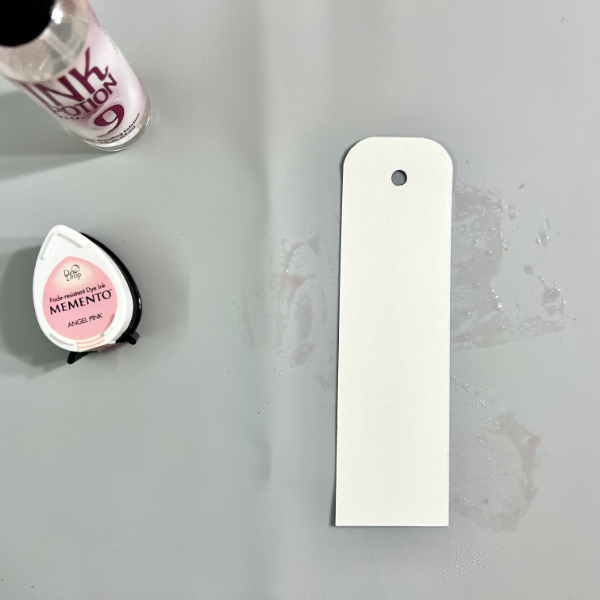
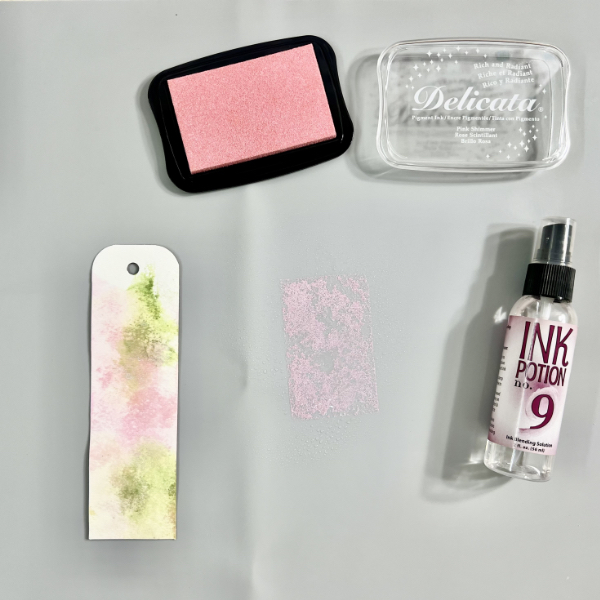
Next step is to create the watercolor wash background using Memento DewDrop ink and Ink Potion No. 9 Spray on each of the bookmarks.
Dab the Memento ink on the craft mat and then spray with some of the Ink Potion No. 9.
Step 3
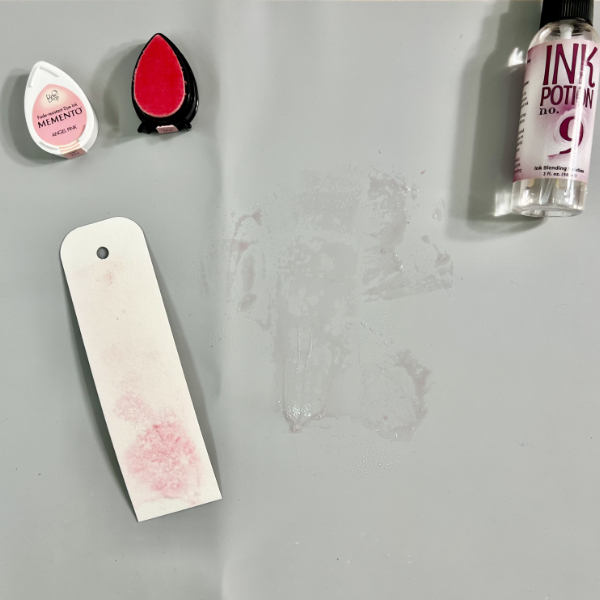
Smoosh a bookmark into the ink. Gently press to get the ink transferred to the bookmark.
Step 4
You can repeat this step as many times as you want to get the first color wash you like to get. You can spray the ink more to get lighter color, or spray the ink less to get more darker color.
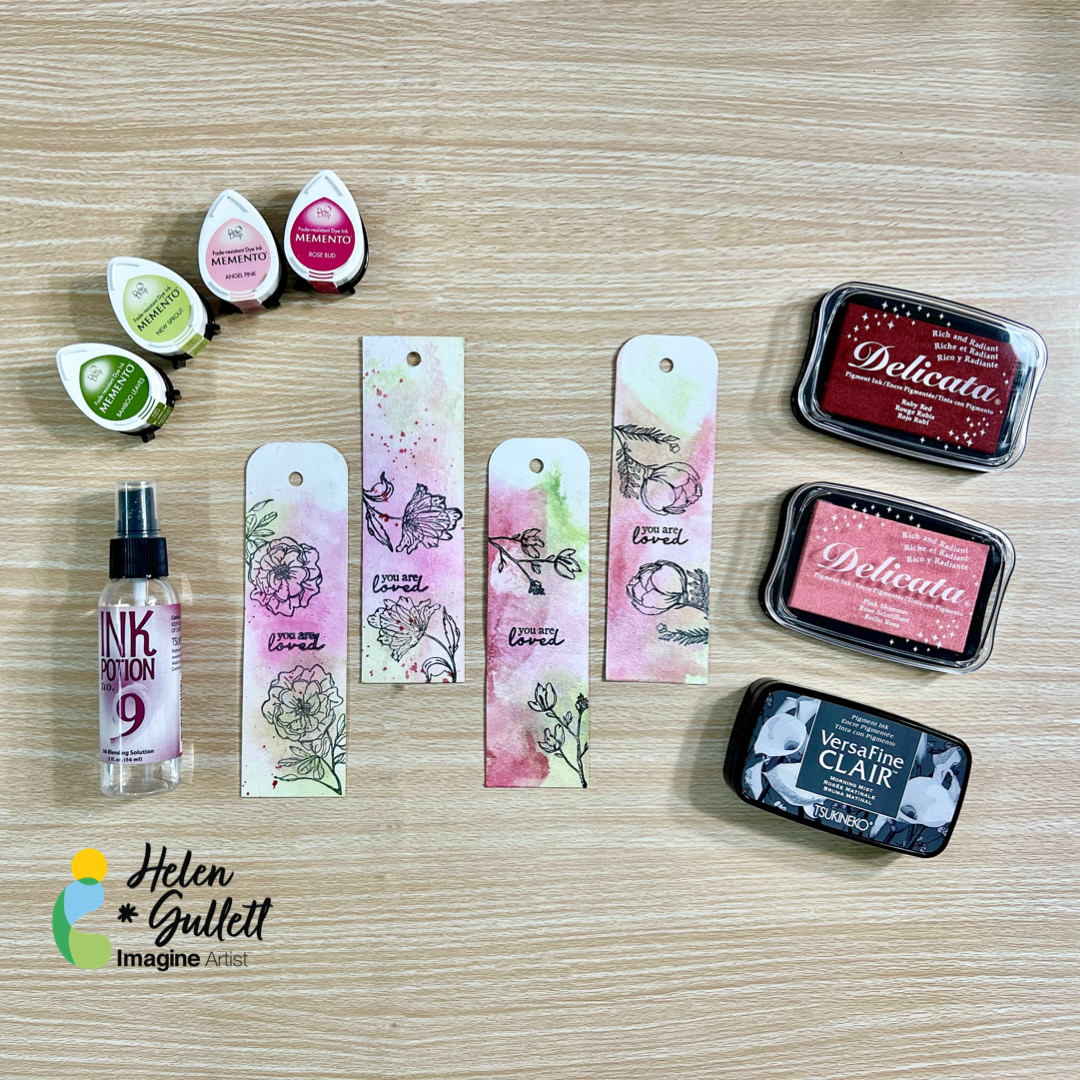
And then repeat the step 2 and step 3 with different colors that you want to use on your bookmark background. For mine, I used the Memento Dew Drop Inks Angel Pink, Rose Bud, New Sprout, and Bamboo Leaves colors.
Step 5
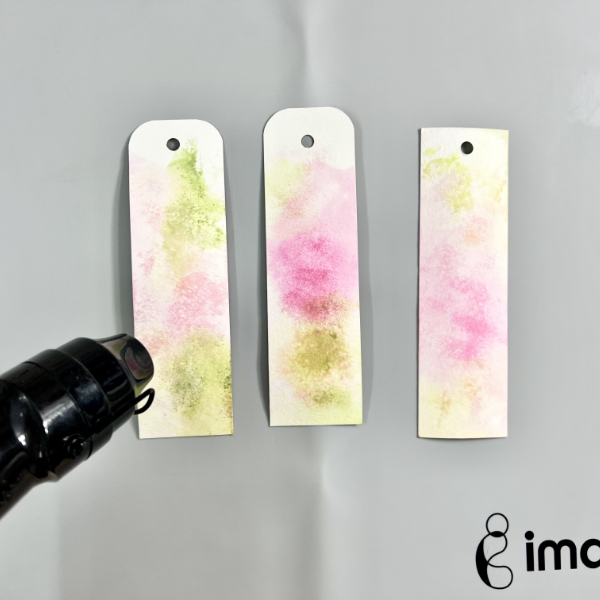
When done with adding watercolor washes on the bookmarks, use the craft heat gun to dry them.
Option step, you can repeat step 2, step 3, and step 4, if you want to add more color to them.
Step 6
Dab some of the Delicata ink on the craft mat, spray it with the Ink Potion No. 9, and then smoosh the bookmark into the ink. Gently press it to get the ink transferred well.
You will get a shimmer look on the bookmark with this step.
Dry all the ink on the bookmark with a craft heat gun.
Step 7
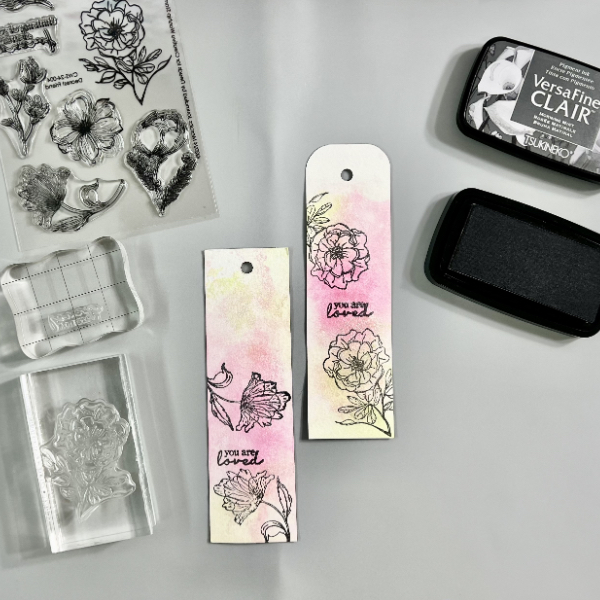
When the bookmark background is completely dry, stamp the image and sentiment on them with VersaFine Clair ink using acrylic blocks (or stamping tool of your choice).
Use a craft heat gun to dry the stamped images and sentiments.
Step 8
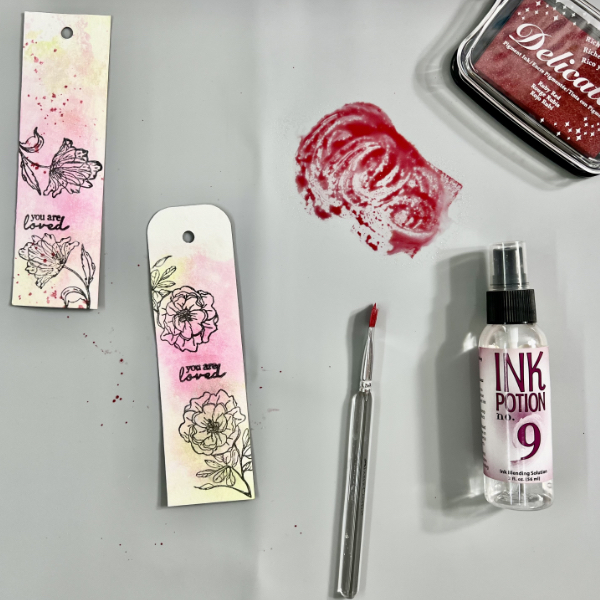
This is optional. You can leave the bookmarks as they are, or you can add some more ink splatters to them.
To add more splatters to the bookmark, dab some of the Delicata Ruby Red ink on the craft mat, spray it with Ink Potion No. 9, and use a flat brush (or fan brush) to add the splatters.
Use a craft heat gun to dry the bookmarks.
Add some ribbon or teasel to the bookmarks.
Hope that you like this project and give it a try. Thanks so much for stopping by our blog today. Have a wonderful day!
Craft Supplies
Imagine Crafts:
- Memento DewDrop Sorbet Scoops (Angel Pink, Rose Bud, New Sprout, Bamboo Leaves)
- Delicata Pink Shimmer Ink Pad
- Delicata Ruby Red Ink Pad
- VersaFine Clair Morning Mist Ink Pad
- Ink Potion No. 9 Spray
- Imagine Craft Mat
- Staz-On All Purpose Stamp Cleaner
Others:
- Sweet ‘n Sassy Stamp – Dearest Friend Stamp Set
- Canson Watercolor Paper 140lb
- Corner Rounder Punch
- Hole Punch (¼ inch)
- Fiskar paper trimmer
- Acrylic stamping blocks
- Flat paint brush or fan brush
- Craft Heat Gun
- Ribbon or twice or tassel

Pingback: DIY Watercolored Bookmarks - Helen G. Designs