By Helen Gullett –
Hello crafty friends! I am a big fan of tote bags. I love it for its multi-purposes and is big enough for carrying stuff. I always wanted to personalize my own tote bag. I am so glad that Imagine carries these amazing VersaCraft Ink Pads and Fabrico Markers for fabric projects. So, today we are going to personalize a tote bag together. Let’s get crafting!
Skill: Beginner
Time: 15 minutes
Direction:
Step 1
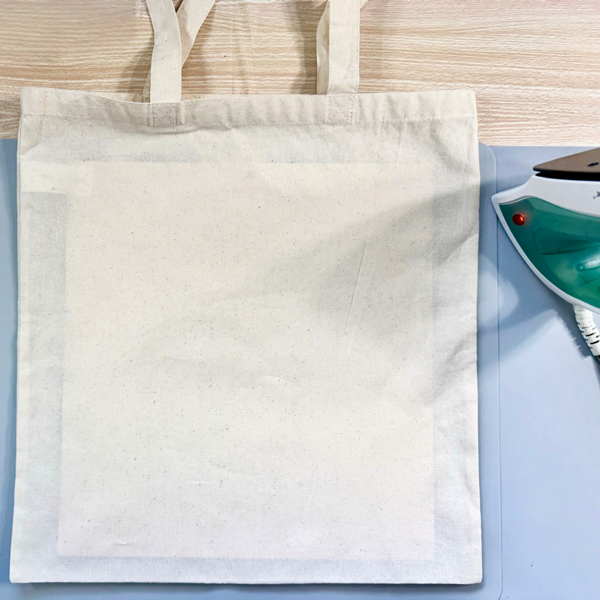
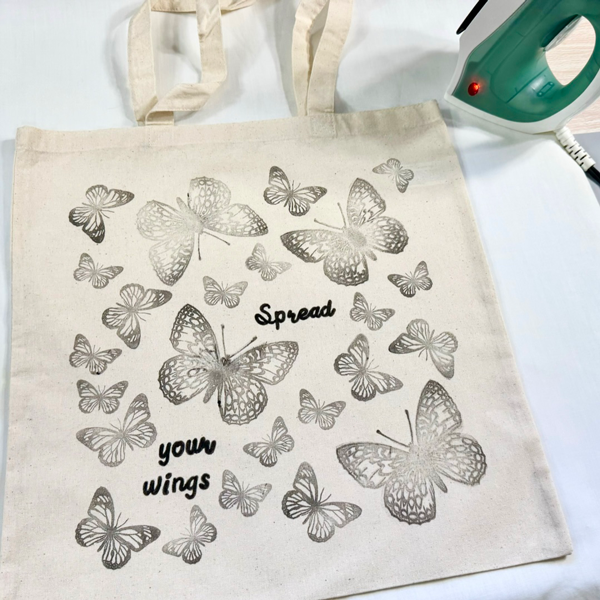
You are gonna need a blank canvas tote bag that can be found easily in any craft stores and online stores. The tote bag I used today is about 13 inch x 15 inch.
Lay it flat on the ironing mat and iron the tote bag to remove the wrinkles. I pre-washed the bag, but it is an optional step if you want to do it.
Put a piece of cardboard or cardstock inside the bag that is big enough to cover the area where you will stamp or paint or draw. Secure it with some washi tapes or any low-tack tapes.
Step 2
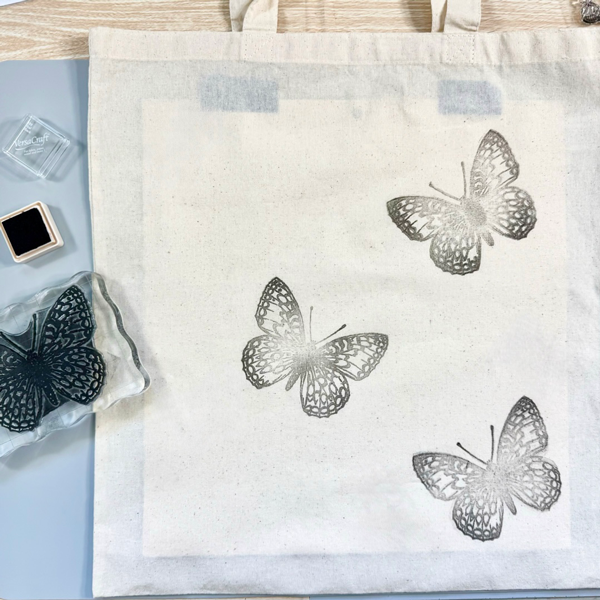
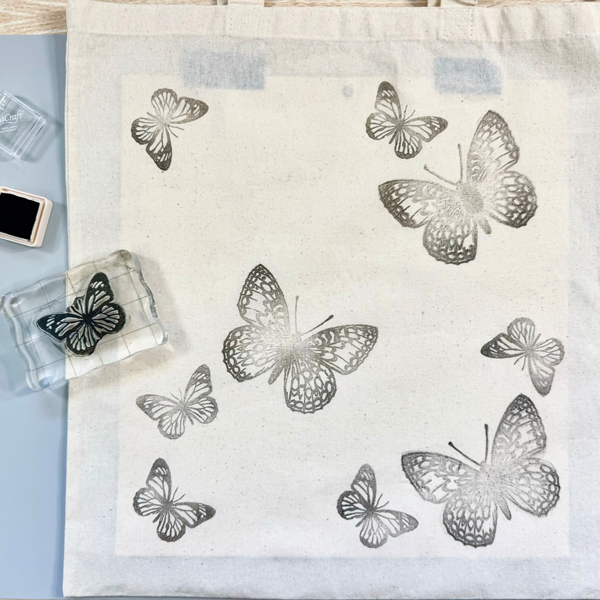
Start stamping the tote bag with the largest image.
Put the largest butterfly on a stamping blog and cover it with the VersaCraft Real Black ink. Stamp it on the tote bag and press it firmly for a few seconds.
I used the “rule of three” to position the butterflies, from here I can fill the empty spaces to build up the pattern.
Step 3
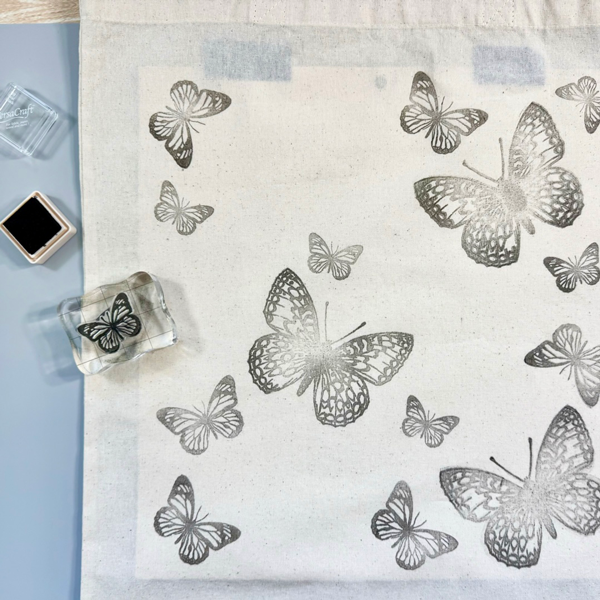
Next is stamping with the second largest image.
Put the stamp on a stamping blog and cover it with the VersaCraft Real Black ink around the big butterfly. Stamp it on the tote bag and press it firmly for a few seconds.
Step 4
Next is the smallest size of the stamp to fill up the rest of the empty space. You will start to see the full pattern on the bag.
Put the butterfly stamp on a stamping blog and cover it with the VersaCraft Real Black ink. Stamp it on the tote bag and press it firmly for a few seconds.
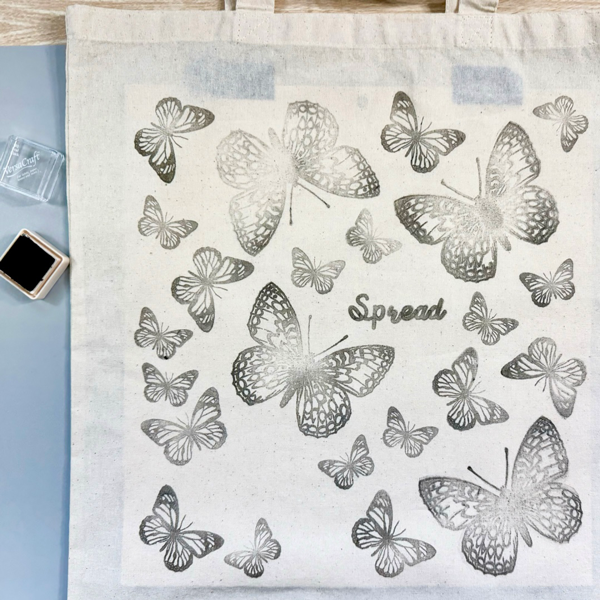
If you plan to have some sentiment or words like I did, make sure you have space for it.
Step 5
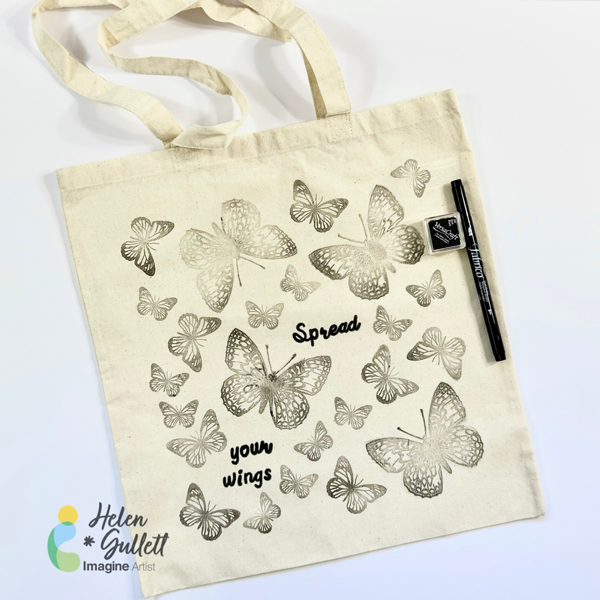
I picked the phrase “Spread your wings” to be on my canvas tote bag.
Stamp each letter from the alpha stamp set with VersaCraft Real Black ink pad.
Step 6
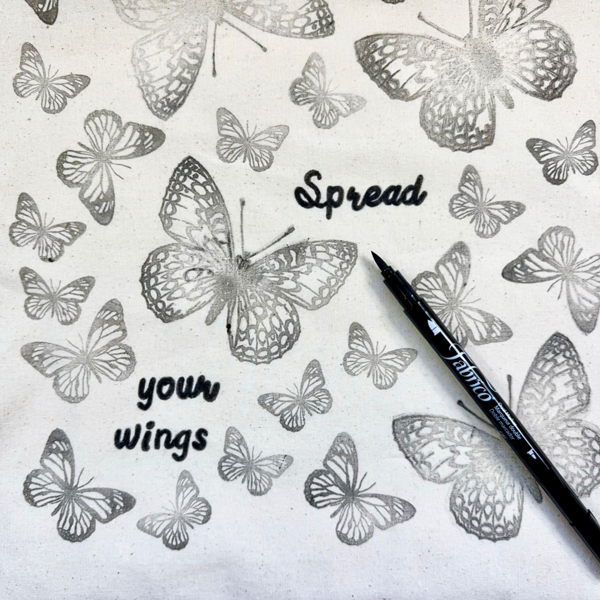
Trace the letters with Fabrico Real Black Marker for bolder print on the canvas tote bag.
Step 7
This final step is optional. You can use an iron to set the ink to the canvas tote bag. But without ironing, the ink will dry permanently in 24 hours (do not get it wet).
I would suggest spot-cleaning the bag, or hand-washing it if the bag gets dirty.
I hope you will give this technique a try and play around with different colors. This personalized tote bag can be made for your own use or as a gift for others.
Thanks so much for stopping by our blog today.
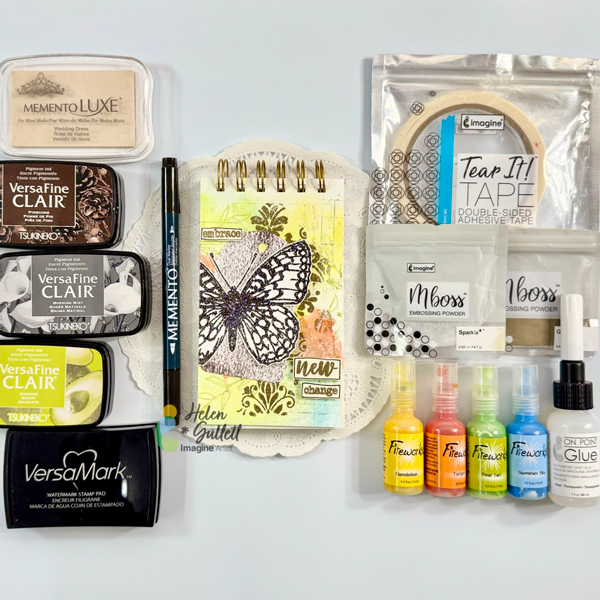
Craft Supplies
Imagine Crafts:
- Fabrico Markers (Real Black)
- VersaCraft Ink Pads (Real Black)
- Imagine Craft Mat
- Staz-On All Purpose Stamp Cleaner
Others:
- Made New Stamp Set (Creative Worship Stamps)
- Butterfly Bliss Stamp Set (Creative Worship Stamps)
- Print Script Caps Alpha Stamp Set (Creative Worship Stamps)
- Print Script Lowercase Alpha Stamp Set (Creative Worship Stamps)
- Blank Canvas Tote Bag
- Acrylic stamping blocks
- Cardboard
- Iron
- Low-tack tape / washi tape
- Lint roller