Create a Nature-Inspired Card for Any Occasion

By Jessica Lin

Skill: Intermediate 
Time: 45 minutes 

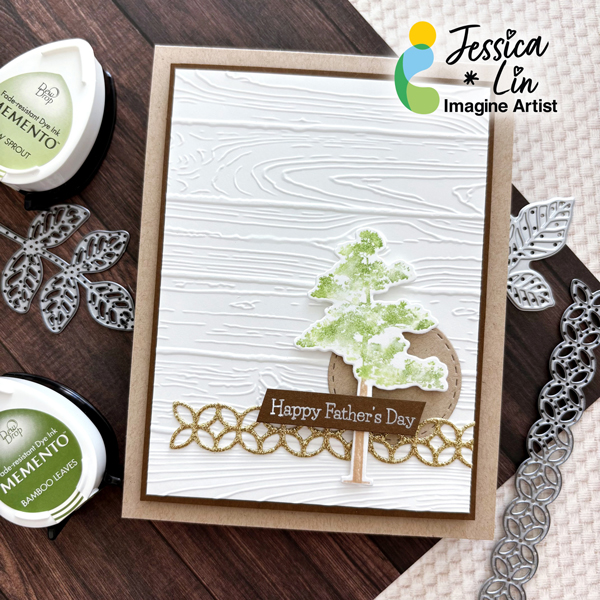
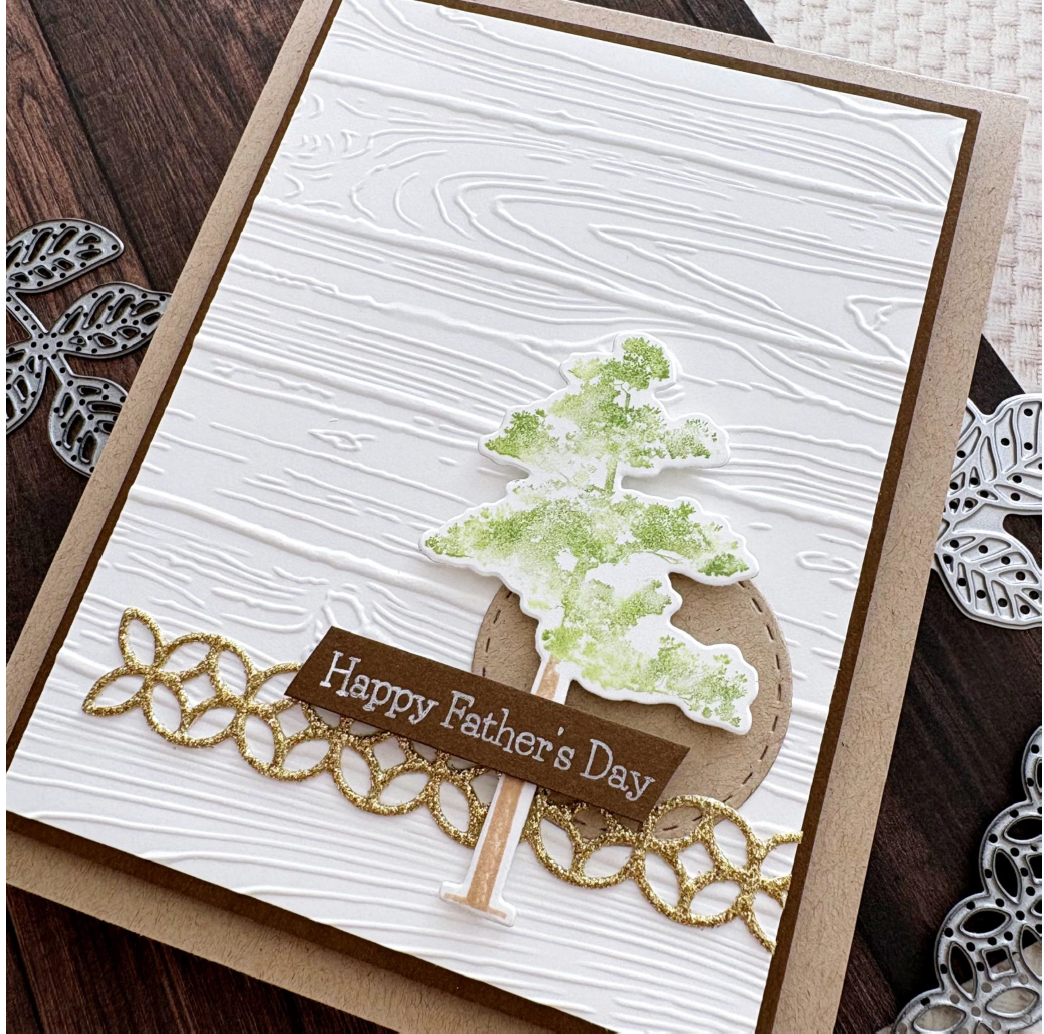
Hi everyone! It’s Jessica here. Previously, I created a nature-inspired all occasions card using a neutral color palette. I liked how it turned out and was inspired to create another version using similar supplies. I decided to turn this into a Father’s Day card since it pairs well with the tall tree image, but it would be great as a thank you or encouragement card as well. 

Step 1:
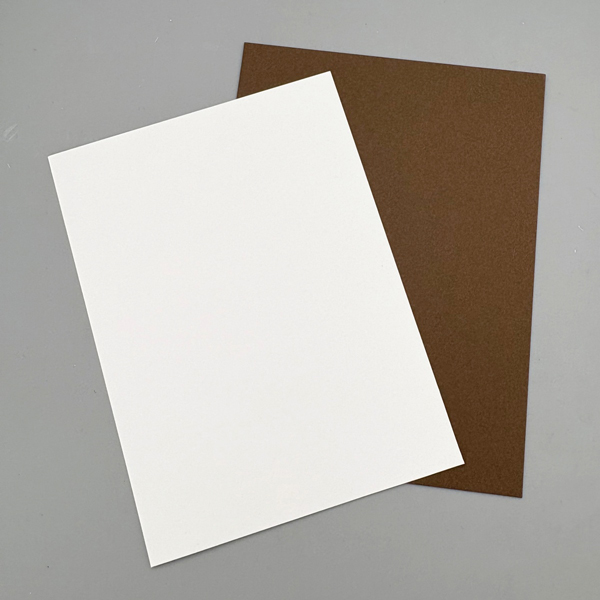
Let’s start by trimming a piece of Classic Crest Solar White cardstock to 3 ⅝’’ x 4 ⅞’’. Next, trim Lessebo Colors Coffee Bean cardstock to 3 ¾” x 5” as the mat layer. 

Step 2:
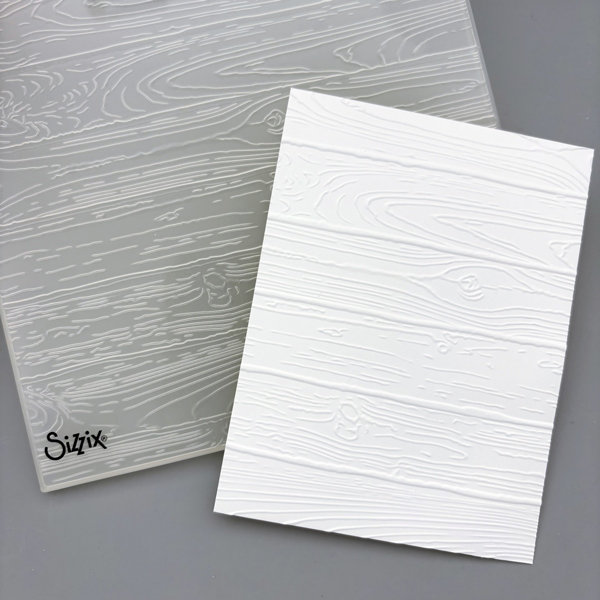
Then, emboss the Classic Crest Solar White cardstock panel with Stampin’ Up’s Pinewood Plank embossing folder. Embossing is my favourite way of adding interest to the background, and the Classic Crest Solar White cardstock always embosses beautifully. 

Step 3:
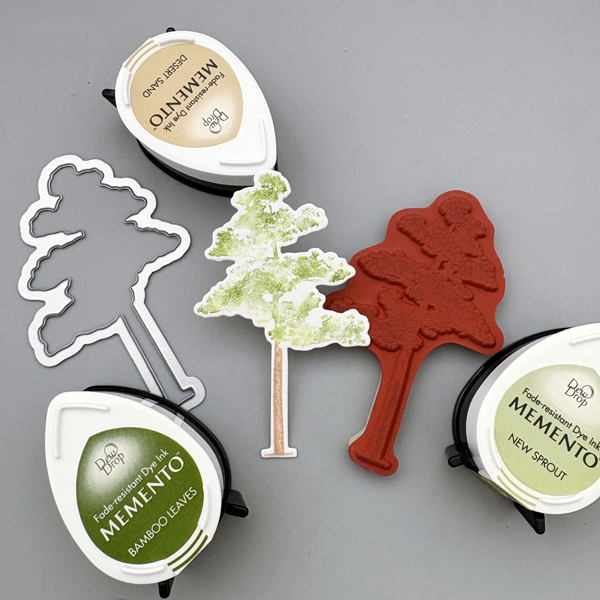
The focal point of the card will be this pinetree image from Stampin’ Up’s Rooted in Nature set. I masked the tree trunk with masking tape, and inked the leaves with Memento New Sprout ink pad. To create a shading effect, I tapped Memento Bamboo Leaves ink sparingly onto the stamp, and dabbed the ink with my finger to smooth out the ink edges. Using a stamp positioning tool, I was able to stamp again at the exact spot to create this duo-tone look. Then, I masked the leaves portion of the stamp and ink up the tree trunk with Memento Desert Sand ink. Lastly, die cut the stamped image with the coordinating dies. 

Step 4:
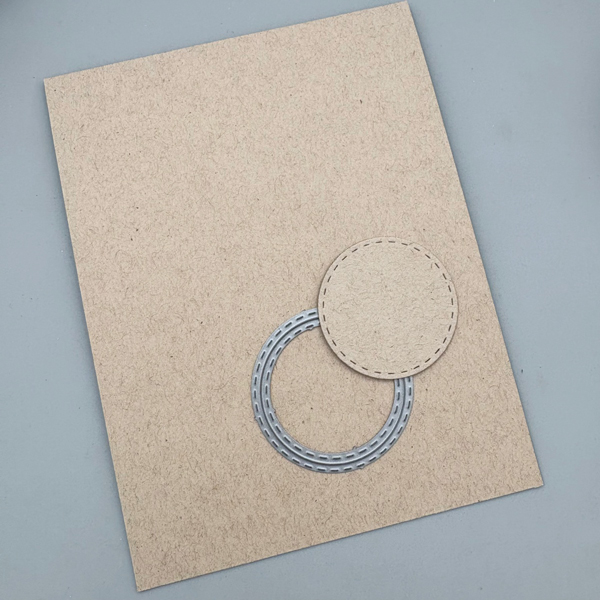
The cardbase for today’s project features Environment Desert Storm cardstock. This cardstock, along with the black and white cardstock from Classic Crest, is the paper I use the most for cardbases. The fibers in this paper bring out a natural, organic look, which is perfect for a nature-themed card. I also die cut a circle accent with this cardstock. 

Step 5:
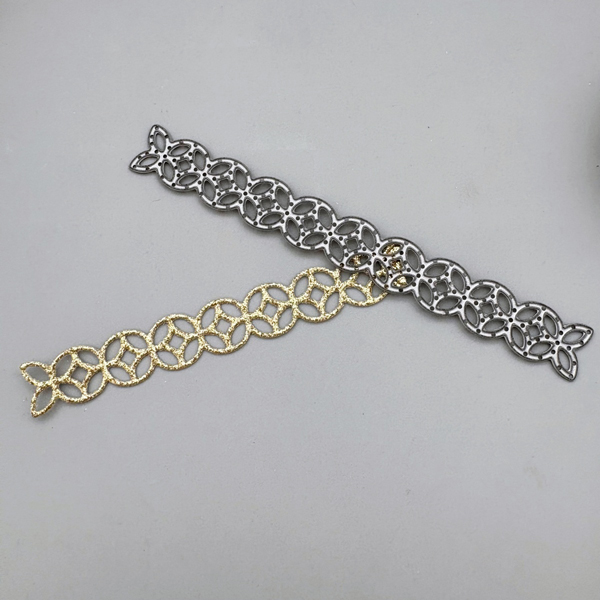
Next, die cut a lacey-border element with DCS Gold Glitter Heavyweight 12 x 12 cardstock. This die is from Stampin’ Up’s Flourish Thinlits set and is so versatile. 

Step 6:
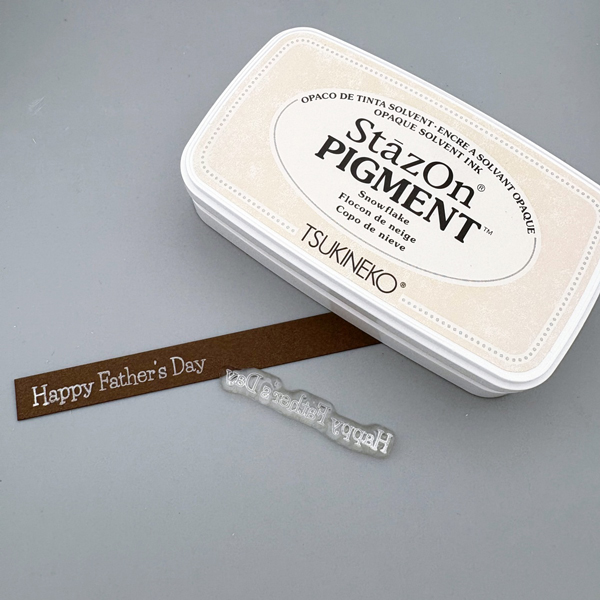
As I mentioned before, I picked a Father’s Day sentiment for today’s card and stamped it with StazOn Pigment Snowflake ink. The white sentiment really pops against the Lessebo Colors Coffee Bean cardstock strip. 

Step 7:
Finally, adhere all of the elements together and this nature-inspired card is complete! I really love the neutral color palette and I hope you do, too. 

Imagine Supplies: 

● Memento – New Sprout, Bamboo Leaves, Desert Sand 
● StazOn Pigment – Snowflake 
● On-Point Glue 
● StazOn Cleaner 
● Tear-It! Tape 
● Craft Mat 

Other Supplies: 

● Stampin’ Up! – Stamps – Rooted in Nature 
● Stampin’ Up! – Dies – Nature’s Roots 
● Stampin’ Up! – Dies – Flourish Thinlits 
● Stampin’ Up! – Embossing Folder – Pinewood Plank 
● CutCardStock – Cardstock – Classic Crest Solar White 
● CutCardStock – Cardstock – Lessebo Colors Coffee Bean 
● CutCardStock – Cardstock – Environment Desert Storm 
● CutCardStock – Cardstock – DCS Gold Glitter Heavyweight 12 x 12 

Christmas in July Gift Card Holder 

By Jessica Lin

Skill: Intermediate 
Time: 45 minutes 

Hi everyone! It’s Jessica here. I want to share one of my favorite ways to create a gift card holder today. It’s super simple and quick to put together. I picked a Christmas theme but you could easily change it to a birthday or wedding gift card holder. 

Step 1:
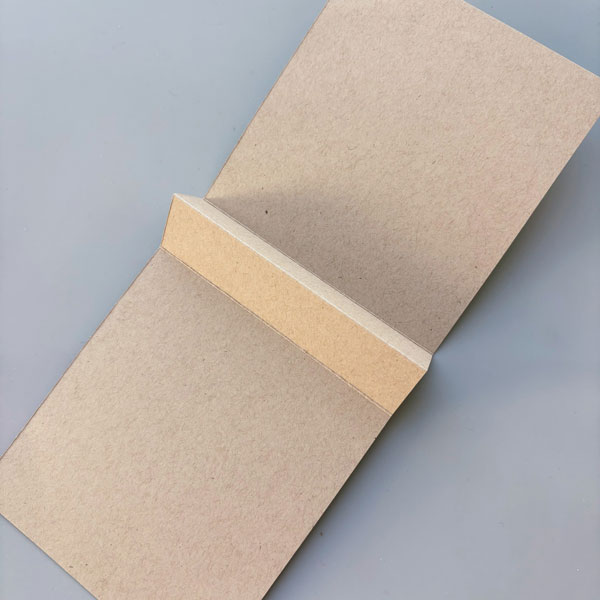
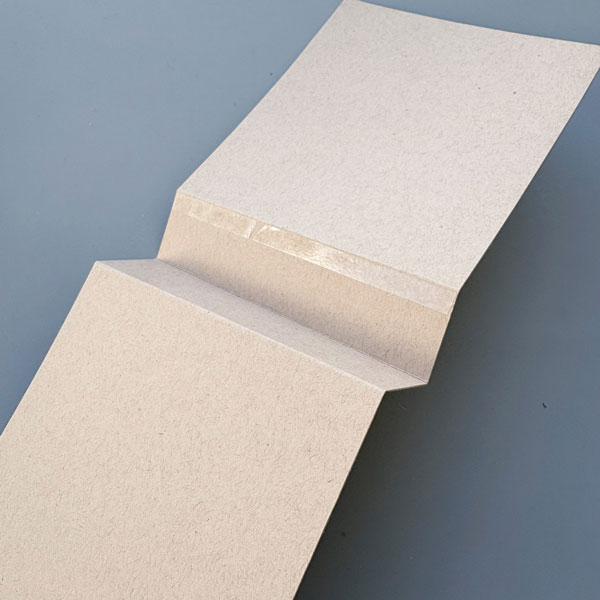
Let’s start by creating the base of the gift card holder. Using Environment Desert Storm cardstock, cut it in half to create a standard A2 card base (4 ¼’’ x 5 ½’’), and score at 4 ½’’, 5 ½’’ and 6 ½’’. Fold along the crease to create a peak just like the one in the photo. 

Step 2:
Next, flip the card base around and apply Tear-It! Tape to the top edge of the scored line. Notice how the “peak” from earlier has turned into a “valley”. You want to avoid adding adhesive to the center of the “valley” since that will become the opening for the gift card holder. 

Step 3:
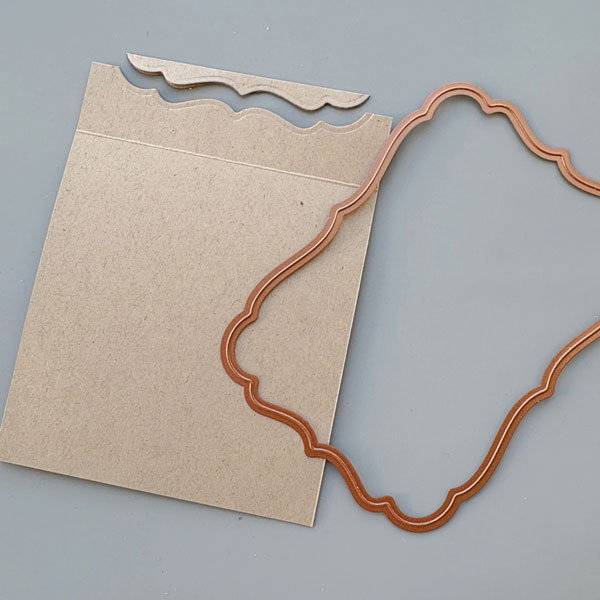
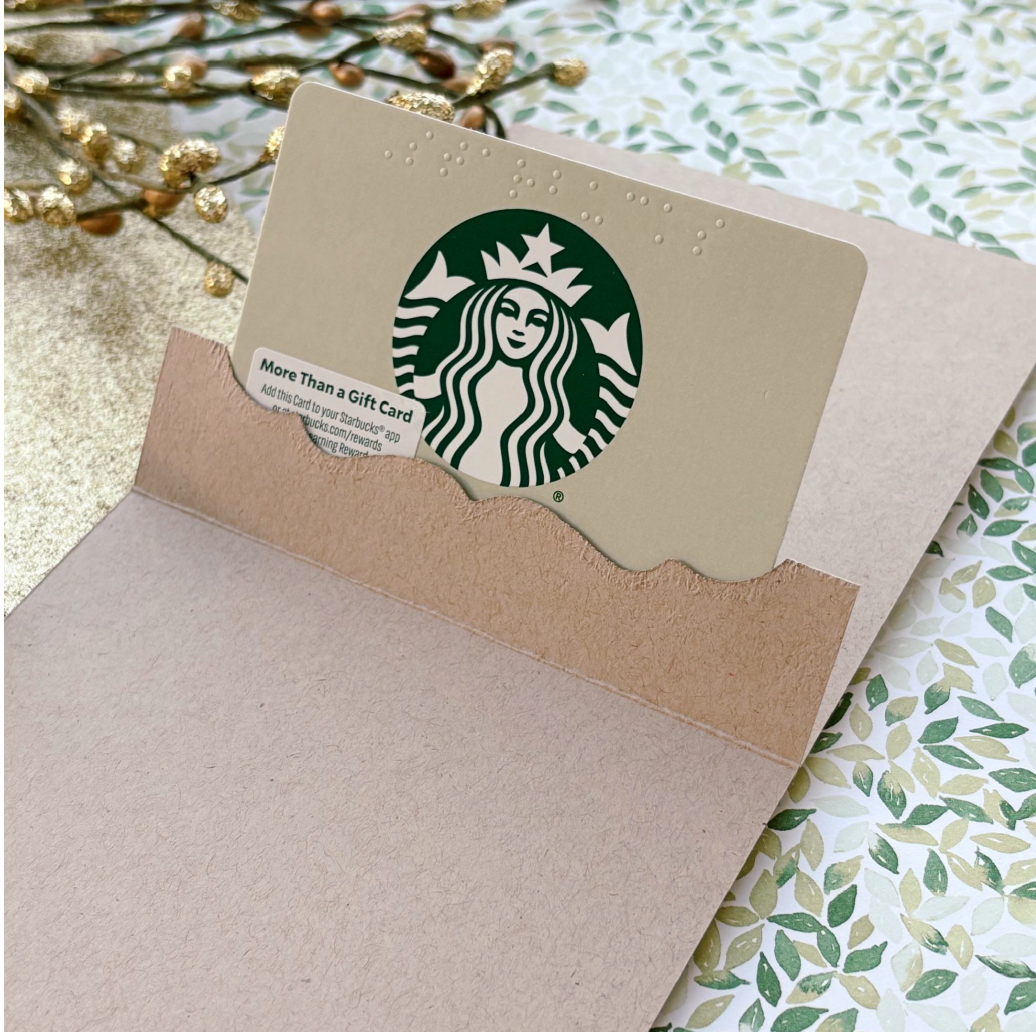
Once the middle portion of the card base is adhered together, you will have a new card base that is 4 ¼’’ x 5’’ with an inner flap. Now, we are ready to create the opening for the gift card. Place the largest frame die from Spellbinders Labels Seventeen set to die cut the gift card opening. The trick is to die cut as little cardstock as possible so that there is a large flap area to hold your gift card. 

Step 4:
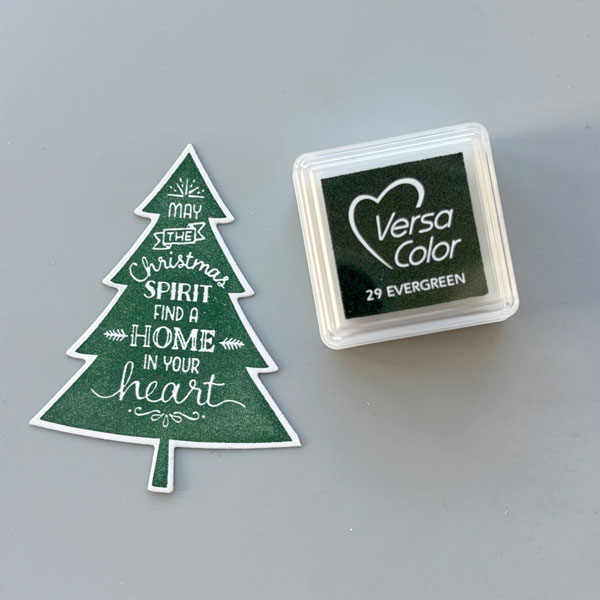
Let’s decorate the front of the gift card holder next. I stamped this Christmas tree image on Classic Crest Solar White cardstock with VersaColor Evergreen ink pad and die cut the image with the coordinating die. 

Step 5:
Then, I stamped another Christmas tree design with VersaMagic Tea Leaves ink pad. Both of these stamps are from Stampin Up’s Peaceful Pines set. 

Step 6:
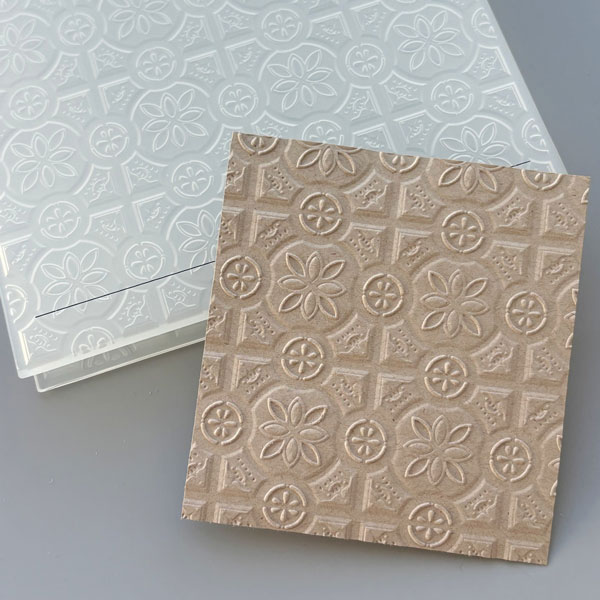
I decided to add an embossed panel to add some interest to the background. I trimmed a piece of Environment Desert Storm cardstock to 3 ¾’’ x 4 ½’’ and embossed it with Stampin’ Up’s Tin Tile embossing folder. The details really pop on this kraft colored cardstock, don’t you think? 

Step 7:
For the sentiment, I picked this scripty “Christmas” die from Ellen Hutson’s Merry & Bright set and die cut it with DCS Gold Glitter Heavyweight 12 x 12. This gold glitter cardstock is becoming a staple in my craft room – it’s easy to die cut with and does not shed any glitter (no glitter mess!). 

Step 8:
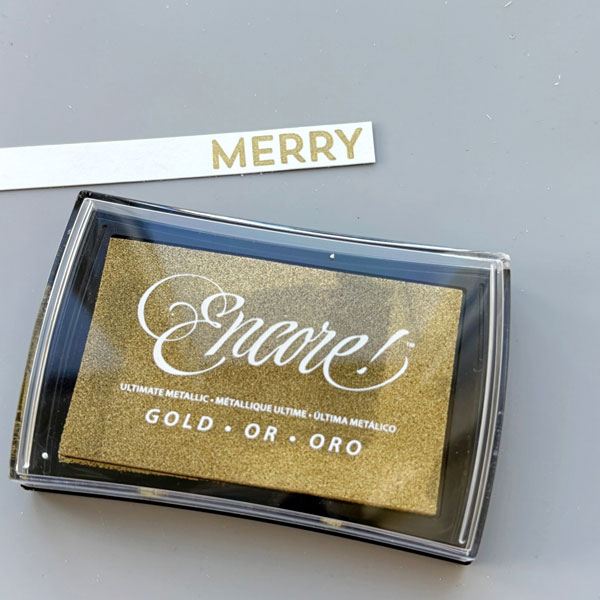
Finally, I stamped “Merry” with Encore! Gold ink pad to complete the sentiment. I picked this color since it matches the DCS Gold Glitter Heavyweight cardstock really well. 

Step 9:
This is what the gift card holder looks like with a gift card inserted. I really like this gift card holder since it’s super easy to assemble and there’s space to write a personal message as well. I hope you enjoyed today’s tutorial, and thanks for stopping by! 

Products Used

Imagine Supplies: 

● VersaMagic – Tea Leaves 
● VersaColor – Evergreen 
● Encore! – Gold 
● StazOn Cleaner 
● Tear-It! Tape 
● Craft Mat 

Other Supplies: 

● Spellbinders – Dies – Labels Seventeen 
● Stampin’ Up! – Stamps – Peaceful Pines 
● Stampin’ Up! – Dies – Perfect Pines 
● Ellen Hutson’s – Dies – Merry & Bright 
● Winnie & Walter – Stamps – In a Word: Grand Merry 
● Stampin’ Up – Embossing Folder – Tin Tile 
● Neenah – Cardstock – Environment Desert Storm, Classic Crest Solar White 
● DCS – Cardstock – Gold Glitter Heavyweight 

 Creative Inking with Sheer Shimmer 

By Jessica Lin

Skill: Beginner
Time: 30 minutes

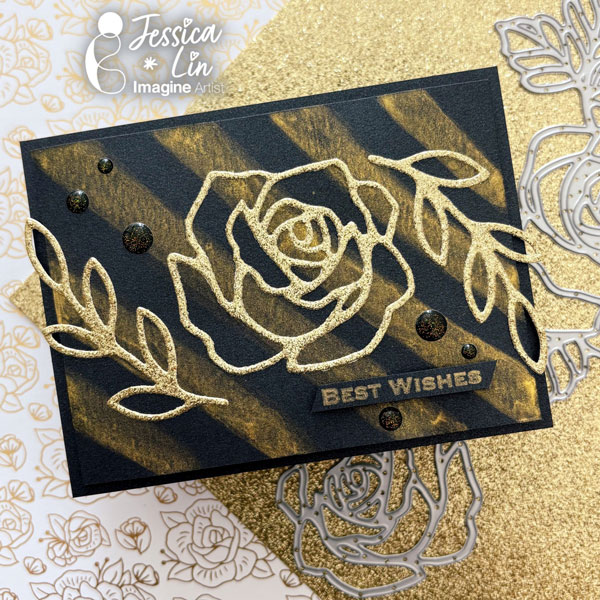
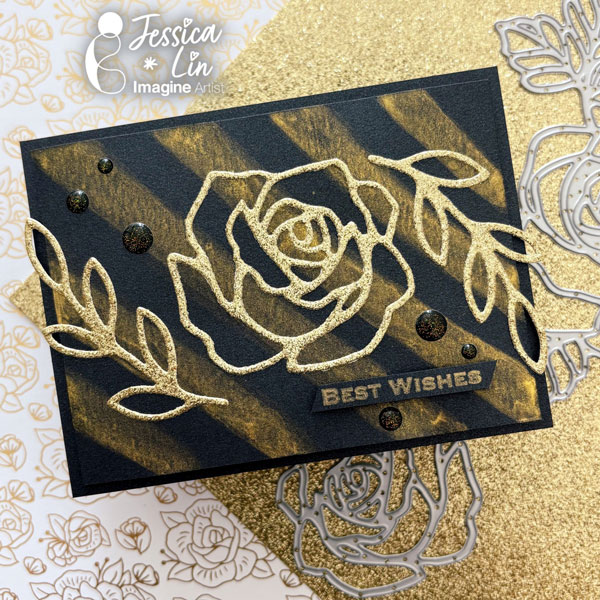
– Hi everyone! It’s Jessica here. Today I would like to share a card with a black and gold color combo. My card creations are typically full of bright colors; so I decided to change it up a bit by using a simpler color palette. Since there are only two colors on this card, I wanted to add various shimmer and glitter textures to create dimension. Let’s take a look!

Step 1:
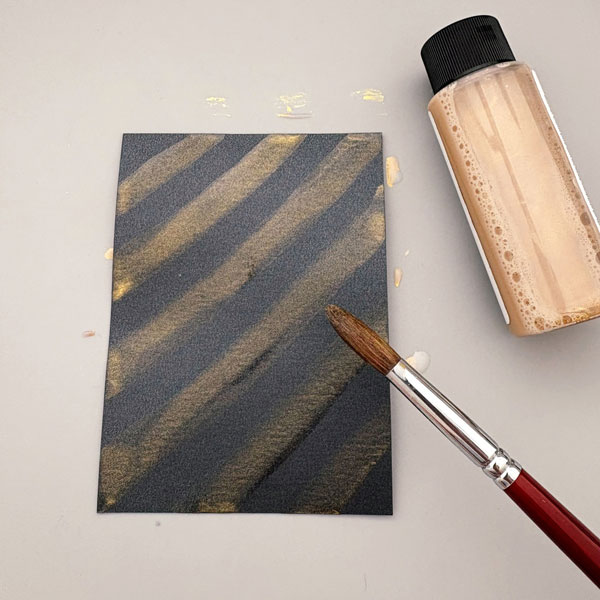
Trim Stardream Metallic 5 x 7 Onyx cardstock to 3 ¾’’ x 5’’. Paint golden stripes on the card panel with Sheer Shimmer Gold. One trick to avoid the gold shimmer from pooling on the edges is to swipe your paintbrush onto the craft mat. Another alternative is starting with a bigger piece of cardstock, then trimming the panel down to size.

Step 2:
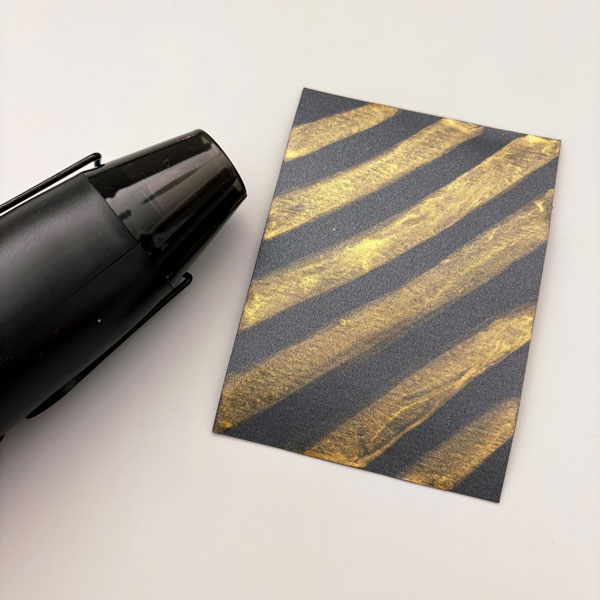
Dry the cardstock panel with a heat gun, and repeat steps 1-2 until you achieve bold, gold stripes. The Stardream Metallic Onyx cardstock has a subtle shimmer as well – it adds an elegant touch to the card base.

Step 3:
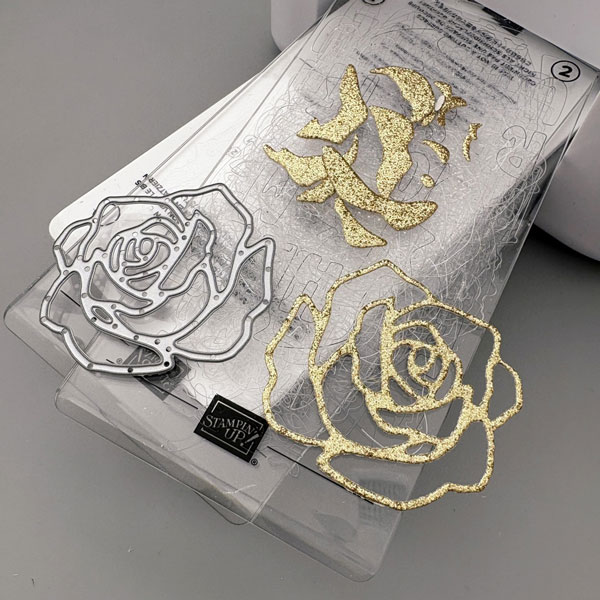
Die cut roses and leaves with DCS Gold Glitter Heavyweight 12 x 12 cardstock. I find this glitter cardstock very easy to cut through. Some of the glitter cardstock I’ve used before uses adhesives to bind to the glitter, which takes a little more time to peel the die cut pieces off each other. This glitter cardstock, on the other hand, separates very easily after it’s been cut through.

Step 4:
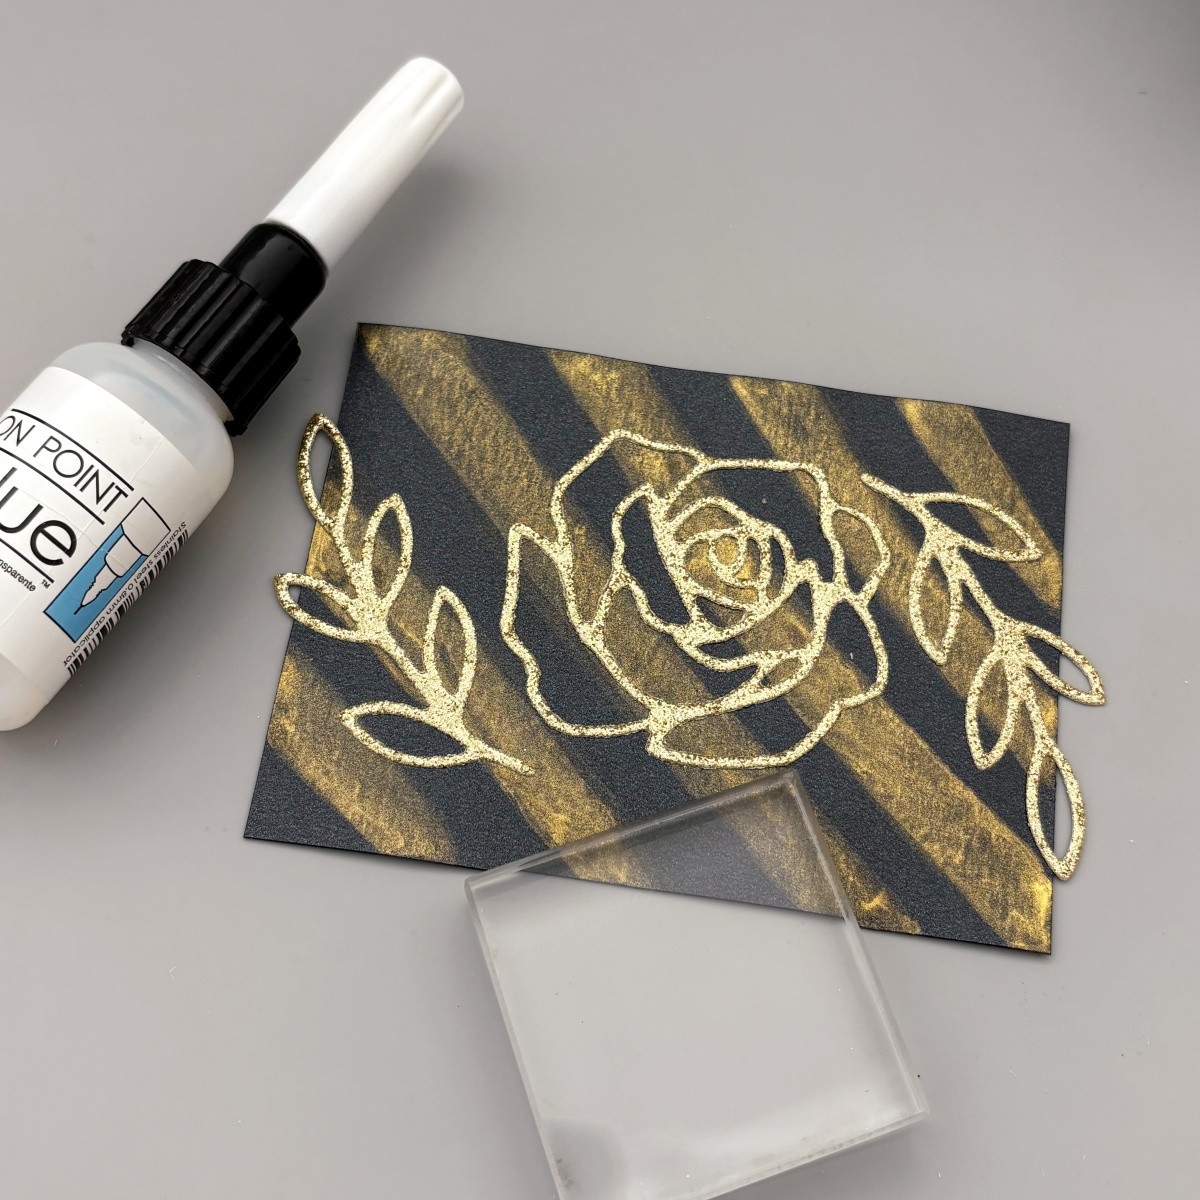
Next, adhere the die cuts to the strips background panel. I used On-Point Glue since the fine-tip nozzle is perfect for applying small amounts of glue. Then, use an acrylic block to press down on the die cut so that it completely adheres to the background.

Step 5:
Finally, stamp the sentiment with Brilliance Galaxy Gold ink pad. This gold ink pad matches the Sheer Shimmer Gold so well! I added some black enamel dots to complete the card. I love the classic black and gold color combo, and I hope this card inspires you to try different kinds of gold shimmer on your project.

Imagine Supplies:

Other Supplies:

  • Stampin’ Up! – Dies – Rose Garden
  • CutCardStock – Cardstock – DCS Gold Glitter Heavyweight 12 x 12
  • CutCardStock – Cardstock – Stardream Metallic 5 x 7 Onyx

 Soft Spring Watercoloring with VersaMagic Inks

By Jessica Lin

Skill: Beginner
Time: 1 hour

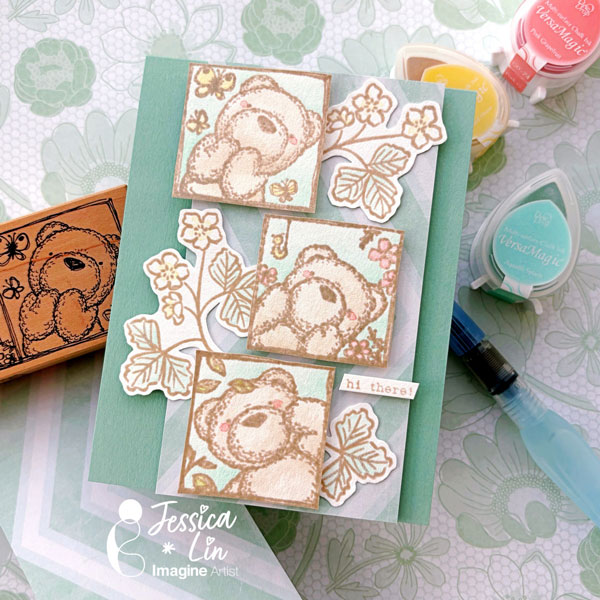
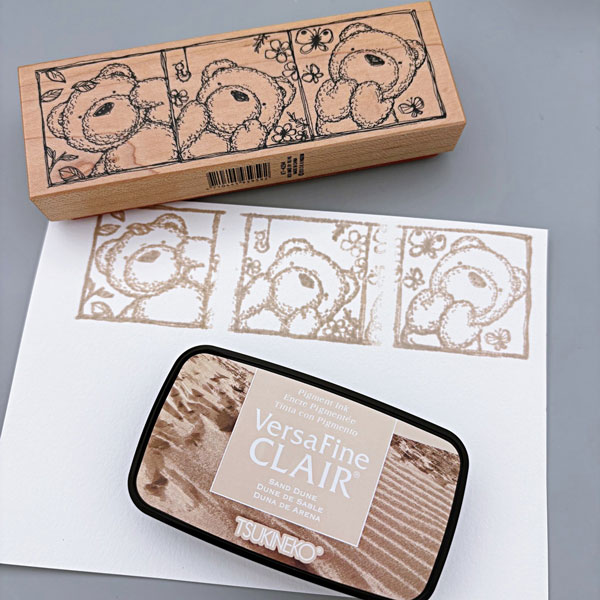
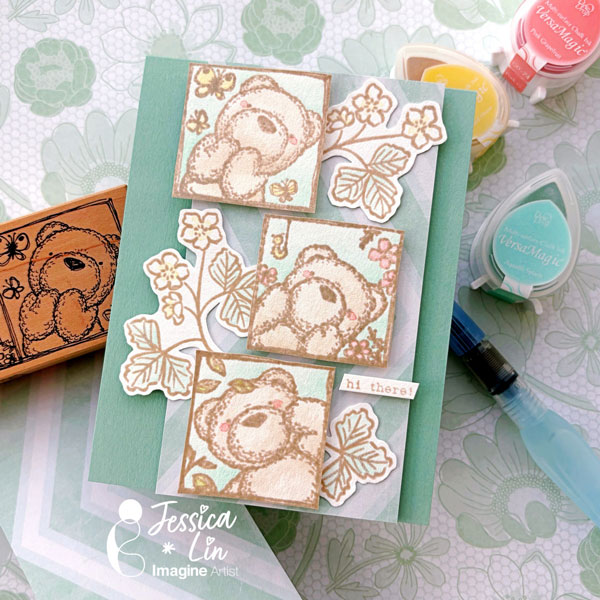
Hi everyone! It’s Jessica here. Have you ever tried using a stamp positioner to “break up” stamp images? The wooden stamp I am using today has three teddy bear designs connected together, but I was inspired to create a different sketch. Let’s get creative!

Step 1:
Stamp the teddy bear designs separately on Strathmore 100% Cotton Watercolor 5×7 cardstock, inking only one square each time with VersaFine Clair Sand Dune ink.

Watercolor cardstock usually have a more textured surface, so using a stamp positioning tool would really help with re-stamping and getting a clear image. I used the We R Precision Press today since the base rods are tall enough to secure the wooden stamp in place. After stamping, I heat embossed the images with clear Mboss powder.

Step 2:
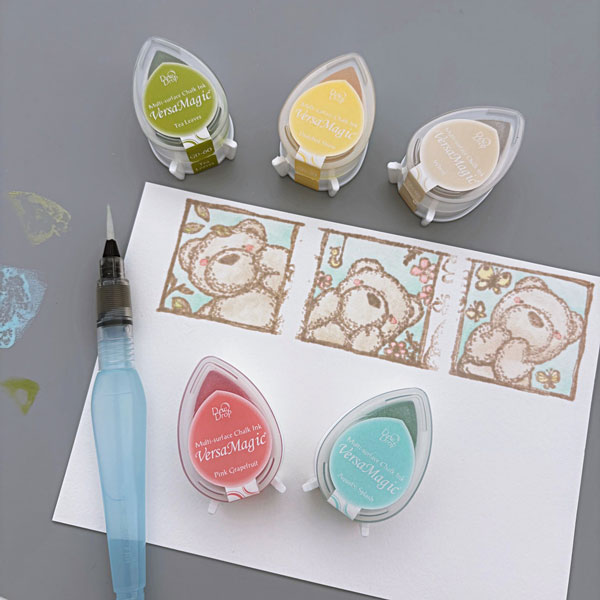
Color the images with your choice of coloring medium. I am watercoloring with VersaMagic ink pads today. The colors I used are Wheat (for the bear), Aquatic Splash (for the sky background), and Tea Leaves, Pink Grapefruit, Thatched Straw (for the leaves, flowers, and butterflies).

Step 3:
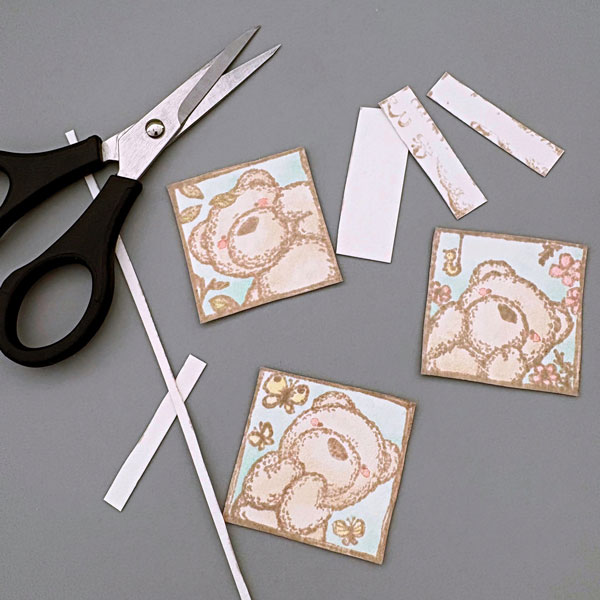
Once the images are dry, fussy cut along the edges. After that, I swiped VersaFine Clair Sand Dune ink pad around the borders of each square so that the white core of the watercolor cardstock is not shown.
Step 4:
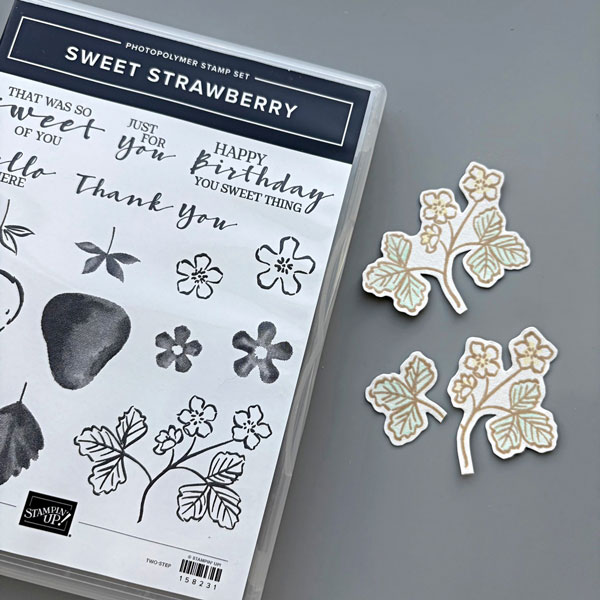
I wanted to decorate the teddy bear frames with some florals, and the images from Stampin’ Up’s Sweet Strawberry stamp set are perfect. They are stamped and watercolored using the same supplies in steps 1 and 2. One of the floral images was even cut in half to fit around the sketch I had in mind.

Step 5:
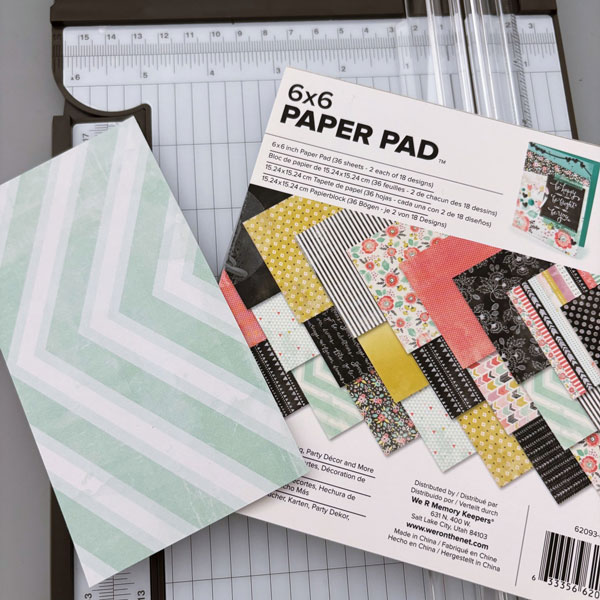
The Chalkboard Prints 6×6 card stock pad has some beautiful geometric patterns. I trimmed the mint green chevron patterned paper to 3’’ x 5 ½’’ as the background of the card.

Step 6:
Finally, I adhered all of the watercolor elements to the mint green chevron patterned paper with foam tape, and mounted the entire panel onto a Mint Macaron cardbase. I also stamped a tiny “hi there!” sentiment from Flora & Fauna’s Under the Sea stamp set. I hope you enjoyed today’s tutorial on how to create different card sketches from a large framed image stamp.

Craft Supplies

Imagine Supplies:

Other Supplies:

  • K Kingdom – Wooden Stamp – KT-4294
  • Stampin’ Up! – Stamps – Sweet Strawberry
  • Floral & Fauna – Stamps – Under the Sea (sentiment)
  • CutCardStock – Cardstock – Strathmore 100% Cotton Watercolor 5×7 cardstock
  • CutCardStock – Cardstock – Chalkboard Prints 6×6 pad
  • Stampin’ Up – Cardstock – Mint Macaron

Make a Lavender Birthday Card

By Jessica Lin

Skill: Beginner
Time: 20 minutes

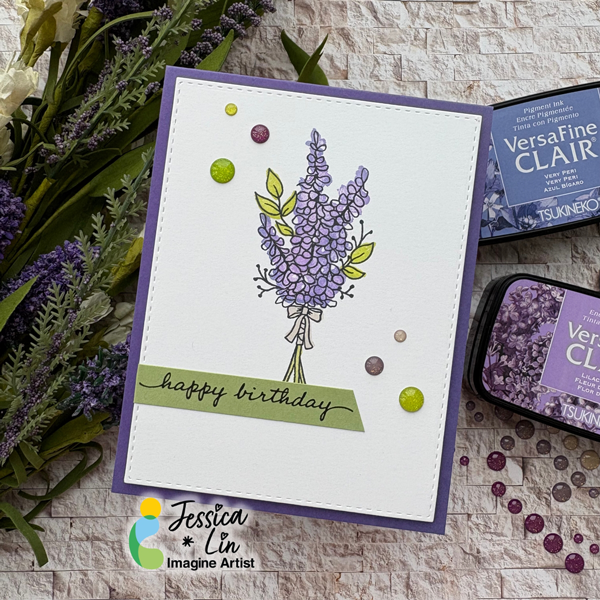
Hi everyone! It’s Jessica here. Today I have a beginner friendly birthday card to share with you. Most of my creations involve die cutting or dry embossing using a die cutting machine. So today, I decided to go back to the basics and create a card that focuses on stamping.

Step 1:
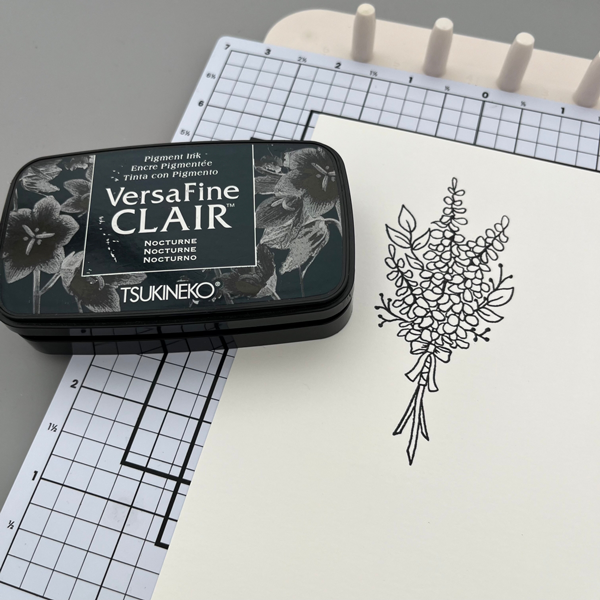
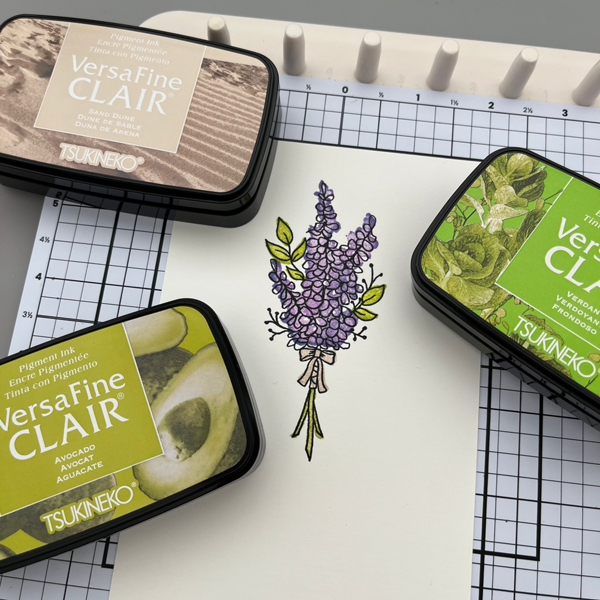
I will be using VersaFine Clair ink pads to stamp all of the images today. For the outline, I used Nocturne. This is my favorite black ink pad because the stamped images are always crisp and dark.

Step 2:
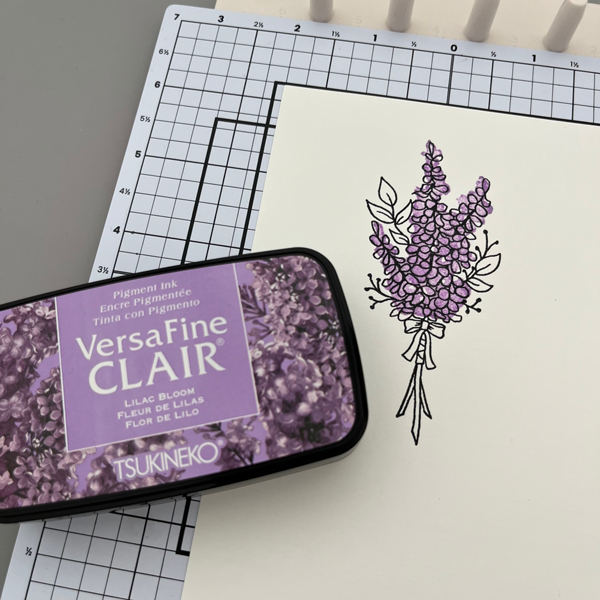
Then I stamped the lavender overlay image with VersaFine Clair Lilac Bloom. The stamp set I am using today is called Lots of Lavender from Stampin’ Up. It’s a simple layering stamp set that is very forgiving for beginners; the overlay stamps have loose, watercolor-like shapes so you don’t have to line up to the outline image exactly.

Step 3:
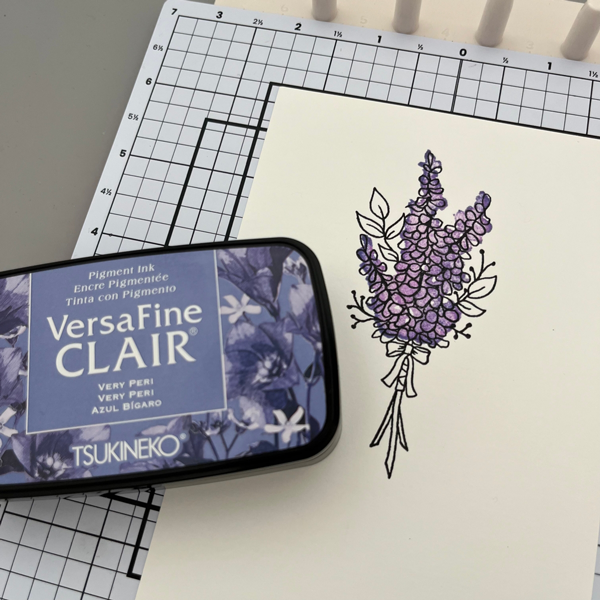
I decided to add a different purple tone to the lavender layer. I inked up the same stamp using VersaFine Clair Very Peri, only this time, I inked up only the edges of the stamp. This way, you can create an image that has duo-tone effects. I think these two purple shades complement each other so perfectly.

Step 4:
I used the same duo-tone technique and stamped the leaves and stems with VersaFine Clair Verdant first, then with VersaFine Clair Avocado. For the bow, I stamped with VersaFine Clair Sand Dune.

Step 5:
Finally, I stamped the “happy birthday” sentiment with VersaFine Clair Nocturne, added a few enamel dots, and the card is complete!

Supplies Used:

Imagine Supplies:

Other Supplies:

  • Stampin’ Up! – Stamps – Lots of Lavender
  • Stampin’ Up! – Stamps – Happiness Abounds (for the sentiment stamp)
  • Doodlebug Sprinkles Enamel Dots

 Create an Easy Candy Treat Box 

By Jessica Lin

Skill: Beginner
Time: 20 minutes

Hi everyone! It’s Jessica here. Today I am sharing a candy box idea that is fitting for all occasions. However, the candy box die I am using today is versatile and you could dress up the box for Halloween treats, too!

Directions:

Step 1:
Stamp the small butterfly base image from Stampin’ Up’s Watercolor Wings set with VersaMagic Red Magic ink pad.

Step 2:
For the second layer of the butterfly stamp, I used VersaFine Clair Glamorous ink pad. I think these two shades of red complement each other very well.

Step 3:
Die cut the butterfly with the coordinating Butterflies Thinlits dies.

Step 4:
Stamp the third layer with VersaMark ink pad and heat emboss with gold embossing powder.

Step 5:
Die cut two pieces of patterned paper using Lawn Fawn’s Candy Box die. Then adhere the sides of the boxes together with Tear-It Tape, while leaving the ends open. After filling the box with treats (chocolates like Ferrero Rocher and Lindt are perfect!), tie the ends of the candy box with pieces of twine.

Step 6:
Stamp a sentiment with VersaMagic Red Magic ink and this simple treat box is complete! Imagine

Craft Supplies:

Imagine

Other Supplies:

  • Stampin’ Up! – Stamps – Watercolor Wings
  • Lawn Fawn – Die – Candy Box
  • Winnie & Walter – Stamps – Sentimental: Endearments
  • Gold Embossing Powder
  • Twine