Create a Cute Monochrome Halloween Card 

By Jessica Lin –

Skill: Beginner
Time: 30 minutes

Hi everyone! It’s Jessica here. Spooky season is right around the corner, can you believe it? I have a monochrome Halloween card idea to share with you today. The supplies are minimal and it’s beginner friendly, too! 
Step 1:
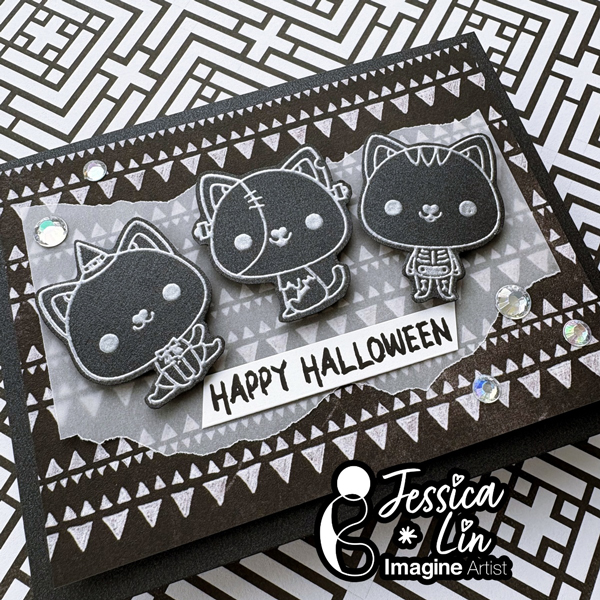
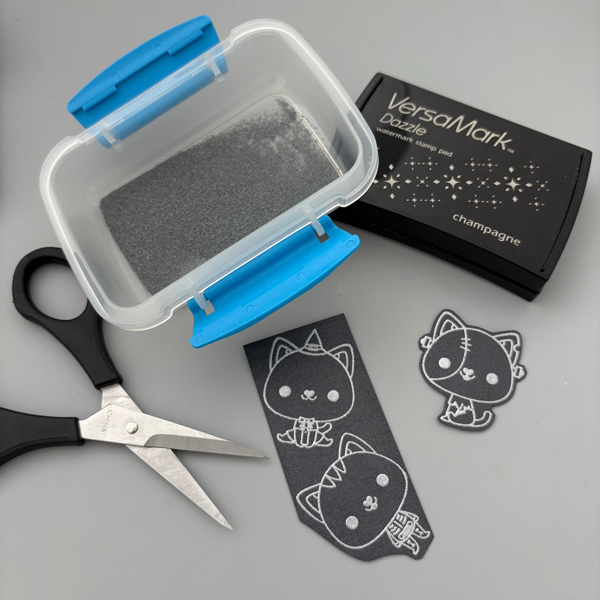
The focal point of today’s card are these adorable cats dressed in Halloween costumes. They are from Mama Elephant’s Meowlloween stamp set. I decided to stamp them on Stardream Metallic 5 x 7 Onyx cardstock as little black cats. After stamping with VersaMark Dazzle ink, I heat embossed the images with silver embossing powder and fussy cut them with scissors.
Step 2:
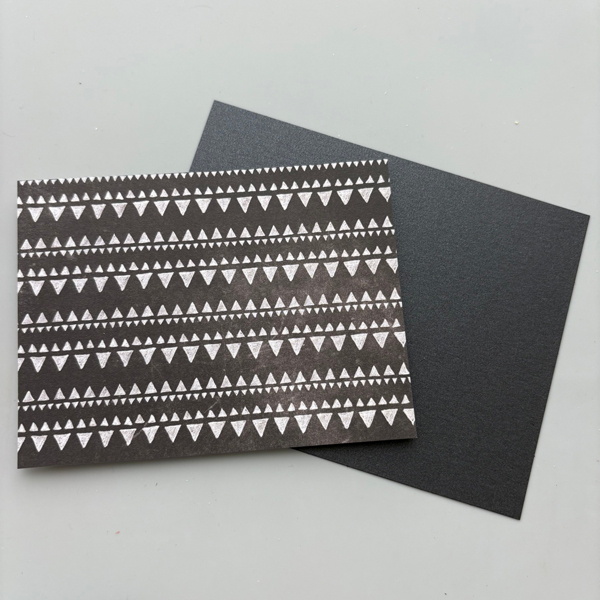
Next, I picked a patterned paper from the Chalkboard Prints 6×6 cardstock pad and trimmed it to 3 ¾’’ x 5’’. There are a lot of great patterns in this paper pad that are black and white, and perfect for Halloween cards. The Stardream Metallic Onyx cardstock is used as the card base. 
Step 3:
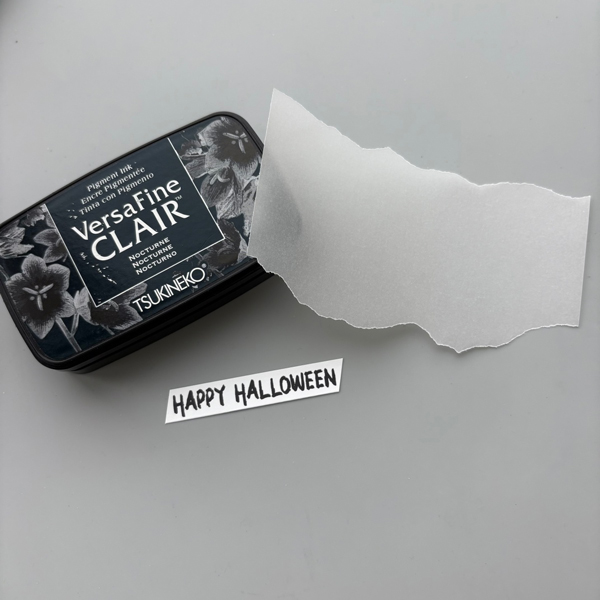
Since the focal images and background are both black, adding a piece of vellum would really help the black kitties stand out against the dark background. I trimmed a piece of Curious Translucent vellum to a width of 4 ½’’, and tore the edges by hand. This is one of my favorite ways to layer with vellum and I like the look and organic feel of the torn edges. For the sentiment, I picked a classic “Happy Halloween” stamp from Brutus Monroe’s Occasional Greetings set. I stamped it with VersaFine Clair Nocturne ink on Classic Crest Solar White cardstock. 
Step 4:
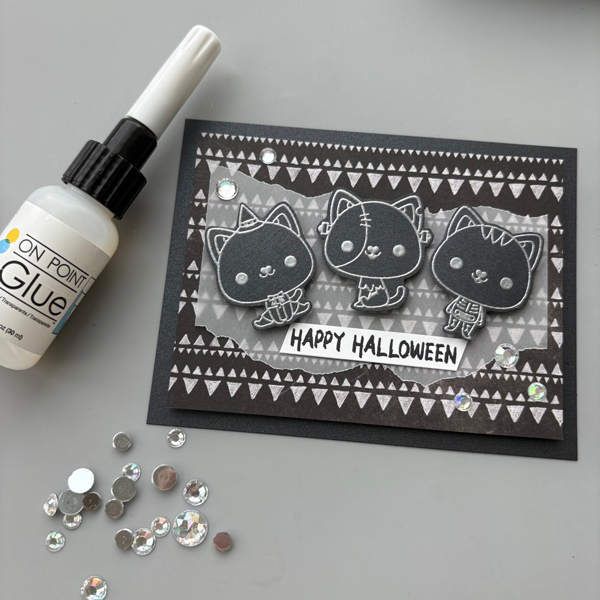
Finally, let’s adhere all of the elements together. I mounted the black cats and background panel with foam tape, and adhered the sentiment strip and vellum piece with Tear-It! Tape. A few rhinestones were also added with On-Point Glue, and the card is complete!

Imagine Supplies: 

● VersaMark Dazzle – Champagne
● Embossing Powder
● VersaFine Clair – Nocturne
● On Point Glue
● StazOn Cleaner
● Tear-It! Tape
● Craft Mat

Other Supplies: 

● Mama Elephant – Stamps – Meowlloween 
● Brutus Monroe – Stamps – Occasional Greetings 
● CutCardstock – Stardream Metallic Onyx 
● CutCardstock – Chalkboard Prints 6×6 cardstock pad 
● CutCardstock – Curious Translucent vellum 
● CutCardstock – Classic Crest Solar White 
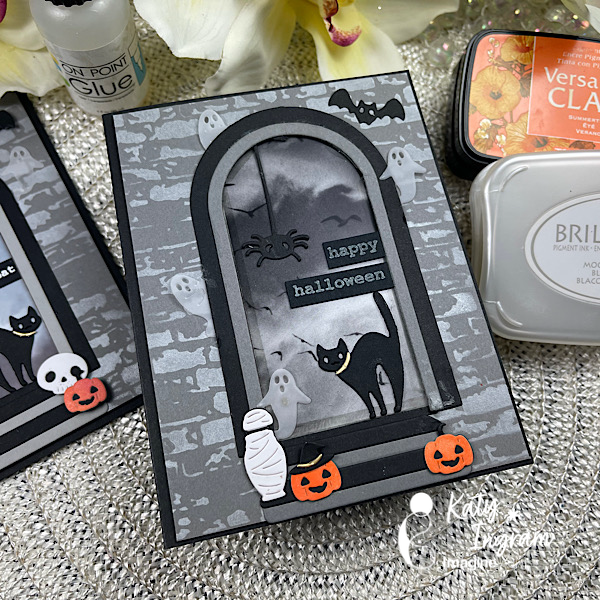
Happy Halloween Featuring Brilliance Moonlight White

By Katy Ingram

Hello Friends! Katy here with another quick project. In today’s video I create a simple Halloween card. I had some printed spooky printed acetate in my stash and paired it with a brick stencil and some Brilliance Moonlight White ink. I just love this white ink more than any others and so I like to showcase it any time I can.

Skill: Beginner, Intermediate
Time: 15 minutes

Video has all the details. Thanks for watching.

Video Link: https://youtu.be/pr5TAJxwc9c

Art Supplies

Imagine Products

Other Products Used
• Papertrey Ink Brick Stencil
• Spellbinders Halloween Tick Tock
• Black Card Stock
• Grey Cardstock
• White Cardstock
• Gold Cardstock
• Vellum
• Foam Blender tool
• Recollections Halloween X-Ray Acetate

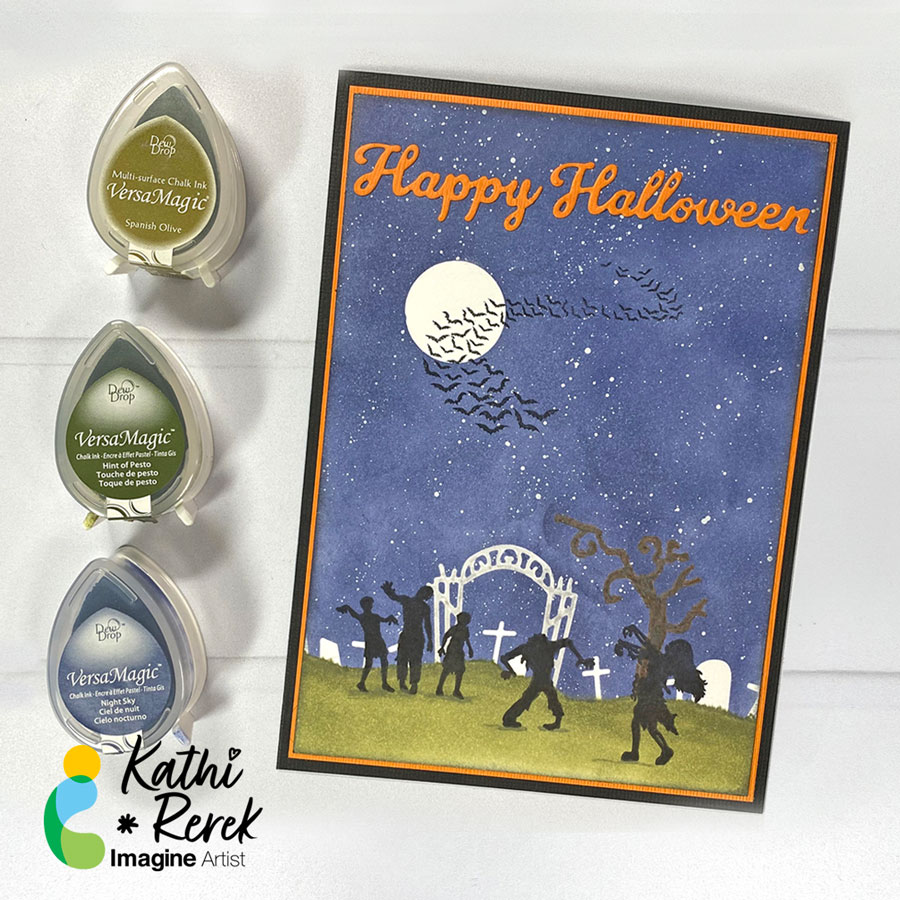
Zombie Graveyard Halloween Card with VersaMagic Inks

By Kathi Rerek

I might be an introvert, but I do love to make scenes — in card form. Here’s a Halloween card created with VersaMagic and VersaFine Clair inks, stamping, and some die-cuts.

Skill Level: Intermediate
Time: 1.5 hours

Instructions:

Step 1:
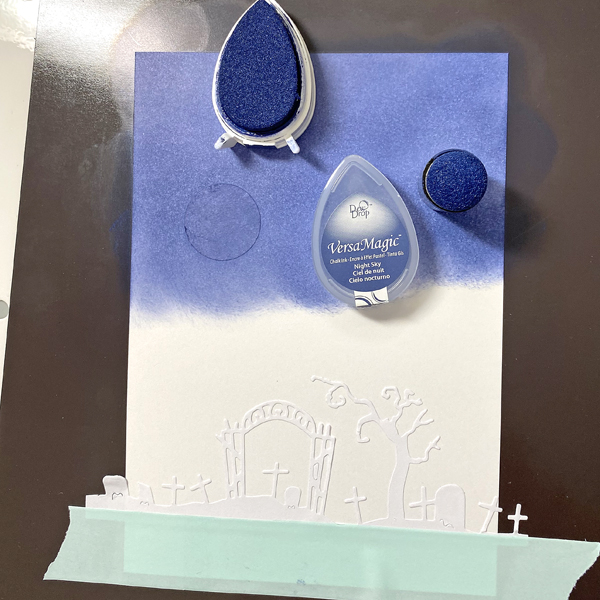
Cut a piece of Bristol paper to 4.75” x 6.75”. Use the Boneyard Edgers die to cut removable sticker paper and place along the bottom of the image panel. Place low tack tape below it.

Use the 1” circle punch to punch the sticker paper and adhere it to the upper left hand side as shown.

Step 2:
Use a Sponge Dauber to apply Night Sky VersaMagic Ink over the masked images onto the background. Heat set.

Step 3:
Spray a little water into a small container. Squeeze a few drops of Moonlight White VersaMagic Re-inker into the pot. Use a paint brush to mix the water and the ink. Tap the inky paintbrush over the night sky background to add splatter to look like stars.

Step 4:
Remove the sticker masks from the moon and from the cemetery.Smoosh the Jumbo Java VersaMagic Dewdrop Inkpad onto a piece of acetate. Lightly mist with water. Use a paintbrush to paint the tree in the graveyard. Heat set. Clean and dry the acetate.

Steps 5A and 5B:
Smoosh the Hint of Pesto VersaMagic Dewdrop Inkpad onto the cleaned piece of acetate. Lightly mist with water. Use a clean paintbrush to apply green ink at the top of the hill below the tombstones, crosses, gate, and tree (5A). Use a Fantastix to apply Spanish Olive VersaMagic Ink to blend this lighter ink below the ink applied in Step 5A. Continue apply the Spanish Olive Versa Magic Ink horizontally to fill in the base of the card and create the cemetery lawn. Heat set the image panel.

Step 6:
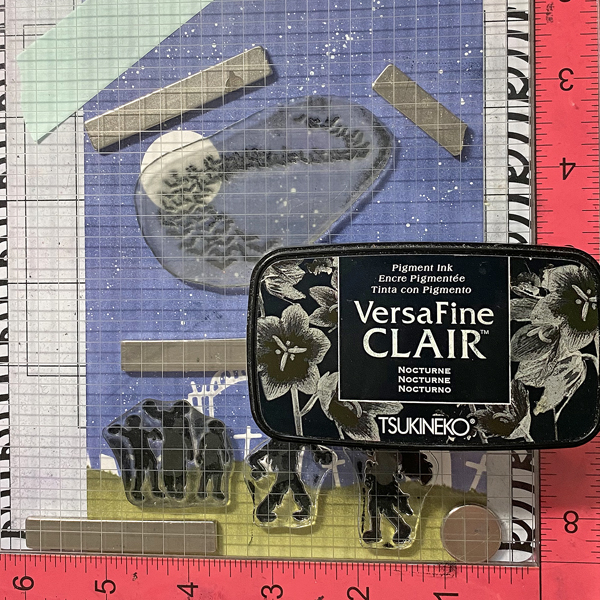
Place the image panel onto the base of a stamping platform secured with magnets and low-tack tape.

Position the clear Zombie stamps from the Zombie Party Clear Stamp Set facedown as desired on the cemetery lawn. Position the Bat Colony Clear Stamp facedown over the moon and sky.

Press the platform’s base onto the back of the stamps. Lift. Ink the stamps with Nocturne VersaFine Clair Ink and stamp. Re-ink and stamp if necessary to attain solid black images. Heat set the panel.

Step 7:
Trim the image panel to 4.625” x 6.625”. Use Nocturne VersaFine Clair Ink to edge the image panel. Cut a piece of orange cardstock to 4.75” x 6.75”. Sorry that there’s no photo.

Step 8:
Apply Tear It! Tape to cover the reverse of a piece of orange cardstock. Use the “Happy Halloween” sentiment dies to cut orange cardstock. Remove the tape’s backing and adhere the sentiment as shown.

Step 9:
Use Tear It! Tape to adhere the layers of the card.

Imagine Crafts Supplies:

Other Supplies:

  • Bristol Paper by Strathmore
  • Carrot Textured Cardstock by Bazzill Basics
  • Raven Textured Cardstock by Bazzill Basics
  • Boneyard Edgers Dies by Frantic Stamper
  • Happy Halloween Dies by Top Dog Dies (defunct)
  • Zombie Party Clear Stamp Set by Whimsy Stamps
  • Bat Colony Clear Polymer Stamp by Lavinia Stamps
  • Low-Tack Tape
  • Misti  Stamping Platform by My Sweet Petunia