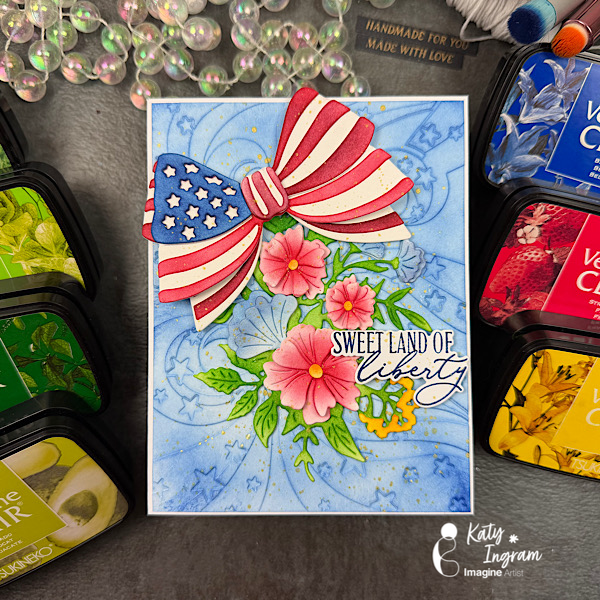
Hello Friends! Katy here with my latest video showcasing VersaFine Clair inks once again to create a floral and patriotic theme card. Video has all the details. Thanks for watching.
Other Products Used 100% Cotton or Watercolor Paper The Greetery Stars & Stripes Bow Die The Greetery Best Bouquet Details Die The Greetery Star Stream 3D Embossing Folder Papertrey Ink Land that I love stamp and die set White Cardstock Blending Brushes
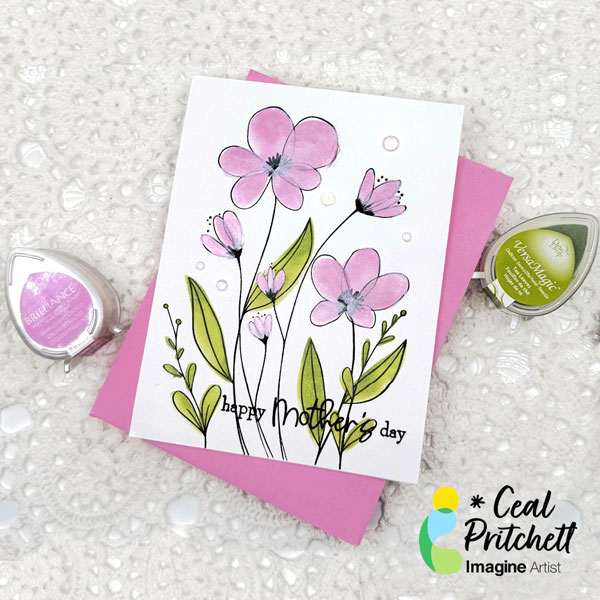
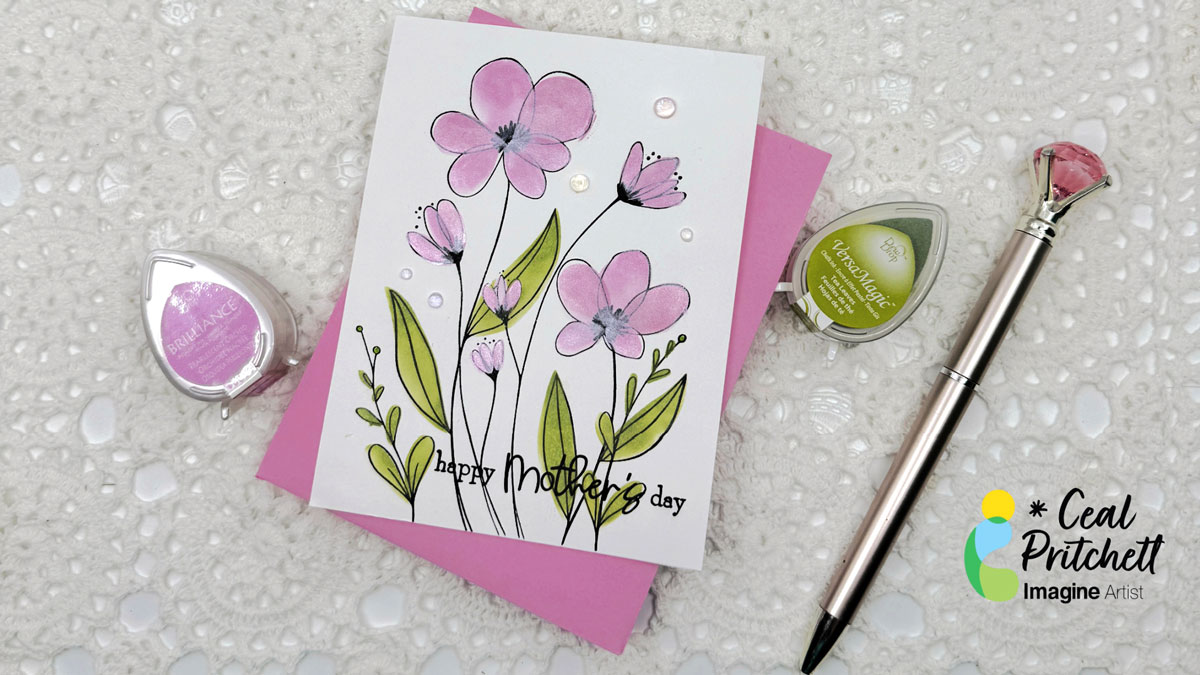
It’s Ceal, here. Today I am sharing how to make this Clean and simple Mother’s Day card using the Brilliance for shimmer and VersaMagic dew drops.
Skill: Beginner to intermediate Time: 30 mins
Directions:
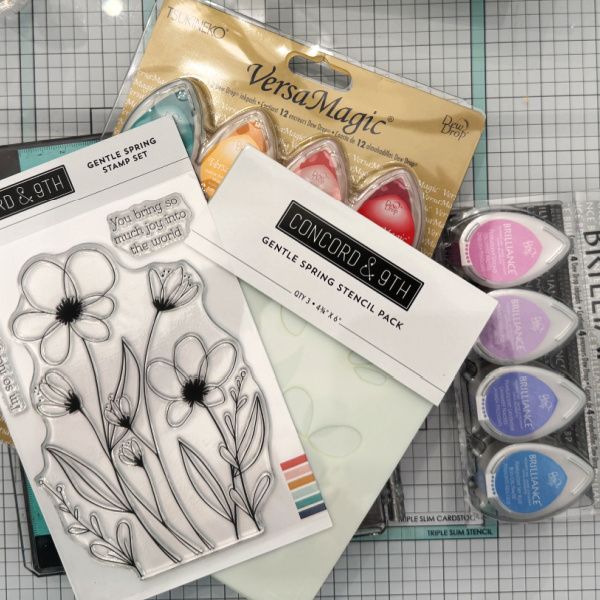
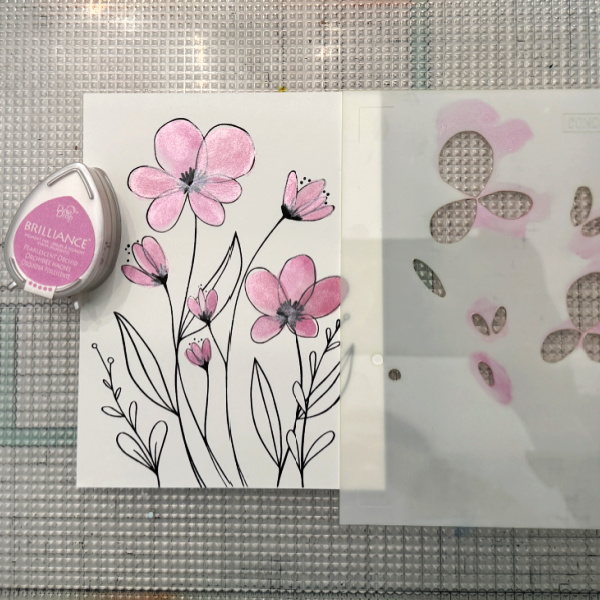
Gather your supplies. You will need a Mother’s Day stamp set or floral set as I have used here and a Mother’s Day sentiment. For inks I used a Brilliance Dew Drop and a VersaMagic Dew Drop
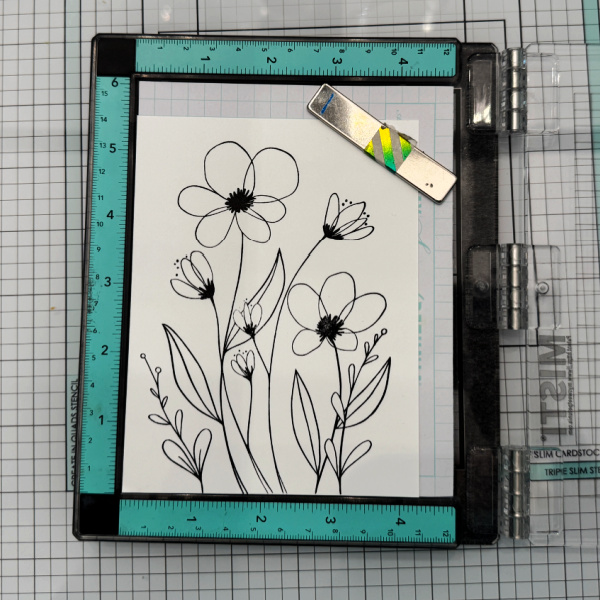
Step 1: Ink your stamp with a black ink
Step 2: Using the coordinating stencil and a blending brush or sponge dauber, ink blend a pearlescent pink on the flowers.
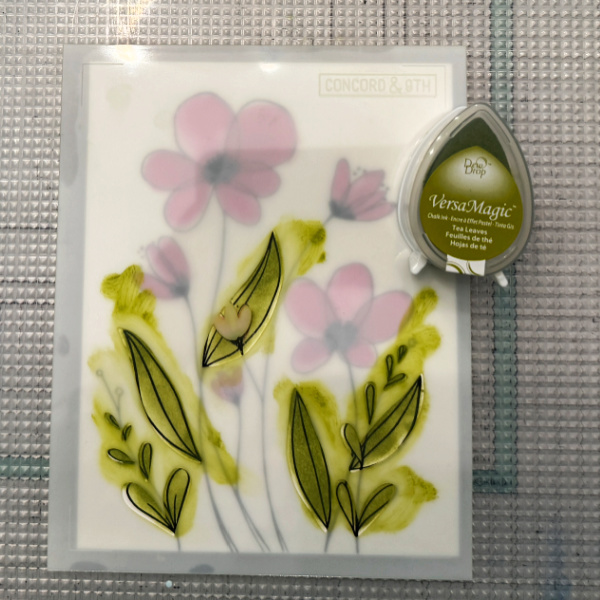
Step 3: Using the coordinating stencil and a sponge dauber or blending brus, ink blend green chalk ink on the leaves.
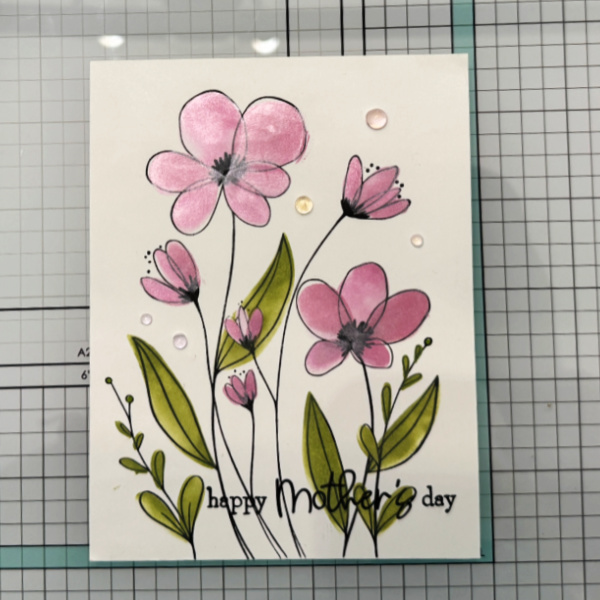
Step 4: Add embellishments of choice. I used some dew drops.
– Hi everyone! It’s Jessica here. Today I would like to share a card with a black and gold color combo. My card creations are typically full of bright colors; so I decided to change it up a bit by using a simpler color palette. Since there are only two colors on this card, I wanted to add various shimmer and glitter textures to create dimension. Let’s take a look!
Step 1: Trim Stardream Metallic 5 x 7 Onyx cardstock to 3 ¾’’ x 5’’. Paint golden stripes on the card panel with Sheer Shimmer Gold. One trick to avoid the gold shimmer from pooling on the edges is to swipe your paintbrush onto the craft mat. Another alternative is starting with a bigger piece of cardstock, then trimming the panel down to size.
Step 2: Dry the cardstock panel with a heat gun, and repeat steps 1-2 until you achieve bold, gold stripes. The Stardream Metallic Onyx cardstock has a subtle shimmer as well – it adds an elegant touch to the card base.
Step 3: Die cut roses and leaves with DCS Gold Glitter Heavyweight 12 x 12 cardstock. I find this glitter cardstock very easy to cut through. Some of the glitter cardstock I’ve used before uses adhesives to bind to the glitter, which takes a little more time to peel the die cut pieces off each other. This glitter cardstock, on the other hand, separates very easily after it’s been cut through.
Step 4: Next, adhere the die cuts to the strips background panel. I used On-Point Glue since the fine-tip nozzle is perfect for applying small amounts of glue. Then, use an acrylic block to press down on the die cut so that it completely adheres to the background.
Step 5: Finally, stamp the sentiment with Brilliance Galaxy Gold ink pad. This gold ink pad matches the Sheer Shimmer Gold so well! I added some black enamel dots to complete the card. I love the classic black and gold color combo, and I hope this card inspires you to try different kinds of gold shimmer on your project.
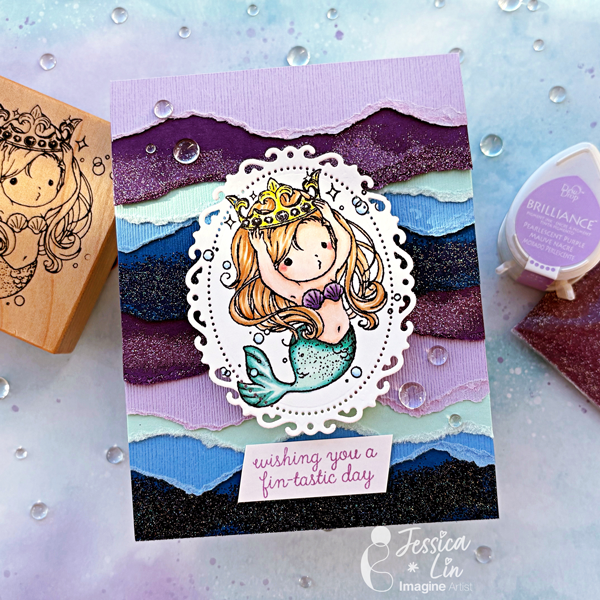
Hi everyone! It’s Jessica here. Do you like collecting certain stamp images? I am fond of mermaids and have a rather big collection. Today, I thought I would use this cute mermaid wooden stamp to create a card.
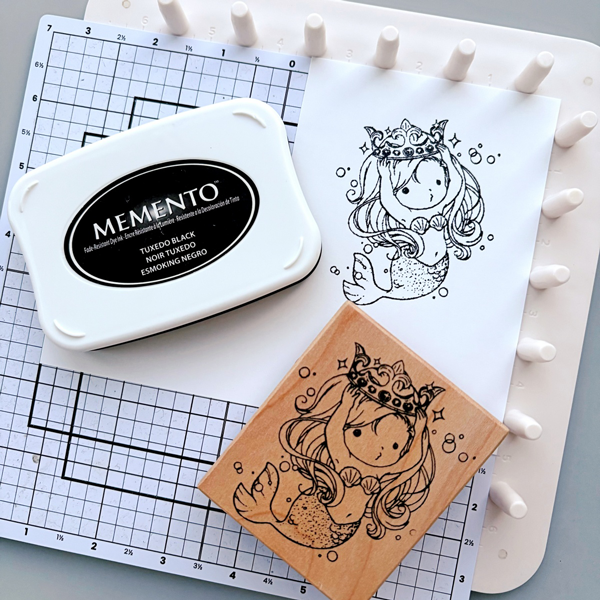
Step 1: When was the last time you used a wooden stamp? If I’m being honest, I bought this stamp around 10 years ago so it was nice to see that it still inked up nicely with Memento Tuxedo Black ink. I stamped it on Classic Crest Solar White cardstock since I will be coloring with Copic markers today.
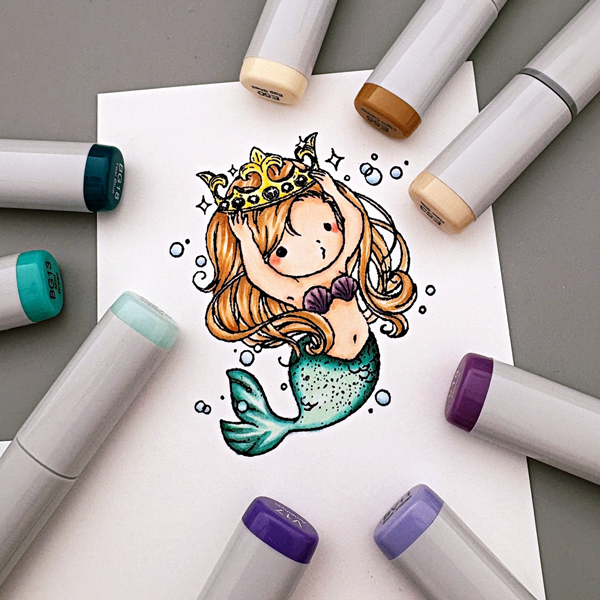
Step 2: This mermaid image is darling and easy to color. I started by drawing strands in her hair with E50 / E53 / E55. Then I colored her skin with E000 / E00 / E11. I also added blush with R20 / R24. For the seashells, I blended BV11 / V15 / V17. I used one of my favorite color combos on her tail: BG10 / BG13 / BG18. Lastly, I color her crown with Y00 / Y11 / Y06.
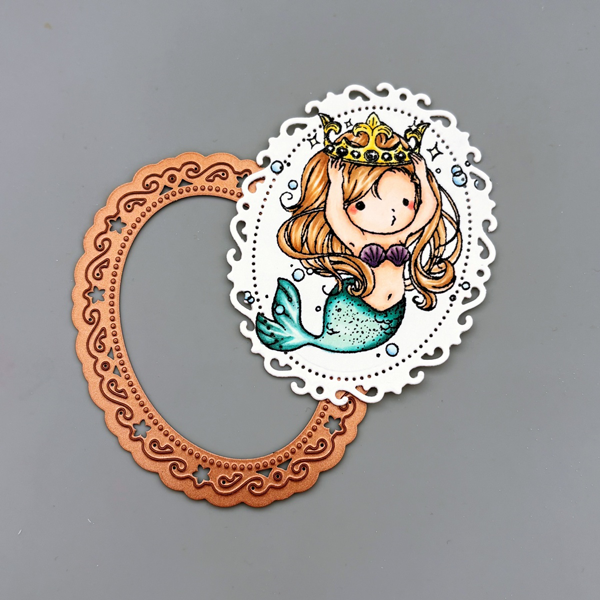
Step 3: Once I finished my coloring, I die cut the image with Spellbinders Nestabilities Floral Ovals die.
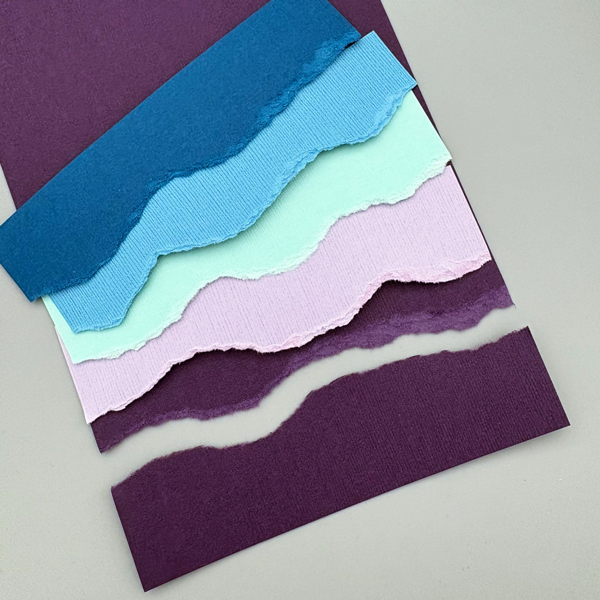
Step 4: I wanted to create a wavy background for today’s card. I picked out DCS Hydrangea Purple, Plum Purple, Seafoam Green, Blue Calico, and Indigo Blue to create an oceanic gradient that reminds me of an underwater palace. I hand-torn them to create wavy patterns; I just love the organic feel you get with the paper fiber edges. These cardstock pieces have texture on one side, and are smooth on the other. I like the variety of textures and ended up using both the smooth and textured sides.
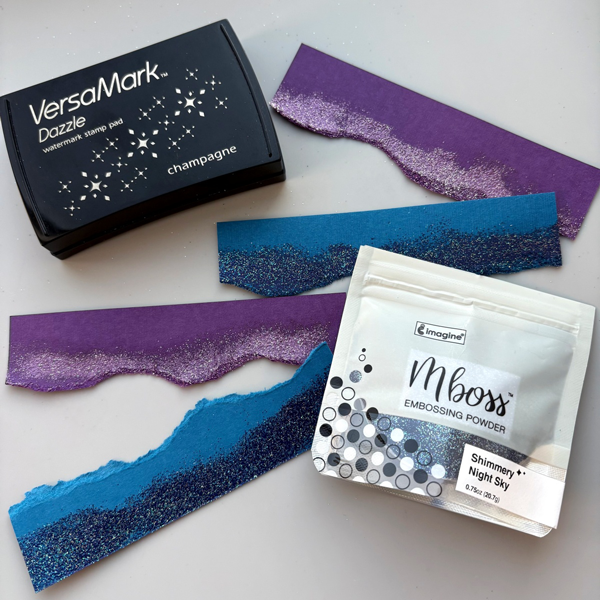
Step 5: To add even more texture to the background, I heat embossed Plum Purple strips with Mboss Princess Party embossing powder, and Indigo Blue strips with Mboss Shimmery Night Sky embossing powder. I swiped VersaMagic ink directly onto the cardstock and the embossing looks great without having to heat emboss a second round.
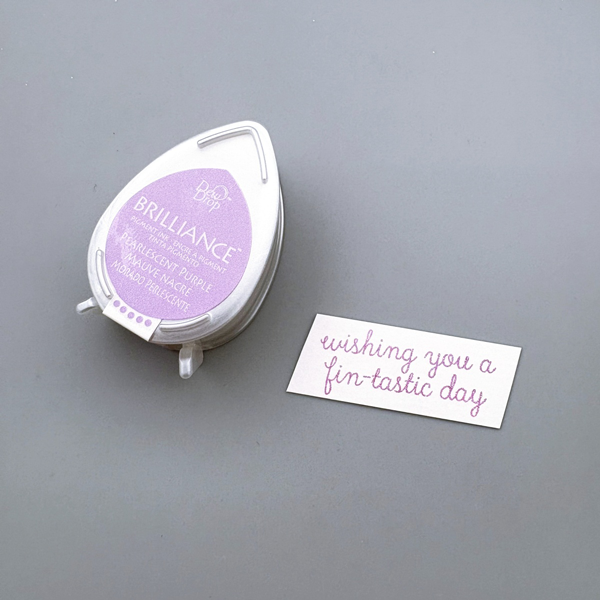
Step 6: Then, stamp the sentiment with Brilliance Pearlescent Purple ink pad.
Step 7: Now it is time to put the background pieces together. I applied Tear-It Tape to the straight edge of each cardstock strip, and adhered them to the cardbase from the bottom to the top. Once you are done, cut any overhang pieces on the sides. Finally, adhere the mermaid die cut piece and the sentiment to the wavy background, and the card is complete!
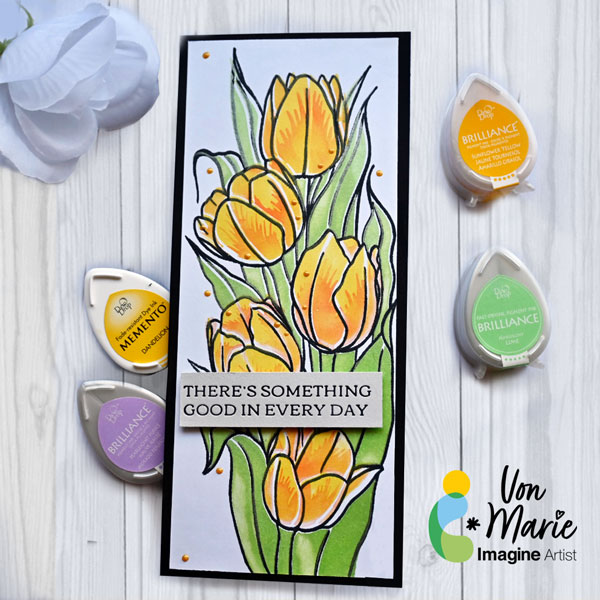
Hello everyone. Von Marie here with my latest video using some Beautiful inks to help with my project for a Spring Tulips Slimline Card. These Brilliance Dew Drops and VersaFine Clair inks are really nice and fun to use. I love the coverage they gave me for these Tulips and Leaves. I had so much fun making this card. Full Details are on my video.
Skill: Intermediate Time: 45 Mins
Craft Supplies
White Cardstock Paper 110 lb. Black Cardstock Paper 110 lb. Slimline Card Base 8 x 31/2 Glass Board and magnets Die-cutting Machine Betterpress Machine Glue Foam Tape
Other Products Used: Unity Stamps Co.Slimline Layering Tulips W/Coordinating Stencil Pinkfresh Studio Betterpress Favorite Things Sentiment Plates ALTERNATIVE PRODUCTS THAT CAN BE USED TO RECREATE SOMETHING SIMILAR Any inks, stencil, or flower stamp You can watch how to create this Spring Card Here
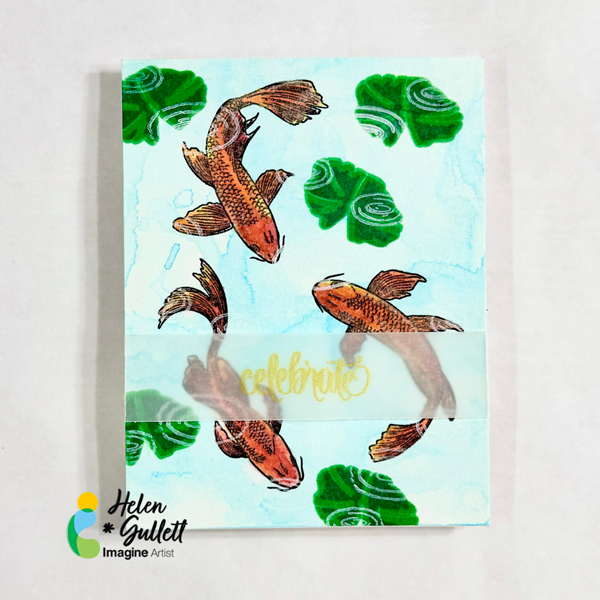
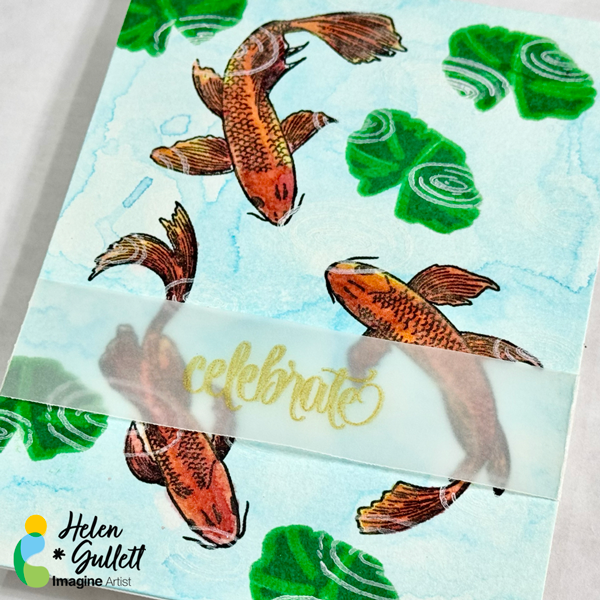
Hello crafty friends… Helen is here today. Today, I would like to share an idea to make a Lunar New Year card. Lunar New Year marks the new month for the new year in oriental calendar and it is also the beginning of Spring. Today we are going to do some watercoloring with Fireworks! Shimmery Craft Sprays and layer stamping technique.
Skill: Beginner Time: 15 minutes
Direction:
Step 1
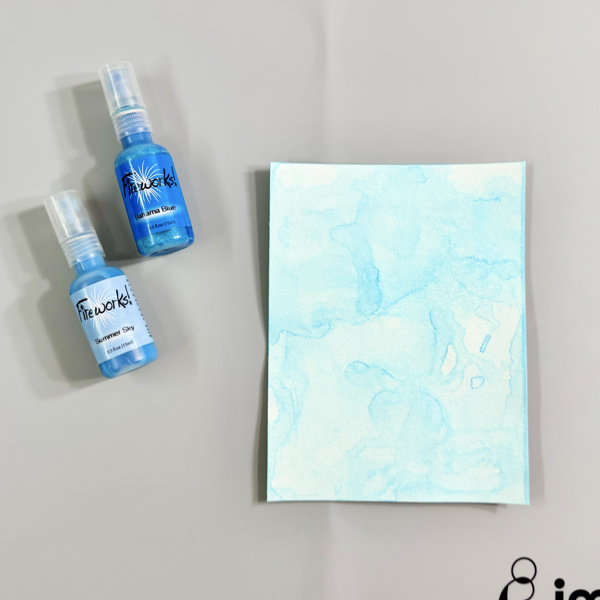
First, cut out a piece of watercolor paper (I used 140 lb watercolor paper) into 4.25 inch x 5.5 inch.
Spray the Fireworks! Summer Sky and Bahama Blue on the craft mat, and lightly spray with water to create the watercolor ink blends on the craft mat.
Smoosh the watercolor paper to the ink and repeat it until the watercolor inks cover the paper. You can dry the ink in between smooshing for extra texture and more layers of colors. Dry the whole panel with a craft heat gun.
Step 2
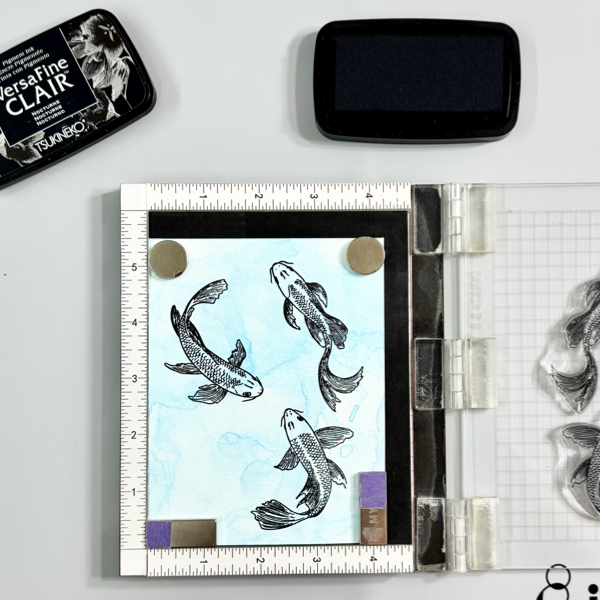
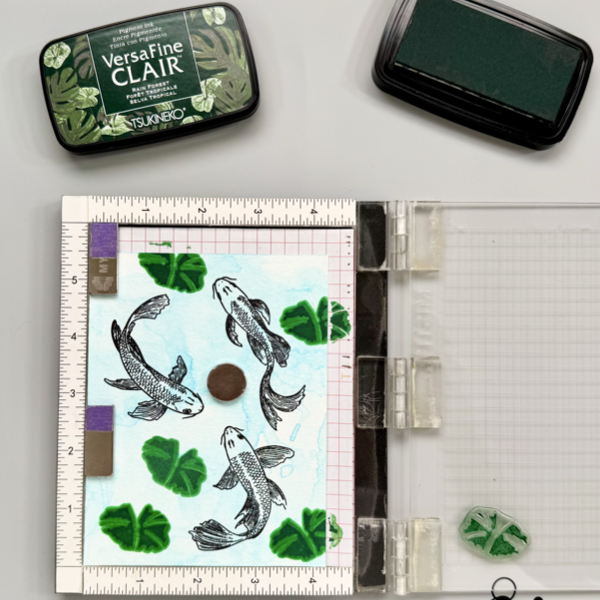
Put the watercolored background panel on the stamping tool.
Stamp the fish images on it with the VersaFine Clair Nocturne ink pad. Repeat it if needed.
Dry the stamped images well with a craft heat gun and put it back on the stamping tool.
Step 3
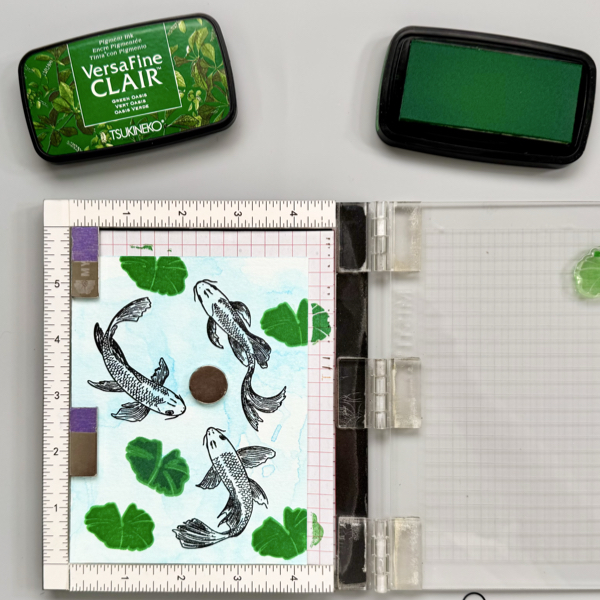
Stamp the bottom layer of the lily pad leaf with the VersaFine Clair Grass Green ink pad.
Move the position of the stamp to a different spot and stamp again.
Repeat it until you like the pond scene on the card.
Dry the stamped images well with a craft heat gun and put it back on the stamping tool.
Step 4
Next is to stamp the second layer of the lily pad leaf. Position the stamp on top of the first stamped image and then stamp it with the VersaFine Clair Green Oasis ink pad.
Repeat it until you stamp on all the first layer stamped images.
Dry the stamped images well with a craft heat gun and put it back on the stamping tool.
Step 5
Next is to stamp the third layer of the lily pad leaf which means it is the top layer of the layer stamps. Usually it would be the darkest color of the color combo.
Position the stamp on top of the previous stamped image and then stamp it with the VersaFine Clair Rain Forest ink pad.
Repeat it until you stamp on all the stamped images.
Dry the stamped images well with a craft heat gun.
Step 6
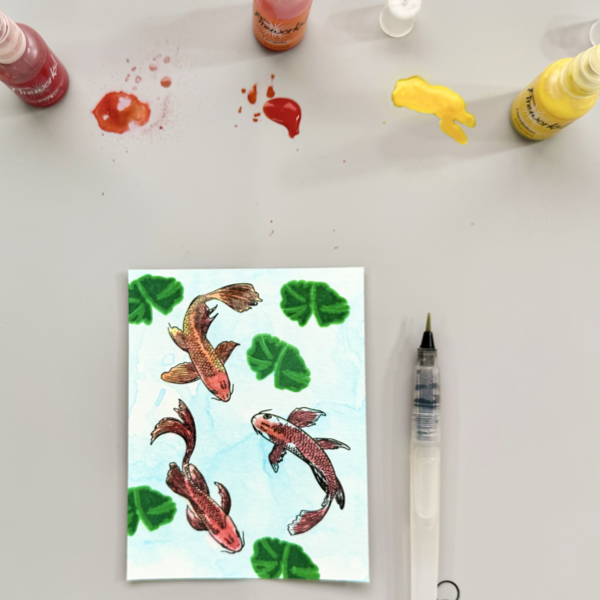
This is the fun part: watercoloring with the Fireworks! Shimmer Craft Spray.
Spray a little bit of each color of the Lady Bug, Dandelion, and Tangelo directly on the craft mat. I only sprayed it once and no water was added.
Pick up the ink color and start watercoloring the koi fishes. Each color will blend well.
For a lighter pigment color, you spray a little bit of water and mix it together.
Step 7
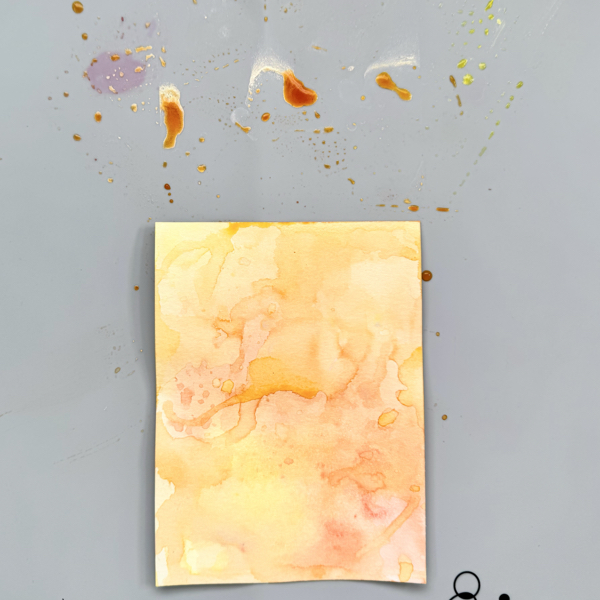
DO NOT WIPE OFF the left over of the Fireworks! Shimmer Craft Sprays on the mat.
Spray more water on it and smoosh a piece of watercolor paper on it to get another watercolored background panel.
Dry it well with a craft heat gun and set side so you can use for your next project.
Step 8
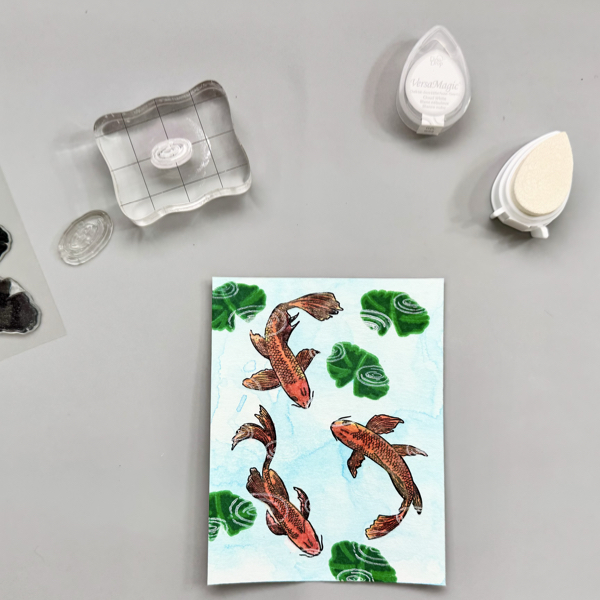
Stamp the water ripple stamps all over the panel with a stamping block using the VersaMagic Cloud White Dew Drop ink.
This will give the water ripple effect that those koi fishes swimming under the water.
One more time dry the whole panel with a craft heat gun to make sure all the inks are set well on the watercolor paper.
Step 9
Cut a piece of heavyweight heat-resistant vellum paper into 1 inch x 4.75 inch.
Put it on the stamping tool and secure it with the magnets.
Stamp the sentiment in the middle of the vellum paper with Brilliance Galaxy Gold Dew Drop ink.
Carefully remove it from the stamping tool and dry the ink with a craft heat gun.
Step 10
Add the sentiment vellum strip on the background panel and fold the extra flap to the behind of the panel and secure it with some of the On Point Glue.
Add the whole finished panel to the card base with On Point Glue. Hold it down for a couple minutes until the glue dries well.
The card is done.
This watercolored Lunar New Year card is flat enough to send it in regular mail for sure. I hope you will give this tutorial a try to create your own flat card yet has some layers effect on it.
Thank you so much for stopping by our blog today. Have a wonderful day!
Craft Supplies
Imagine Crafts:
VersaFine Clair – Grass Green, Green Oasis, Rain Forest, Nocturne