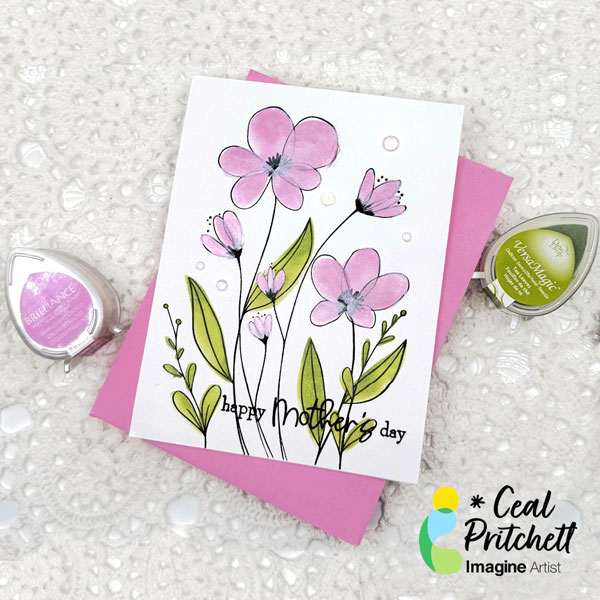
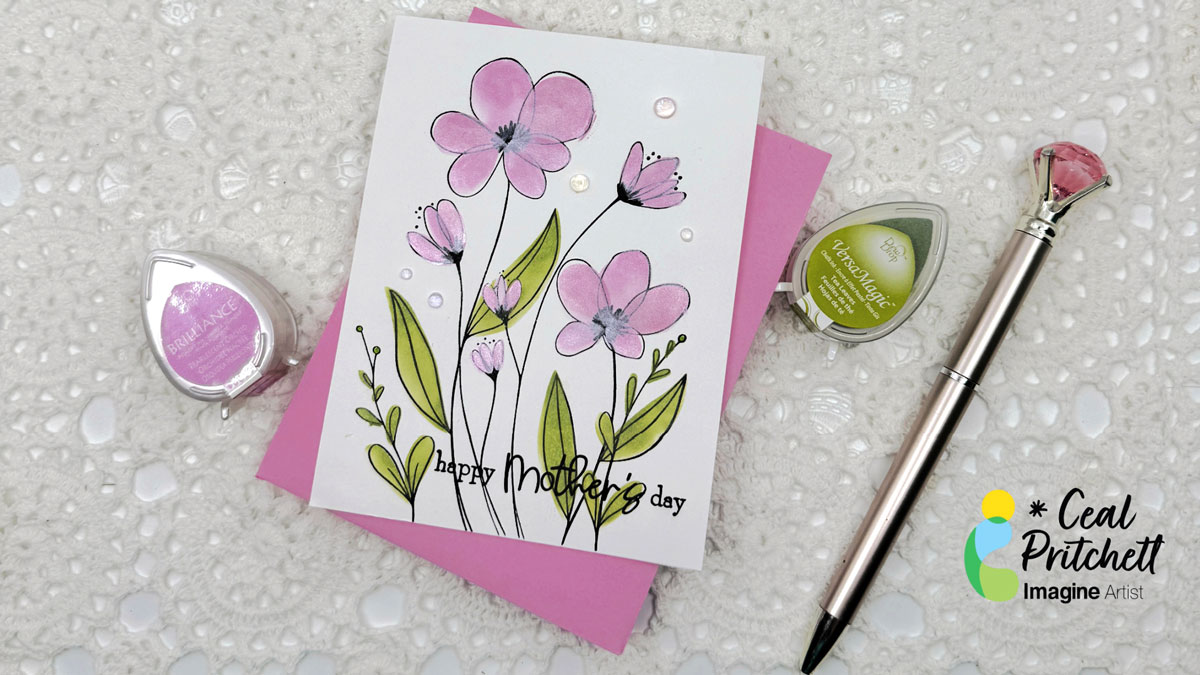
It’s Ceal, here. Today I am sharing how to make this Clean and simple Mother’s Day card using the Brilliance for shimmer and VersaMagic dew drops.
Skill: Beginner to intermediate Time: 30 mins
Directions:
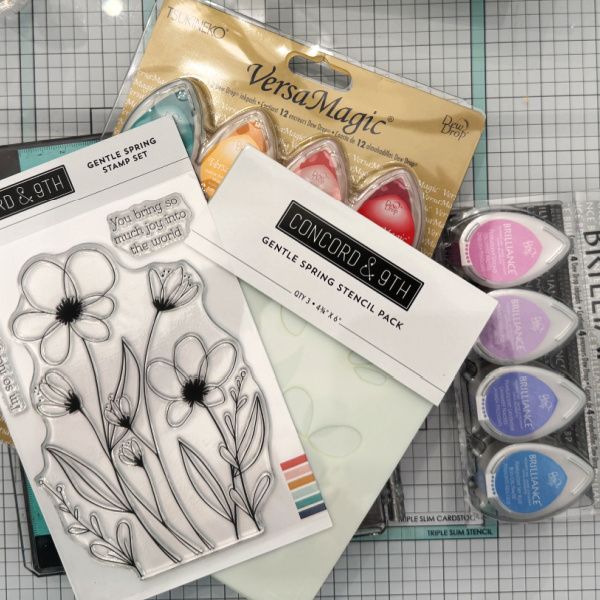
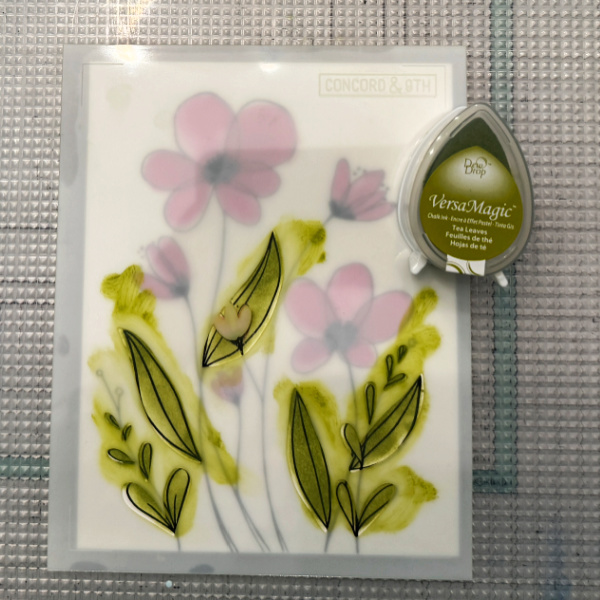
Gather your supplies. You will need a Mother’s Day stamp set or floral set as I have used here and a Mother’s Day sentiment. For inks I used a Brilliance Dew Drop and a VersaMagic Dew Drop
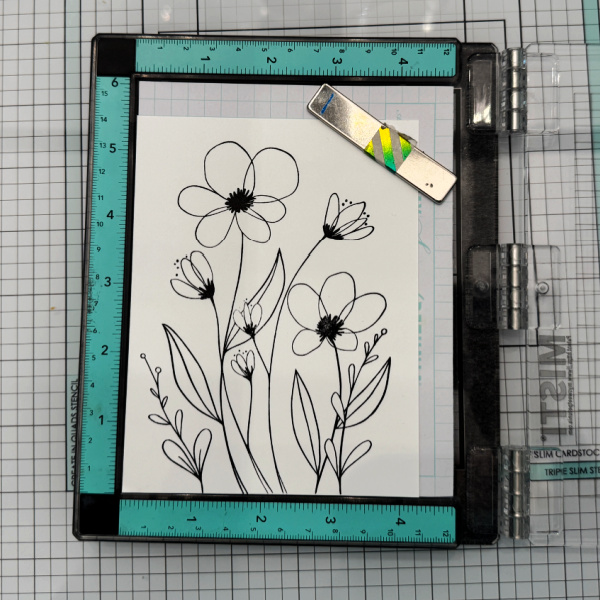
Step 1: Ink your stamp with a black ink
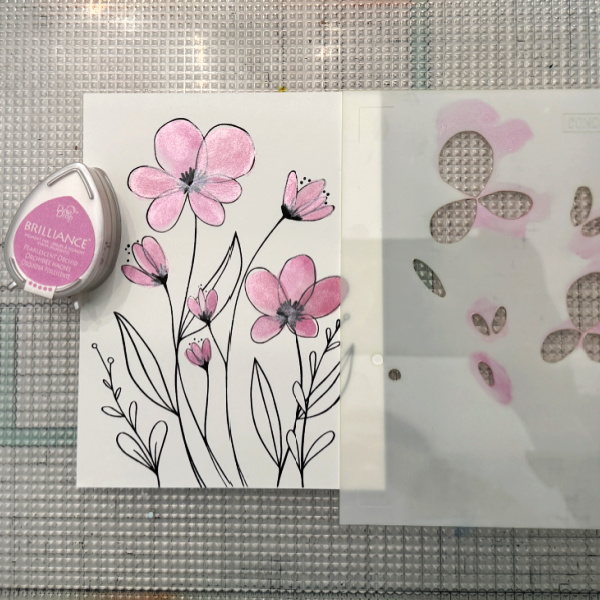
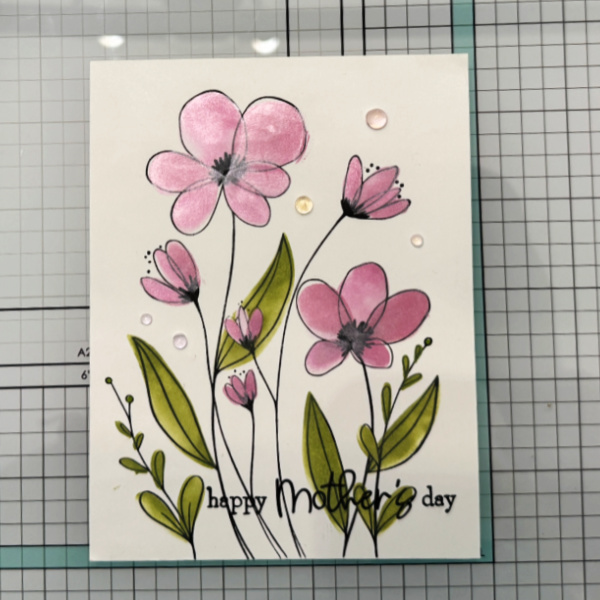
Step 2: Using the coordinating stencil and a blending brush or sponge dauber, ink blend a pearlescent pink on the flowers.
Step 3: Using the coordinating stencil and a sponge dauber or blending brus, ink blend green chalk ink on the leaves.
Step 4: Add embellishments of choice. I used some dew drops.
– In today’s blog post, I will show you a couple of ways to incorporate stencils into your cards using VersaMagic Chalk Inks, Brilliance Pigment Ink, and Delicata Inks. This is a wonderful way to use those stencils you have in your stash for an encouragement card or any holiday.
Skill: Intermediate Time: 1 hour
Directions:
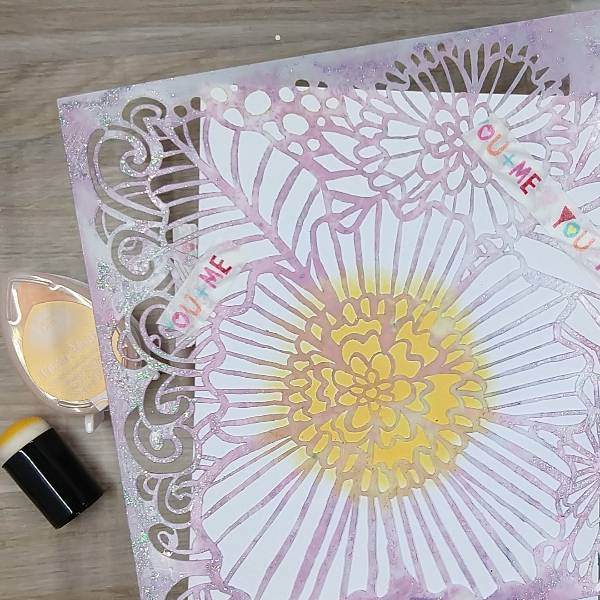
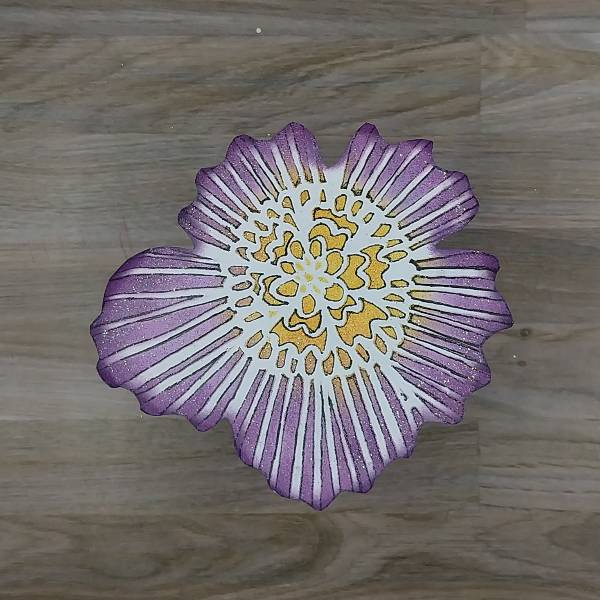
Step 1: Use washi tape to secure a large floral stencil to a piece of cardstock or watercolor paper, making sure that the cardstock is slightly larger than the stencil image you are going to use. Use a sponge dauber to apply Mango Madness VersaMagic Chalk Ink onto the center of the flower. Optional: Move the stencil away from the image and heat emboss the center of the flower with clear embossing powder before replacing the stencil and moving onto the next step.
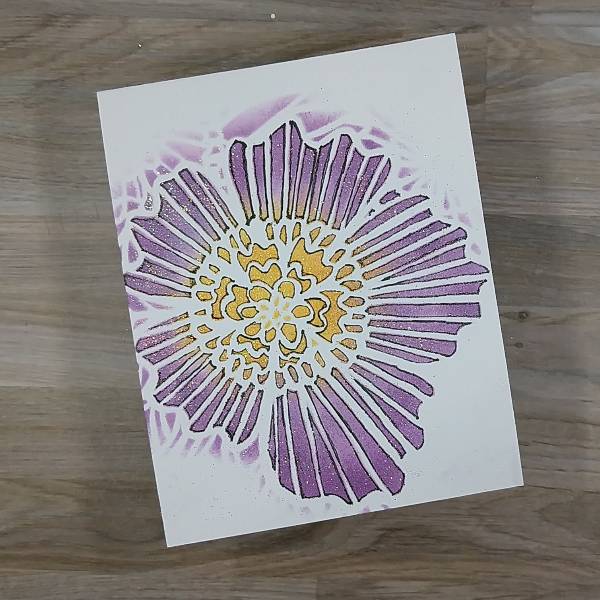
Step 2: Using a second sponge dauber, apply Pearlescent Purple Brilliance Ink to color in all of the flower’s petals.
Step 3: Using the same dauber, apply Purple Hydrangea VersaMagic Chalk Ink to the outer edges of the flower’s petals. Optional step: Remove the stencil and add embossing powder to your flower petals to help with smudging. Then return the stencil onto your paper in the exact same place on your paper.
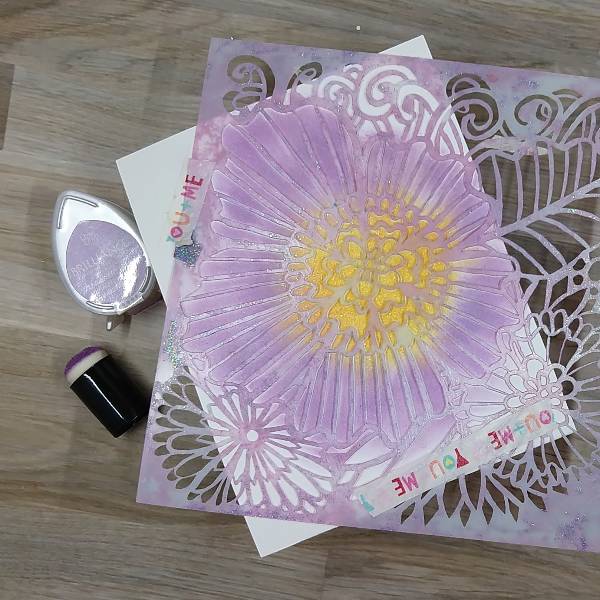
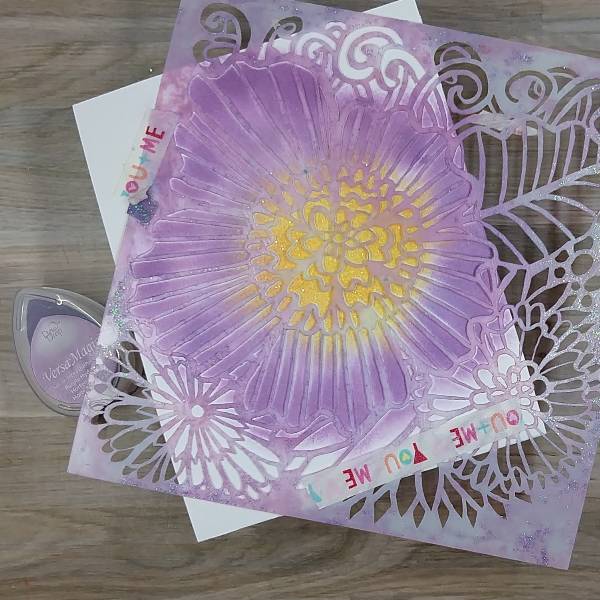
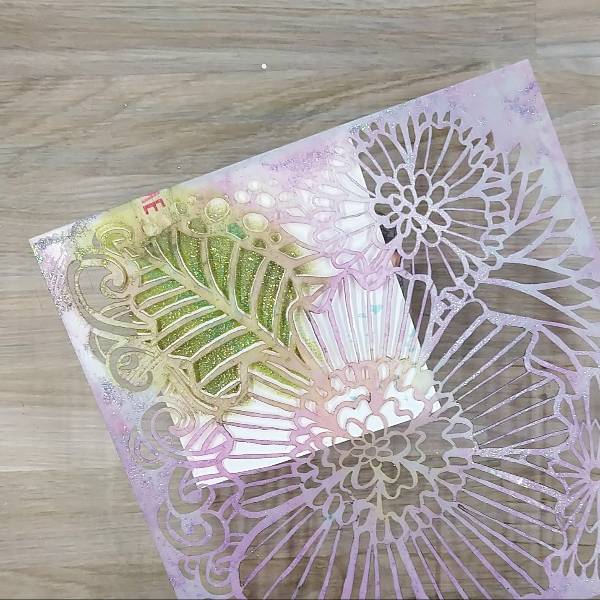
Step 4: Using a black artist pen, trace the edges of the stencil’s holes (to add a border around each ink blended area of the stencil). Then remove the stencil and set it aside. (I decided not to add the black outlines to the innermost circle of the flower’s center as I was planning something different there. Later, I realized that I had not outlined one tiny triangle that I should have in the center of the flower.)
Step 5: Fussy cut the edges of the flower with a pair of scissors. Then use the sponge dauber to ink blend the edges of the flower with more of the Purple Hydrangea VersaMagic Chalk Ink.
Step 6: Attach the leafy part of the stencil to another piece of watercolor paper or cardstock with more washi tape. Using another sponge dauber, blend the inner part of the leaf with Tea Leaves VersaMark Chalk Ink and the outer edges with Hint of Pesto VersaMark Ink. Mix a little Turquoise Gem VersaMagic Chalk Ink with water and watercolor the center parts of the leaves. Optional: Remove the stencil and heat emboss the ink with more clear embossing powder. Replace the stencil over the leaf.
Step 7: Using the black artist pen, trace the edges of the leafy part of the stencil’s openings (to add a border around each ink blended area of the stencil). Then remove the stencil and set it aside.
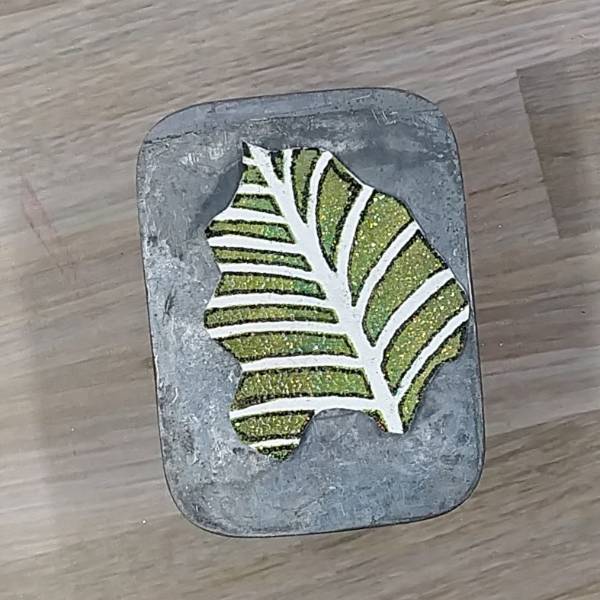
Step 8: Fussy cut the stenciled leaf using a pair of scissors. Using the same sponge dauber you used to blend the rest of the leaf, blend the Hint of Pesto VersaMagic Chalk Ink around the edges of the leaf. (Sorry, I forgot to take a picture of the leaf with the ink blended edges.)
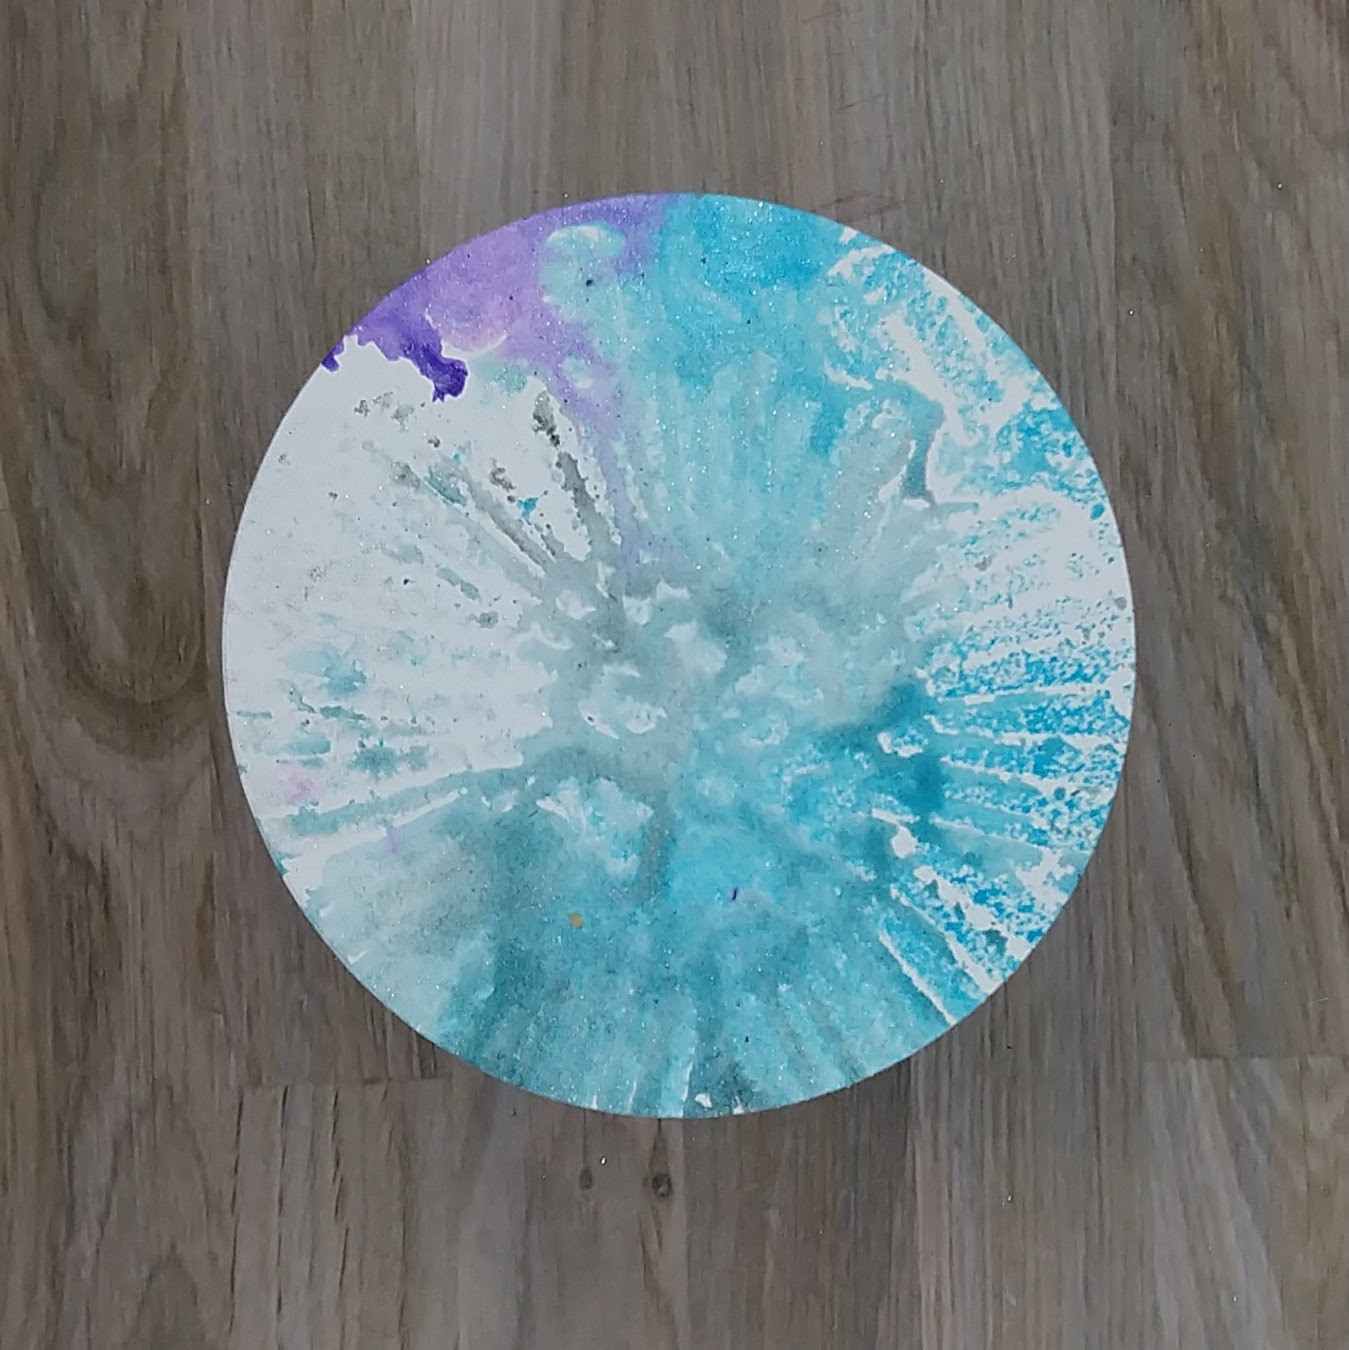
Step 9: Return the stencil to another piece of watercolor paper. Spray the paper through the stencil with Sparkle Sheer Shimmer Spray as well as Bahama Blue and Grape Jelly Fireworks! Shimmery Craft Spray. Allow the spray to dry or use your heat tool to dry the spray. After the spray dried, use a circular die to cut a piece of the watercolor paper that is slightly larger than the stenciled flower.
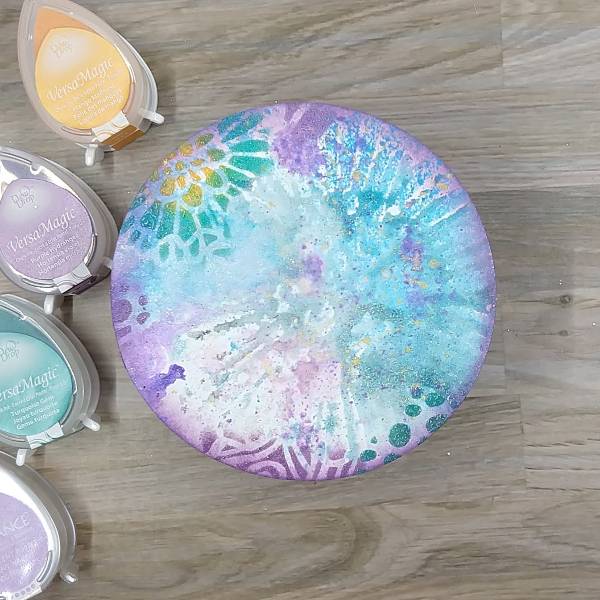
Step 10: Ink blend the whole edge of the circular die cut with more of the Brilliance Pearlescent Purple ink with a sponge dauber. Return the stencil to the circular die cut and use a variety of the same colors of ink to stencil the edges of the die cut using more sponge daubers. In blend the small flower with Mango Madness and Turquoise VersaMagic Chalk Inks, the dots with more of the Turquoise VersaMagic Chalk Inks, and the curved lines with Purple Hydrangea VersaMagic Chalk Ink. Optional: Heat embossed the ink with more clear embossing powder.
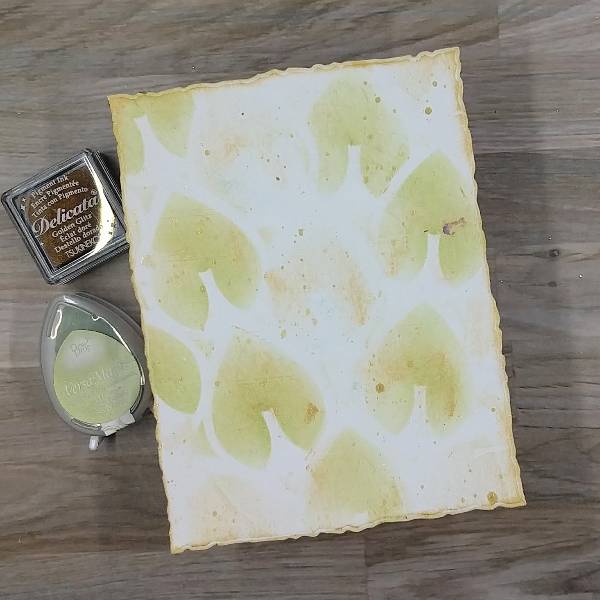
Step 11: Create the background panel by die cutting a piece of white cardstock or watercolor paper with an A2-sized die cut. Place a stencil with larger open leafy areas over the watercolor paper and then gently run Golden Glitz Delicata ink across the panel to add some soft gold accents. Ink blend several of the leaves with Tea Leaves VersaMagic Chalk Ink, making sure that there are some gold leaves and green leaves. Gently press the Golden Glitz Delicata Ink cube to the edges of the panel to leave a gold border around the edge of the panel. Splatter some gold watercolor across the panel and allow it to dry.
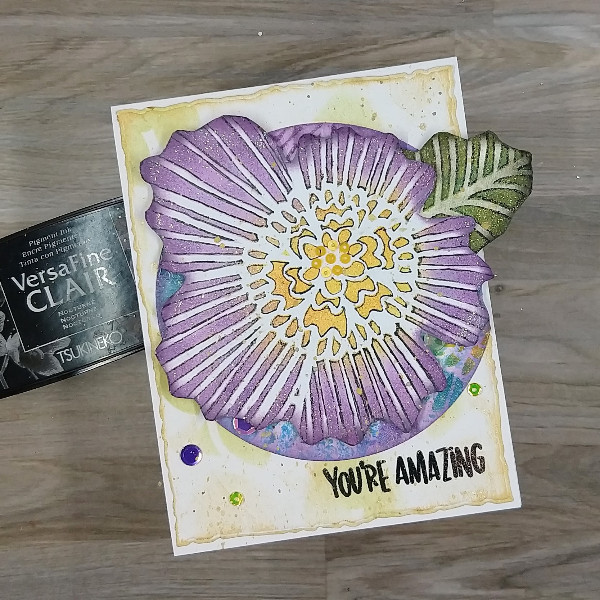
Step 12: Stamp a sentiment of your choice on the lower right part of the panel with Nocturne VersaFine Clair ink. Optional: Heat emboss the sentiment with clear embossing powder. Glue the circular die cut onto the center-right of the panel and trim the very edge of the circular die cut to match the background panel. Attach the leaf and flower to the card with foam tape. Glue small yellow sequins to the center of the flower and add purple and yellow sequins onto the card. Glue the whole panel onto an A2-sized white card base. Splatter a little more gold watercolor across the card.
Other TCW (The Crafter’s Workshop)-Stencil-Dahlia Blooms (6”x6”) Simon Says Stamp-Stencil-Mod Layering Leaves (1 of 2 stencils in the set) Simon Says Stamp-Stamp-Amazing Catherine Pooler-Sequins-Paisley Park and Saint Lucia sequin mixes Embossing powder in my stash Hero Arts-Die-Nesting Circle Infinity die set Honey Bee Stamps-Die-Deckle Edge A2 die set Altenew-Foam Tape-Instant Dimension Foam Tape Scissors Black artist pen Clear embossing powder Glue
Hello crafty friends! Today, I have a different way to use your VersaMagic Ink Pads. You only need a embossing folder and different colors of ink to create a colored background.
Skill: Intermediate Time: 60 minutes
Directions:
Select an embossing folder of your preference. If you use a 3D Embossing Folder, you will note a bigger difference in the background.
Step 1:
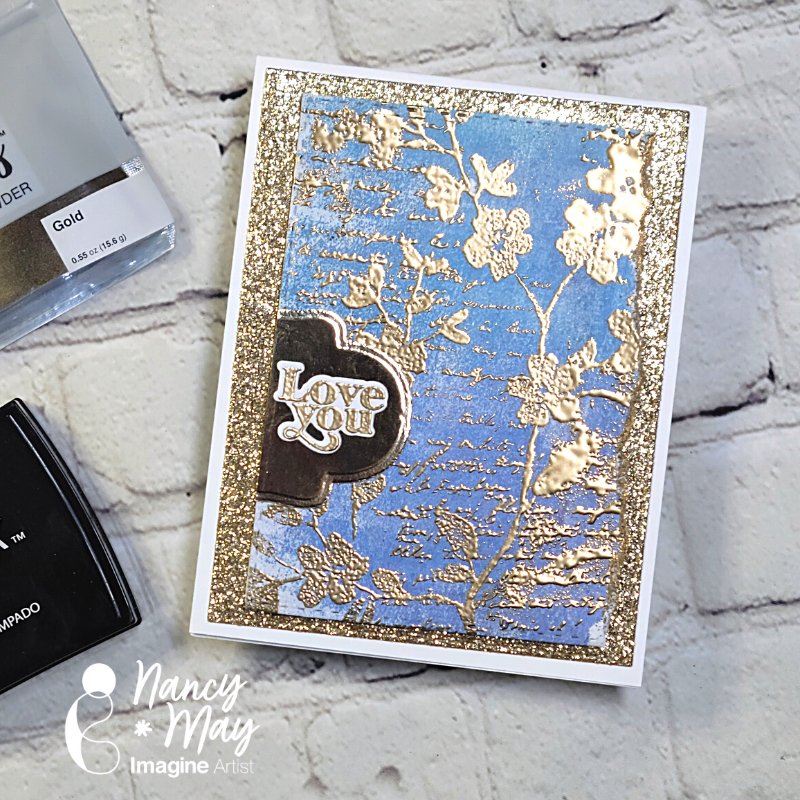
Select the colors of VersaMagic Ink that you want to use. In today’s card, I am using Purple Hydrangea, Red Magic, Mango, Ocean Depth and Turquoise Green. Also select the embossing folder that you wanted to use.
Step 2:
Place the piece of cardstock behind your embossing folder before applying the ink to the embossing folder. With this you will see clearer how the colors will look on your background. Apply the ink directly with the ink pad over one of the sides of your folder. Remember that it has an embossing side and a debossing side. In my sample, I used the debossing side.
Insert the piece of cardstock inside of your embossing folder and pass it through the die cut machine before the ink dries.
Step 3:
To enhance the details that were not covered by the ink, you can use the Sheer Shimmer Stix Dauber. Just softly press the dauber directly over the details where you want to add the shimmer look. I used the Frost color to keep it neutral.
Step 4:
Now is the time to add the sentiment. I didn’t want to cover the colorful background, so I went for a large die cut sentiment. First, I inked a piece of white smooth cardstock with one of the colors used in the background. In my model it is the Turquoise Green. I applied it directly with the ink pad and let the paper dry naturally before the die cut the sentiment.
To add more contrast, I also die cut a tiny complement of the sentiment in a coordinated card stock. I pasted it directly over the large die cut sentiment using the OnPoint Glue.
Step 5:
Resize your layer and paste it directly over the card base using Tear it Tape. Paste the large sentiment over the colored background using crafty foam tape to add more dimension to the card.
Thanks for stopping by and remember, you don’t need to create complicated projects. Just use the best inks and let your creativity shine!
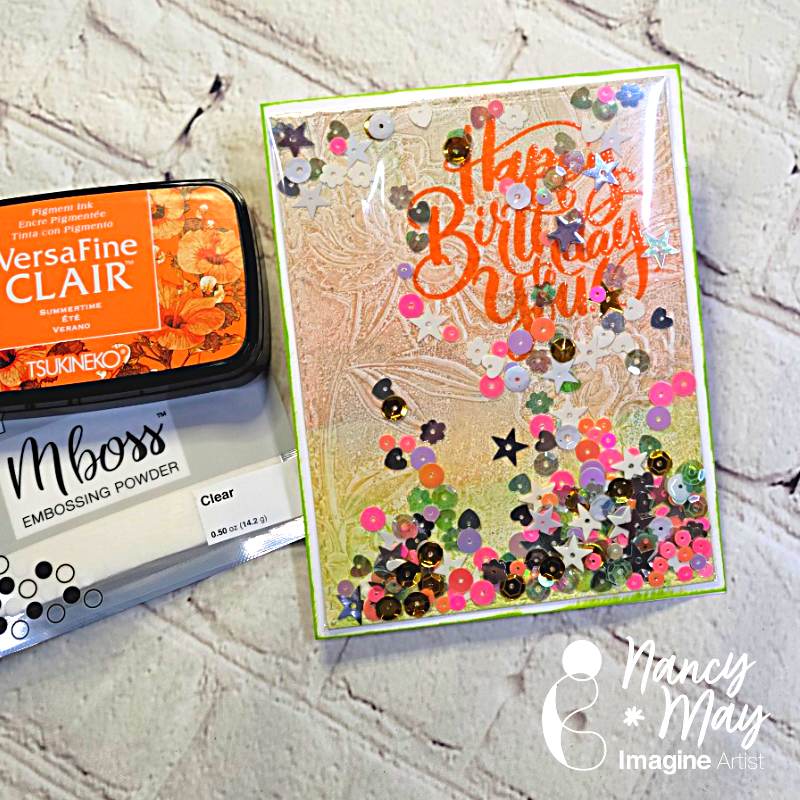
Last time we met we created a bunch of backgrounds together, using a few different inky mediums and a gel plate, along with some other supplies. This time we are going to turn one of those inky backgrounds into a lovely card. For the sake of time, we are only making one on screen, but I have 3 BONUS shaker cards to show you as well, so stick to the end!
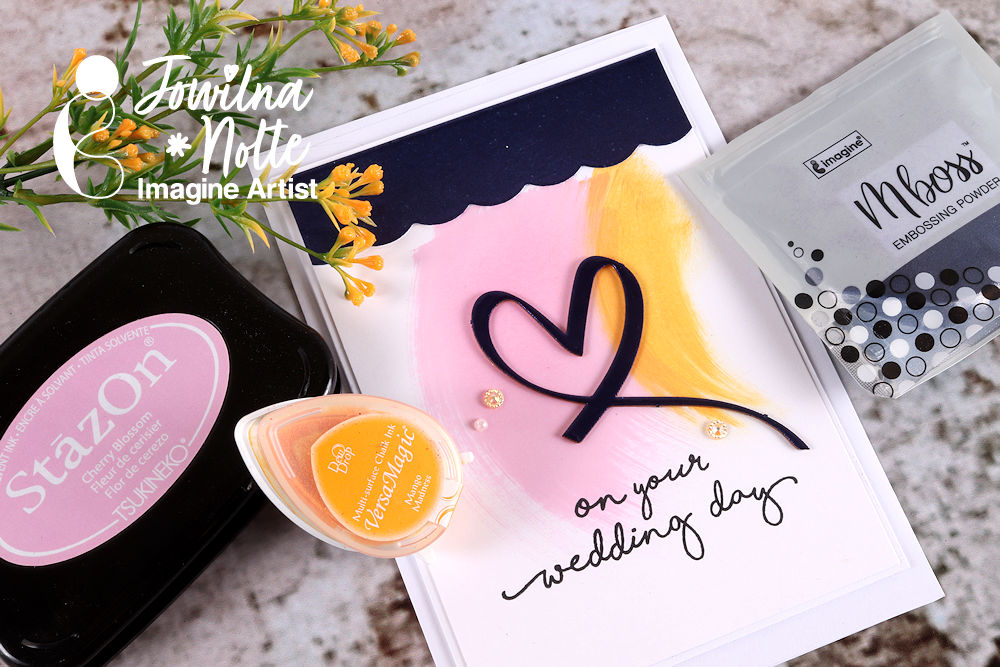
Recently I had to make a quick wedding card for a fun and vibrant couple. Instead of going the traditional route I opted for just having fun – mimicking their personalities.
Skill Level: Beginner
Time: 20 minutes
Directions:
Step 1
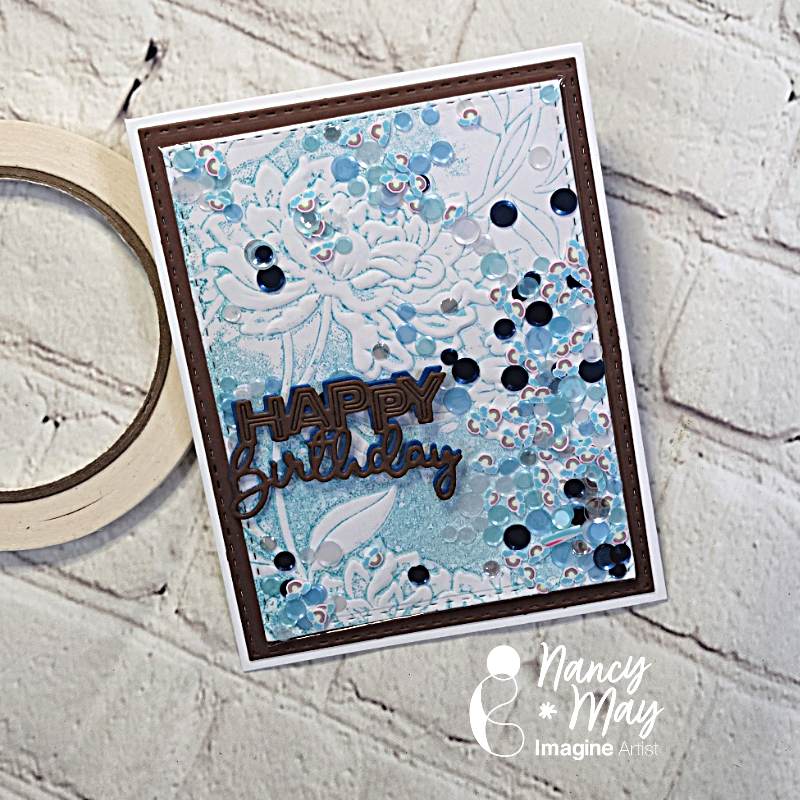
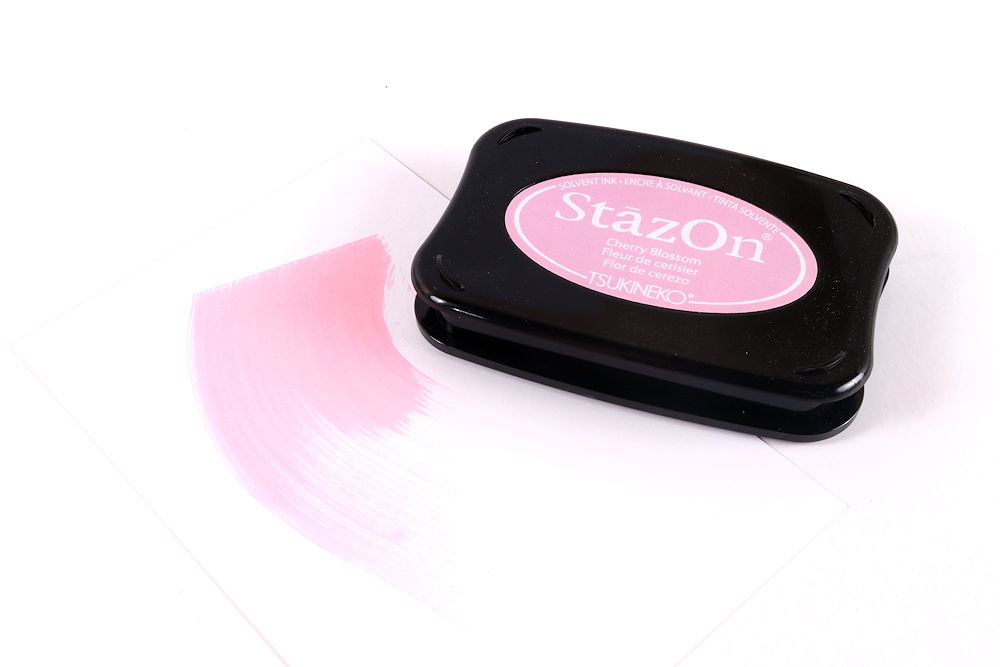
On a smooth white background panel used your StazOn ink Cherry Blossom and swipe the ink pad across the panel.
Step 2
Repeat the process this time using Versamagic ink to swipe across the background.
Step 3
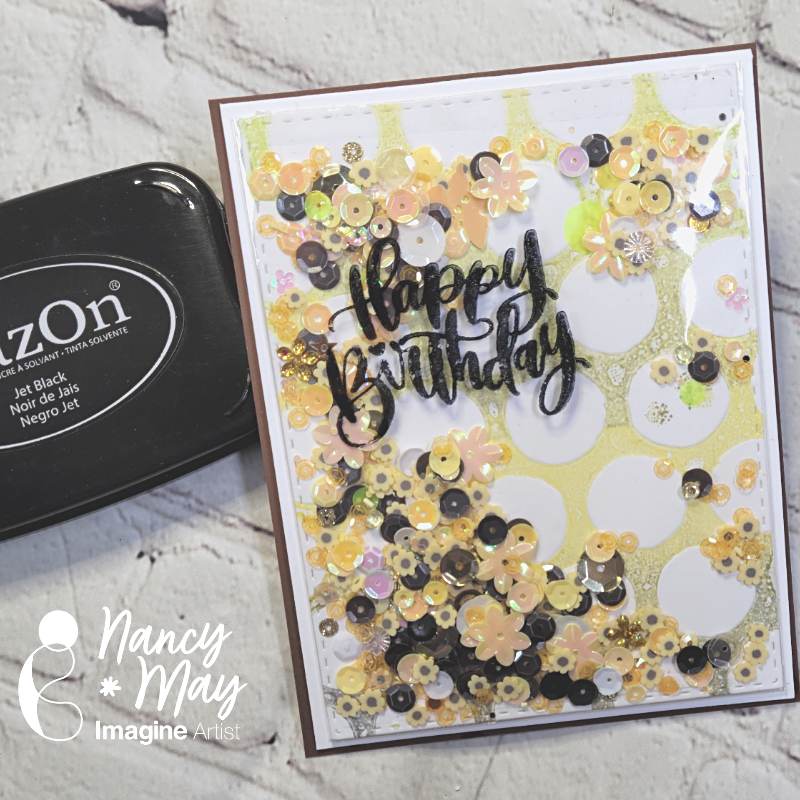
Stamp a sentiment across the bottom of the panel using VersaFine Clair Nocturne.
Step 4
Emboss a scrap cardstock strip using Indigo Pealr Mboss embossing powder and VersaMark Frost. Then cut the strip with a scallop edge. Emboss a chipboard heart using the same Indigo Pearl Mboss embossing powder.
Step 5
Assemble the card by adhering the panel to a folded card. Then adhere the embossed heart using On Point glue as well as the embossed strip and embellishments to finish off your card.
The embossing powder adds some glamour and shine to this simple yet fun card. Just like the couple – fun colours combined together with a touch of glam and pizazz.
Mboss embossing powder really takes any project t the next level. Available in a huge variety of colours they truly are amazing.
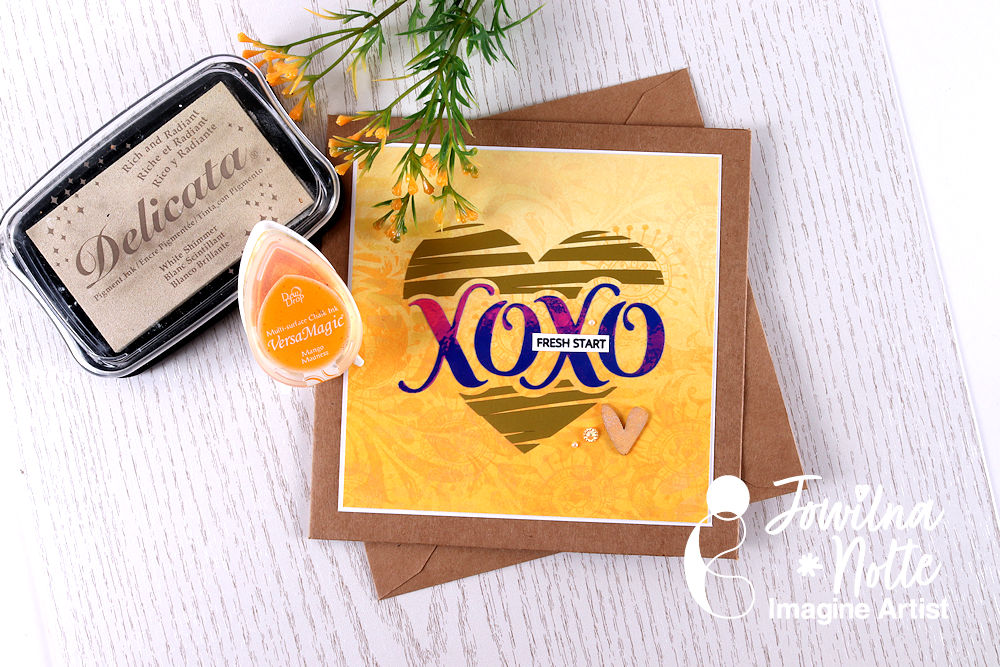
I am not one for a traditional Mother’s Day Card – although the message inside may be one of gratitude, on the outside it can reflect something personal as well.
Instead of doing the usual thing I combined some fun stamping and inking with a vinyl heart and a little stamped sentiment that will mean the world to my mom.
“FRESH START” is my prayer for her this Mother’s Day – the beginning of so much more than just being a mother.
Skill Level: Beginner
Time: 30 minutes
Directions:
Step 1
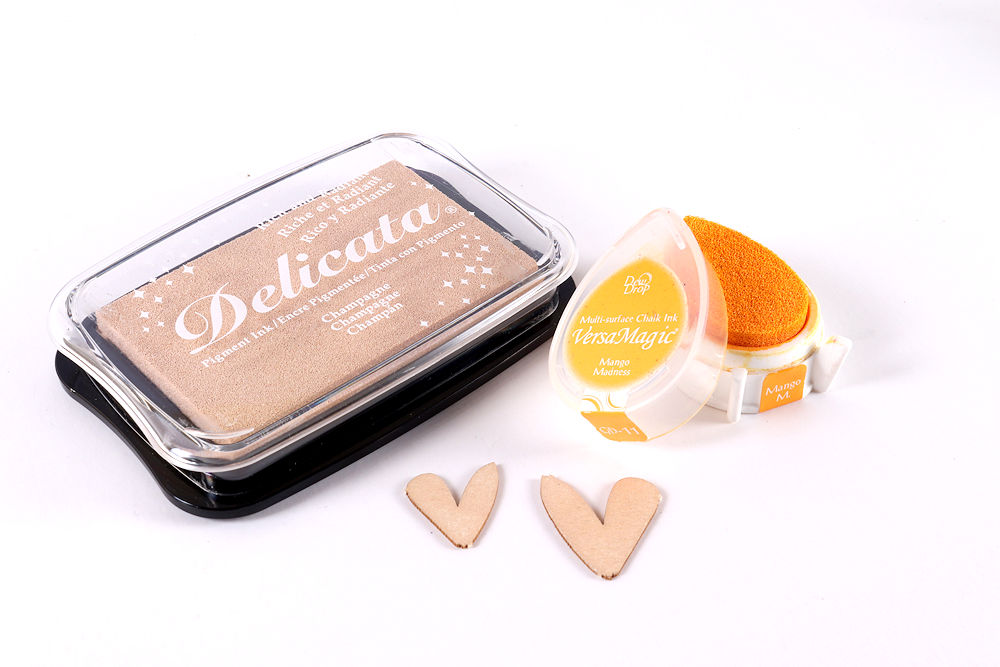
Combine VersaMagic Mango Madness with Delicata Champagne to ink some chipboard hearts.
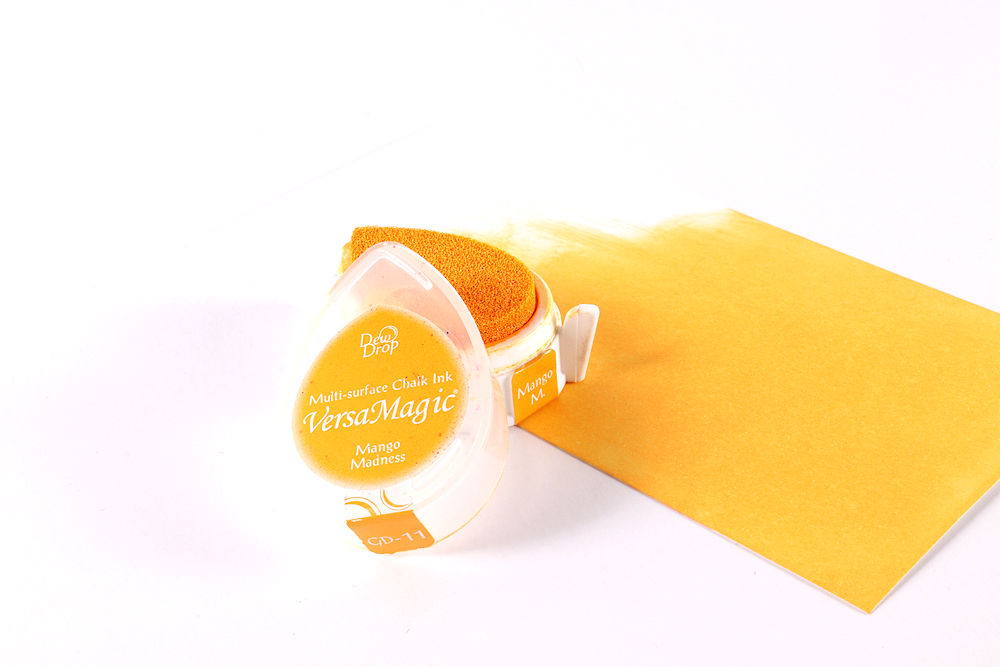
Step 2
On a white smooth cardstock background, use the VersaMagic and ink the background. Combine the “direct to paper” method carefully blending the ink and then use a sponge dauber for achieve an ombre effect towards the top.
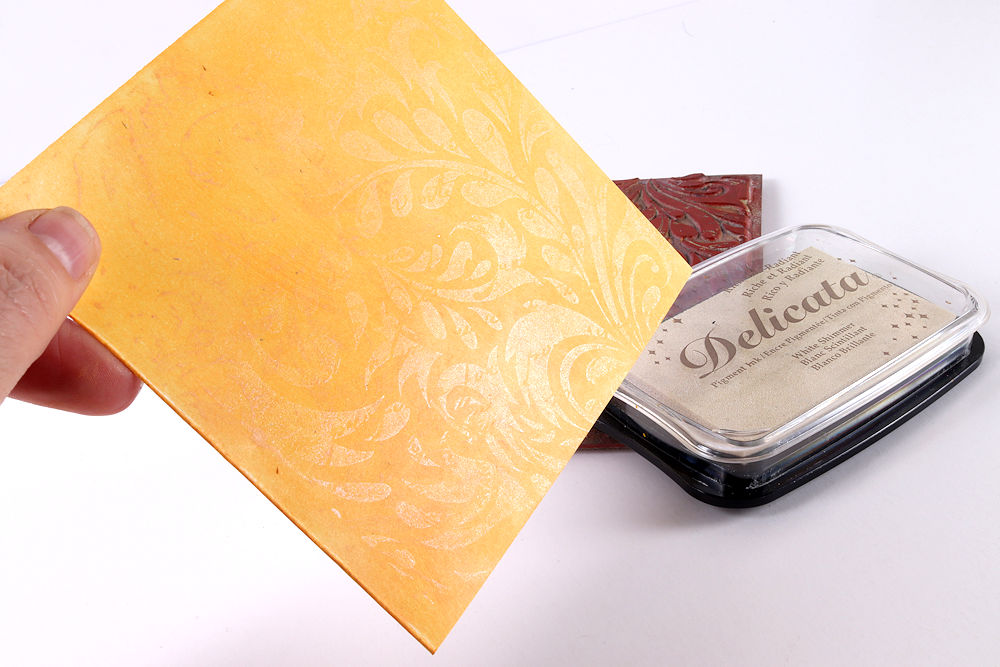
Step 3
Stamp onto the background several times overlapping different stamp designs and VersaMagic ink. Then finishing off the top layer using Delicate White Shimmer to stamp the last layer. Look at that gorgeous shimmer.
Step 4
Apply a layered vinyl heart, stamped sentiment and chipboard heart, as well as some embellishments.
Matt onto white cardstock layer and then onto a kraft card.
And just like that I created a heartfelt and meaningful Mother’s Day Card with lots of sparkle and shimmer – wishing my mom a bright future ahead.