Hello Friends! Katy here with my latest video sharing a great way to use VersaFine Clair re-inkers on watercolor paper with felt pads and Isopropyl Alcohol, but I also share using an ink pad if you don’t have a re-inker. Video has all the details. Thanks for watching.
Step 1: Trim a piece of watercolor paper a little bit larger than an A2 sized cardbase (4.5” x 5.75”) and watercolor smoosh the panel with Gray Flannel Memento Ink mixed with water on acetate packaging. Allow the panel to dry. Then repeat the process with Pearlescent Lavender Brilliance Ink and then finally with Champagne Delicata Ink.
Step 2: Stamp stars on watercolor paper with Paradise VersaFine Clair ink. Repeat the process so make the blue of the ink darker. Then heat emboss with clear embossing powder. Then die cut with the corresponding die.
Step 3: Press Blue Belle VersaFine Clair Ink onto another piece of watercolor paper and then use this paper to die cut the sentiment. Die cut two pieces of scrap paper with the same sentiment die and glue the three layers together for dimension.
Use the corresponding shadow die to die cut a vellum shadow layer and glue behind the sentiment.
Step 4: Spray the background panel with Paris Dusk Fireworks! Craft Spray through a stencil. While the spray is still wet, remove the stencil and spray the panel with Summer Sky Fireworks! Craft Spray to move both colors of spray. Splatter some of the light blue areas of the panel with Paris Dusk Fireworks! Craft Spray. Allow panel to dry.
Step 5: Trim the background panel to about 4” by 5.25” and then distress the edges with a pair of scissors. Press the edges of the panel into the Gray Flannel Memento Ink pad and then heat emboss with more clear embossing powder. Next, glue the sentiment onto the center-right and the Star was attached with foam tape.
Step 6: Stamp a sub-sentiment on a small piece of watercolor paper with more of the Blue Belle VersaFine Clair ink and then heat embossed it with more of the clear embossing powder. Then distress the edges with scissors and then press the edges into the Blue Belle VersaFine Clair Ink.
Step 7: Attach the sub sentiment onto the panel with more of the foam tape. Then glue the whole panel onto an A2-sized white cardbase to finish the card.
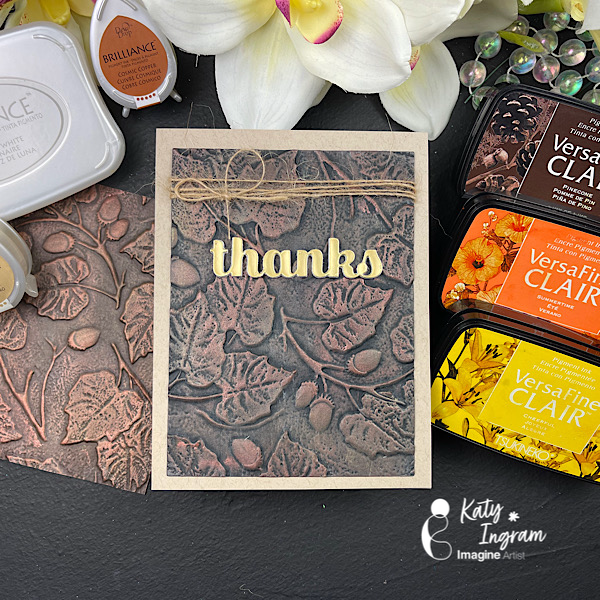
Hello Friends! Katy here with another quick project. I love trying new things with my inks and embossing folders and in todays video I used my VersaFine Clair with some Brilliance pigment inks in Cosmic Copper and Galaxy Gold and Moonlight White, with a 3D embossing folder.
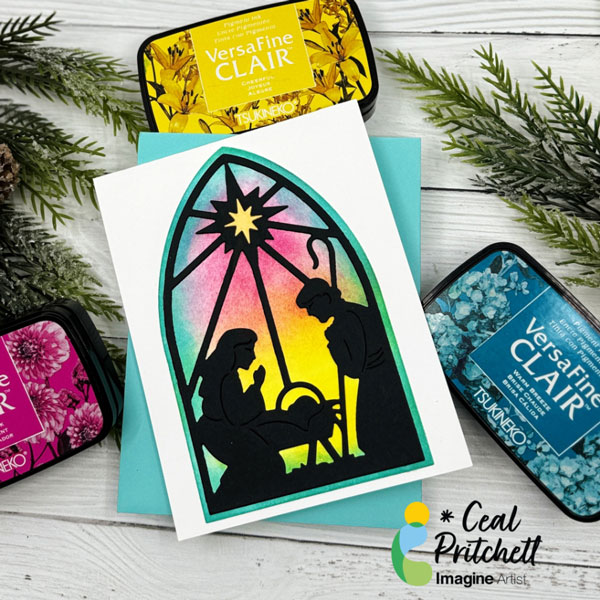
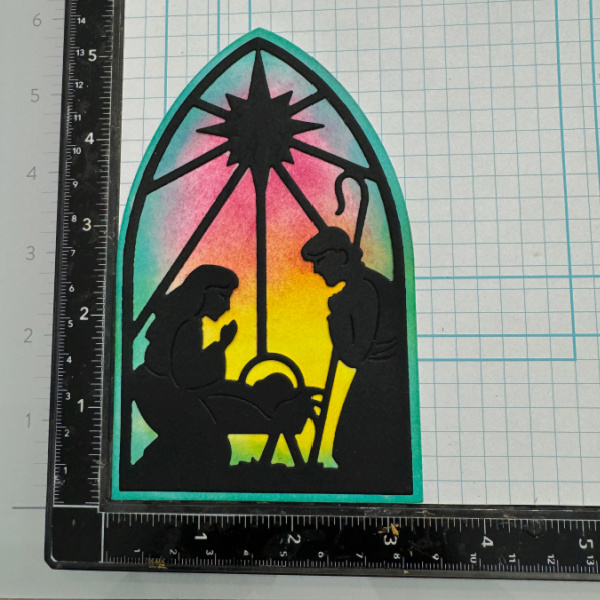
Hello Crafty Friends! It’s Ceal, here. Today I am sharing how I made this faux stained-glass Christmas Card.
Skill Level: Beginner Time: 30 Minutes
Directions:
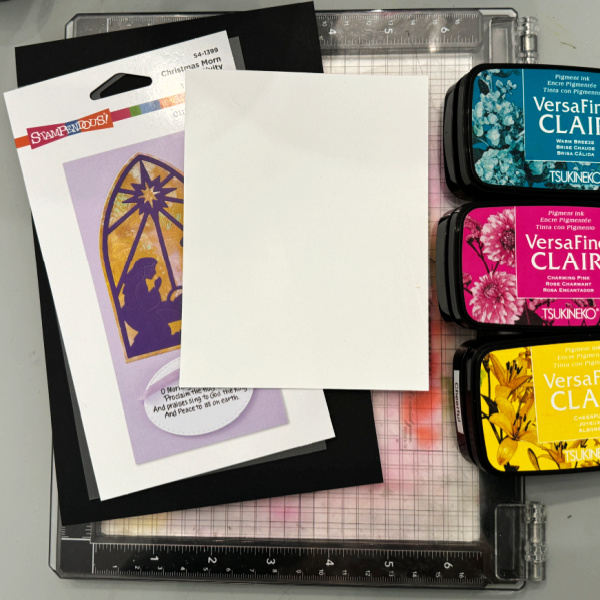
Gather your supplies. You will three inks, Pink, Yellow and Blue. A blending tool, a silhouette die along with black, white and gold cardstock.
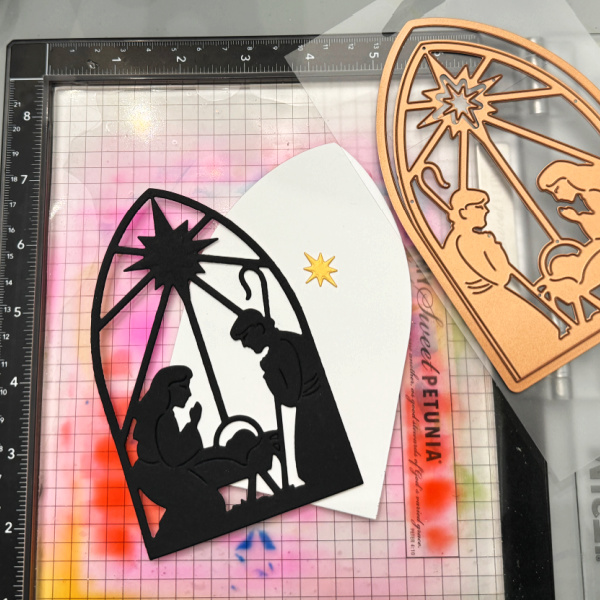
Step 1: Cut the nativity die out of black cardstock, the backer out of white and the star out of the gold cardstock.
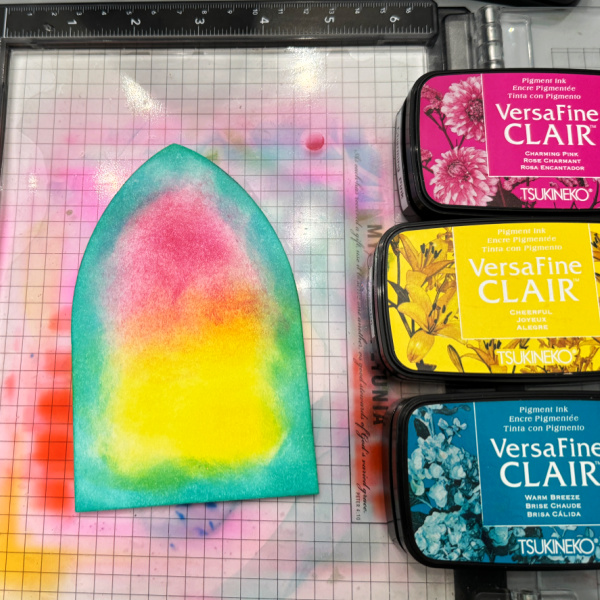
Step 2: On the backer using a sponge or other blending tool, blend the blue around the outer edge of the panel and the pink and yellow inside the blue.
Step 3: Line up the nativity over the backer and adhere it down with On Point glue. As you can see in the photo above, I use the corner of the MISTI to help me line things up.
Other Products: Misti 2.0 – My Sweet Petunia Nativity Die – Stampendous White Cardstock – CutCardStock Black Cardstock – Hero Arts Gold foil cardstock – Erin Lee Creative
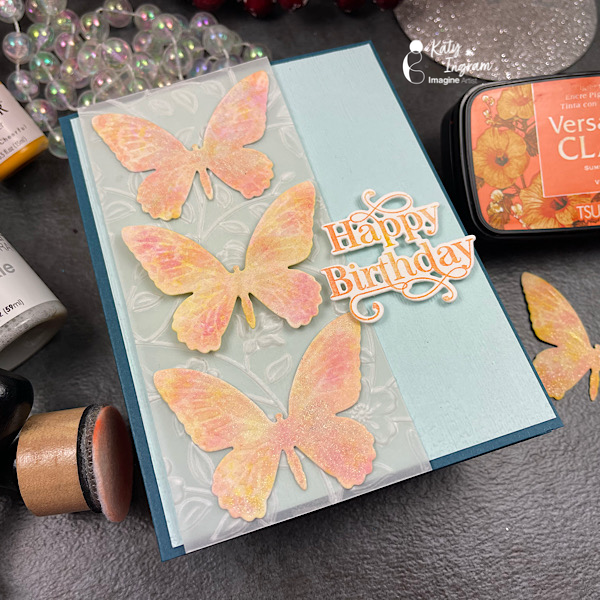
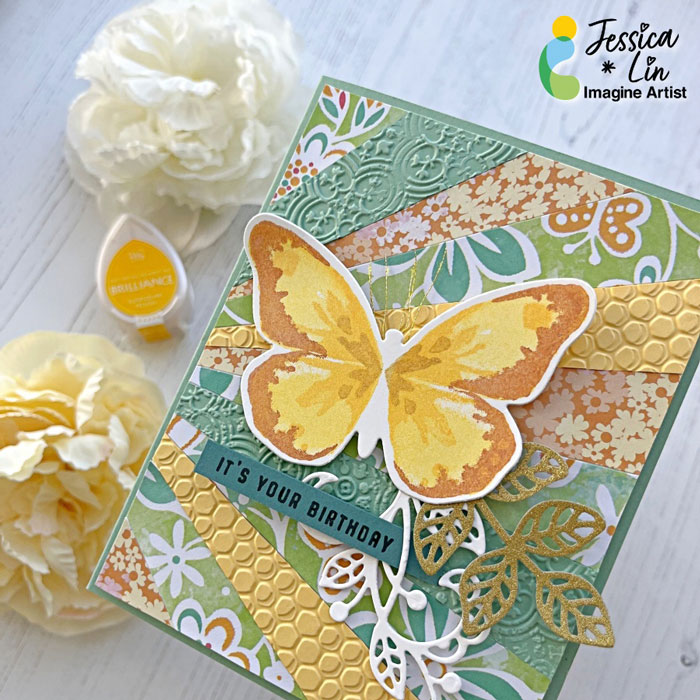
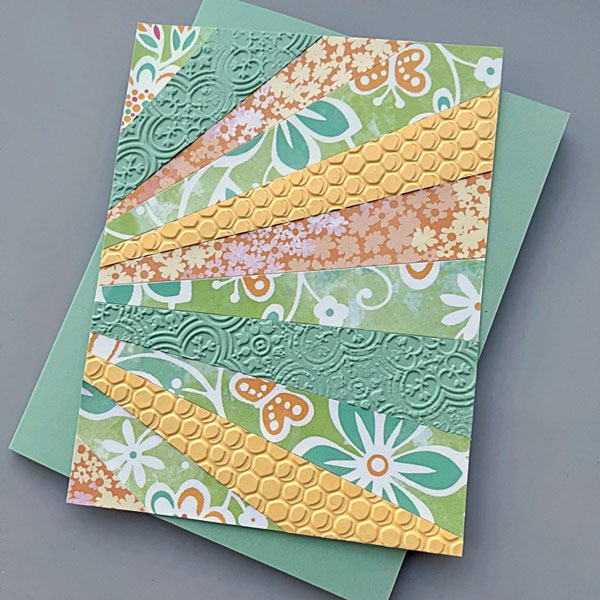
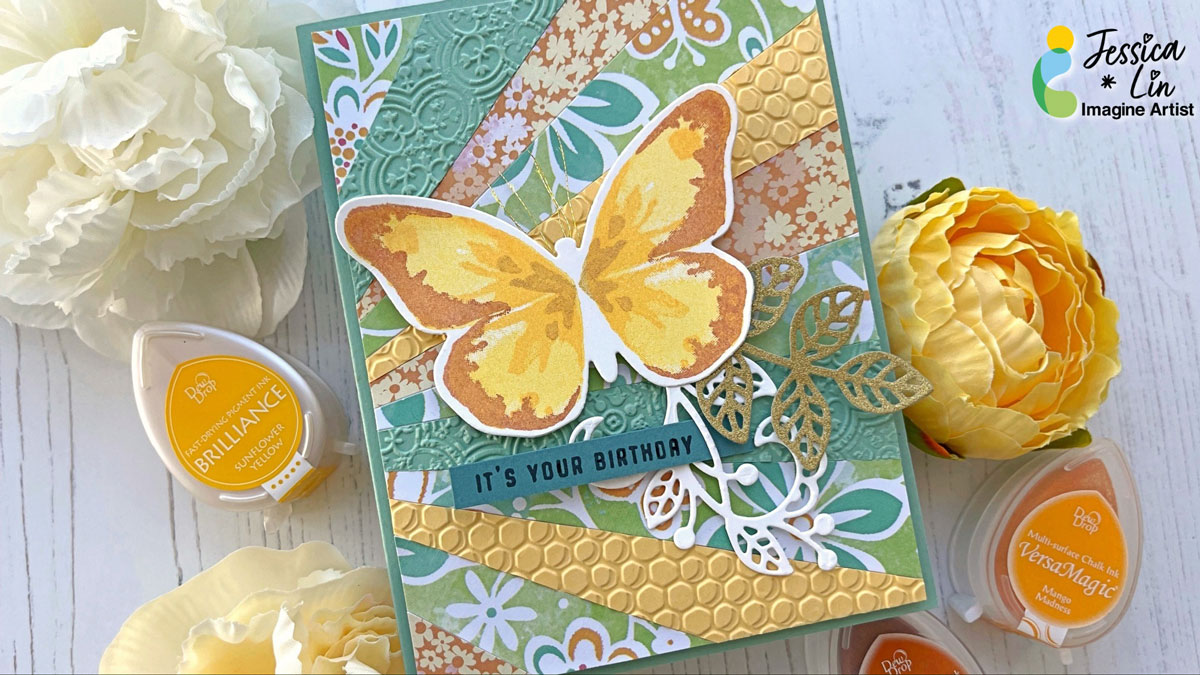
Hi everyone! It’s Jessica here and I’m excited to share a patterned paper trick with you today. If you like to save scraps of pretty paper, but are unsure how to use them, I highly recommend trying out today’s technique!
Skill: Intermediate Time: 30 minutes
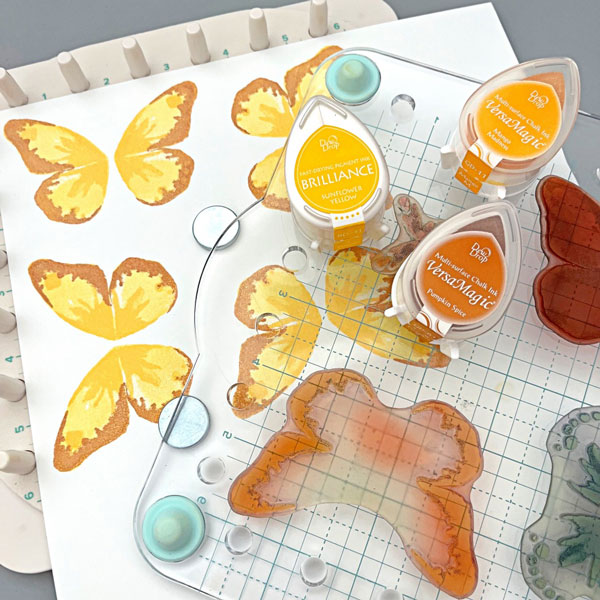
Step 1: The focal image of today’s card is this butterfly stamp from Watercolor Wings. It’s one of my favorite layering stamp sets of all time. I used Brilliance Sunflower Yellow for the base layer. Then I stamped the second and third layers with VersaMagic Mango Madness and Pumpkin Spice. I did add a fourth layer using Brilliance Galaxy Gold as well (not pictured).
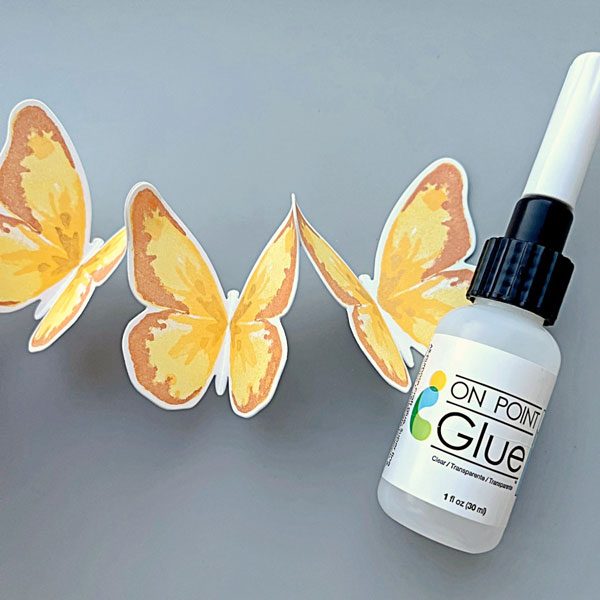
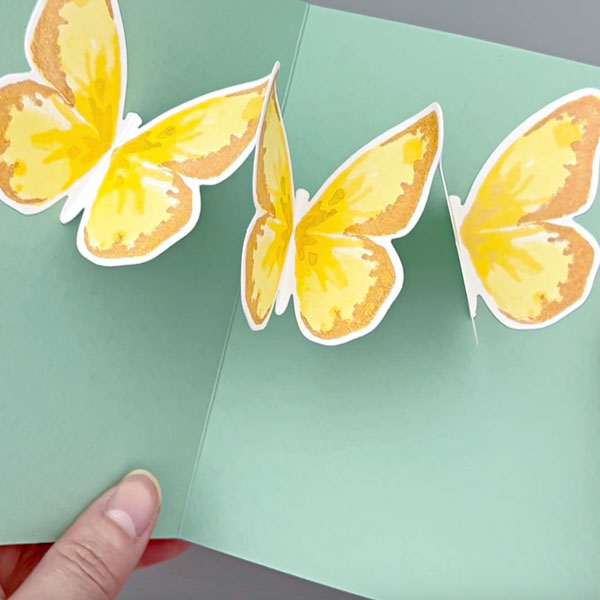
Step 2: Die cut the butterfly images with Bold Butterfly dies. Then adhere the tips of the butterfly die cuts with On Point Glue. This would create a string of butterflies for a surprise pop up mechanism inside the card (next photo).
Step 3: To make the patterned paper background for the card front, trim your patterned paper scraps to 1 x 6’’. Then cut each piece diagonally to create long, triangular shapes. I used Stick It adhesive to cover the entire background panel and adhered the patterned paper pieces on top. However, you could use whichever adhesive you prefer. Once the entire panel is covered, trim off the hanging pieces on the edges.
Step 4: Lastly, adhere the last butterfly along with any additional foliage die cuts. And the card is complete!
– I’ve been experimenting with 91° Isopropyl Alcohol to blend inks and decided to see what would happen with Kaleidacolor Ink. I’m totally thrilled with the results!
Skill Level: Beginner to Intermediate
Time: 1.5 hours
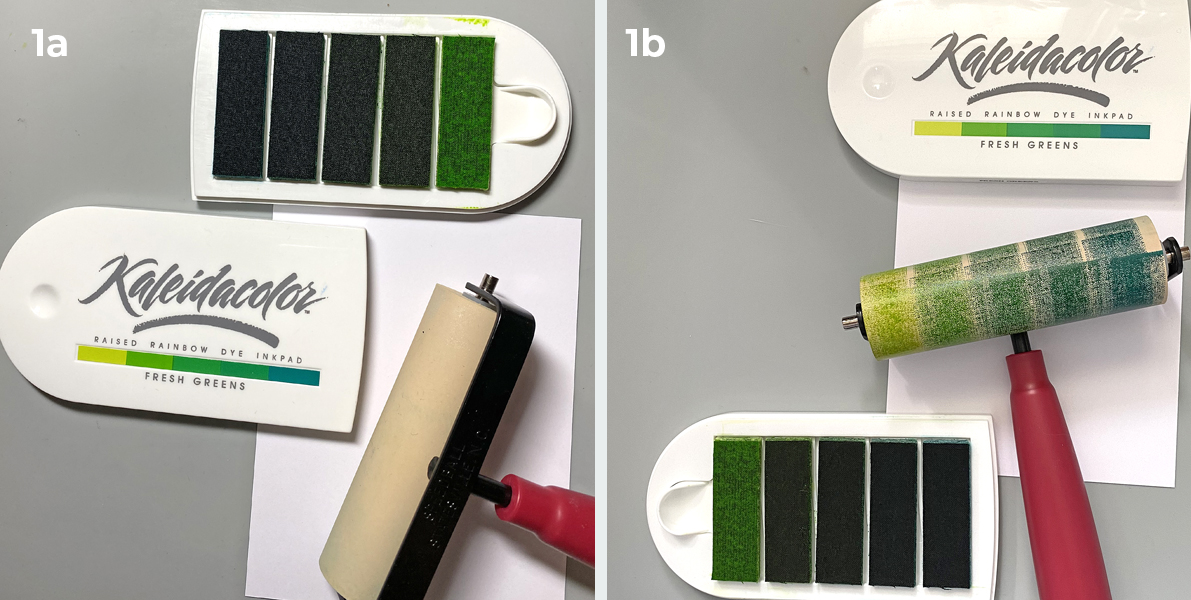
Step 1.
Keeping the Kaleidacolor’s ink pads separate, apply ink to the brayer.
Step 2:
Use the brayer to roll the ink onto one side of a 4.25” x 5” panel of white cardstock. Re-ink the brayer if necessary. Notice that the lightest green is in the center of the paper.
Flip the paper 180° and repeat. It’s always a good idea to create more than one panel of inked cardstock!
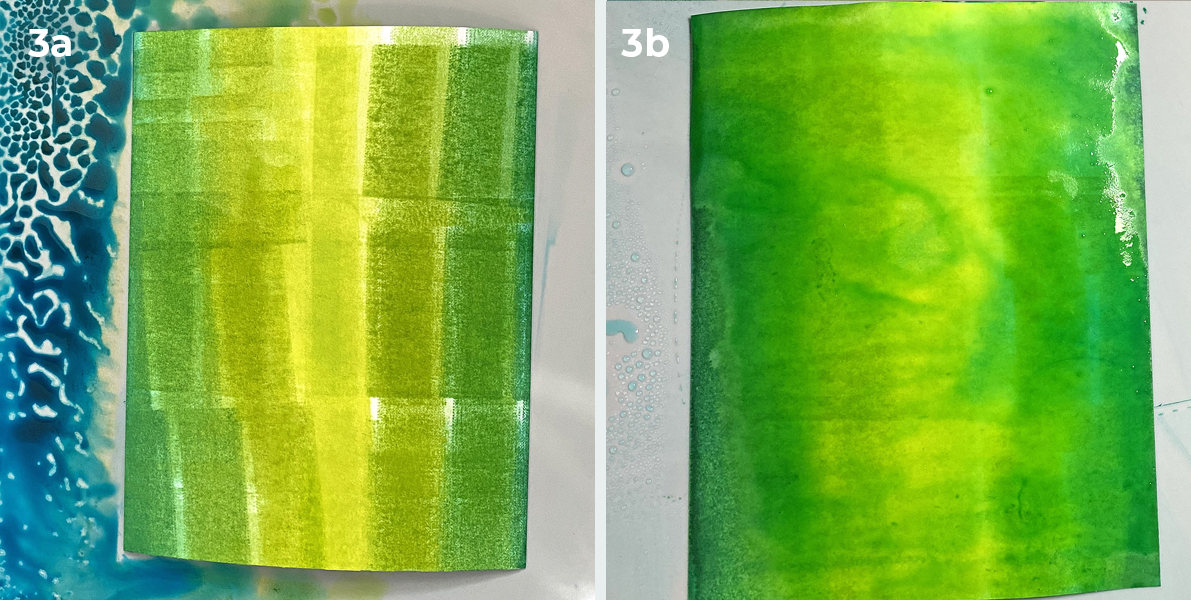
Step 3:
Spray the inked cardstock with Isopropyl Alcohol until the paper is completely saturated. Tilt the paper so that the alcohol moves the ink around. Note that whereas the paper is wet, it is not pilling!
Safety Warning: Be sure to have good ventilation when using any kind of solvent!
Pro Tip:
Place a piece of white seam binding or ribbon into the puddle of ink to create perfectly matching trim!
Step 4:
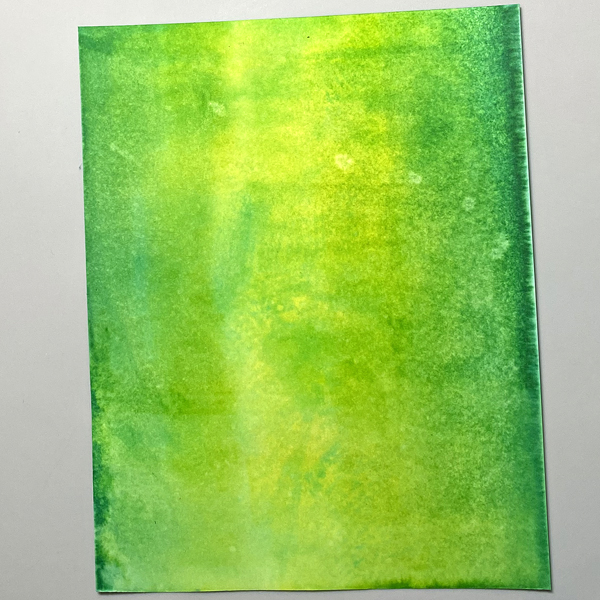
Mist the cardstock with water to add white speckles and blotches. Heat set.
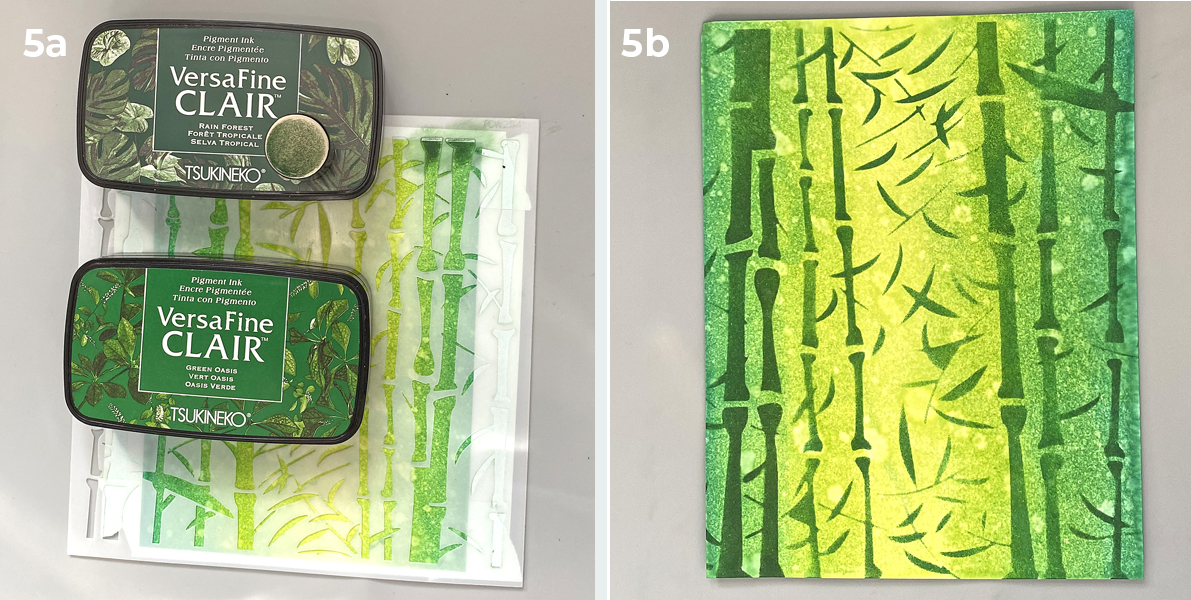
Step 5:
Tape the inked cardstock to t he back of the bamboo stencil.
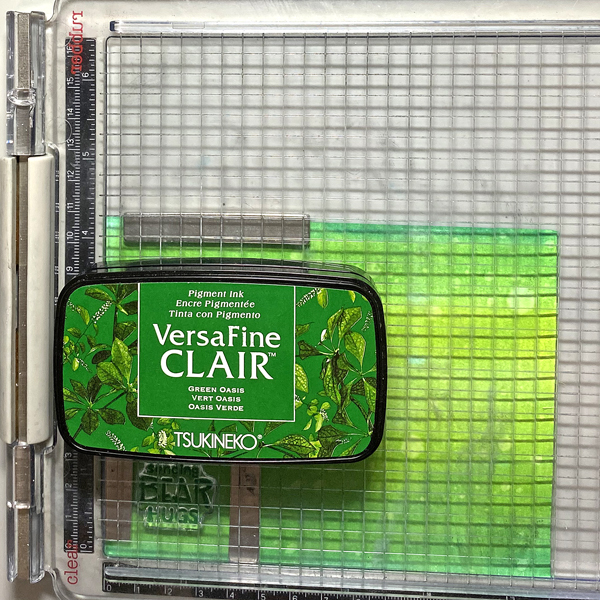
Sponge Rainforest and Green Oasis VersaFine Clair Inks over the stencil onto the inked cardstock. Heat set.
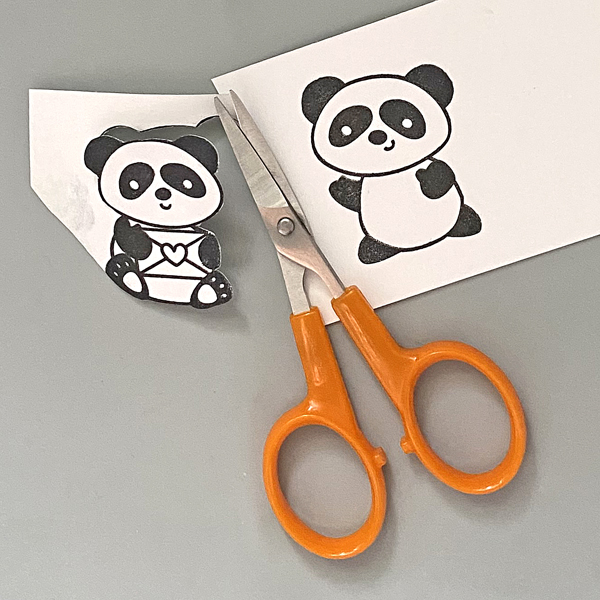
Step 6:
Use Nocturne VersaFine Clair Ink to stamp two of the pandas from the Pandamonium Clear Stamp Set. Heat set.
Step 7:
Fussy-cut both pandas.
Step 8:
Smoosh Rose Bud, Angel Pink, Summer Sky, and Dandelion Dew Drop Inkpads onto a craft mat. Mist with water. Use a fine paintbrush to color the pandas.
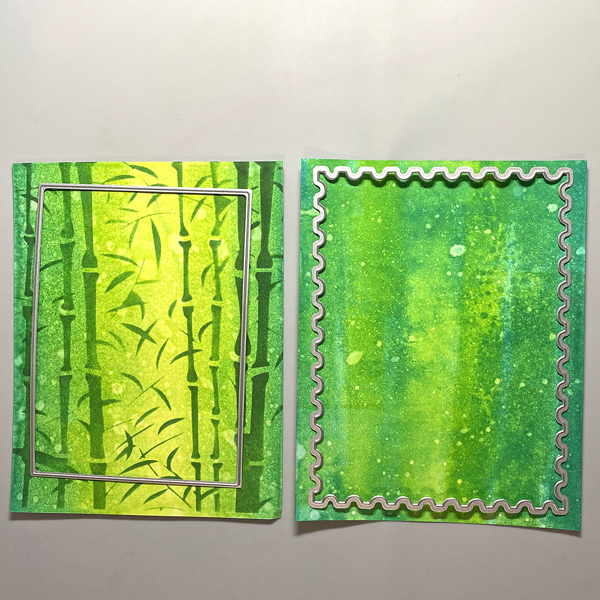
Step 9:
Use a plain rectangle and a postage edged rectangle dies to cut inked panels.
Step 10:
Place a piece of paper tape across the bottom of the stenciled cardstock.
Heavily sponge Rain Forest VersaFine Clair Ink below the tape to cover the stenciling. Use the ink to edge the piece as well.
Step 11:
Use Green Oasis VersaFine Clair Ink to stamp the sentiment.
Step 12:
Use a Postage Edged die to cut the sentiment.
Step 13:
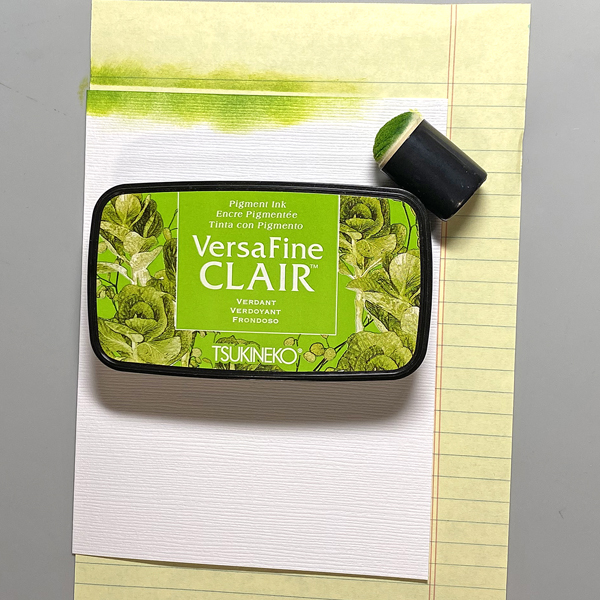
Create an A2 card from Avalanche cardstock. Apply Verdant VersaFine Clair Ink around the edges of the white cardstock. VersaFine Clair Ink works really well with textured cardstock!
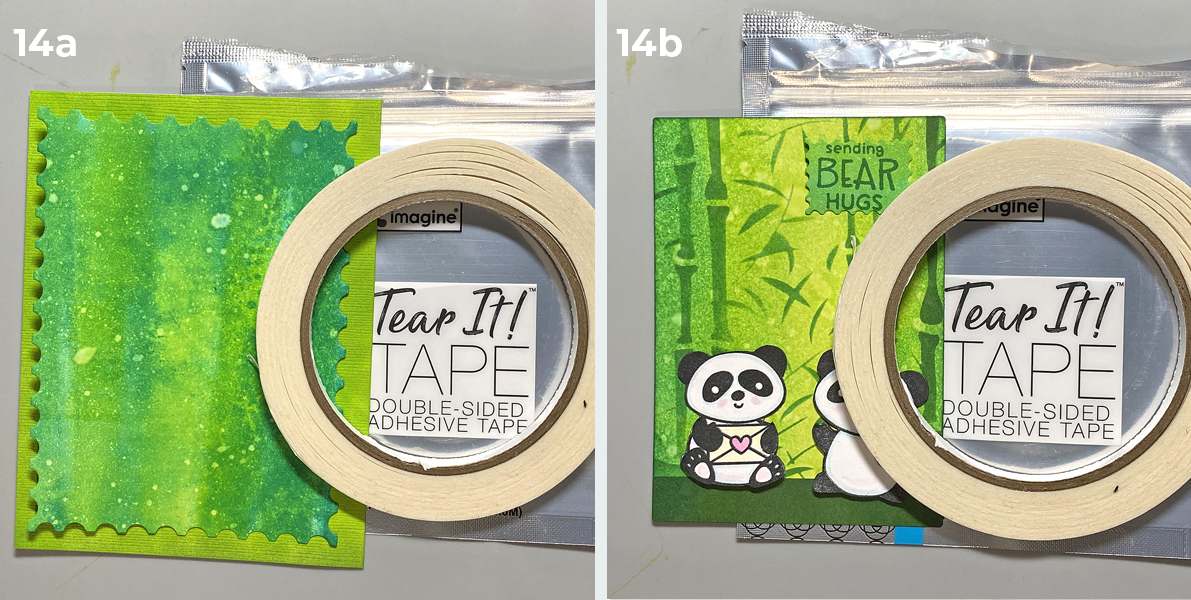
Step 14:
Use Tear It! Tape to attach the postage edged die-cut to the card.
Adhere the pandas and the sentiment die-cut to the stenciled panel, then adhere the stenciled panel to finish the card.