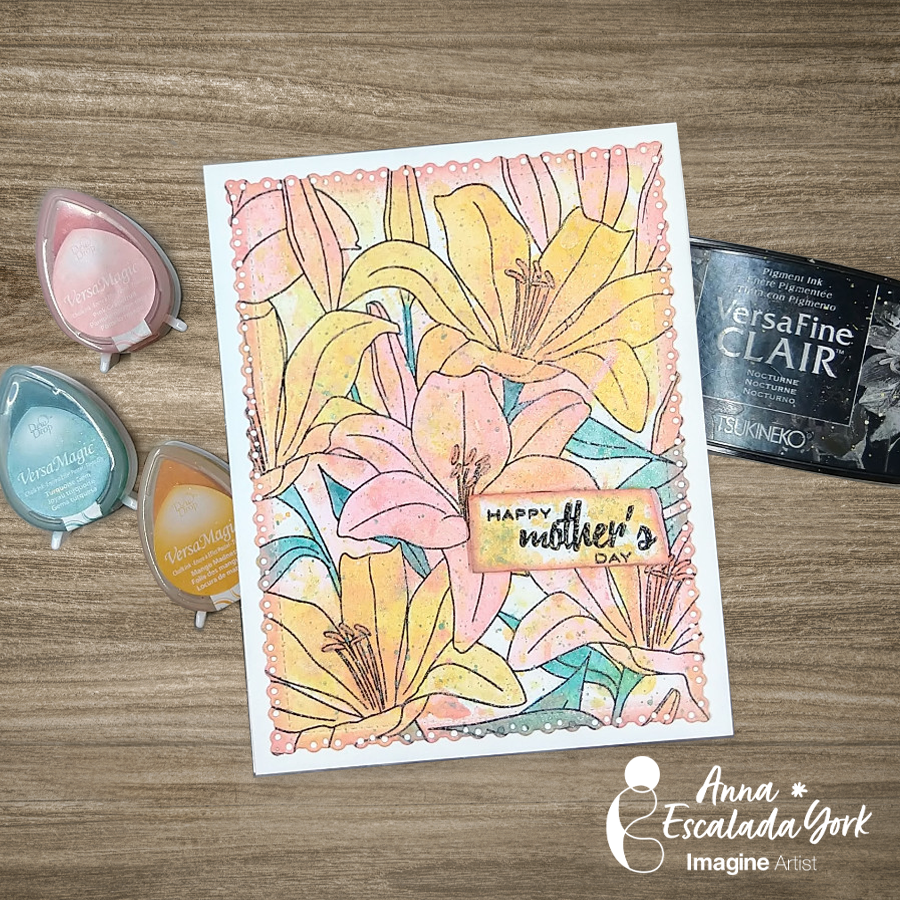
Let’s Make A Happy Mother’s Day Card

By Anna Escalada York

In today’s tutorial, I am sharing the card I made for my mom for Mother’s Day, using sprays and ink
mixed with Sheer Shimmer spray to watercolor the images.

Skill: Intermediate
Time: 1.5 hours

Directions:
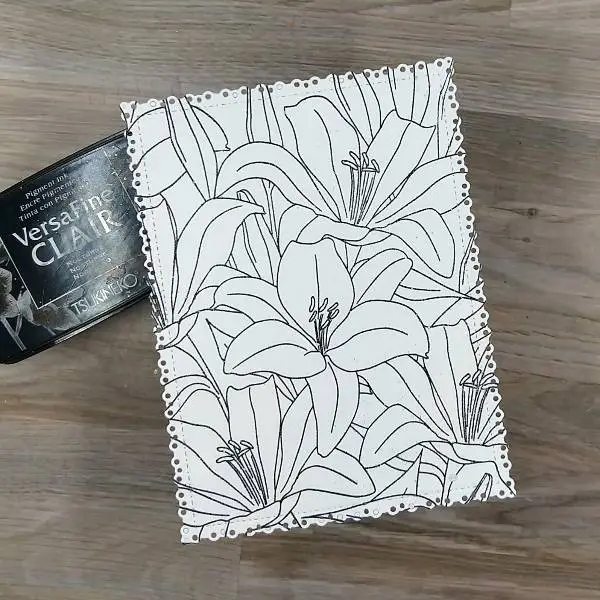
Step 1:
Use a die cut to create a watercolor paper panel and then stamp a large flower stamp with Nocturne VersaFine Clair Ink. Heat emboss with clear embossing powder
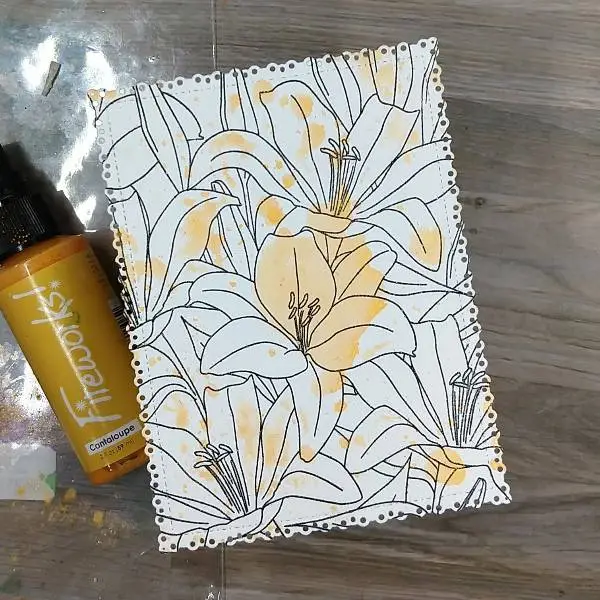
Step 2:
Spray Cantaloupe Fireworks! Spray onto a piece of scrap acetate packaging, and press the
sprayed acetate onto the stamped panel, making sure to get spray on multiple parts of the
stamped panel. Let dry.
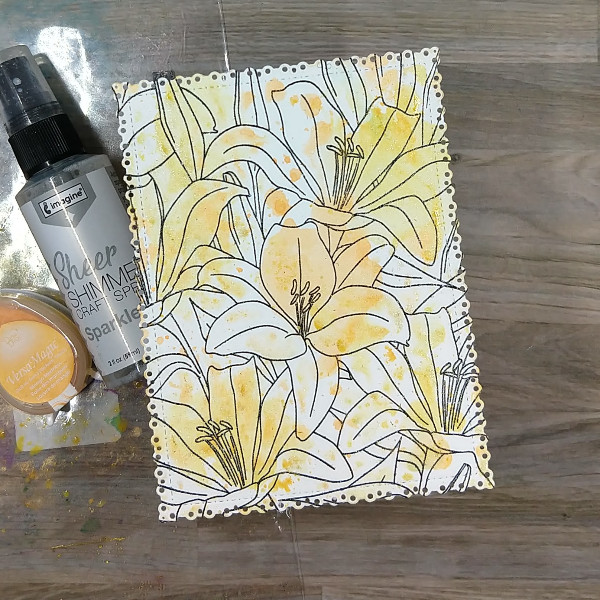
Step 3:
Press the Mango Madness VersaMagic Chalk Ink pad onto the acetate packaging. Then spray
Sparkle Sheer Shimmer Craft spray onto the ink to give it a watery consistency. Then press this
color of yellow ink onto the stamped panel to add interest and a variety of colors. Let dry.
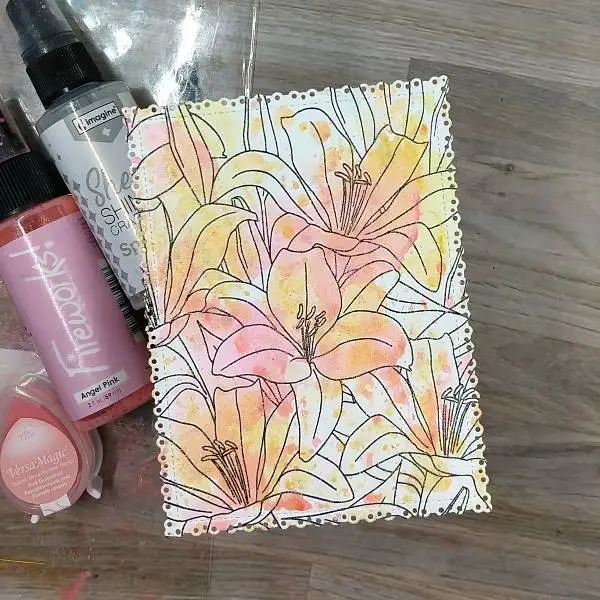
Step 4:
Repeat the process with pink inks. Spray Angel Pink Fireworks! Spray onto the acetate
packaging and press the packaging onto the stamped panel. After the spray dried, press Pink
Grapefruit VersaMagic Chalk Ink onto the acetate and spray it with more of the Sparkle Sheer
Shimmer Craft spray and press that onto the stamped panel as well. Again, let dry.
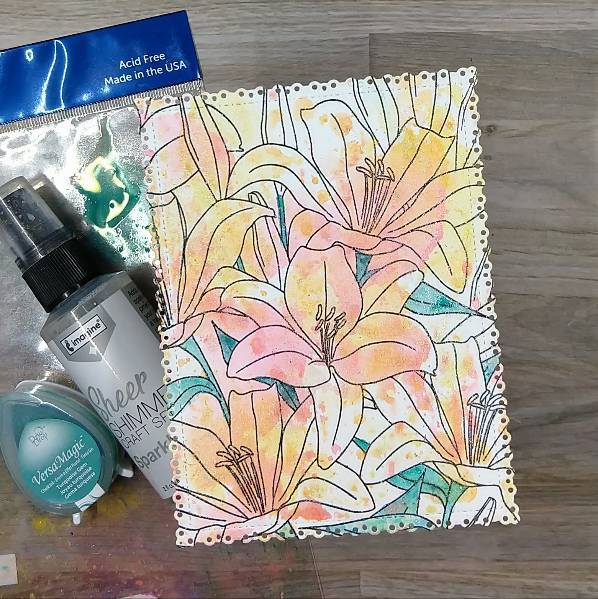
Step 5:
Press the Turquoise Gem VersaMagic Chalk Ink pad onto the acetate packaging and spray the ink with more of the Sparkle Sheer Shimmer Craft Spray to create a watercolor consistency. Then use a thin paintbrush to paint the leaves and stems of the flowers turquoise. Let dry.

Step 6:
Spray more of the Cantaloupe Fireworks! Spray onto the acetate packaging and use the spray to watercolor about half of the flowers yellow. Let dry.

Step 7:
Spray more of the Angel Pink Fireworks! Spray onto the acetate packaging and then paint the rest of the flowers pink. Again let the spray dry.
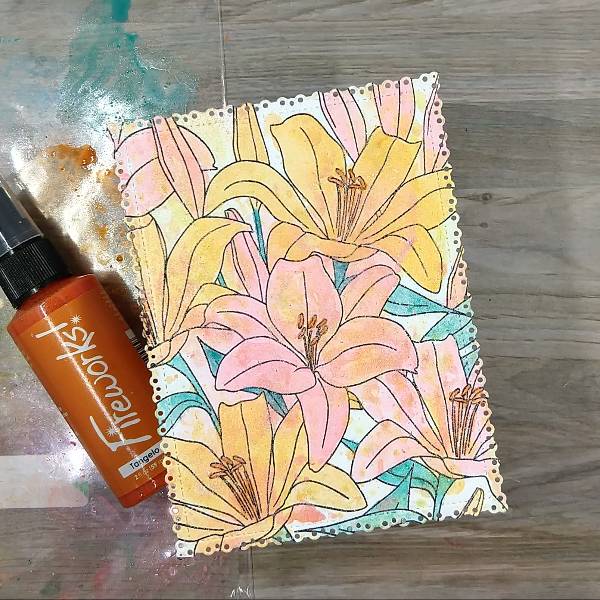
Step 8:
Spray Tangelo Fireworks! Spray onto the acetate packaging, and use it to paint the anthers and filaments (center parts) of the flowers. Let dry.
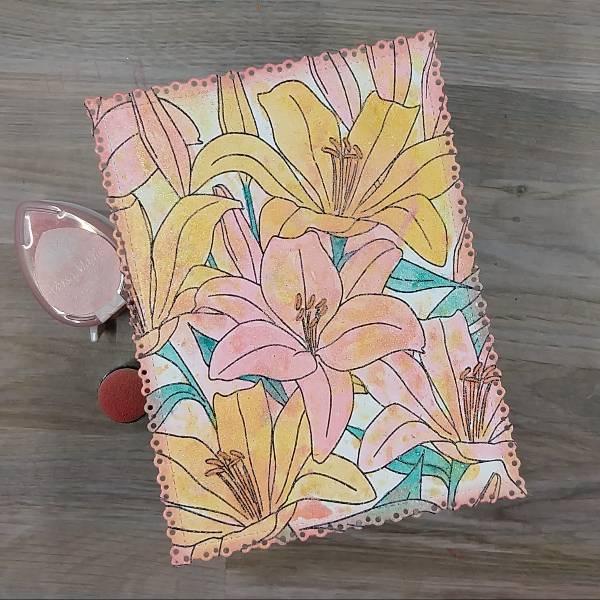
Step 9:
Use an ink dauber to ink blend the edges of the panel with Pink Grapefruit VersaMagic Chalk Ink.
(I ended up touching up the leaf on the bottom edge by painting a second layer of the Turquoise Gem VersaMagic Chalk Ink mixed with water to make sure the turquoise color wasn’t lost.)
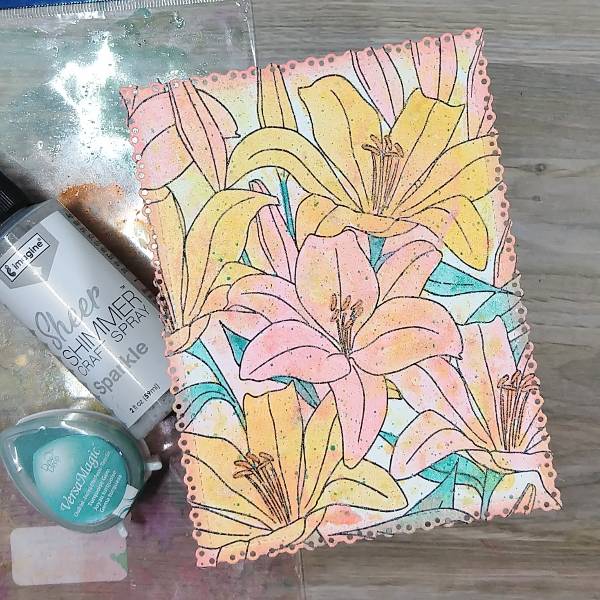
Step 10:
Press the Turquoise Gem VersaMagic Chalk Ink pad onto the acetate packaging and spray the ink with more of the Sparkle Sheer Shimmer Craft Spray to create a watercolor consistency a second time. (In my case, I had leftover from step 5, so I used that.)

Hold a paintbrush saturated with the turquoise watercolor parallel to the panel and tap it against your finger. Repeat if needed and let dry.
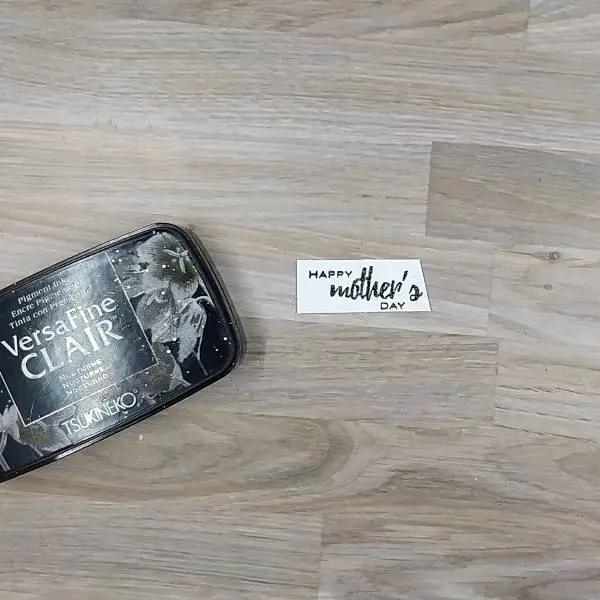
Step 11:
Stamp a sentiment onto a piece of watercolor paper with Nocturne VersaFine Clair ink. Heat emboss with clear embossing powder and trim with scissors or a paper trimmer.

Ink blend around the edges of the stamped layer with more of the Canary VersaColor ink with an ink dauber.
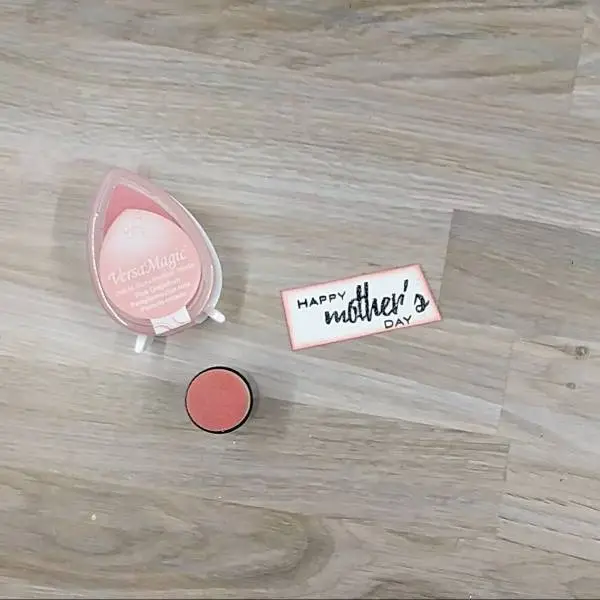
Step 12:
Use an ink dauber to ink blend the edges of the sentiment strip with Pink Grapefruit VersaMagic Chalk ink.

Step 13:
Spray one part of the acetate packaging with Cantaloupe Fireworks! Spray and press Turquoise Gem VersaMagic onto another part of the acetate before spraying it with more Sparkle Sheer Shimmer Craft spray. Alternate pressing the sentiment strip into both colors of spray before splattering the strip with more of the turquoise ink. Let dry.
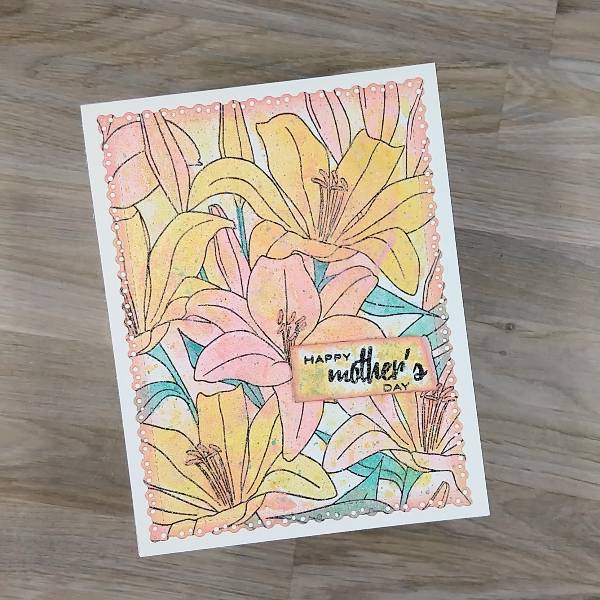
Step 14:
Glue the panel onto an A2-sized white card base and attach the sentiment onto the card with some foam tape for dimension to finish the card.

Craft Supplies

Imagine
• Fireworks! Shimmery Craft Spray – Angel Pink
• Fireworks! Shimmery Craft Spray – Cantaloupe
• Fireworks! Shimmery Craft Spray – Tangelo
• Sheer Shimmer Spray – Sparkle
• VersaFine Clair Ink – Nocturne
• VersaMagic Chalk Ink – Mango Madness
• VersaMagic Chalk Ink – Pink Grapefruit
• VersaMagic Chalk Ink – Turquoise Gem
• Sponge Dauber

Other
• Altenew – Stamp – Extra Special stamp set
• Altenew – Tape – Instant Dimension Foam Tape
• Gina Marie Designs – Die – Pleated Lace Rectangles die set
• The Ton Stamps – Stamp – Lily Fields
• Clear embossing powder Scissors
• Glue

Creative Ways To Use Inks With Dies

By Alison Heikkila

Hello! This is Alison Heikkila. My second video for Imagine this month once again focus on dies and how to use them creatively with inks. We’re making a pretty floral encouragement card, and I hope it gives you some ideas on how to use your dies and inks together.

*Some affiliate links are used in this post. That means that if you shop through these links, I may receive a small compensation, at no cost to you.

Skill Level: Intermediate
Time to Complete: 20-30 minutes

Craft Supplies:


Imagine:
VersaFine Clair: Shady Lane
VersaFine Clair: Morning Mist
VersaMark Ink
Mboss: Violet
Memento Ink: Grape Jelly
Fireworks! Spray: Bamboo Leaves
Tear It! Tape
On Point Glue

Other:
Spellbinders & Simon Hurley: Everyday Foliage
Spellbinders & Simon Hurley: Handwritten Sentiments
Vellum
White Cardstock

I hope this inspires you to make stamps out of your dies. And don’t forget to try double-dipping into embossing powder! The effect is so pretty. Thanks so much for stopping by. Have an inspiring day!

Let’s Make a Pantone Peach Fuzz Colored Card

By Anna Escalada York

In today’s blog post, I will show you how to incorporate sprays and markers to change or
enhance the color of colored cardstock to help you stretch your supplies.

Skill: Advanced
Time: 2 hours

Directions:

Step 1:
Color a piece of teal or green patterned paper with green markers–College Ivy Memento marker
and Emerald Fabrico marker.

Step 2:
Die cut the colored patterned paper to form the leaves of the flower die cut.
Optional step: Spray the colored patterned paper with Sparkle Shimmer Spray.

Step 3:
Spray a die cut panel of watercolor paper with Angel Pink and Cantaloupe Fireworks! Sprays.
After it dried, I sprayed both sprays again. This combination of the two colors almost achieved
the peach fuzz color.

Step 4:
Using a piece of peach cardstock, die cut the small flowers for the floral die cut three times.

Step 5:
Stamp Pink Shimmer Delicata ink onto the flowers using a stamp. (On the card, you can see a
little shine on the flowers, but it ins’t visible in pictures.)

Step 6:
Add Pink Shimmer and Gold Glitz Delicata Ink onto parts of a large background stamp. Make
sure to leave parts of the stamp uninked (such as the lower left corner of the stamp).
Optional step: Add holographic embossing powder onto the stamped image.

Step 7:
Use Tangelo and Morocco Memento markers to color a smaller stamp and repeatedly stamp
card base to add texture.

Step 8:
Die cut the main sentiment out of more of the peach colored cardstock and the shadow die out
of some peach patterned paper. Spray the sentiment with Sparkle Sheer Shimmer spray and
the shadow paper with Cantaloupe and Angel Pink Fireworks! sprays. After the sprays dry, glue
the two layers together.

Step 9:
Glue the floral die cut pieces together.

Step 10:
Create the matte layer of the card by die cutting a piece of orange patterned paper and then
spraying it with more of the Cantaloupe and Angel Pink Fireworks! Sprays and Sparkle Sheer
Shimmer spray to mute the bold orange color.

Step 11:
Glue the floral die cut and the sentiment onto the upper card base. Trim off the right edge of the
sentiment so that it doesn’t overhang the upper card panel. Then glue the matte (orange) panel
behind the upper panel.

Step 12:
Stamp the sub sentiments with by coloring them again with more Morocco Memento marker.
(The sub sentiments came in 3 parts “I am,” “you are” and “going through this.” Since the last
sentiment wouldn’t fit on the card without a little help, I performed “stamp surgery” where the
stamp was cut before stamping to create two smaller stamps. If you are uncomfortable with this,
you can mask part of the stamp and stamp the sentiment a couple of times if you are trying to
create something similar.)

Step 13:
Glue the card panel onto an A2-sized white card base and then glue a few rhinestones around
the flowers and the sentiment.

Art Supplies

Imagine:

Other:

  • Simon Says Stamp – die cuts – Fine Foxglove
  • Simon Says Stamp -stamp- Document It
  • Honey Bee Stamps – stamp – With Sympathy
  • Honey Bee Stamps – die cuts – With Sympathy
  • HAI Supply – gem embellishments – Crystalline Grapefruit
  • My Colors Cardstock – paper – Peach
  • Echo Park – paper – Easter Tweetings
  • Embossing powder in my stash
  • Patterned paper (orange and teal) in my stash
  • Watercolor paper
  • Scissors
  • Glue

Faux Metal Embossed Tin Foil

By Nancy May

– I love it when I can incorporate everyday items from around the house in my craft room. Today we are paying with tin foil…aluminum foil…kitchen foil…whatever you might call it…We are going to repurpose basic tin foil into faux metal panels, emboss them with embossing folders and see which Imagine products will adhere to the foil to create that beautiful faux metal look. Then we will make a couple of beautiful cards

~Nancy

Skill: Intermediate

Time: undetermined

Art Supplies

Imagine 

• Craft Mat

• IrRESISTible Spray

– Copper

– Bronze

– Bamboo Leaves

– Love Letter

• Fireworks! Shimmery Craft Spray

– Desert Sand

– Tuxedo Black

– Potter’s Clay

– London Fog

• On Point Glue

• Tear It! Tape

Other 

• Sizzix/Stampin’ Up! – Tin Tile Embossing Folder

• Darice – Quatrefoil Embossing Folder

•Simon Says Stamp – Scandinavian Embossing Folder

• Spellbinders – Raven Embossing Folder

• Simon Says Stamp – Layered Pumpkin Wafer Die

• Ideology – Halloween 2022 Backdrops

• Pinkfresh Studio – Alphabet Dies

•     Glassboard Studio: https://shrsl.com/462kl

  **Use code Handi20

Thorny Rose – Trick or Treat Card

By Alison Heikkila

~Greetings! Alison Heikkila here. Today I have my latest video for Imagine, and I am making it part of my Halloween series. I broke out the Fireworks! Shimmery Craft Spray again (I love that stuff!) and I experimented with a technique idea I had. Did it work? You’ll have to watch the video to find out!

*Some affiliate links are used in this post. That means that if you shop through these links, I may receive a small compensation, at no cost to you. For more information, please see my Affiliates page, where I also have some coupon codes.

Skill Level: Intermediate
Time to Complete: 30-40 minutes

Supplies:
Imagine:
Fireworks! Shimmery Craft Spray in Rhubarb Stalk and Lady Bug
VersaFine Clair Ink in Nocturne
VersaMark Ink
Memento Markers in Rhubarb Stalk, Love Letter, Lady Bug, Olive Grove, Bamboo Leaves, London Fog, and Tuxedo Black
Black Embossing Powder

Other:
A Colorful Life Designs: Thorny Vines stencil– Use code AlFan10 to save 10%
Erin Lee Creative: Stay Weird Stamp Set (no longer available)
Ellen Hutson: Hocus Pocus Stamp & Die Combo
Strathmore: Smooth Bristol Cardstock
Bearly Arts Glue
White cardstock

I hope you enjoyed this! Thanks so much for stopping by. Have a spooktacular day!

Inking Techniques to Make Multiple Artist Trading Cards

By LV Handcrafted

Hello friends! This is Linh (or LV Handcrafted on all the socials). In today’s video I’m showing two techniques for creating background panels that you can either cut down or die cut from!  One technique features the ever-so-popular ink “smooshing” and the other features creating monoprinting with a gel plate!  These techniques are fast and easy to make multiples of if you ever need to make the same card en mass. I made a set of 6 Artist Trading Cards (ATC) using one panel for the background and the monoprint for die-cutting.

Skill: Advance

Time: 45 minutes

Supplies Used

Other Products Used