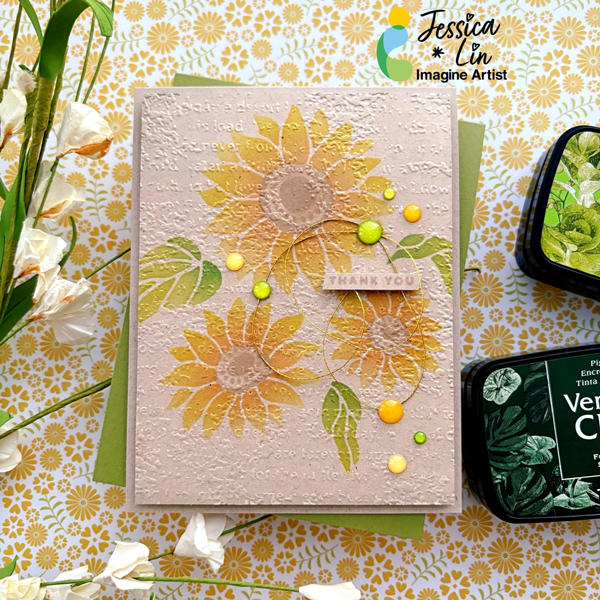
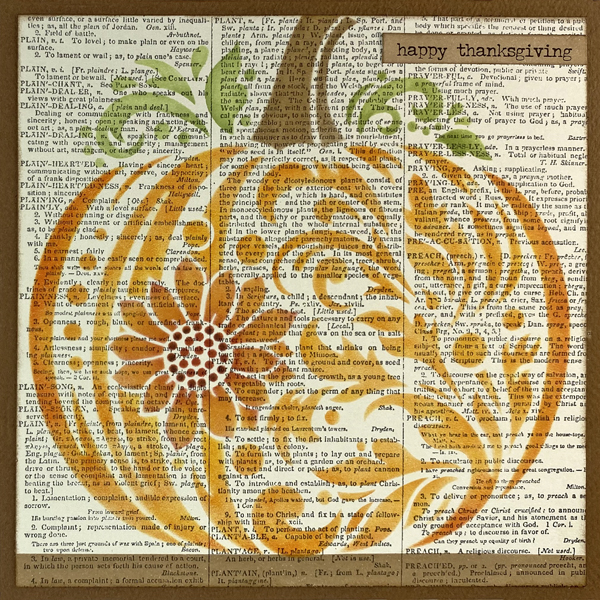
Skill: Beginner Time: 30 minutes Hi everyone! It’s Jessica here. Have you tried blending inks on kraft colored cardstock before? It’s an easy way to create a new look and I love using this trick for fall and Thanksgiving cards. I’ll be using several VersaFine Clair ink pads for today’s project. Let’s see how these color changes on kraft colored cardstock!
Directions:
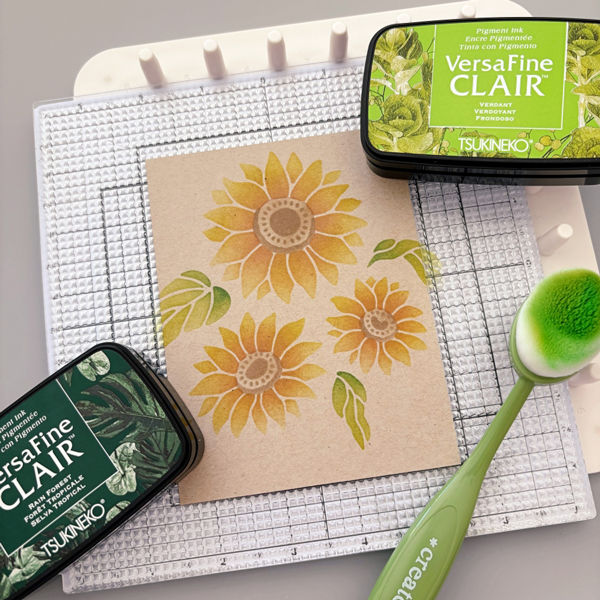
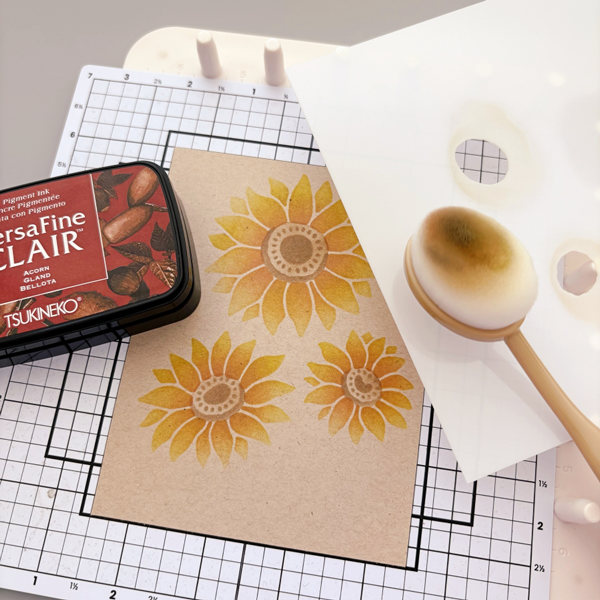
Step 1: Cut a piece of Neenah Desert Storm cardstock to 4’’ x 5 ¼’’. Then ink blend VersaFine Clair Cheerful ink onto Layer 1. The layering stencil set I’m using today is called Abundant Beauty from Stampin’ Up.
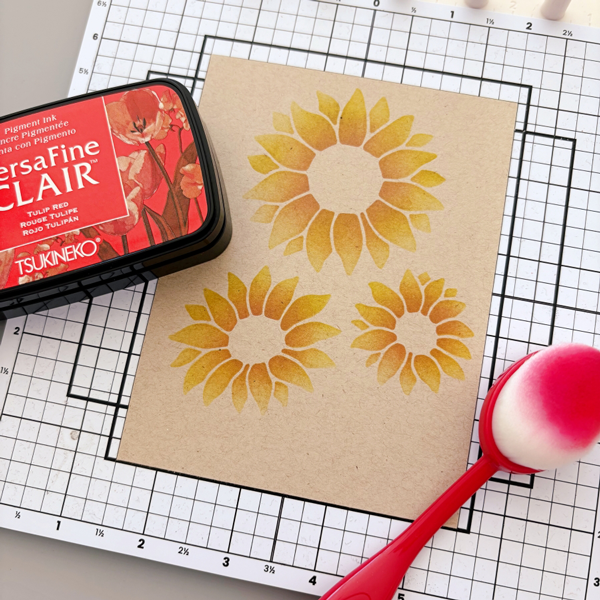
Step 2: Using the same layer of stencil, ink blend the center of the sunflowers with VersaFine Clair Tulip Red ink pad. This is an orangey-red shade on white cardstock, but on kraft cardstock, it has a golden brown undertone.
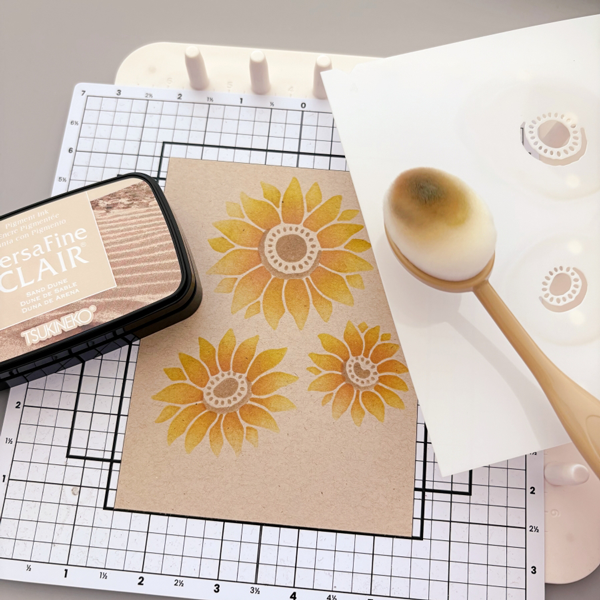
Step 3: Then I ink blended VersaFine Clair Sand Dune on Layer 4 of the Abundant Beauty stencils.
Step 4: For Layer 3, I used VersaFine Clair Acorn. This is a darker brown shade so I ink blended very lightly. You could also use Sand Dune for Layer 3 and Acorn for Layer 4 instead.
Step 5: The leaves images are on Layer 2. I ink blended with VersaFine Clair Verdant and Rain Forest. Usually I would pick Green Oasis to pair with Verdant. However, the kraft cardbase mutes the color saturation of the ink pad, so Rain Forest brings out the dark green contrast better than Green Oasis on kraft cardstock.
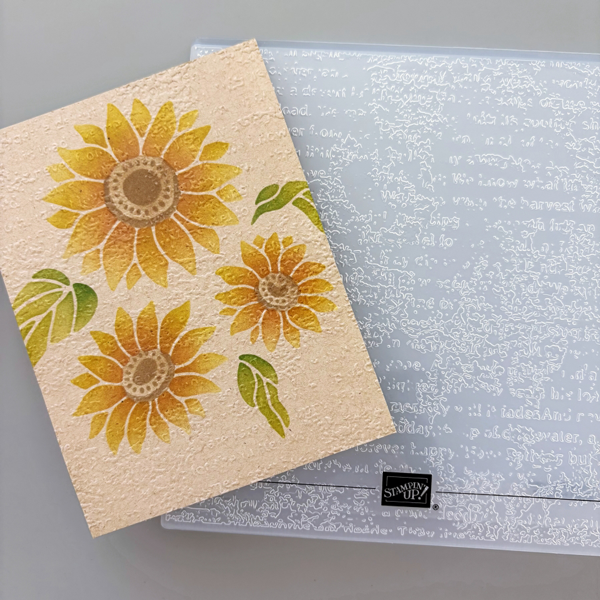
Step 6: To add a little more texture to this simple card, I embossed the stenciled panel with Stampin’ Up’s Timeworn Type embossing folder. Then I embellished the card with Doodlebug Design’s Sprinkles enamel dots and some gold thread and the card is complete!
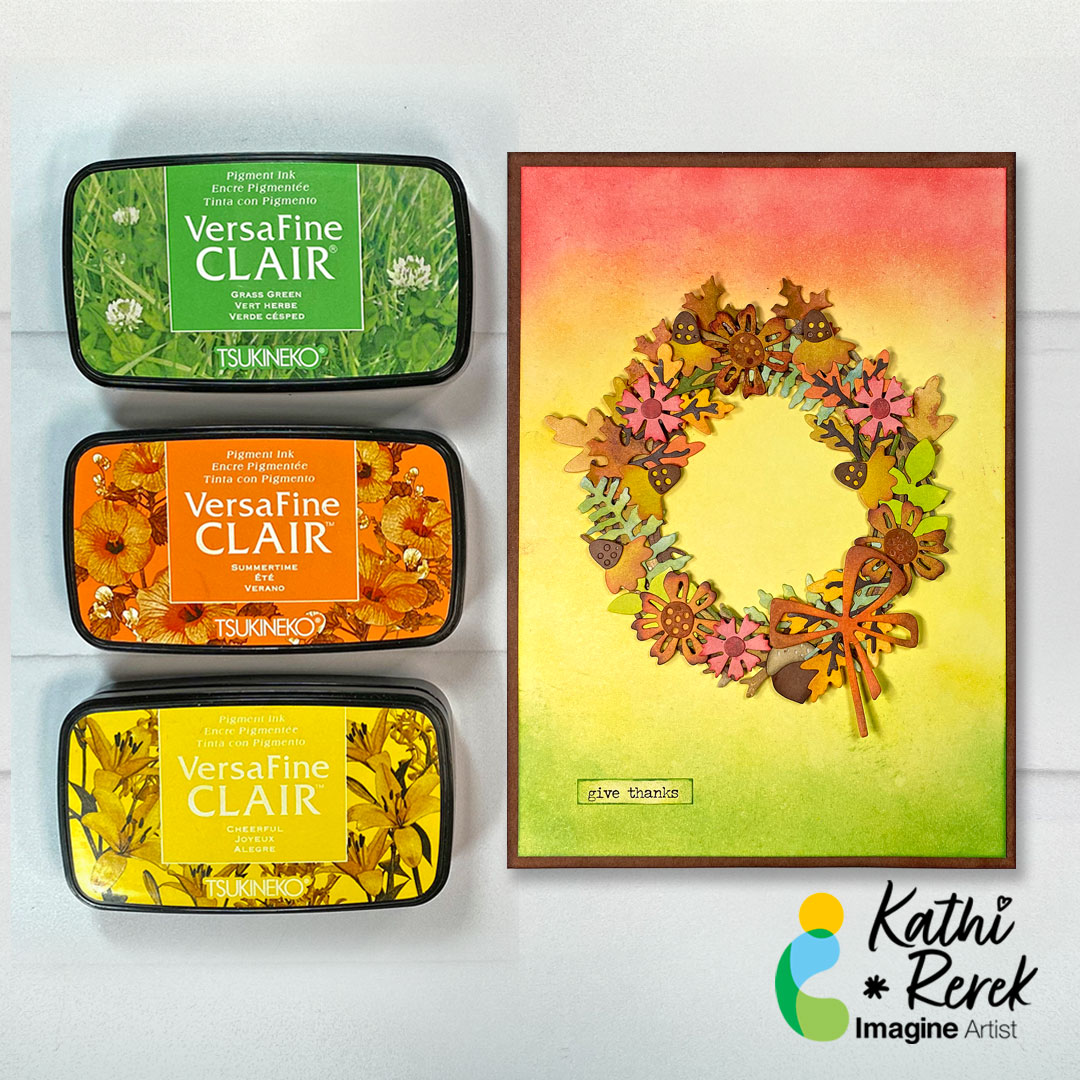
VersaFine Clair Ink is wonderful for coloring die-cuts easily. The VersaFine Clair Inks blend beautifully so you can create new colors to extend their versatility.
The method I used for all of the die-cuts was to place the die-cut(s) onto a Gel Press which will hold them in place while ink is being dabbed onto the die-cut(s) with Sponge Daubers.
I used a separate Sponge Dauber for each color to avoid contaminating the ink pads. I applied the lighter ink color onto the die-cut first and used a tissue to wipe excess ink off of the Gel Press. Darker ink was applied to the die-cut next and the same tissue was used to wipe up excess ink. If more ink was required to color the die-cut or to improve blending, this process was repeated. Photos below will illustrate my method.
Clean the Gel Press with hand sanitizer between colors and die-cuts.
Skill Level: Intermediate Time: 1 hour
Instructions:
Steps 1:
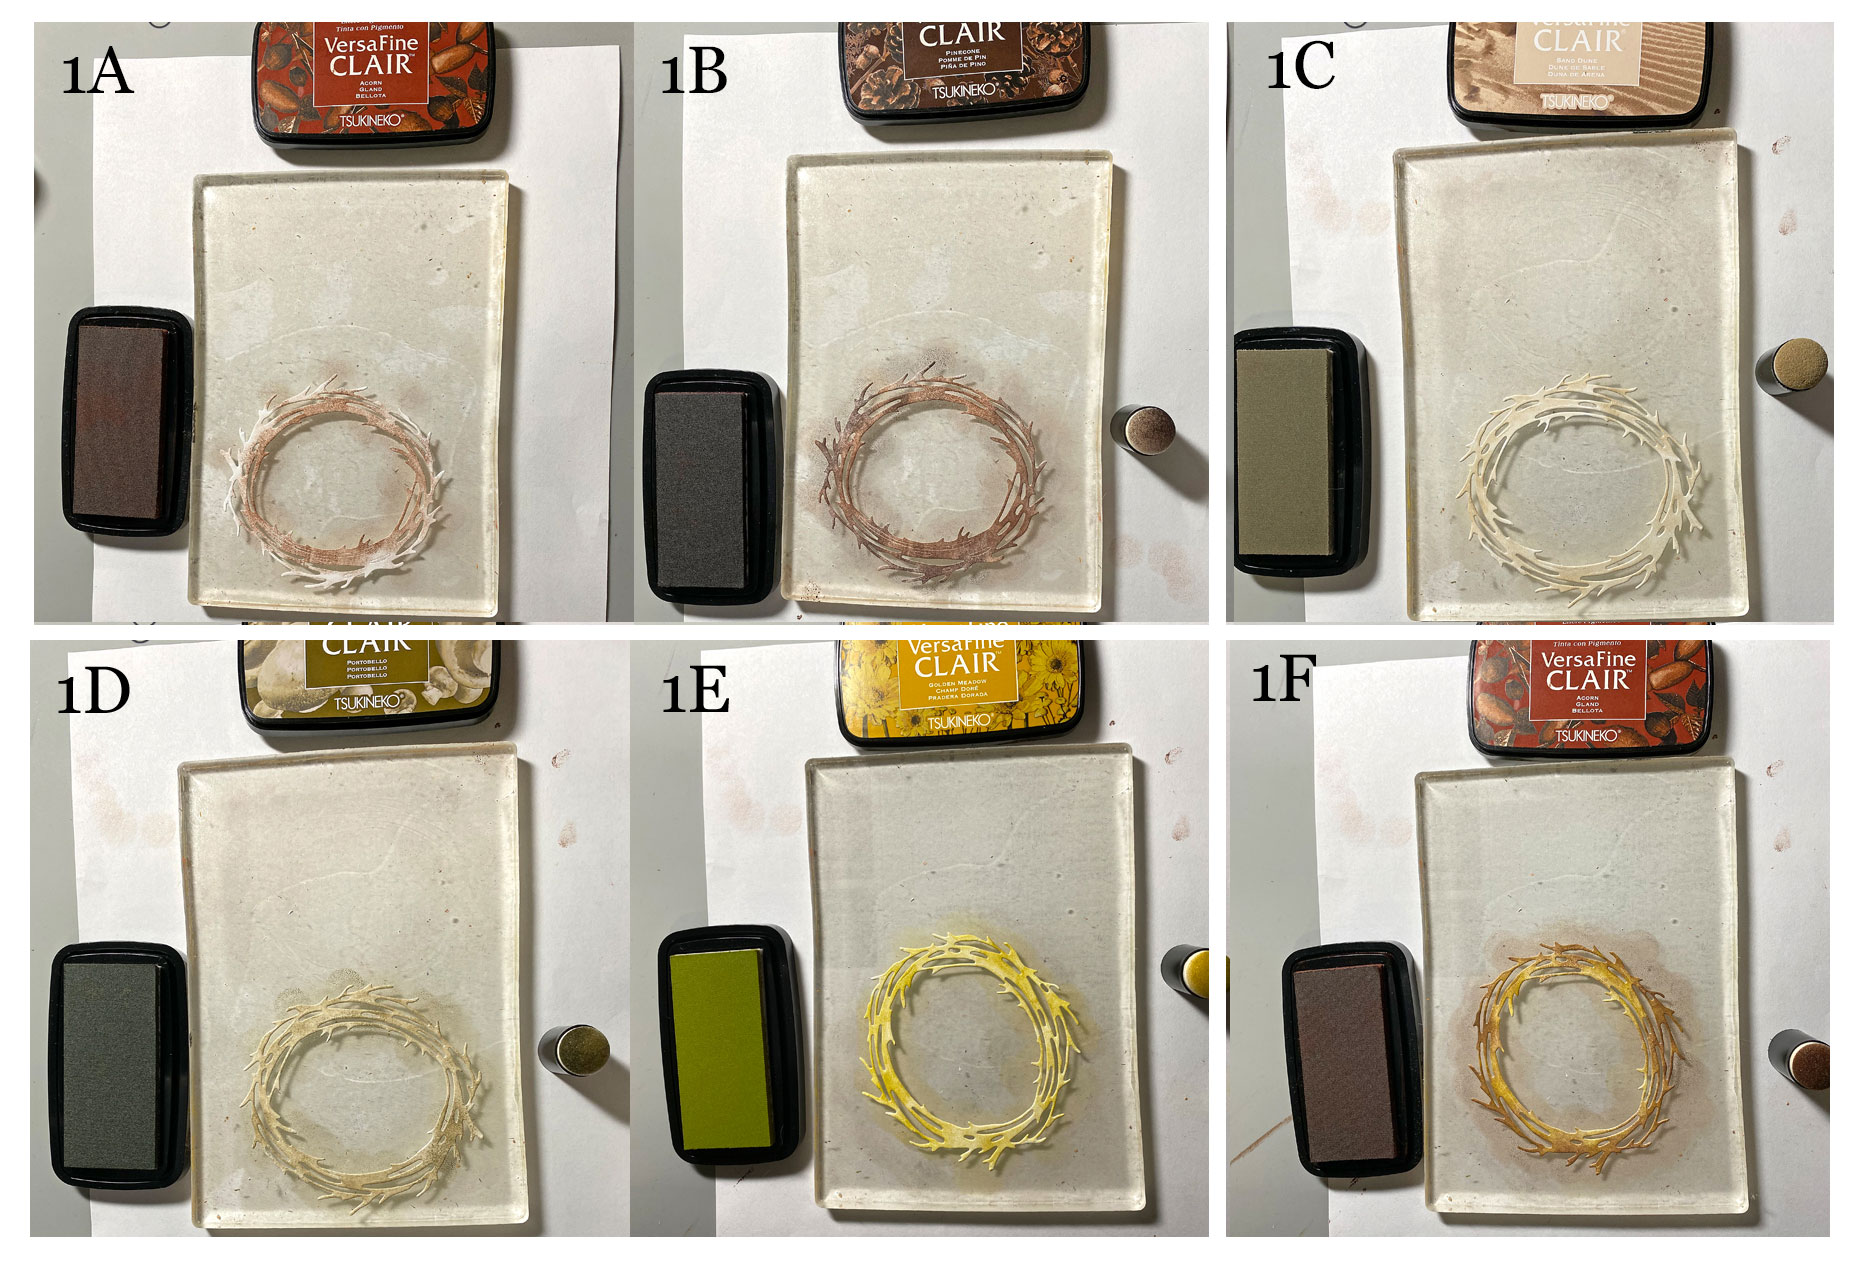
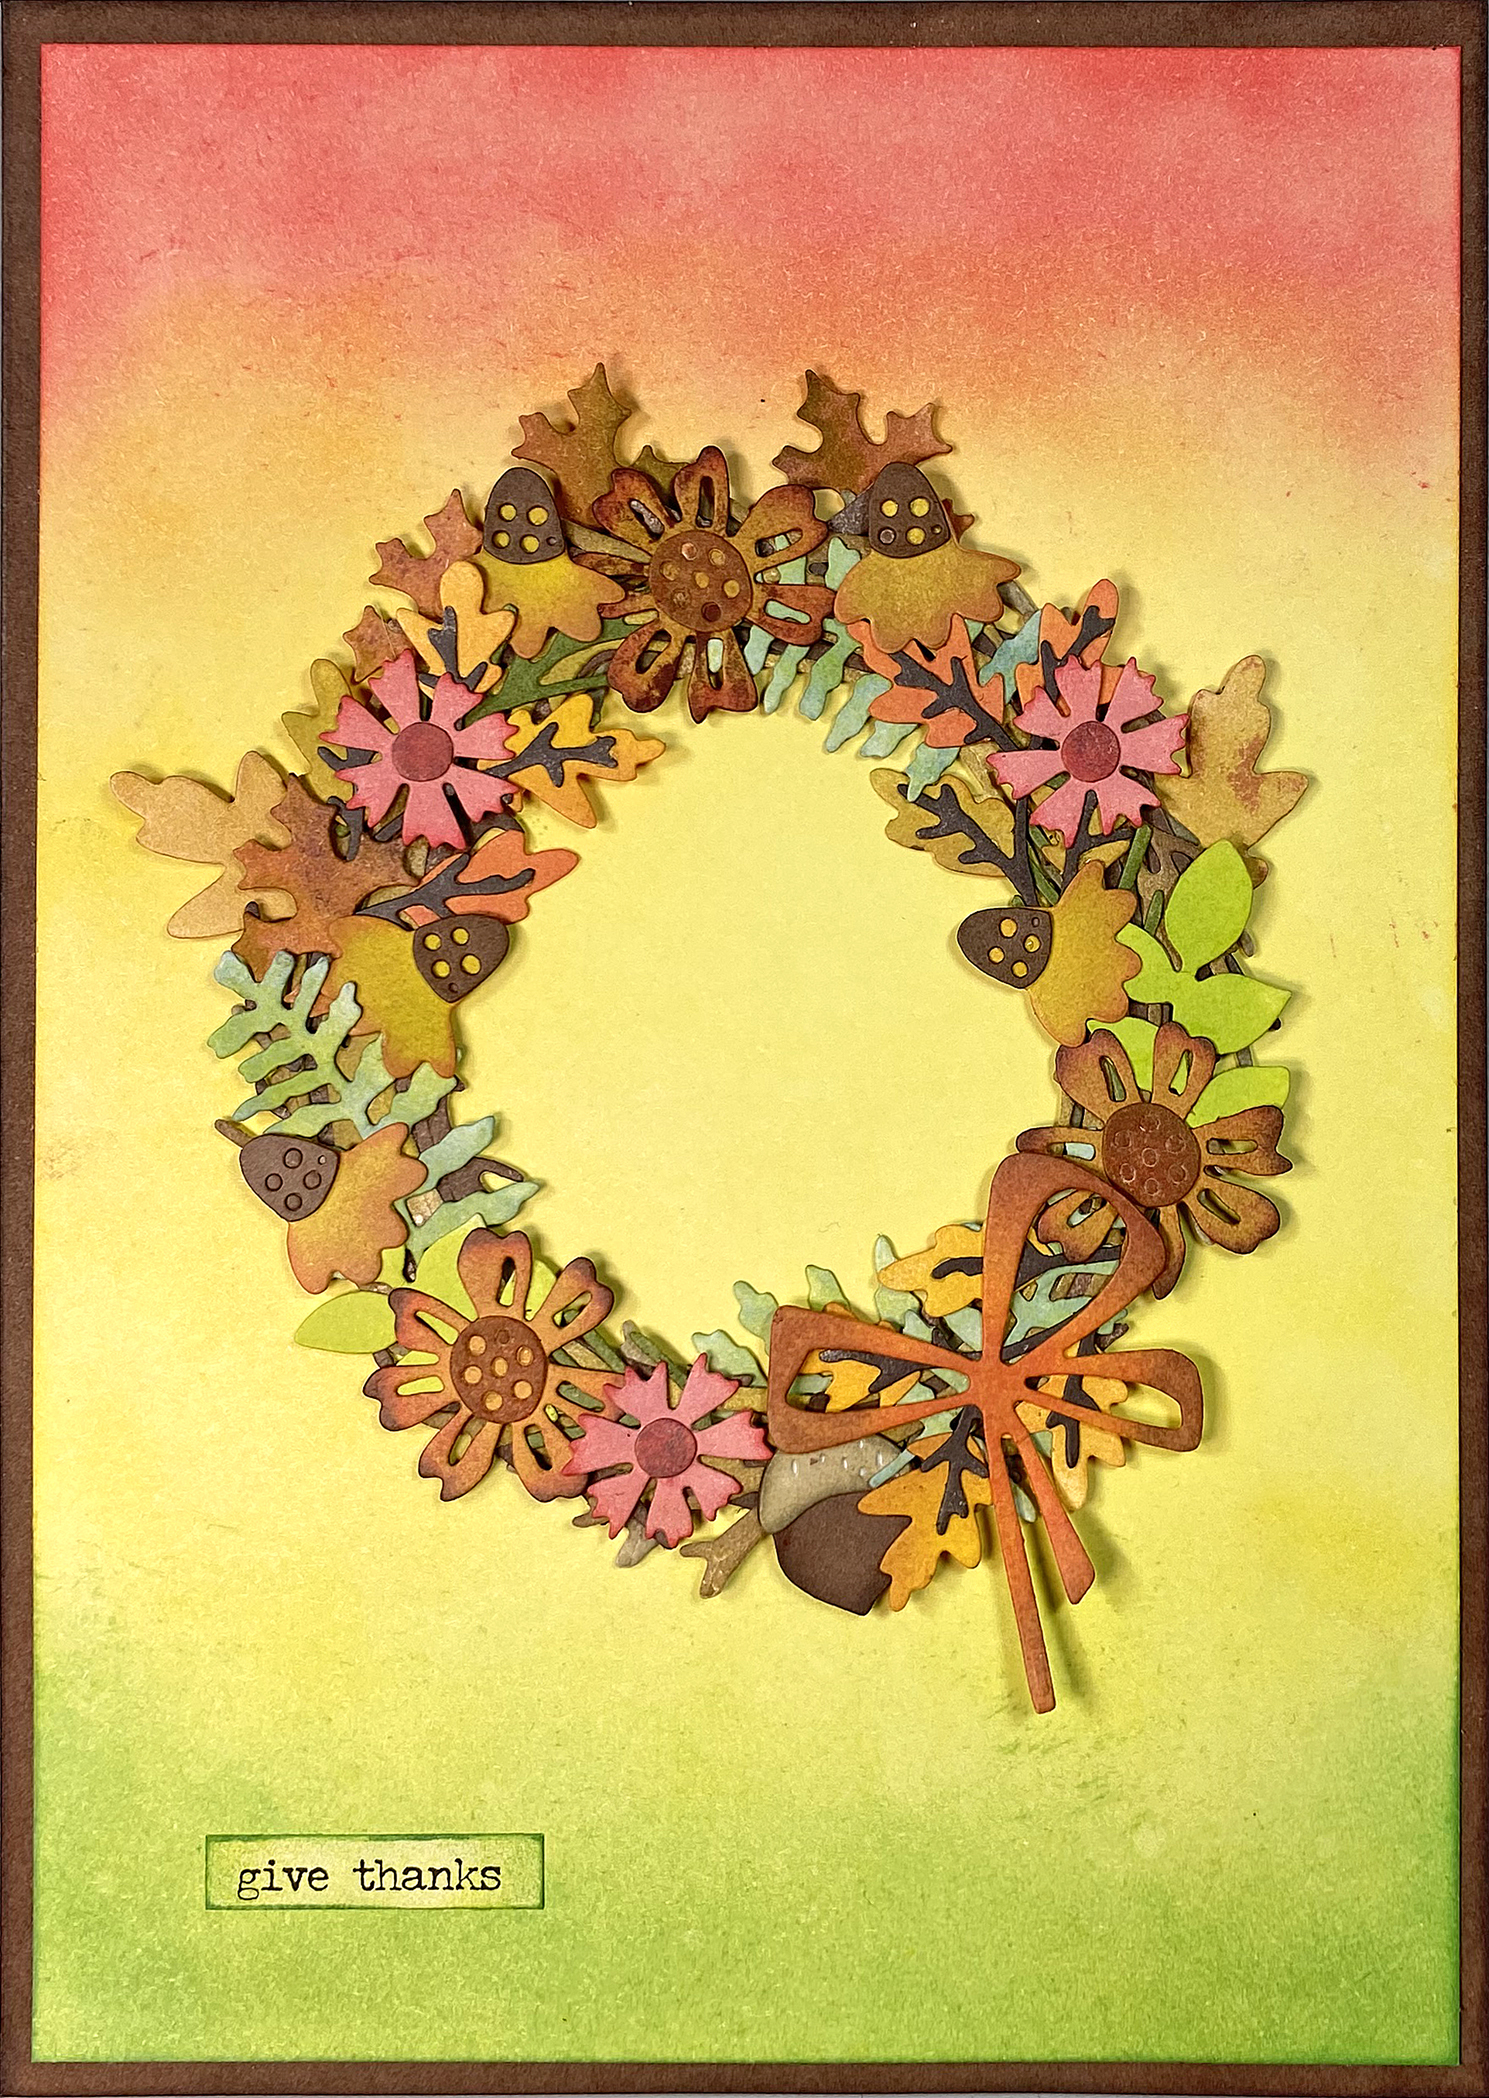
Use all the dies in the Vault Wreath set to cut all the dies from smooth white cardstock at least three times.
Place the wreath die-cut onto the Gel Press, which will keep it in place. Use a Sponge Dauber to dab Acorn VersaFine Clair Ink onto the wreath (1A). Use another Sponge Dauber to dab PineCone VersaFine Clair Ink onto the wreath blending as you go (1B). Remove the first wreath, set it aside, and wipe the Gel Press clean. You can use hand sanitizer if you like.
Place the second wreath die-cut onto the Gel Press. Use Sponge Daubers to dab Sand Dune (1C) then Portobello (1D) VersaFine Clair Inks onto the die-cut. Remove the second wreath, set it aside, and wipe the Gel Press clean.
Place the third wreath die-cut onto the Gel Press. Use Sponge Daubers to dab Golden Meadow (1E) and Acorn (1F) VersaFine Clair Inks onto the die-cut. Remove the second wreath, set it aside, and wipe the Gel Press clean.
Steps 2:
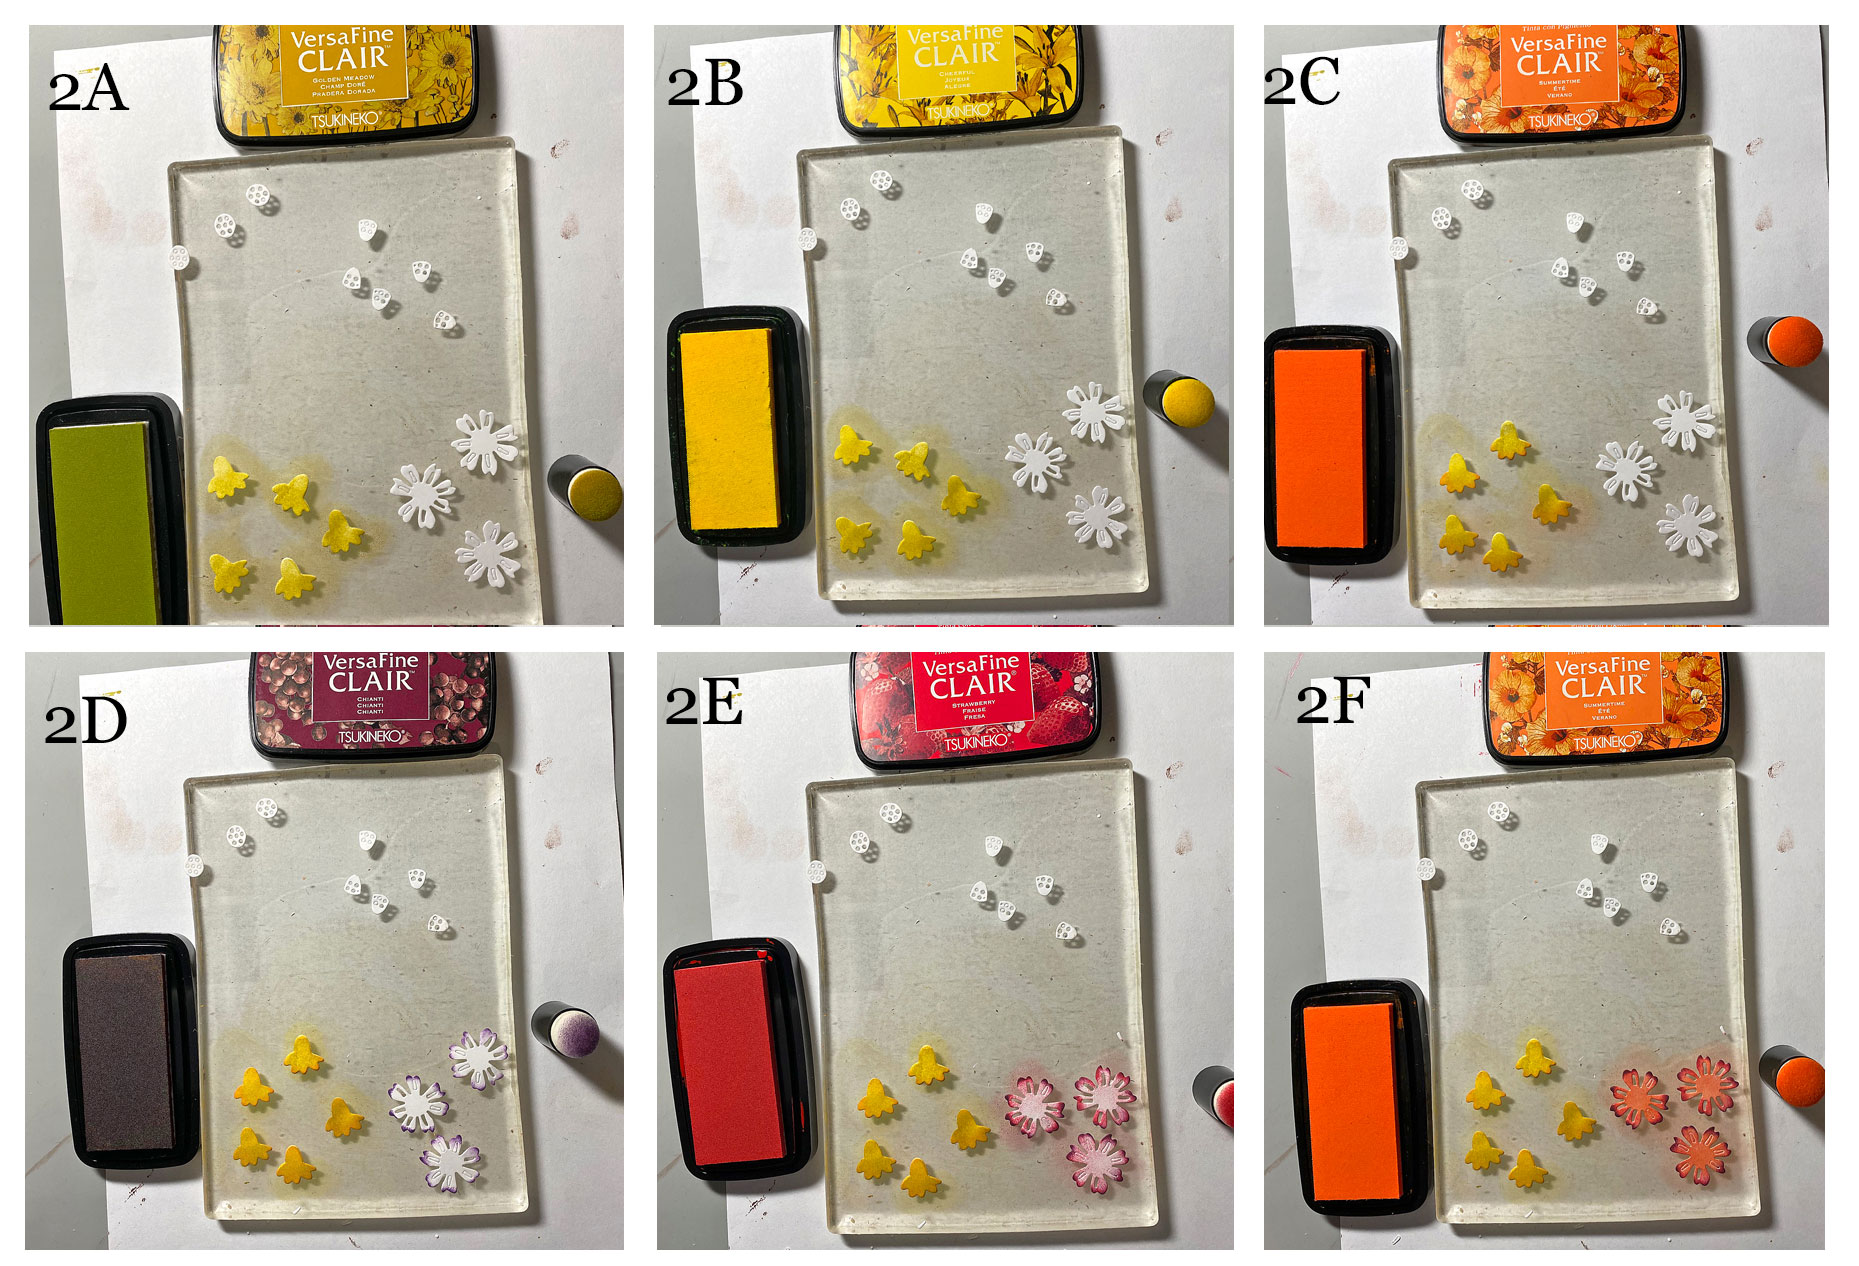
Place the cone flower (bottom left of the Gel Press), cone part (top right of the Gel Press), the small round center of the sunflower (top left of the Gel Press), and the sunflower (bottom right of the Gel Press) die-cuts onto the Gel Press.
Use Sponge Daubers to dab Golden Meadow (2A) and Cheerful (2B) to the Cone Flower die-cuts. Use Sponge Daubers to to apply Summertime (2C) and Chianti (2D) VersaFine Clair Inks to the bottom edges of the cone flowers. Use a Sponge Dauber to apply Summertime (2F) VersaFine Clair Ink to the spiky flower.
Remove the flower die-cuts and leave the centers on the top of the Gel Press. Wipe the Gel Press clean.
Here are the color combinations for the rest of the die-cuts. Remember to firmly place the die-cuts onto the Gel Press, use Sponge Daubers to dab the ink onto the die-cuts, and to clean the Gel Press between sets of die-cuts.
Top of the Cone Flowers: Use Acorn VersaFine Clair Ink.
Sunflower centers: Use Summer Meadow and Acorn VersaFine Clair Inks.
Spiky Flowers: Hawthorn Rose and Tulip Red VersaFine Clair Inks.
Five petal leaves: Verdant VersaFine Clair Ink
Ferns: Avocado and Arctic Blue VersaFine Clair Inks
Pointed Oval Leaves: Avocado VersaFine Clair Ink onto the die-cuts.
Branches: Shady Lane VersaFine Clair Ink
Oak Leaves: Golden Meadow, Cheerful, Summertime, and Chianti VersaFine Clair Inks
Bottom of Acorn: Acorn and Pinecone VersaFine Clair Inks
Top of Acorn: Portobello and Pinecone VersaFine Clair Ink
Bow: Summertime, Cheerful, Tulip Red, and Chianti VersaFine Clair Inks
Step 3:
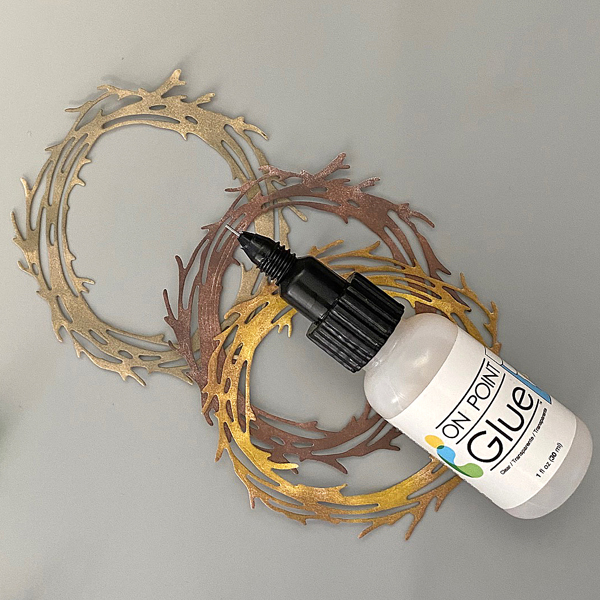
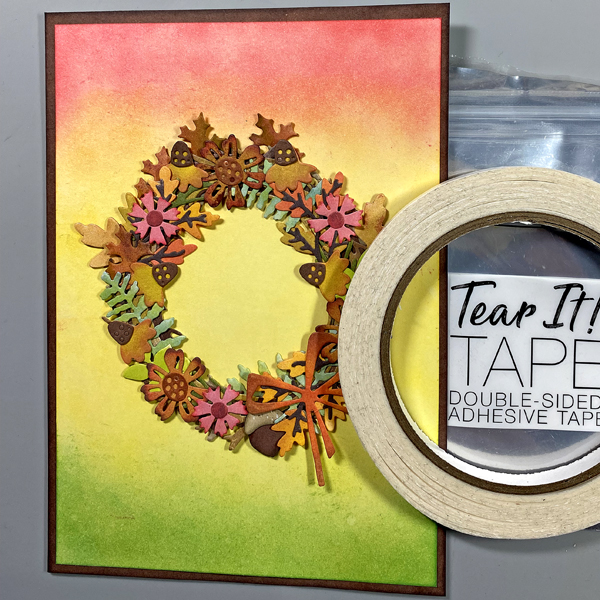
Use On-Point Glue to adhere the wreaths atop one another.
Step 4:
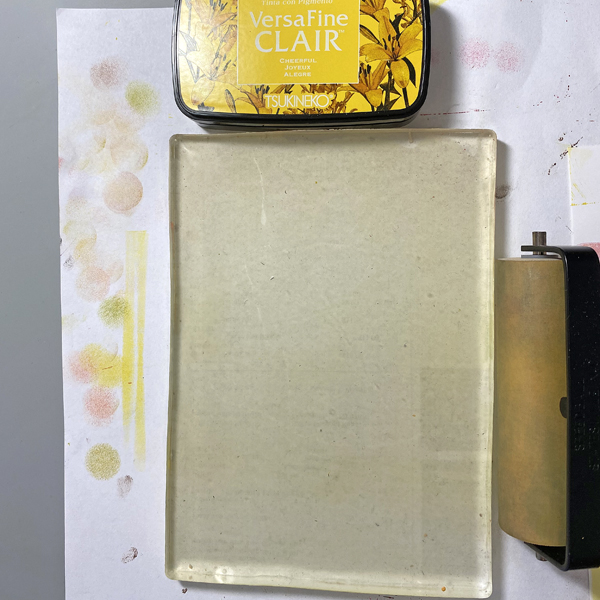
Roll a 4” brayer over the Cheerful VersaFine Clair Ink. Roll the brayer onto scrap paper to reduce the amount of ink on it. Roll the brayer to the Gel Press. Place a piece of 5” x 7” white cardstock onto the Gel Press and pull the print that will become the background panel.
Steps 5:
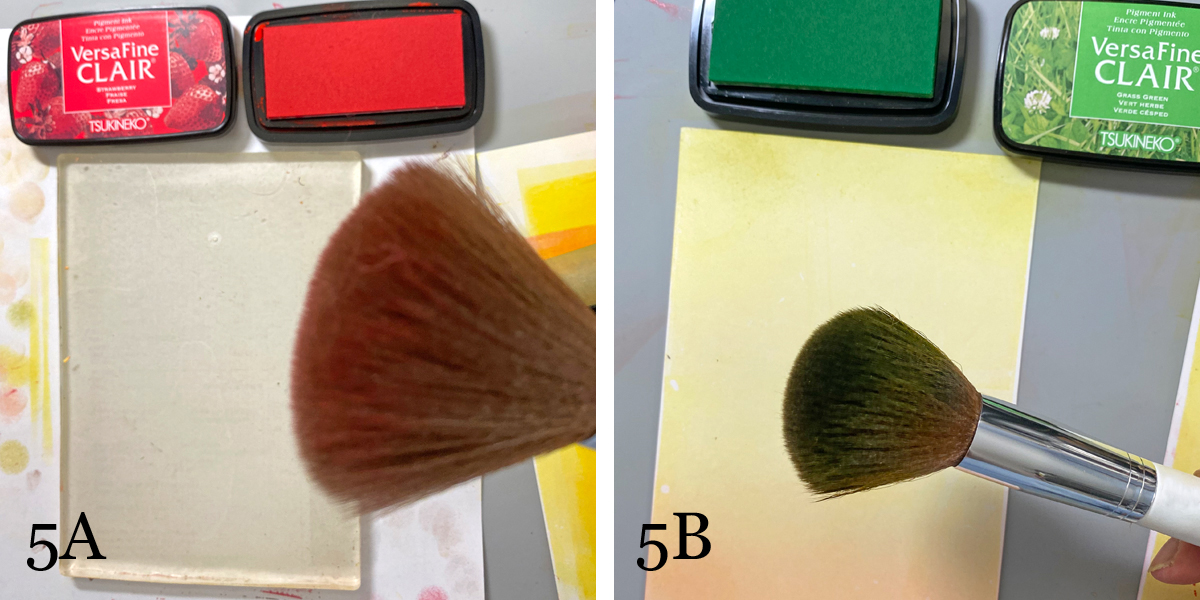
Use a make-up brush and tap lightly onto the Strawberry VersaFine Clair Inkpad. Brush off the excess onto the scrap paper. Brush the ink along the top of the Gel Press (5A). Place background panel on Gel Press and pull print. Take a second make-up brush and tap it lightly onto the Grass Green VersaFine Clair Inkpad. Brush off the excess onto the scrap paper. Brush the ink along the bottom of the background panel (5B)
Step 6:
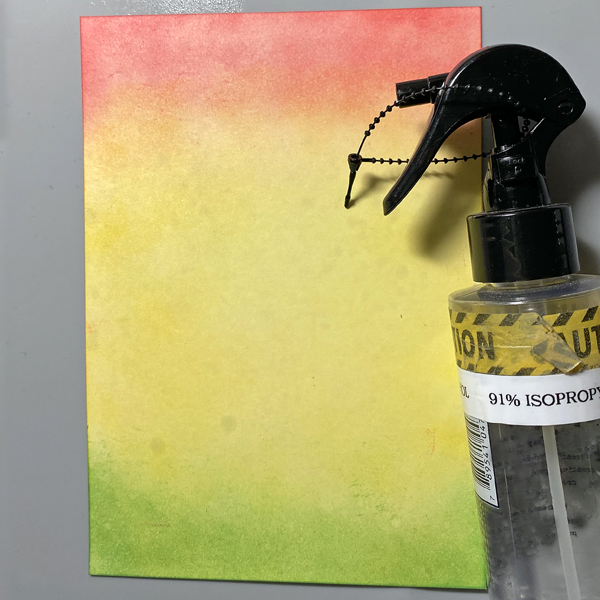
Spray with 91% Isopropyl Alcohol to slightly blend and mottle inked background.
Step 7:
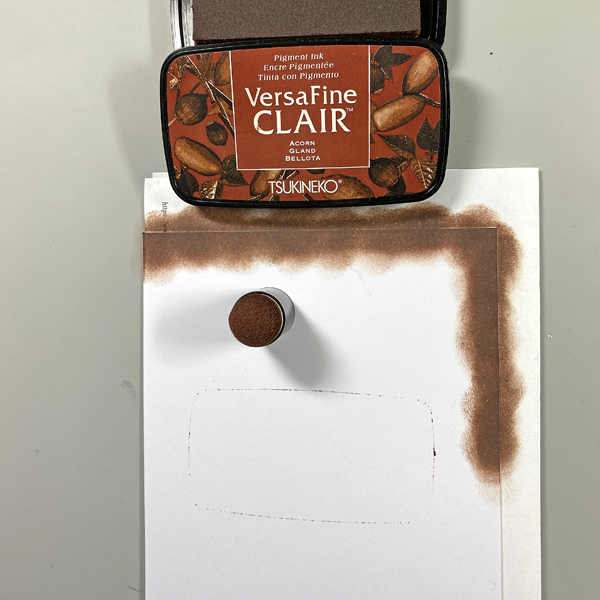
Use a Sponge Dauber to apply Acorn VersaFine Clair ink around the outer perimeter of a white 5” x 7” card. Heat set.
Step 8:
Use Tear It! Tape to adhere the layers of the card.
Steps 9:
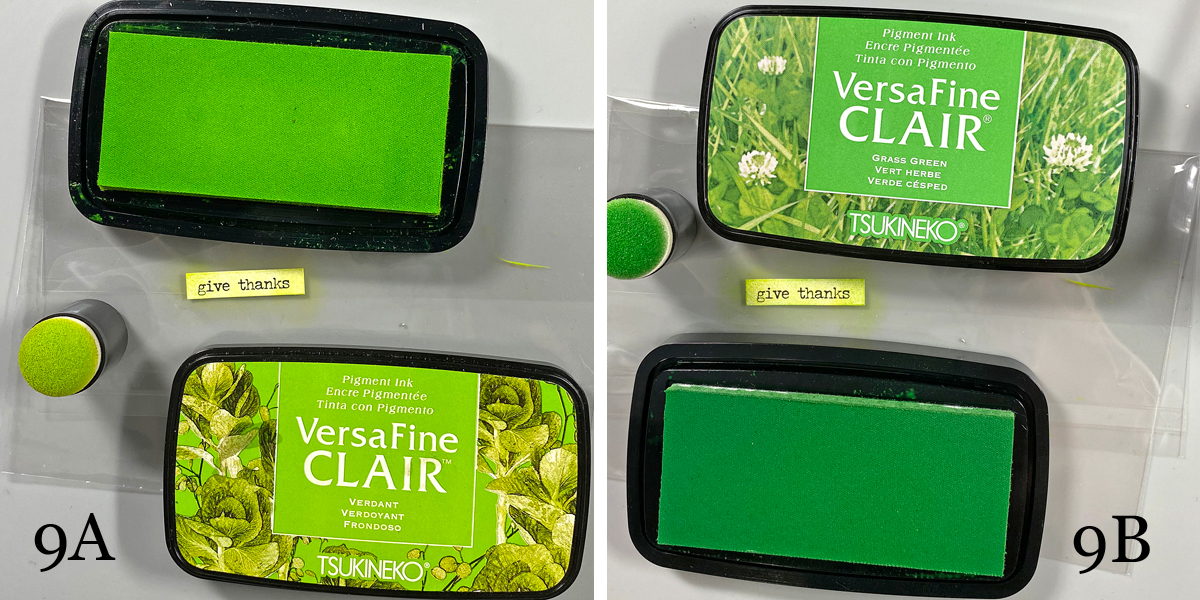
Use Sponge Daubers to color an Idea-ology Sticker (9A). Use a second Sponge Dauber to edge the sticker (9B).
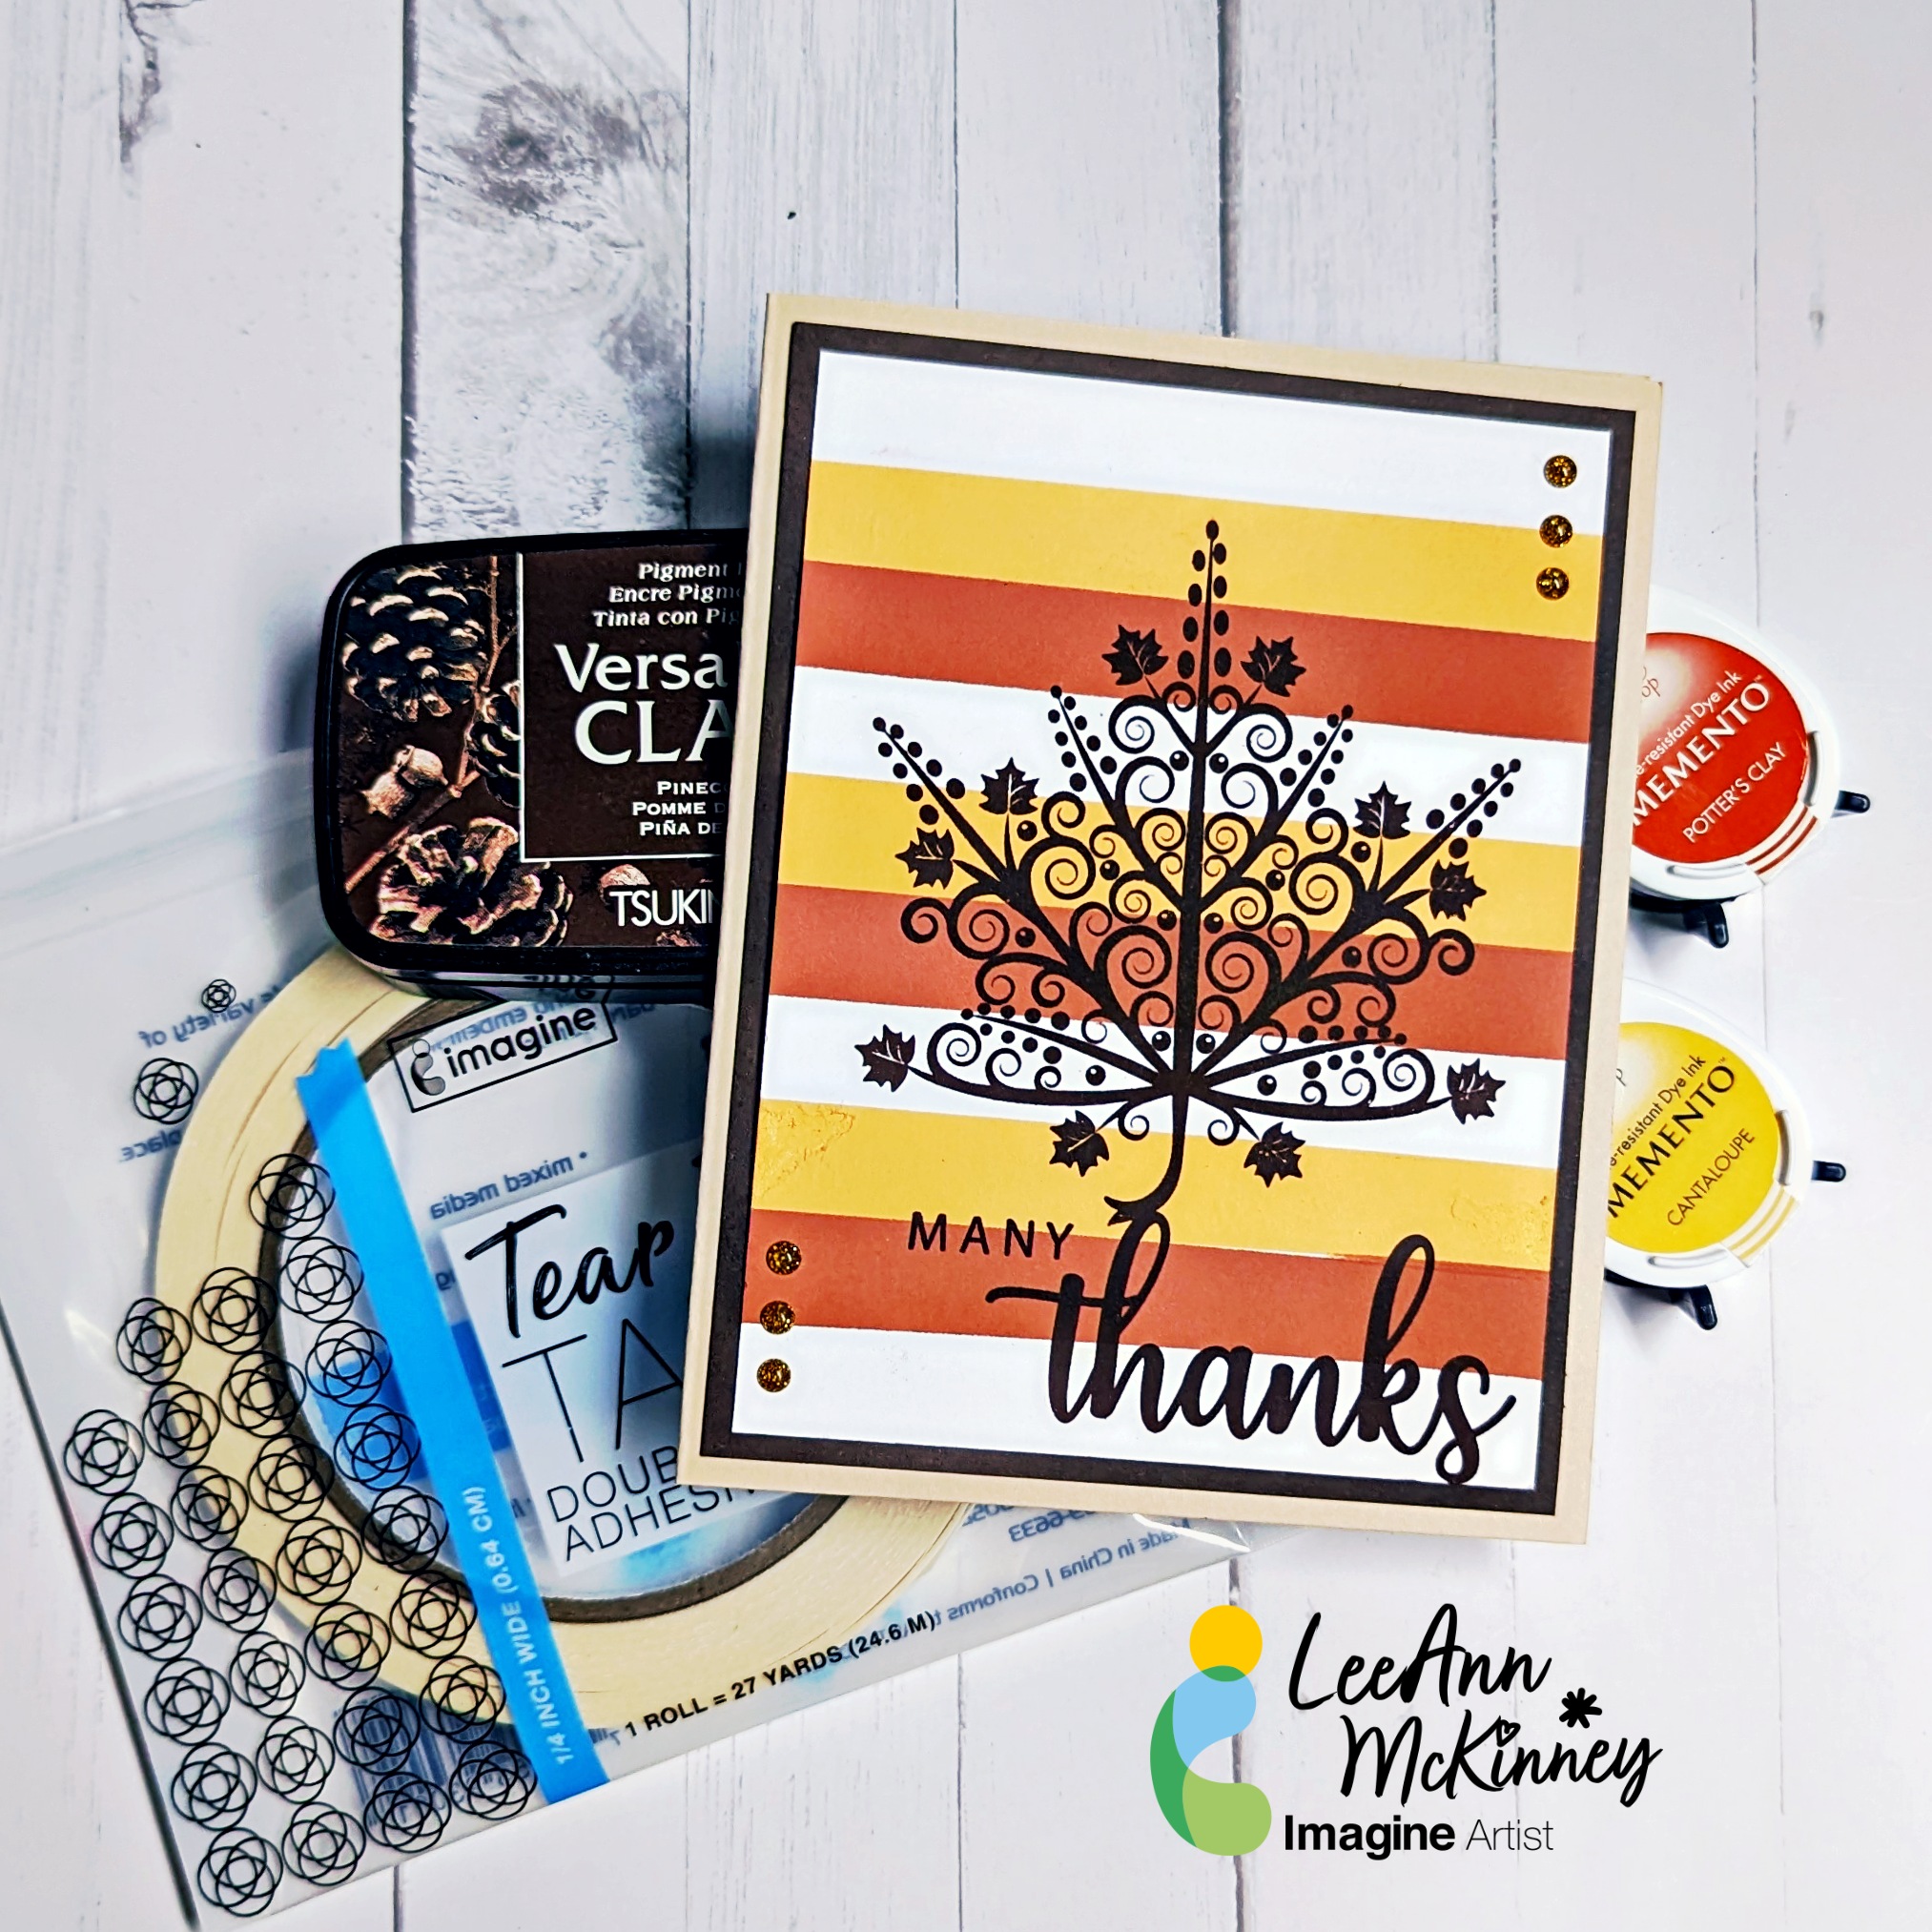
Here’s a quick and easy Thanksgiving card using a beautiful pumpkin stencil, Memento Dew Drop Inks, and a sticker!
Skill Level: Beginner Time: 45 minutes
Instructions:
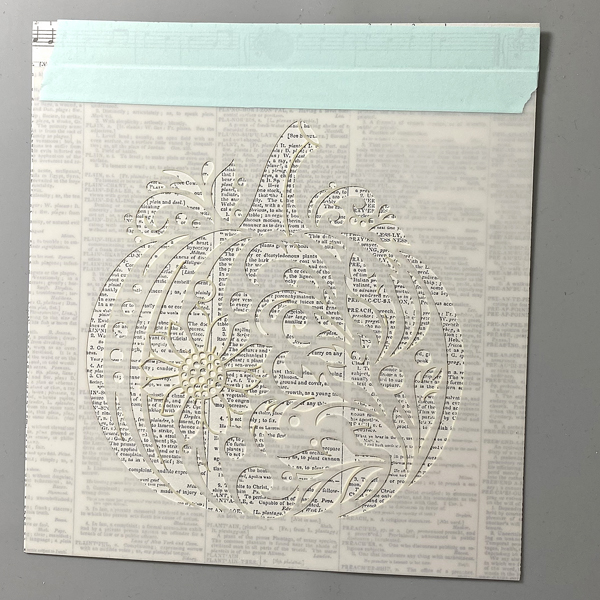
Step 1: Use low-tack tape to adhere the Pumpkin Flourish stencil to the top of a piece of text cardstock and the craft mat. Run a stylus tool along the tape seam between the stencil and the cardstock to create a hinge so that you can pick up the stencil to check out ink coverage.
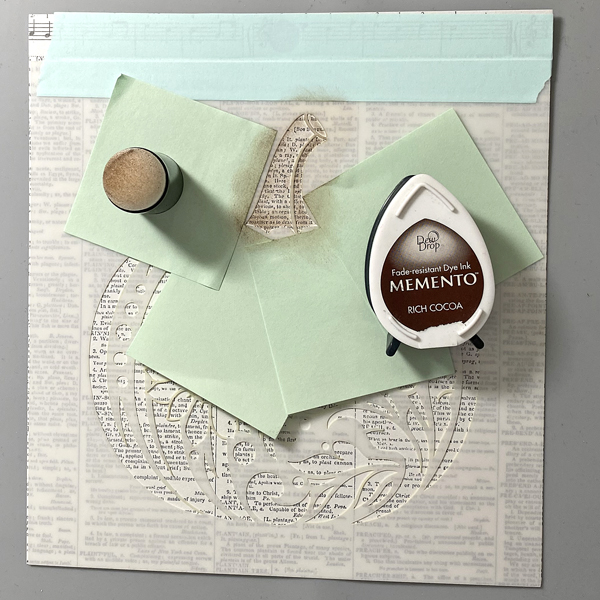
Step 2: Use Post-It Notes to cover the leaves and the pumpkin on the Pumpkin Flourish stencil. Use a Sponge Dauber to apply Rich Cocoa Memento Ink along the edges of the pumpkin’s stem onto the text paper. Use another Sponge Dauber to apply Toffee Crunch Memento Ink over the Rich Cocoa Ink and onto the rest of the stem.
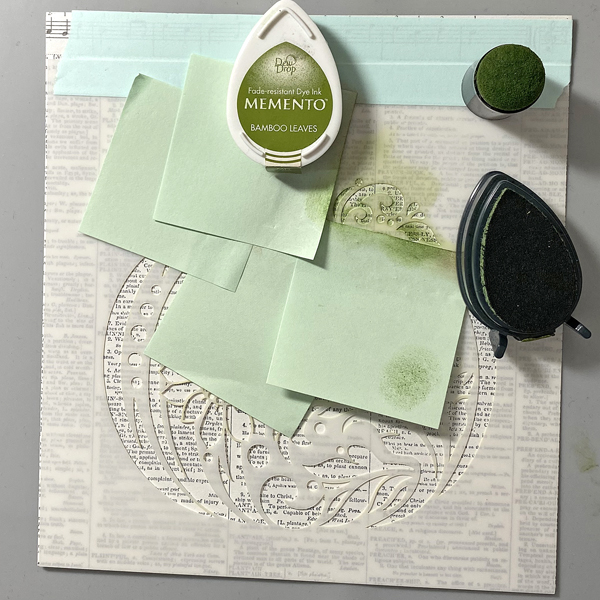
Step 3: Use Post-It Notes to cover the stem and the pumpkin on the Pumpkin Flourish stencil. Use a Sponge Dauber to apply Bamboo Leaves Memento Ink around the outside of the leaf flourishes on the stencil onto the text paper. Use another Sponge Dauber to apply New Sprout Memento Ink fill in the open areas of the leaf flourishes on the stencil.
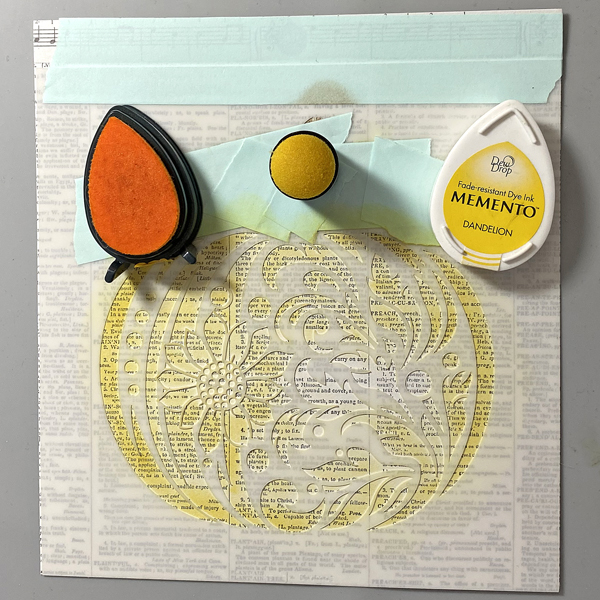
Step 4: Use Post-It Notes to cover the stem and the stem on the Pumpkin Flourish stencil. Use a Sponge Dauber to apply Dandelion Memento Ink over the pumpkin area of the stencil onto the text paper.
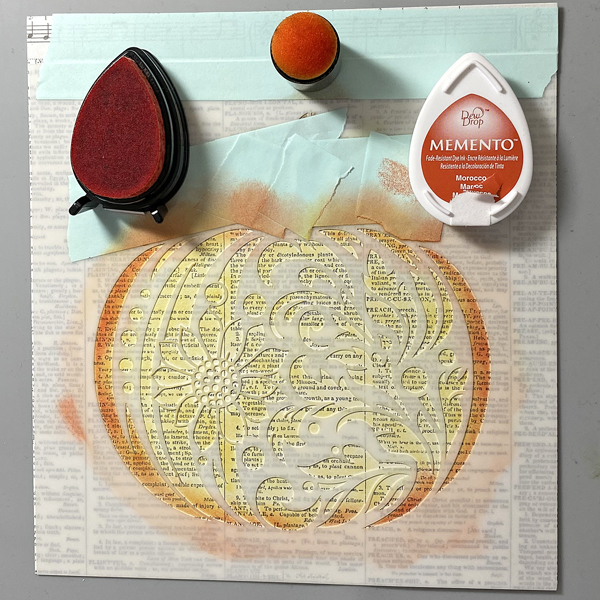
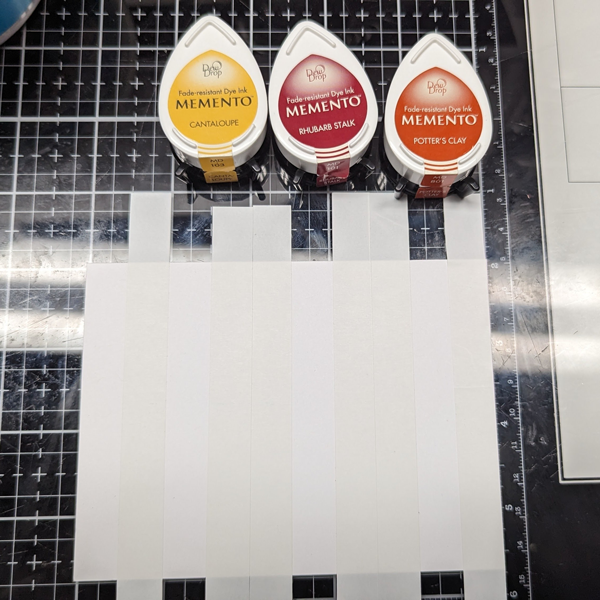
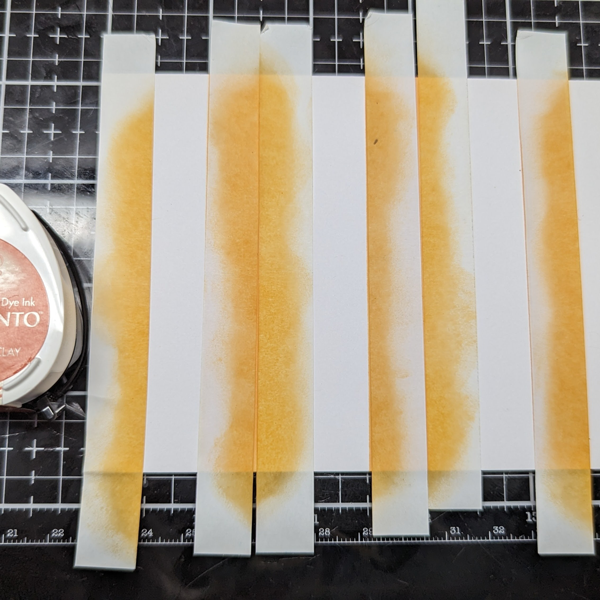
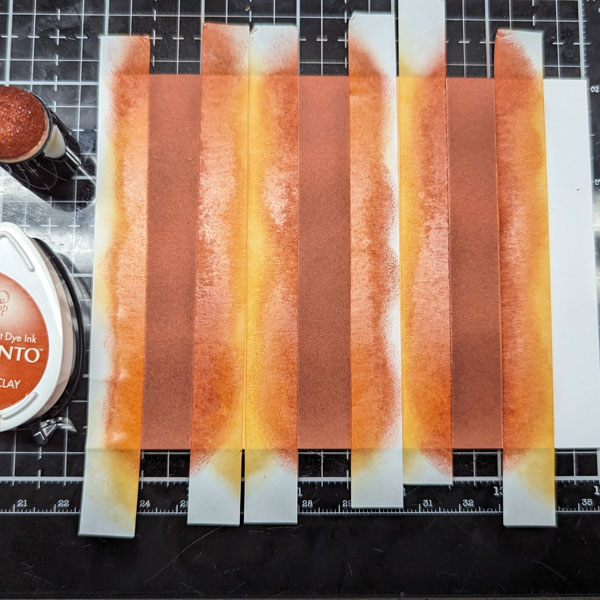
Step 5: Use a Sponge Dauber to apply Morocco Memento Ink over the outside edges of the pumpkin stencil onto the text paper. Working from the outside of the pumpkin stencil towards the center of the pumpkin stencil, use separate Sponge Daubers to apply Tangelo Memento Ink, then Canteloupe Memento Ink over the stencil onto the text paper.
Step 6: Use a Fantastix to apply Rhubarb Stalk Memento Ink over the flower on the stencil onto the text paper. Apply the ink more heavily on the outer and inner edges of the flower stencil. Apply the Rhubarb Stalk Memento Ink very heavily on the center of the flower. Use a second Fantastix to apply Elderberry Memento Ink to the outer dot circle in the center of the flower stencil.
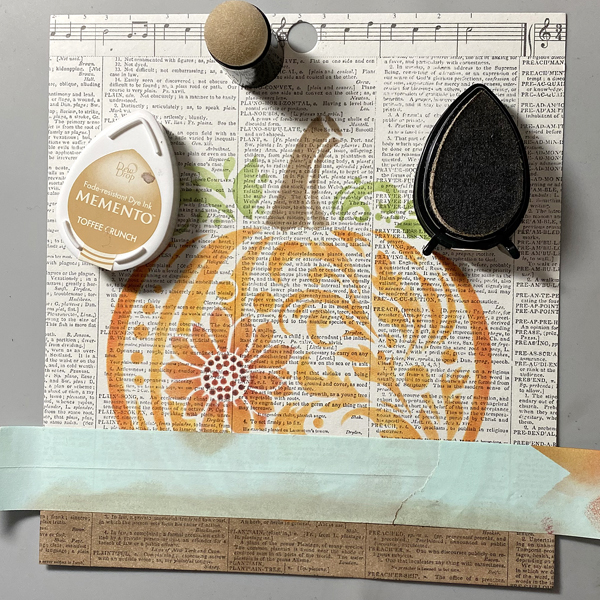
Step 7: Remove the low-tack tape and the stencil from the panel. Position a piece of low-tack tape horizontally across the bottom of the image panel right below the stenciled pumpkin. Use Sponge Daubers to apply Rich Cocoa and Toffee Crunch Memento Inks over the tape and onto the text paper.
Use the Rich Cocoa Memento Ink and its Sponge Dauber to tint a “Happy Thanksgiving” Idea-ology Small Talk-Occasion sticker. Trim the image panel to 4.75” square, edge with the Rich Cocoa Memento Ink, and adhere the sentiment sticker to the upper right of the image panel.
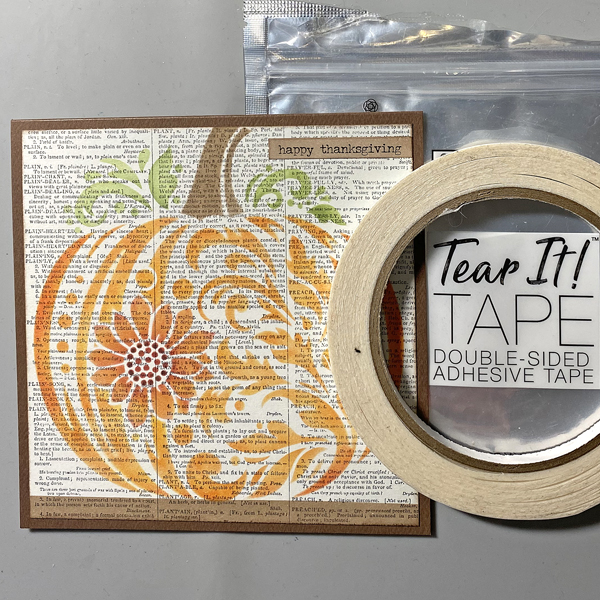
Step 8: Use Tear It! Tape to adhere the layers of the card.
Hello crafty friends! Today, I would like to share how to make this clean-and-simple (CAS) Happy Thanksgiving card. It is easy and quick to make for mass-production handmade cards. Let’s get crafting!
Skill: Beginner Time: 15-20 minutes
Direction:
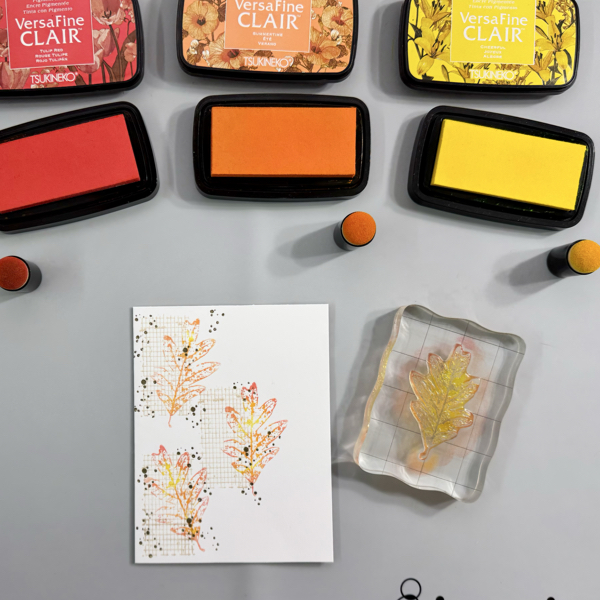
Step 1 We are going to stamp directly on top of an A2 card base (4.25 inch x 5.5 inch card). Start by stamping the texture background on the card with VersaFine Clair Sand Dune ink pad.
Step 2 Next, stamp another texture stamp (on this one I used dots) randomly on the card using VersaFine Clair Portobello ink pad.
Step 3 This step we are going to blend the ink colors on the stamp by adding lighter ink first then darker ink using sponge daubers, and then stamping it on the card.
First, add the VersFine Clair Cheerful ink randomly on the leaf stamp, then add some of the VersaFine Clair Summertime ink, and then add some of the VersaFine Clair Red Tulip ink. Using sponge daubers is the best way adding the ink that will make the ink blending well directly on the stamp.
Stamp inked leaf image on the card as soon as you are done. Using VersaFine Clair inks are great for this technique because they have longer drying time.
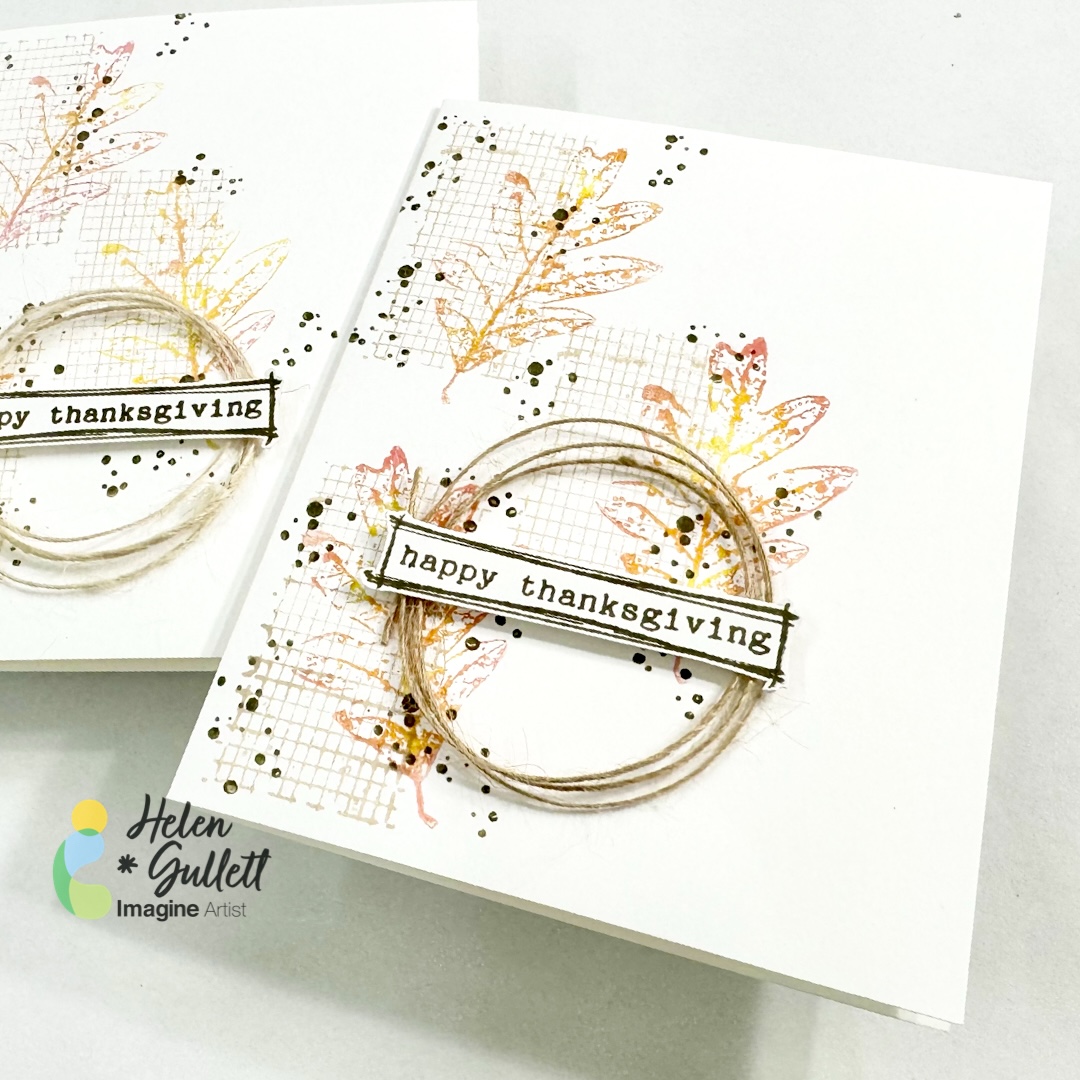
Step 4 On a piece of white cardstock, stamp the sentiment and frame using VersaFine Clair Portobello ink pad. Dry the stamped image with a craft heat gun. Fussy cut the stamped image with scissors around the frame.
Step 5 Add some of the Tear It! Tape on the back of the sentiment and then add some of the burlap twine on it, wrap around to make it look like a simple wreath. Press the burlap twine firmly on the tape. Add a small piece of white fun foam and then add some of the Tear It! Tape on it. Add the sentiment on the card.
Isn’t that quick and easy to make this CAS Thanksgiving card? It looks simple yet has some layers and texture on it. I hope you will give it a try.
Thank you for stopping by our blog today. Have a fabulous day!
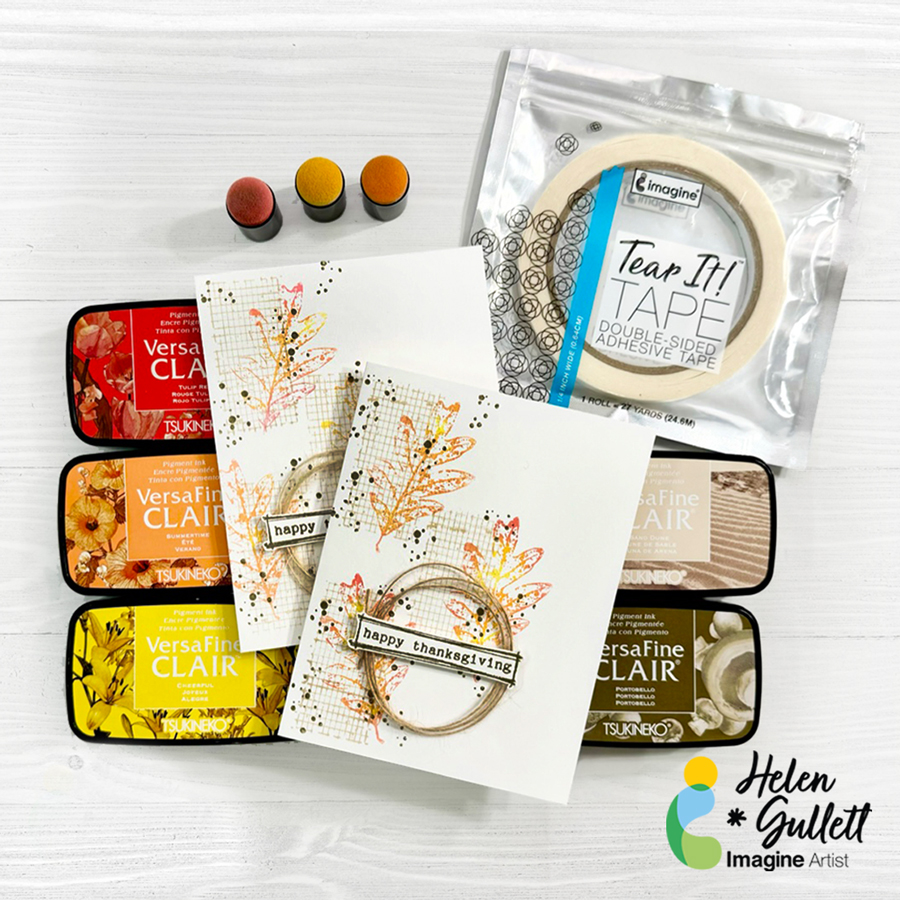
Craft Supplies
Imagine Crafts:
VersaFine Clair (Sand Dune, Portobello, Cheerful, Summertime, Red Tulip)
– I love it when I can incorporate everyday items from around the house in my craft room. Today we are paying with tin foil…aluminum foil…kitchen foil…whatever you might call it…We are going to repurpose basic tin foil into faux metal panels, emboss them with embossing folders and see which Imagine products will adhere to the foil to create that beautiful faux metal look. Then we will make a couple of beautiful cards