Make a Fall Turnabout Card

By Ceal Pritchett

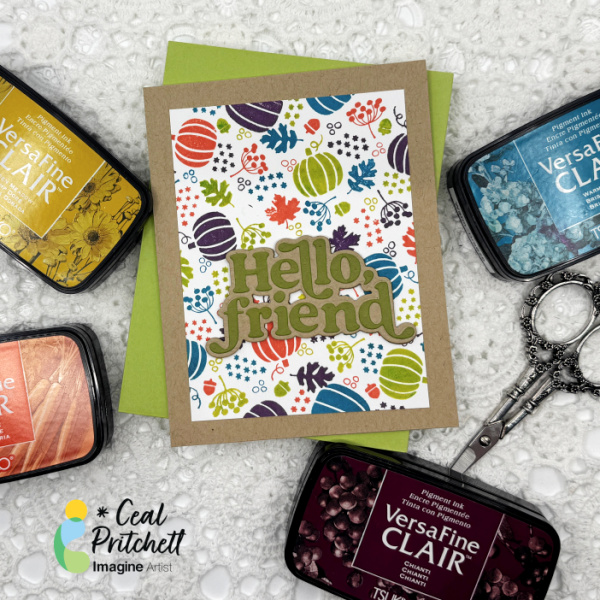
Hey there crafty friends! It’s Ceal, here. Today I am sharing how I made this colorful fall card using a turnabout stamp set, some VersaFine ink pads and the Stampwheel.

Time: 45 Minutes
Skill: Intermediate

Directions:
Gather Supplies:
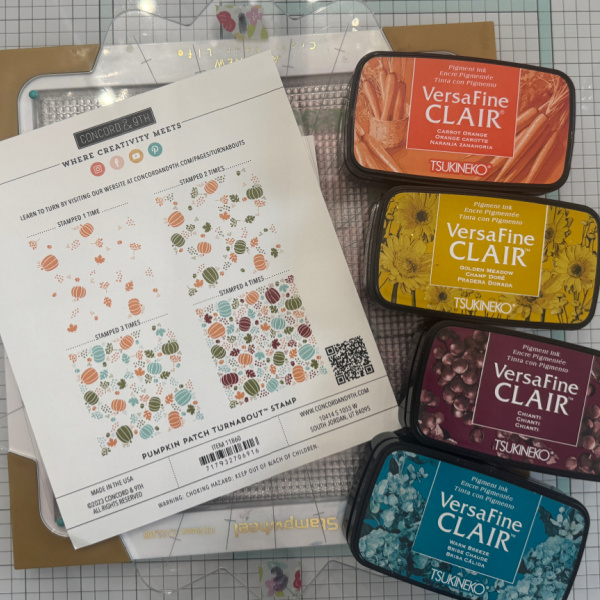
I haven’t shared a turnabout card here yet and I wanted to do that because they are my favorites. Gather your supplies, you will need a stamp platform, a Turnabout stamp and some of your favorite inks. I love VersaFine Clair because they are so vibrant.
Step 1:
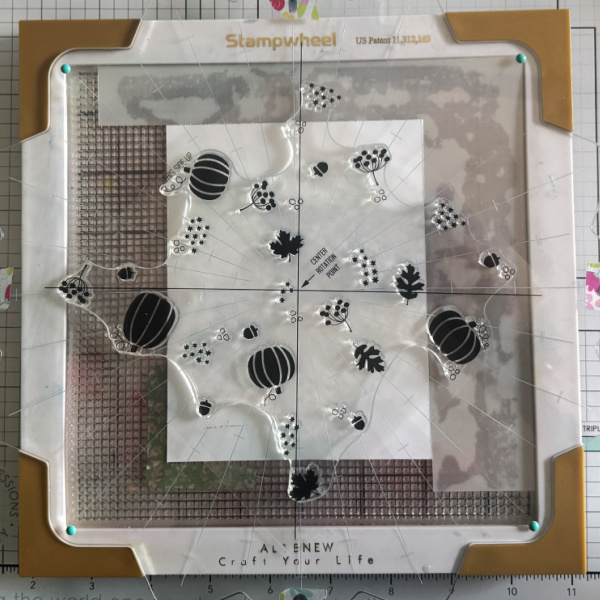
Line up our turnabout stamp using the alignment guide that comes with the stamp. The Stampwheel is easy to line it up because you line up the lines.
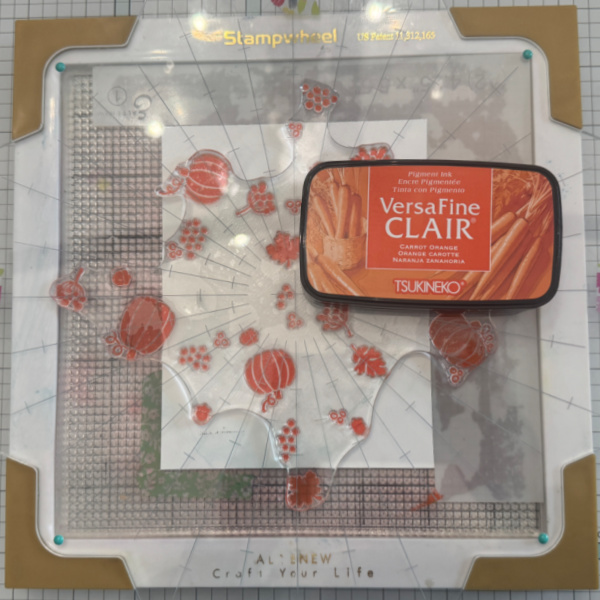
Step 2:
Ink up the stamp with the first color, I used Carrot Orange and placed it in the tabs at the top of the stamp wheel. I labeled my stamp wheel 1-4 so I would know where I am when stamping.
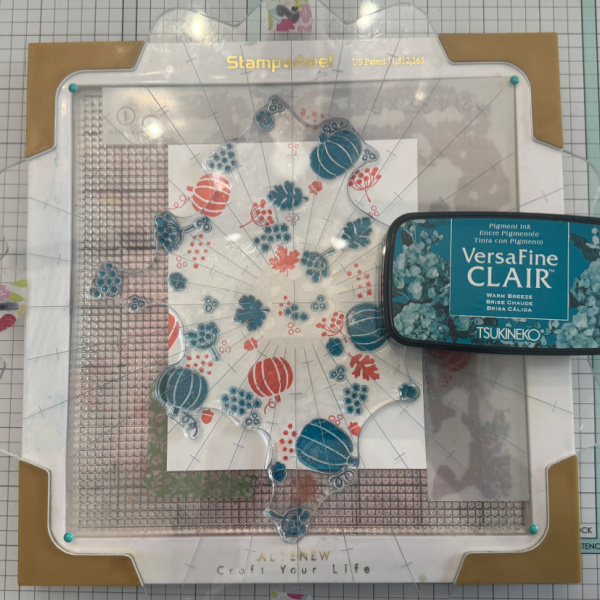
Step 3:
Rotate the top, ink up the stamp with the next color (I used Warm Breeze) and place the plate down in the tabs.
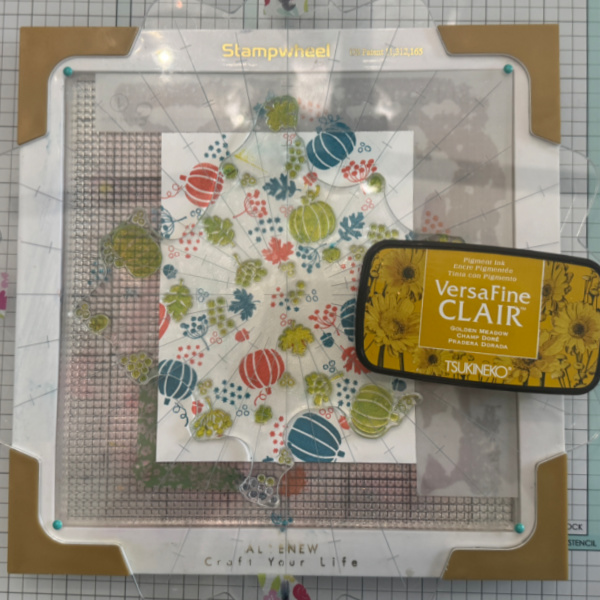
Step 4:
Rotate the plate and ink up with the next color, I used Golden Meadow (I think I had some blue left on my stamp therefore it turned green).
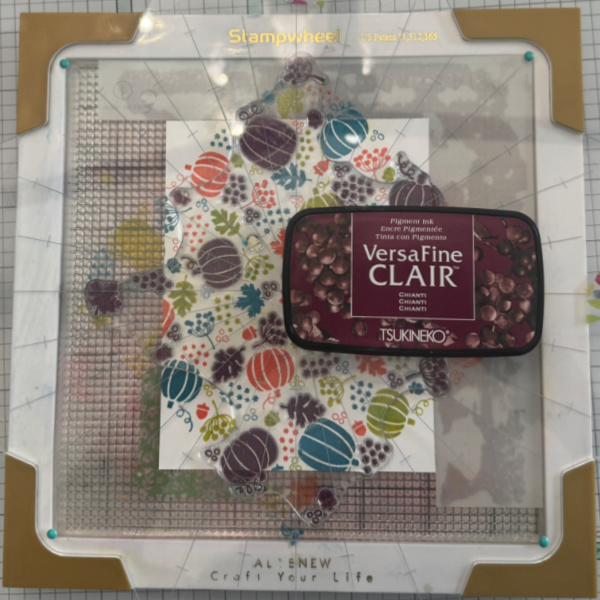
Step 5:
Rotate the plate and ink up the final color, I used Chianti. Next cut down your panel to 5 x 3.5 and adhere to the wheat panel
Step 6:
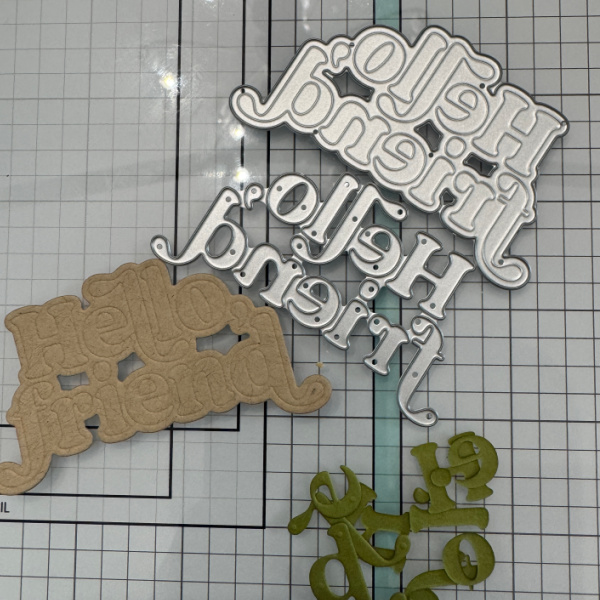
Die cut the sentiment and backer panel. I love how the die has where it scores the words into the backer so when you go to add the letters they fit perfectly.  To finish the card add the sentiment to the card.

Supplies:

Imagine Products
VersaFine Clair – Carrot Orange, Warm Breeze, Golden Meadow and Chianti

Other Products
Pumpkin Turnabout – Concord & 9th
Hello Friend – Kristina Werner for Concord & 9th
Thanksgiving Card Tutorial: Ink Blend Directly on Your Stamps

By Katy Ingram

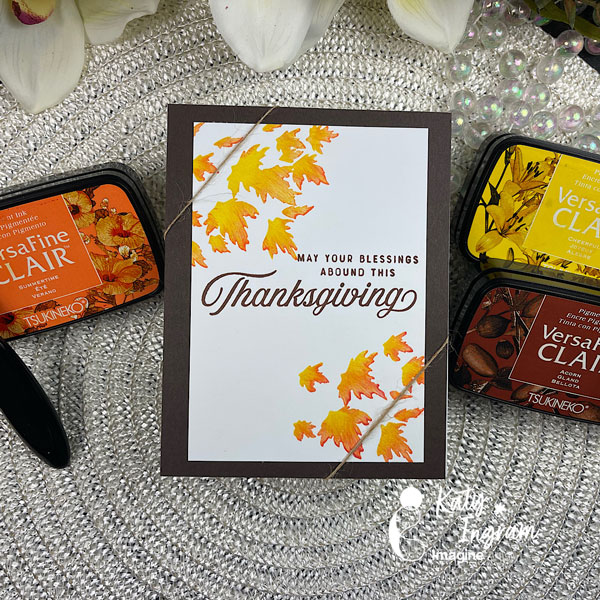
Hello Friends! Katy here with another quick project. In today’s video I create a simple Thanksgiving card and I share with you an easy way to ink blend directly on your stamp. This is a great technique to use on your silhouette stamps and a great way to change up the color from just basic black.

Video has all the details. Thanks for watching.

Skill: Beginner, Intermediate
Time: 15 minutes 

Art Supplies

Imagine Products

• VersaFine Clair
– Summertime
– Cheerful
– Strawberry
– Acorn
• On Point Glue 

Other Products Used

• The Greetery Autumn Sketches stamp set
• White Cardstock
• Brown Cardstock
• Twine
• Stamp positioner tool
• Skinny detail blending brush

Make a See-Through Thanksgiving Card

By Tracy Fear

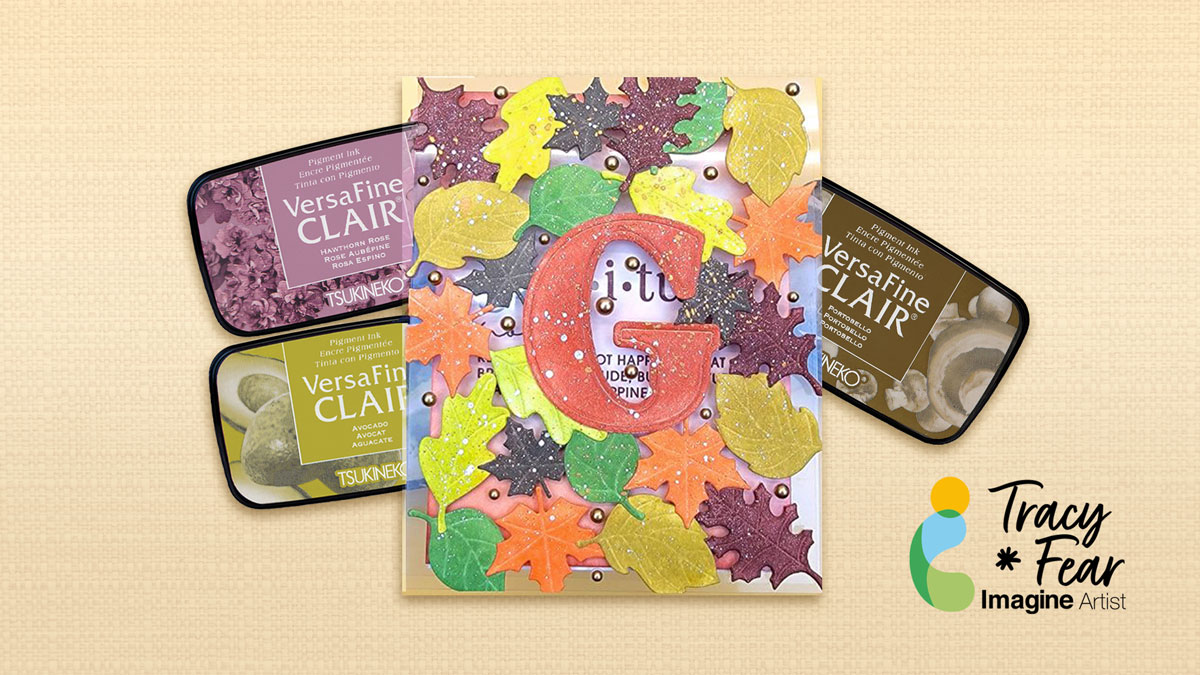
Hello Friends! Today we are going to have some fun and create a see-through Thanksgiving card with a sort of mosaic created from die cut leaves on a clear card base.

Tracy

Skill: Intermediate
Time: 90 Minutes

Art Supplies

Imagine Products
VersaFine Clair Acorn, Portobello, Avocado, Summertime, Golden Meadow, and Cheerful

Other Products Used
Scrapbook.com Stamps and die set Gratitude and die set Autumn Leaves
• Gold Flatback Pearls
• PVA Adhesive
• Leaf shaped die cuts
• Sentiment Stamp
• Die cut machine
• 100lb white paper
• Stencil Brushes or blending brushes
• Flatback Pearl Embellishments
• Adhesive
• Paint for splattering

ALTERNATIVE PRODUCTS THAT CAN BE USED TO RECREATE SOMETHING SIMILAR
Any Inks any combination of background stamps, dies, and feature stamps

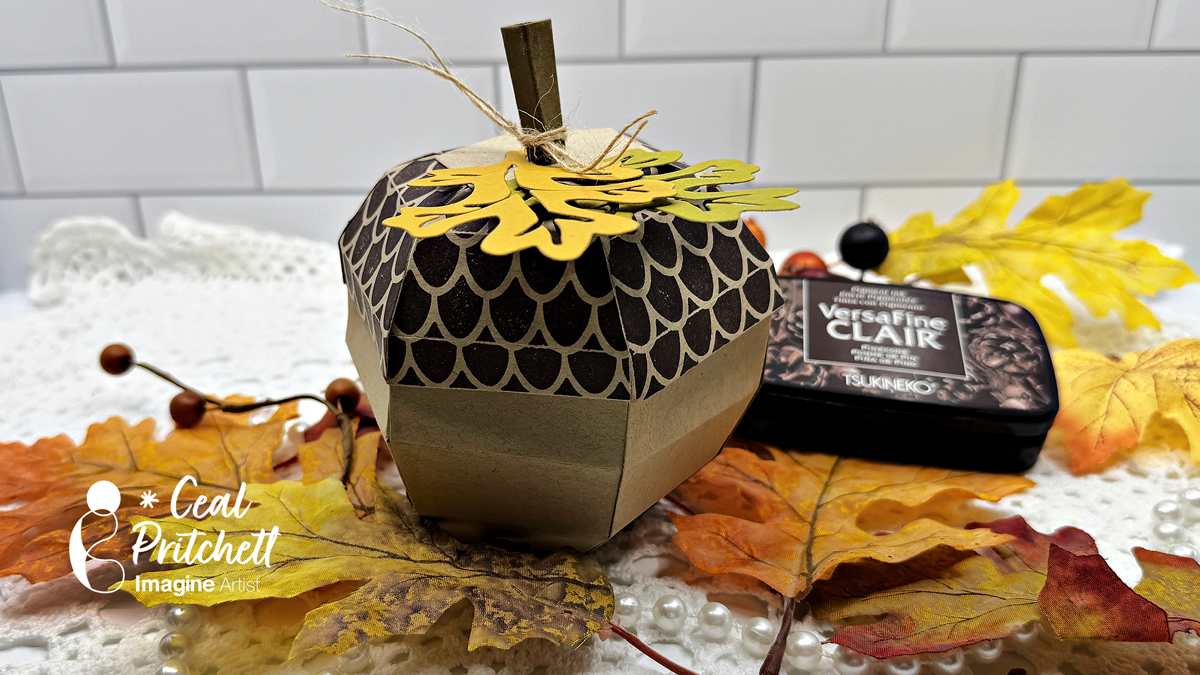
How to Make a Fall Acorn Box

By Ceal Pritchett

Hello crafty friends!
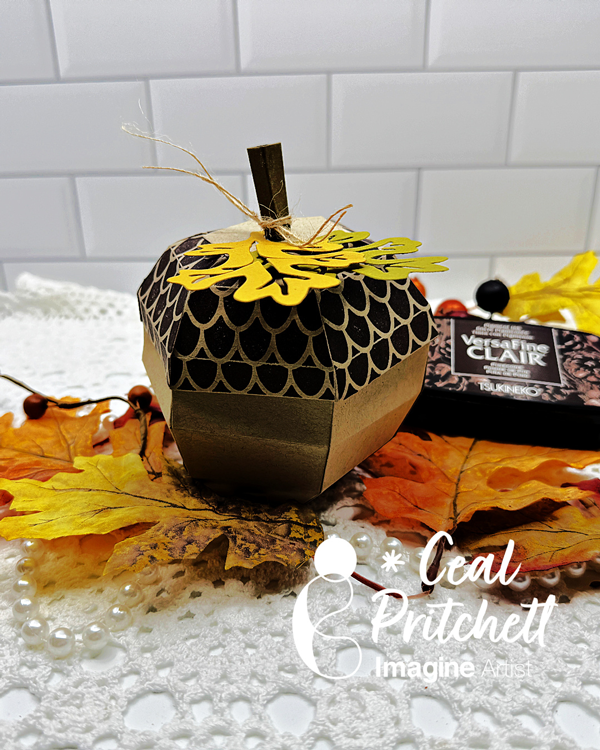
I’s Ceal, here. Today I am sharing a tutorial on how to make this acorn gift box.

Skill: Intermediate to Advanced
Time: 45 Minutes

Directions:

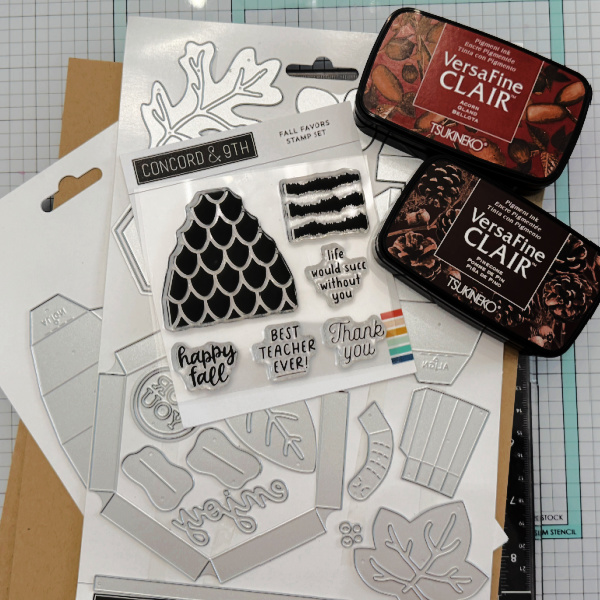
Gather your supplies. For this project you will need the Fall Favors Box die set and the coordinating stamp set. A dark brown ink (VersaFine Clair used here), Kraft and other colors of cardstock.

Step 1:
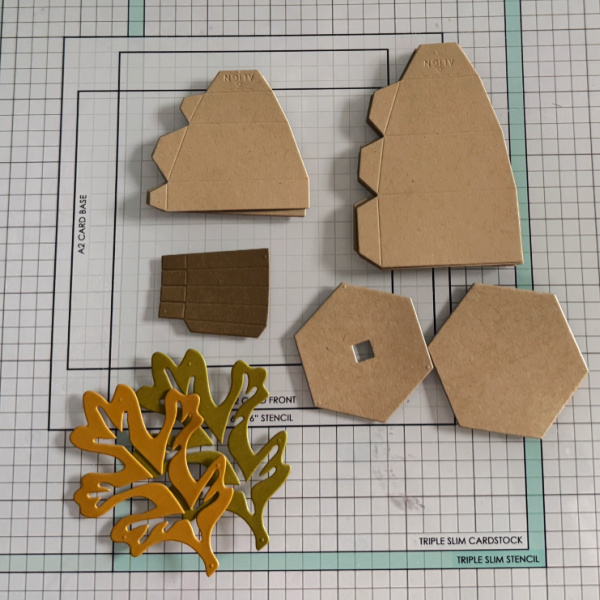
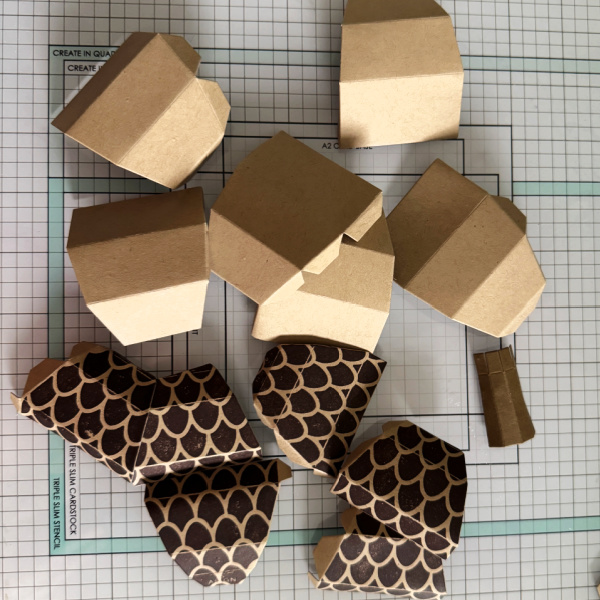
Out of kraft cardstock, cut six pieces each of the small (top) and large (bottom) of the acorn, along with the top and bottom hexagon pieces. Cut the stem out of a dark brown cardstock and the leaves out of your color of choice.

Step 2:
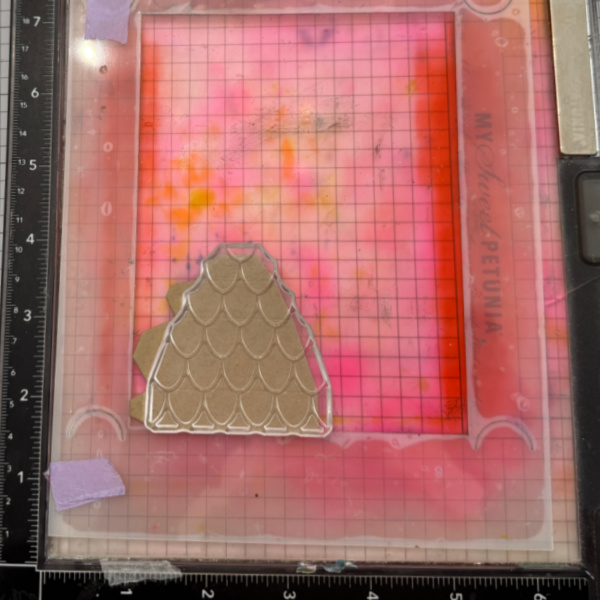
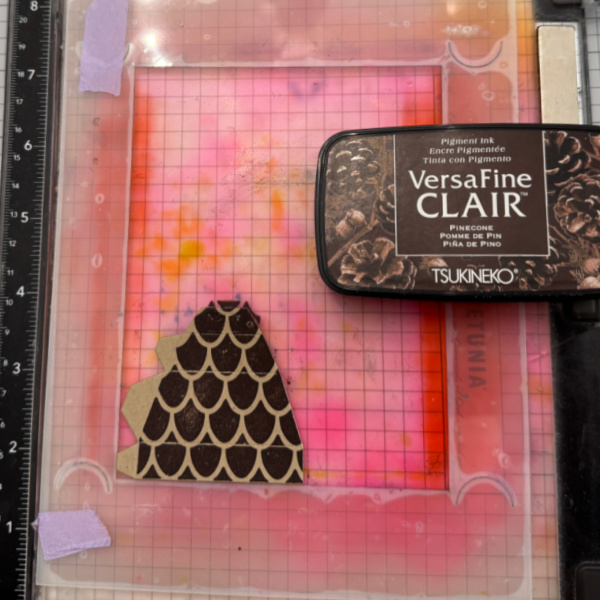
Line up the stamp that adds the detail to the acorn top and then stamp all six pieces with a dark brown ink, VersaFine Clair Pinecone used here.

Step 3:
Crease all of the score line on all the die cut pieces. Do not use a bone folder, just simply crease them on the score lines.

Step 4:
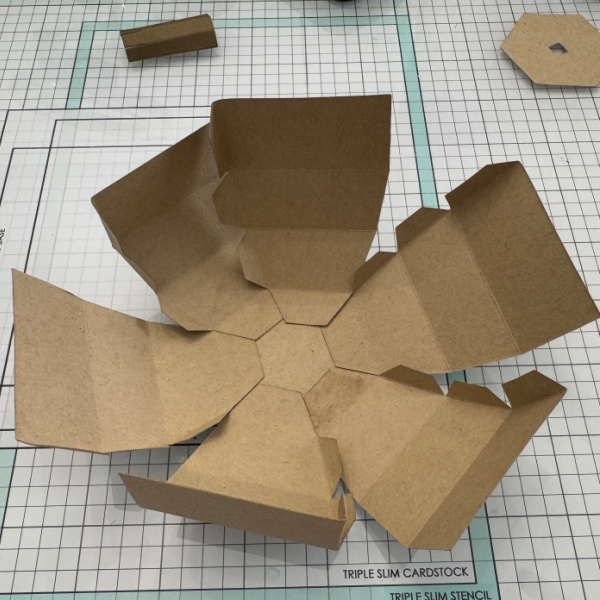
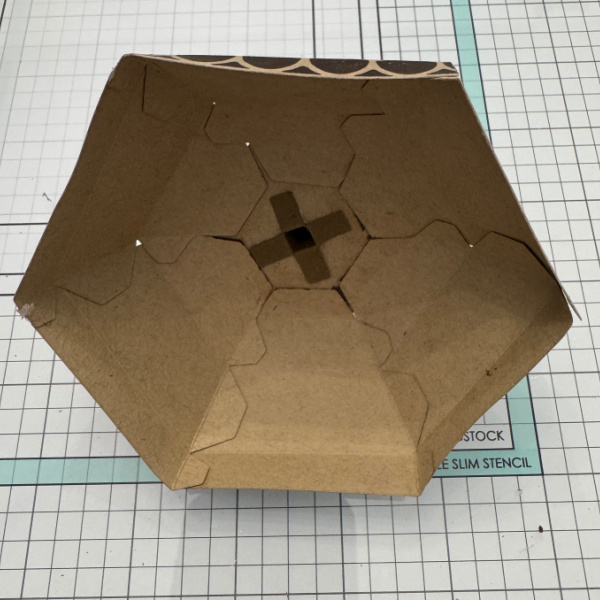
Align the large (bottom) pieces of the acorn on the hexagon as shown. Tip: I used liquid glue to allow me to move them as needed.

Step 5:
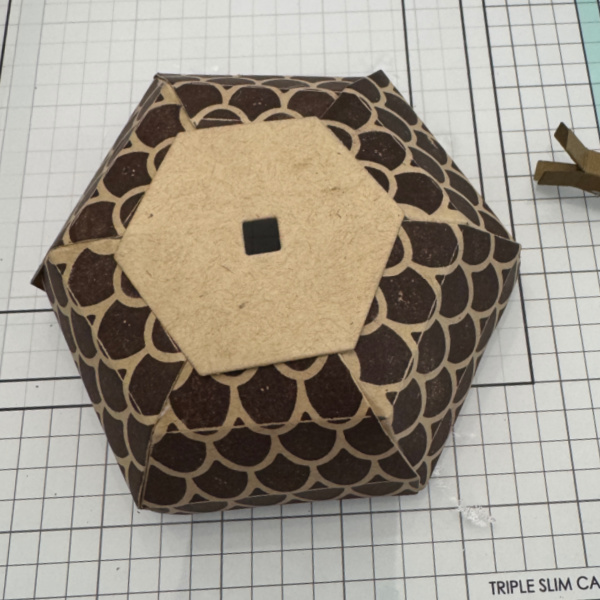
Align the small (top) pieces of the acorn on the hexagon with the square hole in it.

Step 6:
Fold the stem piece on the score lines and add h=glue to create the stem and then thread it through the square hole on the top. After threading it through the hole, fold back the tabs and glue down as shown.

Finish the project by adding the leaves and some twine.

Supplies:

Imagine Products

• VersaFine Clair: Nocturne
• VersaFine Clair: Pinecone
• On Point Glue

Other Products
• Fall Favors Box Dies – Concord & 9th
• Fall Favor Extras Dies – Concord & 9th
• Fall Favors Stamp Set – Concord & 9th
Quick and Easy Stenciled Pumpkin Thanksgiving Card

By Kathi Rerek

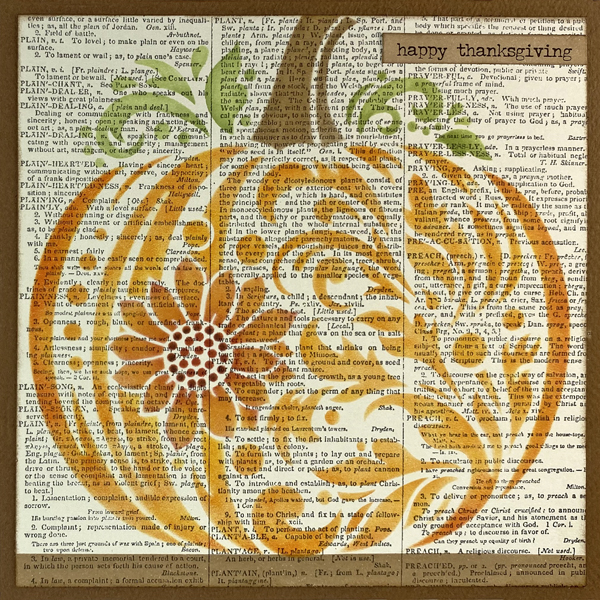
Here’s a quick and easy Thanksgiving card using a beautiful pumpkin stencil, Memento Dew Drop Inks, and a sticker!

Skill Level: Beginner
Time: 45 minutes

Instructions:

Step 1:
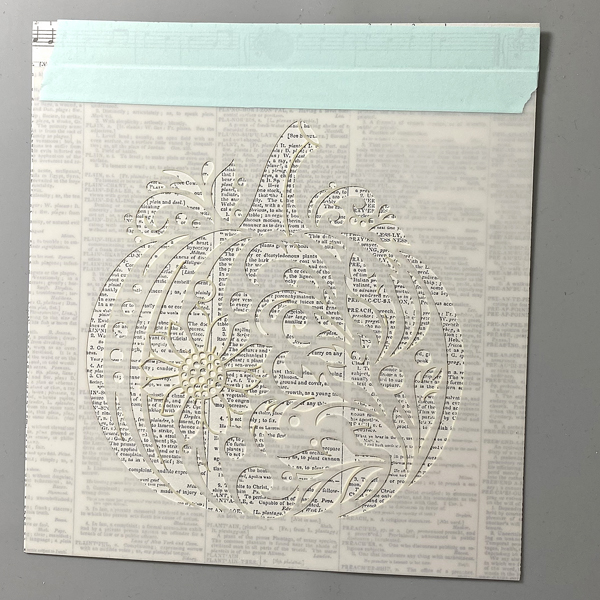
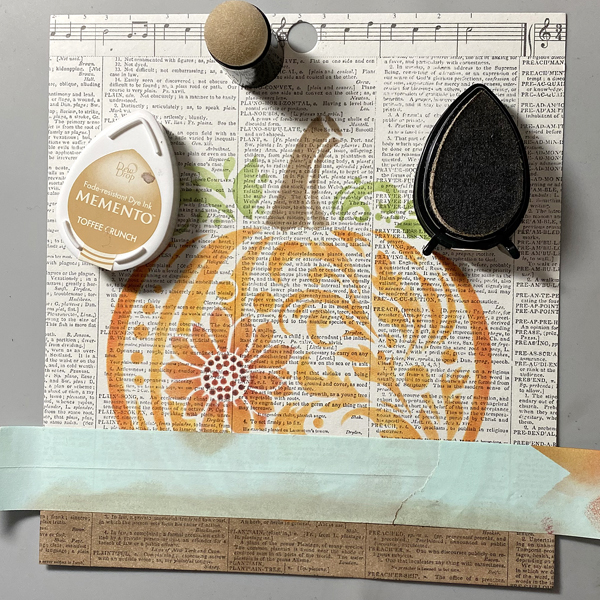
Use low-tack tape to adhere the Pumpkin Flourish stencil to the top of a piece of text cardstock and the craft mat. Run a stylus tool along the tape seam between the stencil and the cardstock to create a hinge so that you can pick up the stencil to check out ink coverage.

Step 2:
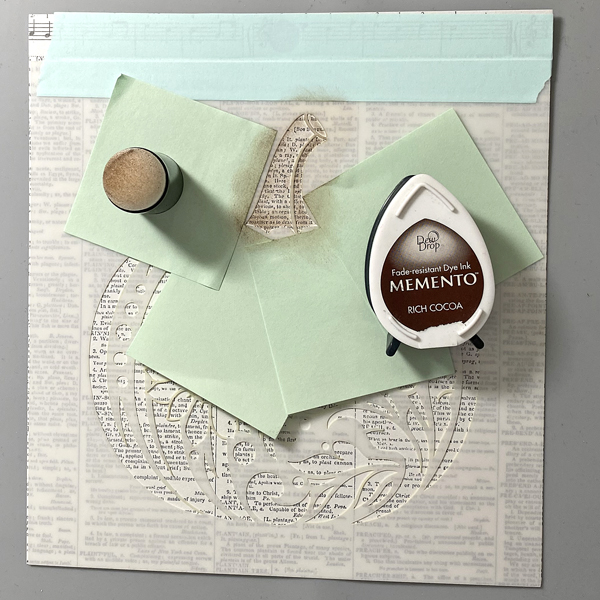
Use Post-It Notes to cover the leaves and the pumpkin on the Pumpkin Flourish stencil. Use a Sponge Dauber to apply Rich Cocoa Memento Ink along the edges of the pumpkin’s stem onto the text paper. Use another Sponge Dauber to apply Toffee Crunch Memento Ink over the Rich Cocoa Ink and onto the rest of the stem.

Step 3:
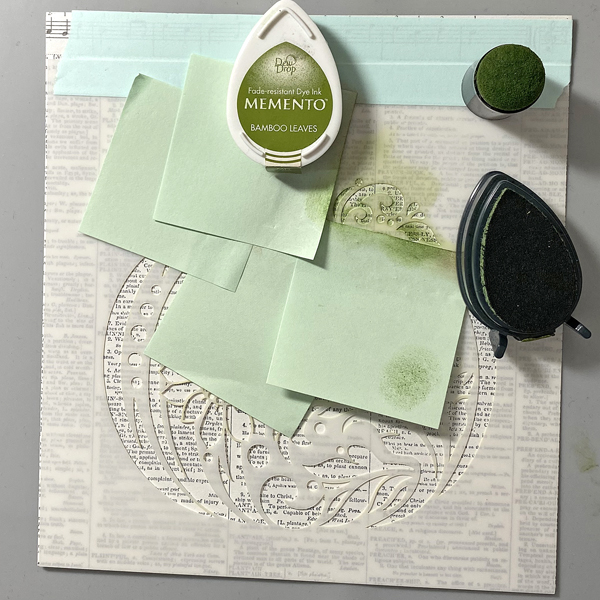
Use Post-It Notes to cover the stem and the pumpkin on the Pumpkin Flourish stencil. Use a Sponge Dauber to apply Bamboo Leaves Memento Ink around the outside of the leaf flourishes on the stencil onto the text paper. Use another Sponge Dauber to apply New Sprout Memento Ink fill in the open areas of the leaf flourishes on the stencil.

Step 4:
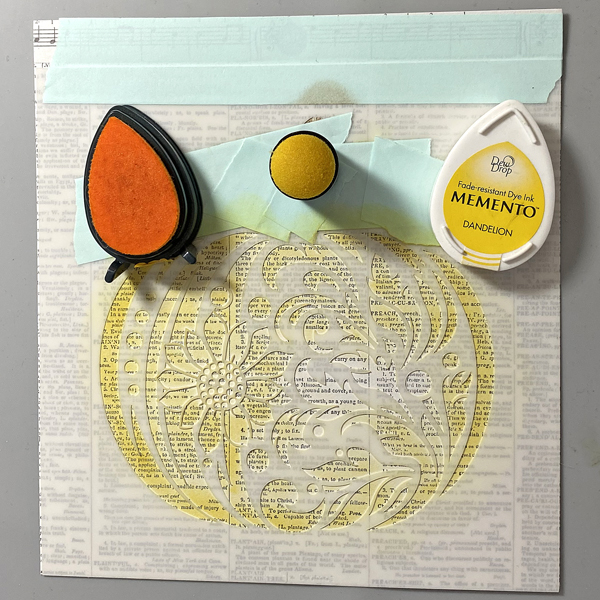
Use Post-It Notes to cover the stem and the stem on the Pumpkin Flourish stencil. Use a Sponge Dauber to apply Dandelion  Memento Ink over the pumpkin area of the stencil onto the text paper.

Step 5:
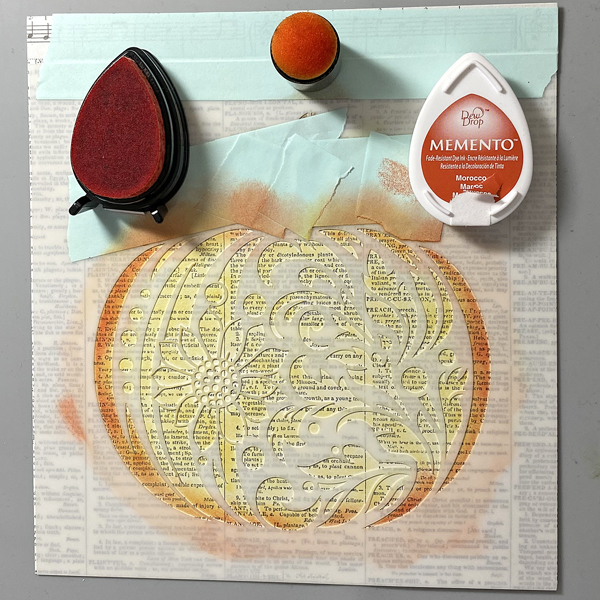
Use a Sponge Dauber to apply Morocco Memento Ink over the outside edges of the pumpkin stencil onto the text paper. Working from the outside of the pumpkin stencil towards the center of the pumpkin stencil, use separate Sponge Daubers to apply Tangelo Memento Ink, then Canteloupe Memento Ink over the stencil onto the text paper.

Step 6:
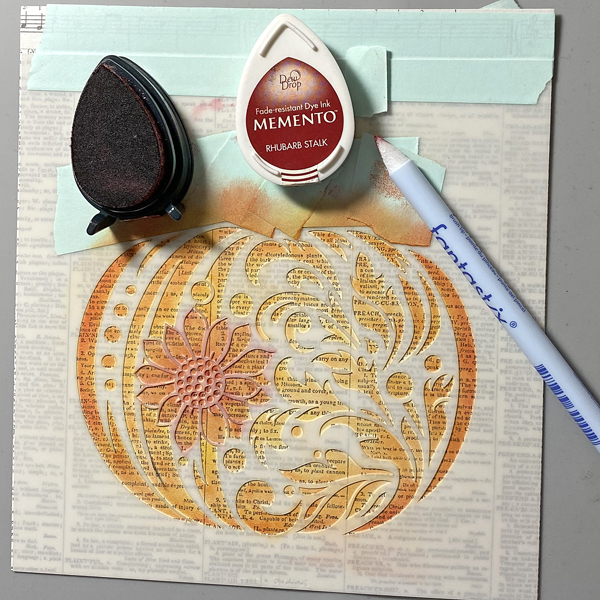
Use a Fantastix to apply Rhubarb Stalk Memento Ink over the flower on the stencil onto the text paper. Apply the ink more heavily on the outer and inner edges of the flower stencil.  Apply the Rhubarb Stalk Memento Ink very heavily on the center of the flower. Use a second Fantastix to apply Elderberry Memento Ink to the outer dot circle in the center of the flower stencil.

Step 7:
Remove the low-tack tape and the stencil from the panel. Position a piece of low-tack tape horizontally across the bottom of the image panel right below the stenciled pumpkin. Use Sponge Daubers to apply Rich Cocoa and Toffee Crunch Memento Inks  over the tape and onto the text paper.

Use the Rich Cocoa Memento Ink and its Sponge Dauber to tint a “Happy Thanksgiving” Idea-ology Small Talk-Occasion sticker. Trim the image panel to 4.75” square, edge with the Rich Cocoa Memento Ink, and adhere the sentiment sticker to the upper right of the image panel.

Step 8:
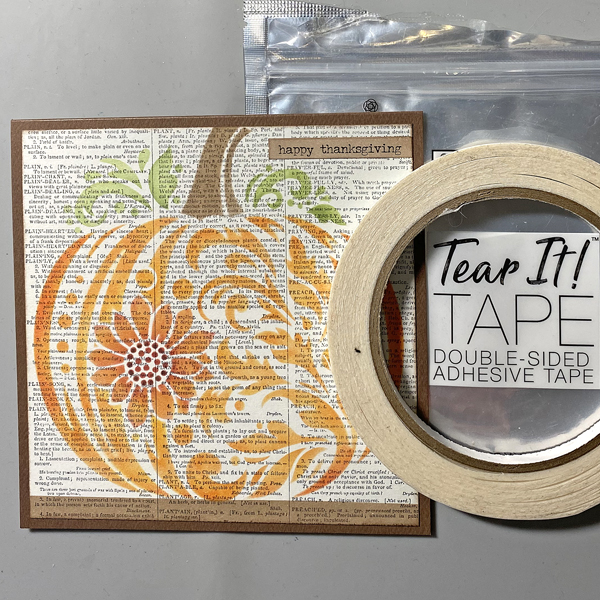
Use Tear It! Tape to adhere the layers of the card.

Finished Card

Imagine Supplies:

Other Supplies:

  • Brown Cardstock by Bazzill Basics
  • Pumpkin Flourish Stencil by Miss Ink Stamps
  • DIY Shop Patterned Paper Pad by American Crafts
  • Small Talk: Occasions Idea-ology Stickers by Tim Holtz for Advents
  • Low-Tack Tape
  • Post-It Notes

Make a Gorgeous Milk Carton Treat Box

By Ceil Pritchett

Hello crafty friends!
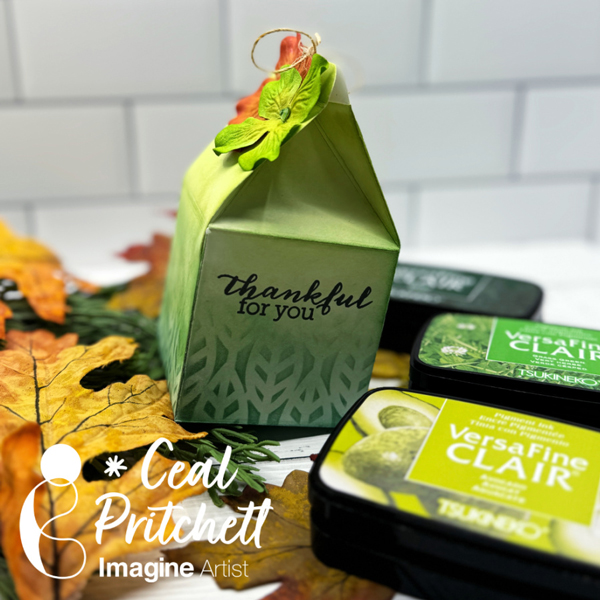
Today I am sharing how to create this milk carton treat box

Skill Level: Beginner
Time: 30 minutes

Directions:

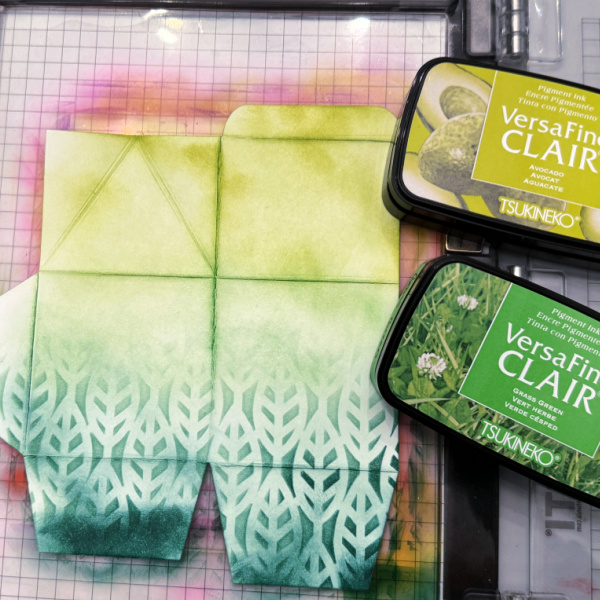
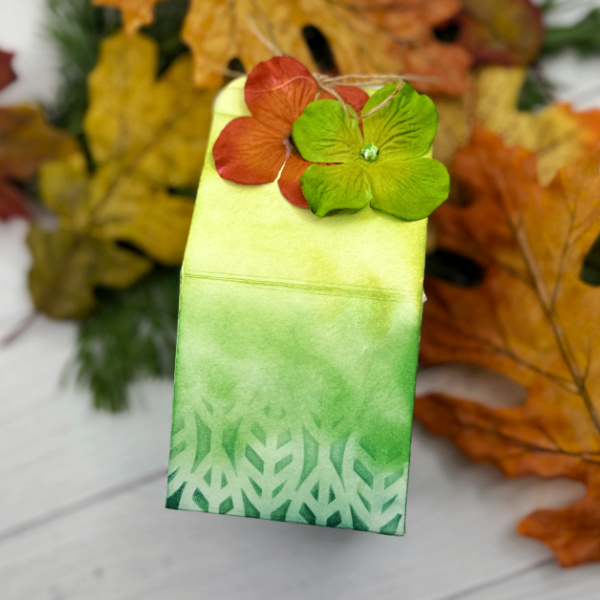
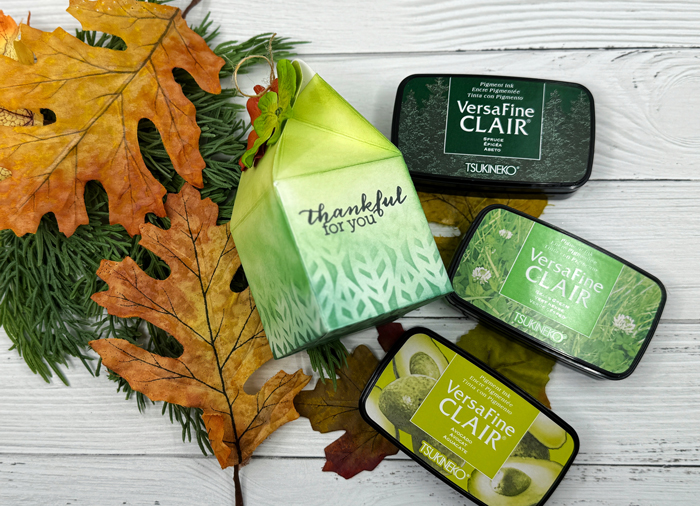
Gather your supplies. You will need a treat box die (I am using a tailored Expressions) a stencil and three colors of ink (I am using VersaFine Clair new colors) White cardstock cut to 6 x 8.5

Step 1:
Cut out two pieces of the die using white card stock. Place one of the pieces down on a stick mat to hold it in place. Place the stencil over it and ink the bottom third of the die with the darkest ink color.

Step 2:
Remove the stencil and ink the next third using the medium color of ink and the last third with the lightest color of ink. Repeat this process for the next piece.

Step 3:
Assemble the carton and embellish. I used some embellishments from my stash.

Products Used:

Imagine products:
VersaFine Clair – Avocado, Grass Green and VersaFine Clair Spruce
On Point Glue

Other products:
Neenah Classic Crest Solar White 80lb Cardstock – CutCardStock
Milk carton die – Taylored Expressions
Stencil – Ink On 3
Embellishments