Make a Card for Dad

By Helen Gullett

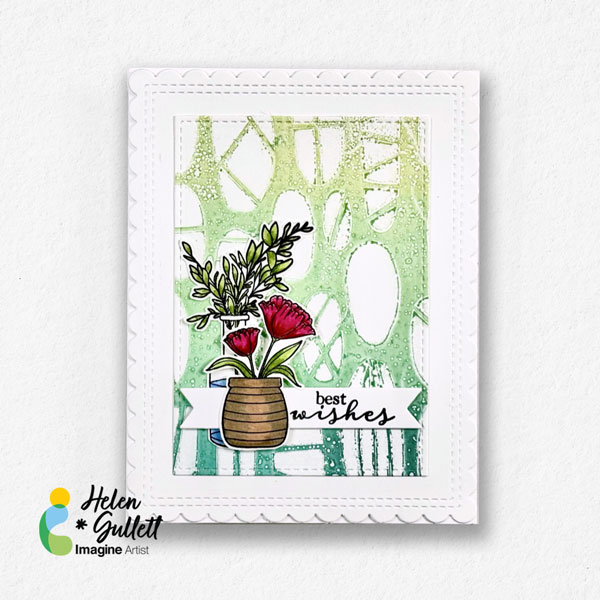
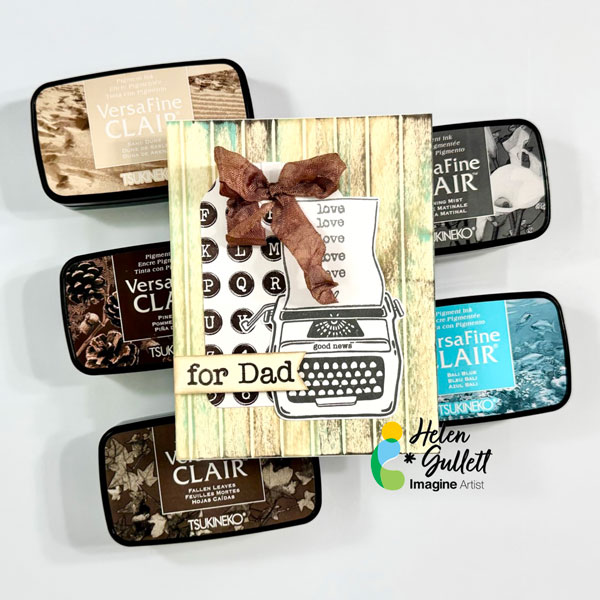
~Hello crafty friends! Today, we are going to make a masculine card style card for dads with a faux wood background and some layers. So, let’s get crafting!

Skill: Intermediate
Time: 15-20 Minutes

Directions:

Step 1

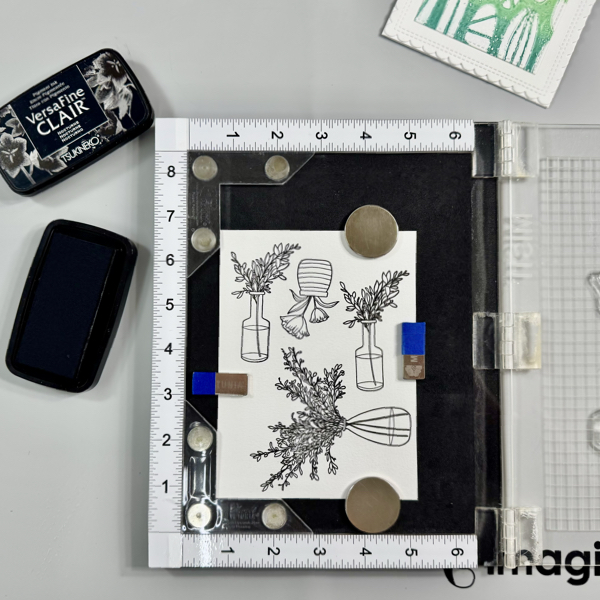
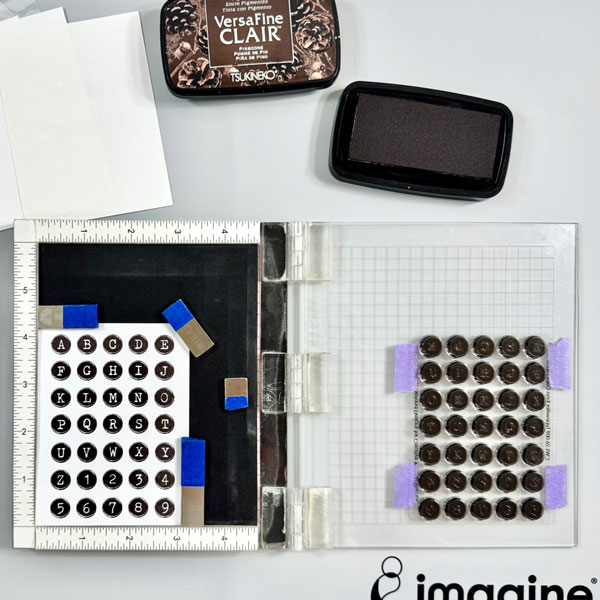
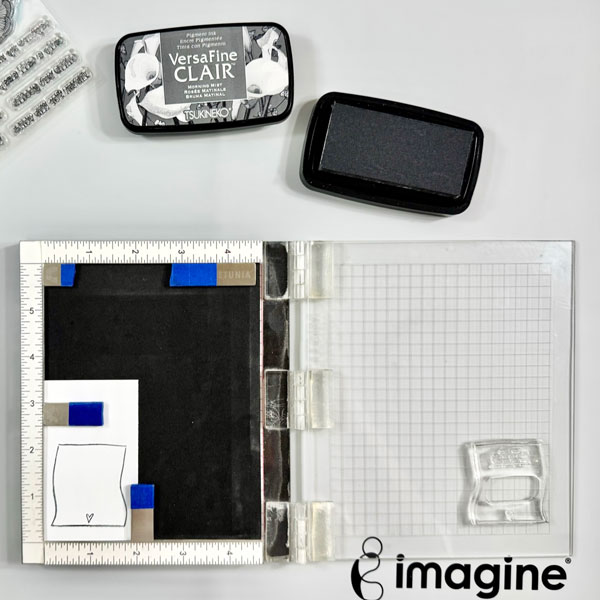
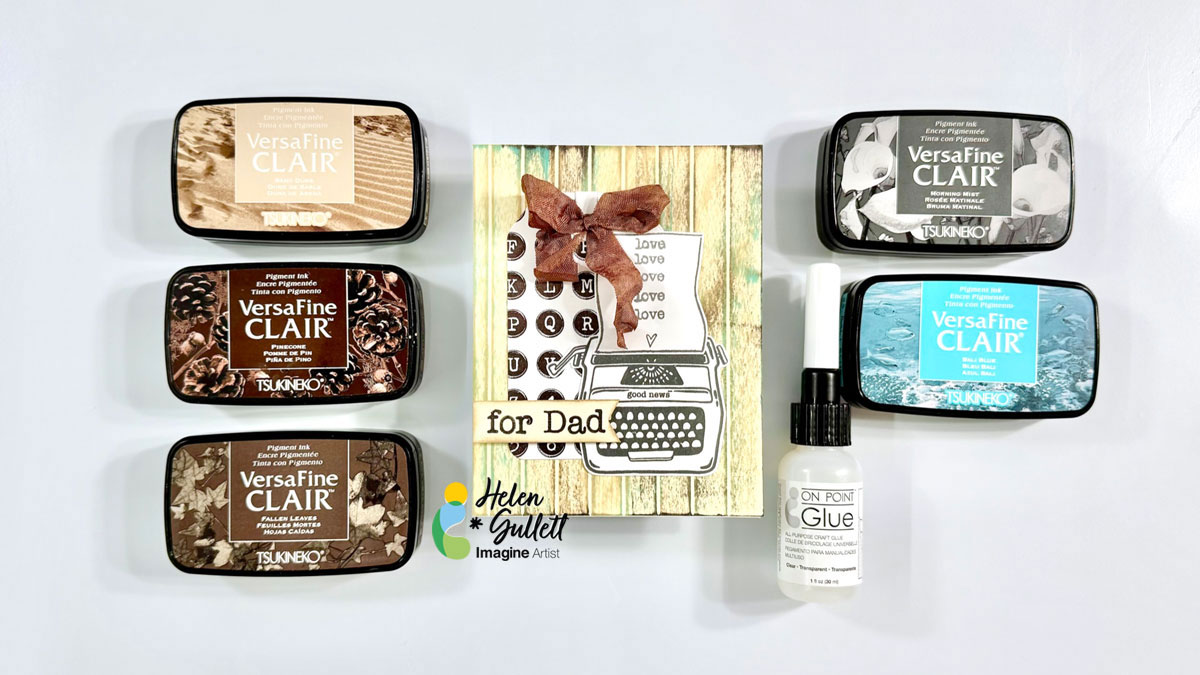
Stamp the Typewriter Keys Caps alpha stamp set on a piece of white cardstock with the VersaFine Clair Pinecone ink pad.

Since I used the whole stamp set, I did not remove them from its acetate backing and added to the stamping lid and taped it.

Step 2

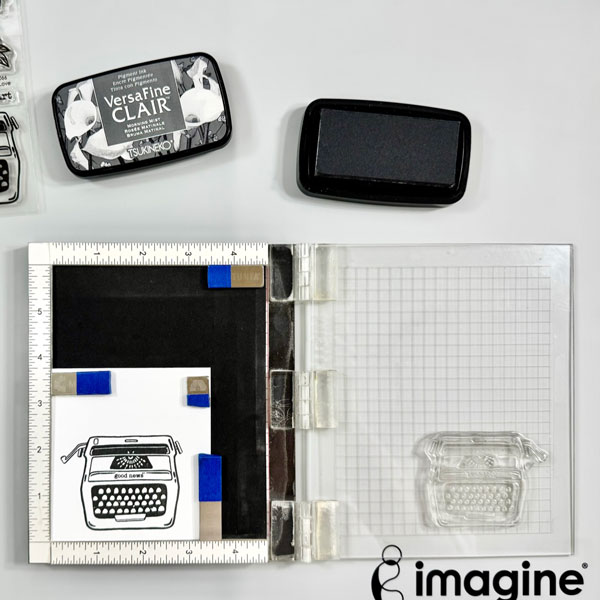
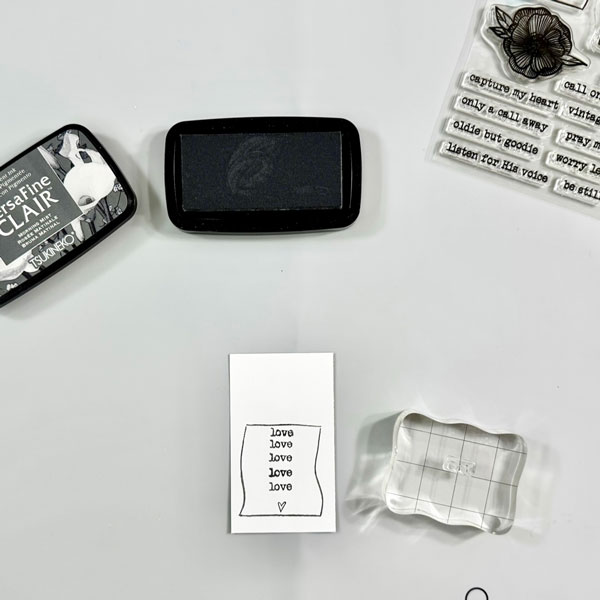
On another piece of white cardstock, stamp the typewriter image with the VersaFine Clair Morning Mist ink pad.

Step 3

Stamp the paper image with the VersaFine Clair Morning Mist ink pad on a piece of white cardstock.

Step 4

Stamp the word “love” in the middle of the stamped paper image with VersaFine Clair Morning Mist ink pad.

Step 5

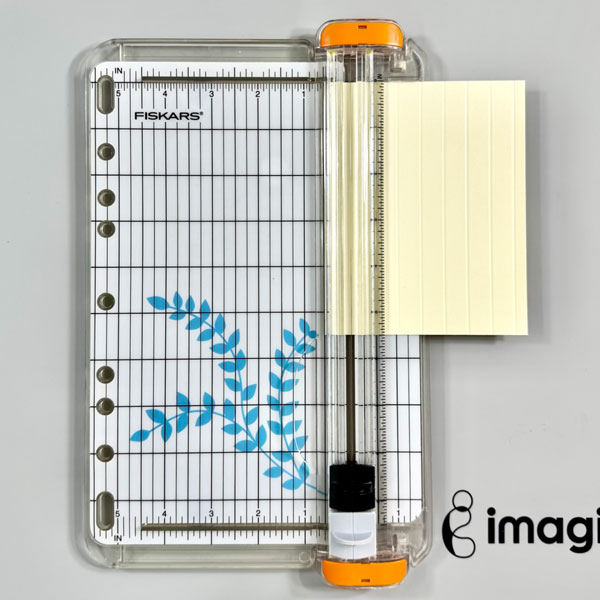
Cut a piece of ivory cardstock into 4.25 inch x 5.5 inch.

Score the cardstock at ½ inch until the whole cardstock scored.

Step 6

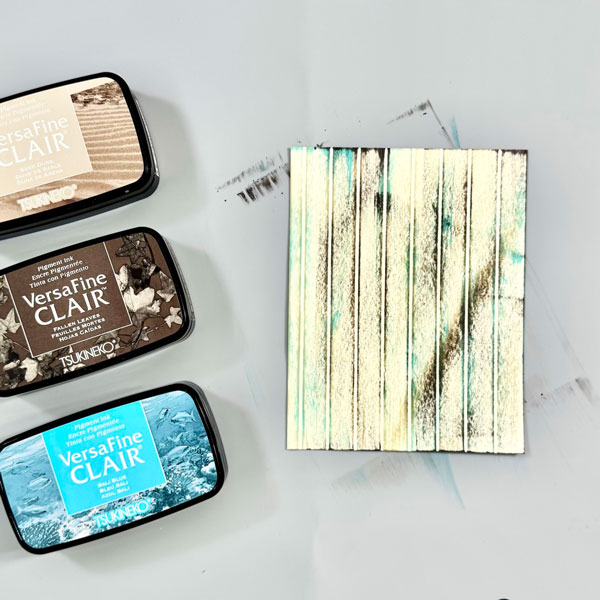
This is the fun part… ink swiping to create the faux wood background.

Lightly swipe the ink over the scored cardstock, start with VersaFine Clair Sand Dune ink pad, and then use the VersaFine Clair Fallen leaves, and the VersaFine Clair Bali Blue ink pad.

Use a craft heat gun to dry the inks in between swiping to avoid the ink transfer to the different color ink pad.

Step 7

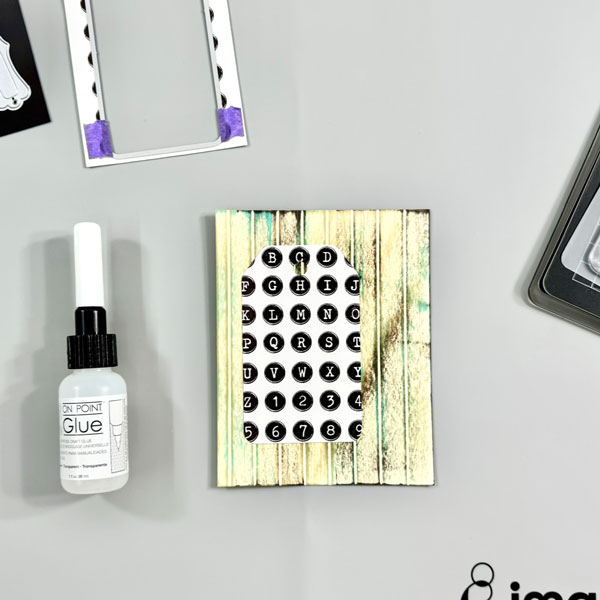
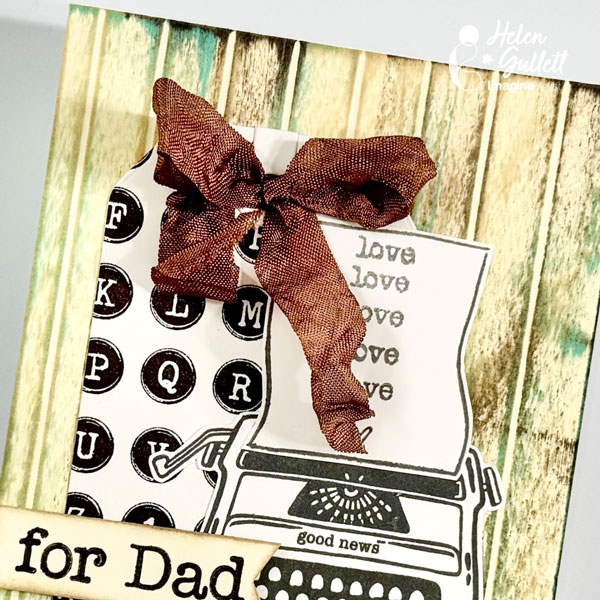
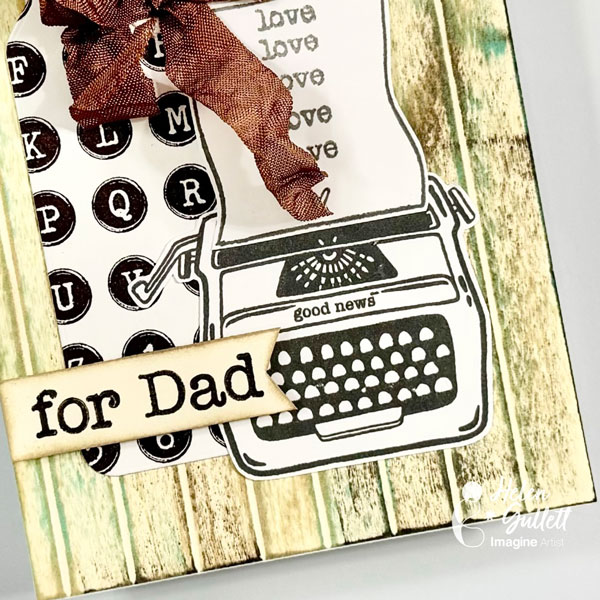
Use a tag die to cut the stamped alpa cardstock.

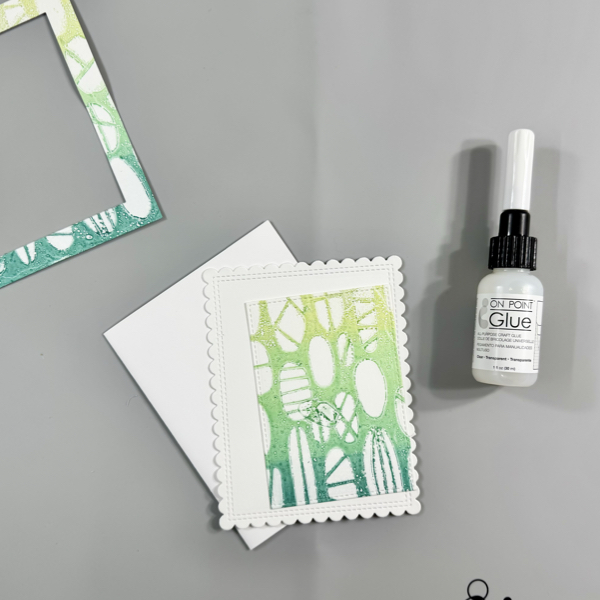
Add it to the faux background mat with On Point Glue.

Step 8

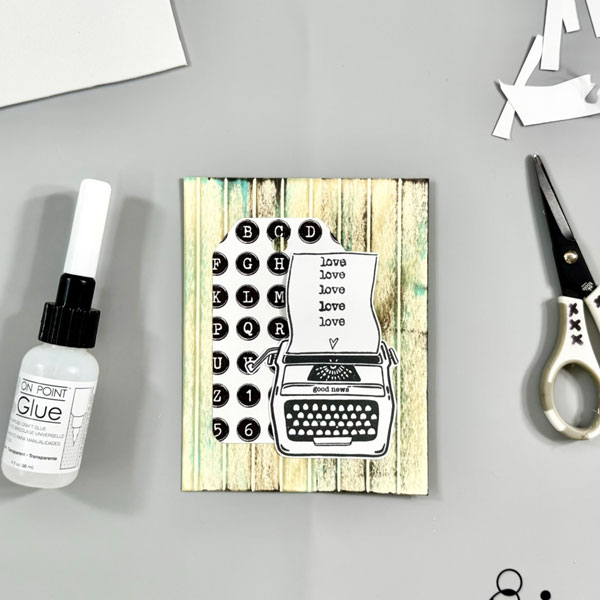
Fussy cut the stamped typewriter image and the stamped paper image with micro-tip scissors.

Add the paper to the typewriter with On Point Glue. And then add a little piece of white fun foam behind the paper using On Point Glue for a bit of dimension.

Add the whole image to the background mat with On Point Glue.

Step 9

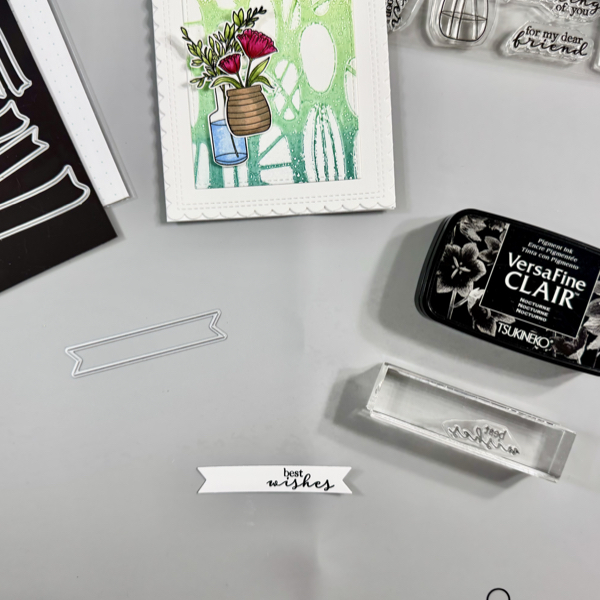
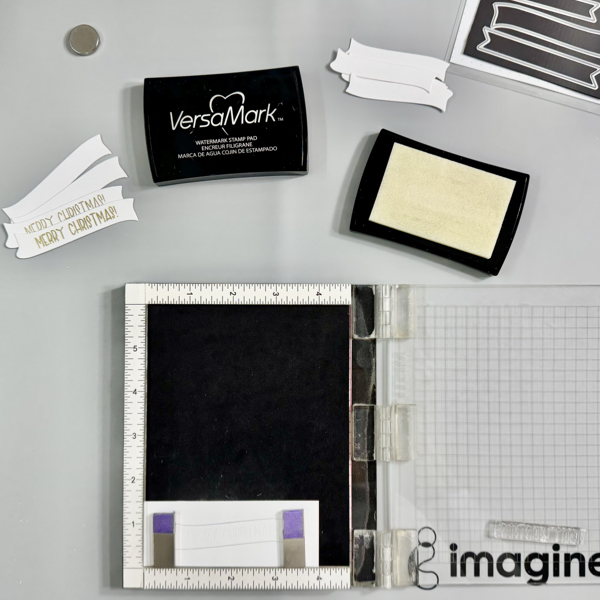
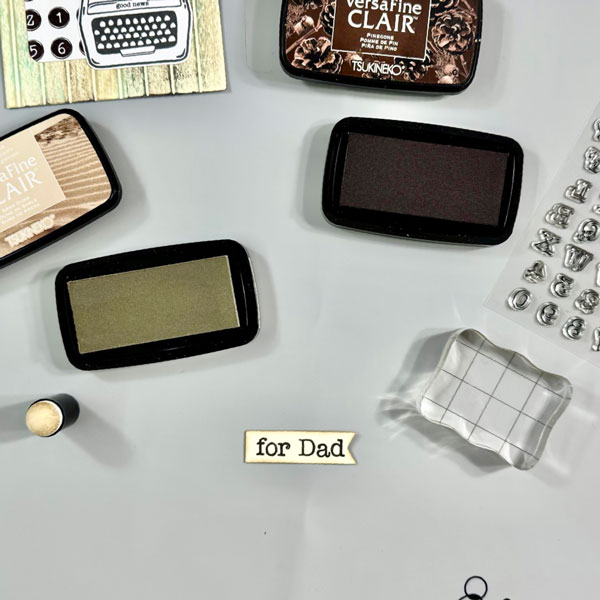
On a piece of ivory cardstock, stamped the sentiment with VersaFine Clair Pinecone ink pad. Trim it into a banner flag, and then add some of the VersaFine Clair Sand Dune ink around it with a sponge dauber.

And then add a piece of fun foam behind the sentiment and the sentiment banner to the background mat with On Point Glue.

Step 10

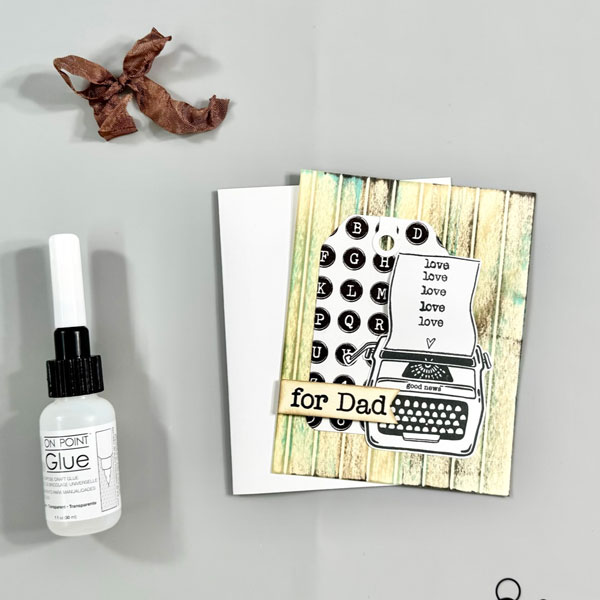
Add the whole finish background mat to the card with On Point Glue. Press firmly for a few seconds to make sure the glue dries well.

Add the ribbon bow to the top of the tag with On Point Glue. Hold it for a few seconds for the glue to dry well in place.

The simple scoring and ink swiping techniques are a fun technique to try to add texture to the faux wood background.

I hope you like this masculine card idea and give it a try to make a card for a special  dad figure in your life.

Thanks so much for stopping by our blog today. Have a wonderful day!
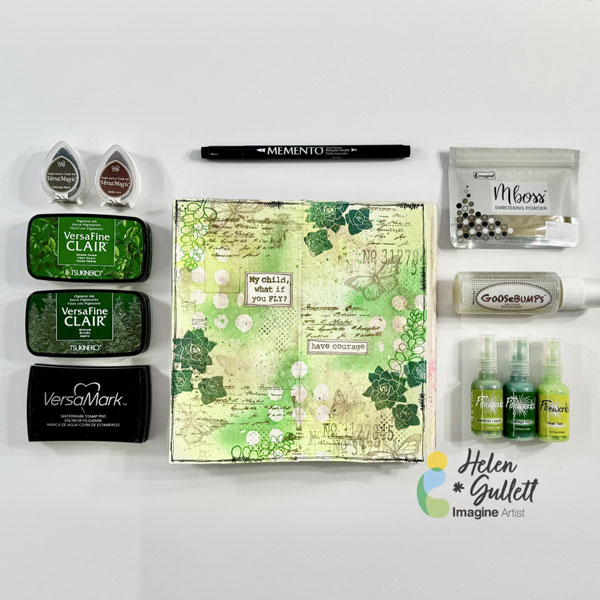
Craft Supplies

Imagine Crafts:

Others:

  • Typewriter Keys Caps Alpha Stamp Set
  • Typewriter Alpha Stamp Set
  • Vintage Love Stamp Set
  • Tags & More Die Set
  • Ivory cardstock
  • Heavyweight White cardstock
  • White fun foam
  • Crinkle ribbon
  • Low-tack tape
  • Stamping tool with magnet
  • Stamping blocks
  • Paper trimmer
  • Micro-tip scissors
  • Diecutting machine

Mixed Media Art Journal

By Helen Gullett

Hello crafty friends! Today, I would like to share how to make this mixed media art journal using some inks, craft sprays, embossing powder, and GooseBumps.Let’s get crafting!

Skill: Intermediate
Time: 30-60 minutes

Direction:

Step 1
I used my handmade traveler journal using watercolor papers and mixed media papers. You can use any mixed media journal you have.

Dab some of the VersaMagic Jumbo Java ink on the craft mat and spray with some water.

Smoosh the page (or paper) to the ink and dry it with a craft heat gun. Repeat this step to create the watercolor background.

Step 2
Once the watercolored background dried well, add some of the anti-static powder to the page.

Stamp the script stamp on the page randomly with VersaMark ink and then add some of the Gold Mboss Embossing Powder to the page. Heat set the embossing powder with a craft heat gun.

Step 3
Add the stencil to the page.

Add some of the GooseBumps Original (Dauber Top Bottle) to the page on the stencil randomly all over the page.

The best result is to let the GooseBumps texture spray dry naturally (about 2 hours) but I use a handheld fan to speed up the drying process to a few minutes. My suggestion is not to use a craft heat gun.

Step 4
Once the GooseBumps texture spray dry well, spray the Cottage Ivy Fireworks! Shimmery Craft Spray.

Dry the ink with a craft heat gun. Make sure to move the heat gun around, not stay too long at one spot to avoid melting the GooseBumps.

Step 5
Next, spray the Bamboo Leaves Fireworks! Shimmery Craft Spray.

Dry the ink with a craft heat gun. Make sure to move the heat gun around, not stay too long at one spot to avoid melting the GooseBumps.

Step 6
And then, spray the Pear Tart Fireworks! Shimmery Craft Spray.

Dry the ink with a craft heat gun. Make sure to move the heat gun around, not stay too long at one spot to avoid melting the GooseBumps.

Step 7
Wipe the ink spray off using a clean slightly damp paper towel.

You can see the shapes start to pop out of the page adding fun texture to the background page.

Step 8
Stamp the dots texture stamp randomly on the page with VersaMagic Midnight Black ink using first generation stamping technique.

Step 9
Stamp the numbers texture stamp randomly on the page with VersaMagic Midnight Black ink using first and second generation stamping technique.

Step 10
Stamp the old ledger texture stamp randomly on the page with VersaMagic Jumbo Java ink using second and third generation stamping technique.

Step 11
Stamp the leaf branch stamp randomly on the page with VersaFine Clair Green Oasis.

Dry the stamped images with a craft heat gun.

Step 12
Next stamp the cactus stamps randomly on the page with VersaFine Clair Spruce ink.

Dry the stamped images with a craft heat gun.

Step 13
Stamp the first butterfly stamp randomly on the page with VersaMagic Jumbo Java ink using second generation stamping technique.

Step 14
Stamp the second butterfly (smaller size) stamp randomly on the page with VersaMagic Jumbo Java ink using second generation stamping technique.

Step 15
On a white cardstock, stamp the sentiments with VersaMark Ink and then add some of the Gold Mboss Embossing Powder. Heat them with a craft heat gun.

Step 16
Trim the embossed sentiments into sentiment stripes with papercutter or scissors.

Add some of the VersaMagic Jumbo Java ink around the edges with finger sponge dauber to give them some shadow.

Step 17
Add the sentiments to the page with On Point Glue.

Step 18
Draw some border lines around the page and sentiment strips using the Memento Marker Tuxedo Black.

Step 19
For more texture, add some of the Cottage Ivy Fireworks! Shimmery Craft Spray to the page by tapping the sprayer tube.

Dry the whole page one more time with a craft heat gun.

I tried to capture the shiny and shimmery on the page in this picture but it looks even more in real life.

I hope you enjoy today’s mixed media project. Thank you for visiting our blog, have a fabulous day.

Craft Supplies

Imagine Crafts:

Others:

Monoprinting Greeting Card With VersaFine Clair and Memento Markers

By Helen Gullett

Hello crafty friends! Today we are going to do some monoprinting with VersaFine Clair inks and a gelli printing plate to create some fun backgrounds. And also, we will do some coloring with Memento Markers.

Let’s get crafting!

Skill: Intermediate
Time: 30 Minutes

Direction:

Step 1
Put the gelli printing plate directly on the Imagine Craft Mat. Make sure it lays flat.

Dab some of the VersaFine Clair inks on the gelli printing plate, do this one color at a time and do not mix them together.

Step 2
Mix the inks on the gelli printing plate with the mini roller. Mix the color from top to bottom, gradually.

Step 3
Put the stencil on the gelli printing plate.

Gently press the stencil to the gelli printing plate.

Step 4
Get a piece of printing/copy paper (preferably thickness 24 lb or more), you can cut it in half or use full size.

Add the paper to the gelli printing with stencil and gently press it down to get ink off the plate.

Step 5
Carefully pick up the paper off the gelli printing plate from one corner.

This is the first printing. For this time, you can keep it aside for future projects.

Step 6
Carefully remove the stencil off the gelli printing plate.

While the inks are still wet (this is why VersaFine Clair inks are the best for this project!), put a piece of white cardstock to the gelli printing plate and gently press down to pick up the ink off the plate.

Step 7
Carefully pick up the printed cardstock of the gelli printing plate.

You get the second print which is a different pattern than the first one.

Use a craft heat gut to dry the ink well.

This is the print that we will use for the background of the card.

Step 8
Once the printed background dried well, cut it with a rectangle die form the Stitched Rectangle dies set.

Then cut another piece of white cardstock with the scallop rectangle die from the same set.

Step 9
Add the white scallop background panel to the card base using the On Point Glue.

And then, add the printed background panel to the card using the same glue.

Set it aside to dry (optional: you can put a couple of large acrylic stamping blocks on it to hold it down while drying).

Step 10
Put a piece of white cardstock on a stamping platform and secure it with some magnets.

Arrange the flower stamps on it and stamp them with the VersaFine Clair Nocturne ink pad.

Remove it from the stamping platform.

Step 11
Dry the stamped images using  a craft heat gun.

Color them using the Memento Markers.

Fussy cut the images with micro-tip scissors.

Step 12
Stamp the sentiment a white cardstock with VersaFine Clair Nocturne ink.

Dry the stamped sentiment with a craft heat gun.

Cut it with one of the banner die from the Banners die set.

Step 13
Add the first flower to the card with On Point Glue.

Using On Point Glue, add a piece of thin foam to the back of the sentiment banner and add it to the card with the same glue.

Then, add some of the thin foam to the second flower and add it to the card with the same glue.

The card is done. Though it looks simple, yet it has some layers to it.

This gelli printing technique is one of a fun way to create pattern backgrounds other stamping.

Thanks for stopping by our blog today.

Craft Supplies

Imagine Crafts:

Others:

Watercolored Lunar New Year’s Card

By Helen Gullett

Hello crafty friends… Helen is here today. Today, I would like to share an idea to make a Lunar New Year card. Lunar New Year marks the new month for the new year in oriental calendar and it is also the beginning of Spring. Today we are going to do some watercoloring with Fireworks! Shimmery Craft Sprays and layer stamping technique.

Skill: Beginner
Time: 15 minutes

Direction:

Step 1

First, cut out a piece of watercolor paper (I used 140 lb watercolor paper) into 4.25 inch x 5.5 inch.

Spray the Fireworks! Summer Sky and Bahama Blue on the craft mat, and lightly spray with water to create the watercolor ink blends on the craft mat.

Smoosh the watercolor paper to the ink and repeat it until the watercolor inks cover the paper. You can dry the ink in between smooshing for extra texture and more layers of colors. Dry the whole panel with a craft heat gun.

Step 2

Put the watercolored background panel on the stamping tool.

Stamp the fish images on it with the VersaFine Clair Nocturne ink pad. Repeat it if needed.

Dry the stamped images well with a craft heat gun and put it back on the stamping tool.

Step 3

Stamp the bottom layer of the lily pad leaf with the VersaFine Clair Grass Green ink pad.

Move the position of the stamp to a different spot and stamp again.

Repeat it until you like the pond scene on the card.

Dry the stamped images well with a craft heat gun and put it back on the stamping tool.

Step 4

Next is to stamp the second layer of the lily pad leaf. Position the stamp on top of the first stamped image and then stamp it with the VersaFine Clair Green Oasis ink pad.

Repeat it until you stamp on all the first layer stamped images.

Dry the stamped images well with a craft heat gun and put it back on the stamping tool.

Step 5

Next is to stamp the third layer of the lily pad leaf which means it is the top layer of the layer stamps. Usually it would be the darkest color of the color combo.

Position the stamp on top of the previous stamped image and then stamp it with the VersaFine Clair Rain Forest ink pad.

Repeat it until you stamp on all the stamped images.

Dry the stamped images well with a craft heat gun.

Step 6

This is the fun part: watercoloring with the Fireworks! Shimmer Craft Spray.

Spray a little bit of each color of the Lady Bug, Dandelion, and Tangelo directly on the craft mat. I only sprayed it once and no water was added.

Pick up the ink color and start watercoloring the koi fishes. Each color will blend well.

For a lighter pigment color, you spray a little bit of water and mix it together.

Step 7

DO NOT WIPE OFF the left over of the Fireworks! Shimmer Craft Sprays on the mat.

Spray more water on it and smoosh a piece of watercolor paper on it to get another watercolored background panel.

Dry it well with a craft heat gun and set side so you can use for your next project.

Step 8

Stamp the water ripple stamps all over the panel with a stamping block using the VersaMagic Cloud White Dew Drop ink.

This will give the water ripple effect that those koi fishes swimming under the water.

One more time dry the whole panel with a craft heat gun to make sure all the inks are set well on the watercolor paper.

Step 9

Cut a piece of heavyweight heat-resistant vellum paper into 1 inch x 4.75 inch.

Put it on the stamping tool and secure it with the magnets.

Stamp the sentiment in the middle of the vellum paper with Brilliance Galaxy Gold Dew Drop ink.

Carefully remove it from the stamping tool and dry the ink with a craft heat gun.

Step 10

Add the sentiment vellum strip on the background panel and fold the extra flap to the behind of the panel and secure it with some of the On Point Glue.

Add the whole finished panel to the card base with On Point Glue. Hold it down for a couple minutes until the glue dries well.

The card is done.

This watercolored Lunar New Year card is flat enough to send it in regular mail for sure. I hope you will give this tutorial a try to create your own flat card yet has some layers effect on it.

Thank you so much for stopping by our blog today. Have a wonderful day!

Craft Supplies

Imagine Crafts:

Others:

  • Koi Pond stamp set (Ink On 3)
  • Bunting stamp set (Avery Elle)
  • Watercolor paper (heavyweight, about 140 lbs / 300 gr)
  • Vellum paper (heavyweight and heat-resistant)
  • White Cardstocks
  • Stamping Tool
  • Acrylic stamping block
  • Waterbrush
  • Bonefolder
  • Paper trimmer
  • Craft heat gun

Create Quick Snowflake Card Sets for the Season

By Helen Gullett

Hello crafty friends… ‘Tis the season when I like to mass-produce handmade holiday cards. So, today we will make a set of five snowflake cards using some cardmaking techniques such as stamping, die cutting, and heat embossing.

Skill: Intermediate
Time: 30 minutes

Direction:

Step 1
Make two card bases out of one 8.5 inch x 11 inch kraft cardstocks by cutting it in half. You can cut two or more cardstocks to make more card bases all at once. Score in the middle of the cardstock and fold it into an A2 card base.

Put the card on the stamping tool and start stamping it with the large snowflake background using VersaFine Clair Sand Dune ink pad.

Set them aside and let the ink to dry.

Step 2
Cut out a bunch of snowflakes with the small snowflakes die set out of the white cardstock.

On each of the snowflakes, add the WaterMark Dazzle Frost ink, then add some of the clear embossing powder, and heat it up with a craft heat gun.

Step 3
Add 3 snowflakes on each of the card fronts using the On Point Glue.

Set them aside until the glue dries well.

Step 4
Die cut the banners for the sentiment with one of the Banners dies. Do not throw away the negative cut out, you can use it as a holder when stamping the sentiment.

Place a banner back inside the negative cut out, hold it with the magnet, and stamp it with the sentiment using the VersaMark Original ink pad. After the stamping, add some of the gold embossing powder, then heat it up with a craft heat gun.

Repeat the step for all the banners.

Step 5
Add some of the Tear It! Tape on both sides of a piece of white fun foam to make your own foam tape.

Add some of the foam tape on the back of a banner and add it to the front card.

Step 6
Add some shimmer to the card by adding some splatters of the Sheer Shimmer Spray – Sparkle using a small flat or round brush.

Step 7
To add extra snowy effect to the card, a mix of Memento Luxe Wedding Dress ink and Sheer Shimmer Sparkle spray on the craft mat. Add some more splatters of the white sparkly ink using a small flat brush to the card front.

Use a craft heat gun to dry the whole front card.

All done.

I hope you like this mass-produced snowflake card idea. You can make a bunch of cards with only one design in a short crafting time.

Thank you for stopping by our blog today. Have a wonderful day!

Craft Supplies

Imagine Crafts:

Others:

Stamping on Fabric: Muslin Bags with Ink and Stencils

By Helen Gullett

Hello crafty friends! Today’s projects are about how you can personalize any muslin bags or canvas bags by adding patterns, words, or anything you can think of with Fabrico Markers, Memento Luxe ink pads, and stencils. It will be fun projects to make for any occasion gift ideas or even for yourself to use. So, let’s make some together!

Skill: Easy
Time: 15-20 minutes

Direction:

Step 1
If your muslin or canvas bag has some wrinkles or folded lines on it, you can iron it before stenciling on it. I ironed my mini muslin bags that I used on these projects today.
Cut out a piece of a thick cardboard or cardstock as an insert mat to put inside the bag to prevent the ink from bleeding through the other side of the bag.
Tape the stencil on the bag with masking tape or washi tape.
Use Fabrico Markers to color through the leafy stencil. To do the ink blending, start with dark color first, then medium color, then lighter color after to blend the color together.
The ink from the bag will transfer to the marker, but do not worry because you can clean the other ink color from the marker tip by scribbling it off on a piece of paper.

Remove the stencil from the bag.

Step 2
Repeat the same step to add more pattern or word to the bag.
On this one, I decided to add the word Be Still on the bag using stencil and Fabrico Marker.
Remove the stencil and set aside for the ink to dry, or iron the bag to dry the inks permanently and quickly.
I love how versatile these Fabrico Markers are when it comes to coloring solid images. The colors blend well together.
The second technique to personalize a muslin bag you can try is by adding ink directly to the bag with ink pads, sponge daubers, and stencil.

Step 3
Add the insert mat inside the mini muslin bag.
Tape the stencil on the mini muslin bag with masking tape or washi tape.
Using a sponge dauber,  pick up the ink from the Memento Luxe Rich Cocoa ink pad by tapping on the ink pad a couple times.
Dab the ink on the sponge dauber on the stencil firmly through the stencil to make sure the ink transfers to the bag.
Repeat the steps until the bag is covered with the pattern.

Step 4
Remove the stencil from the bag.
Iron the bag to dry the ink permanently on the bag.

I love how they look after removing the stencils off the bags. I personally like both techniques, how about you? Which technique do you prefer better to do to personalize your own bags?

Hopefully you also will have fun personalizing your own bags by trying one of both techniques. Thank you for stopping by our blog today. Have a wonderful day!

Craft Supplies

Imagine Crafts:

Others: