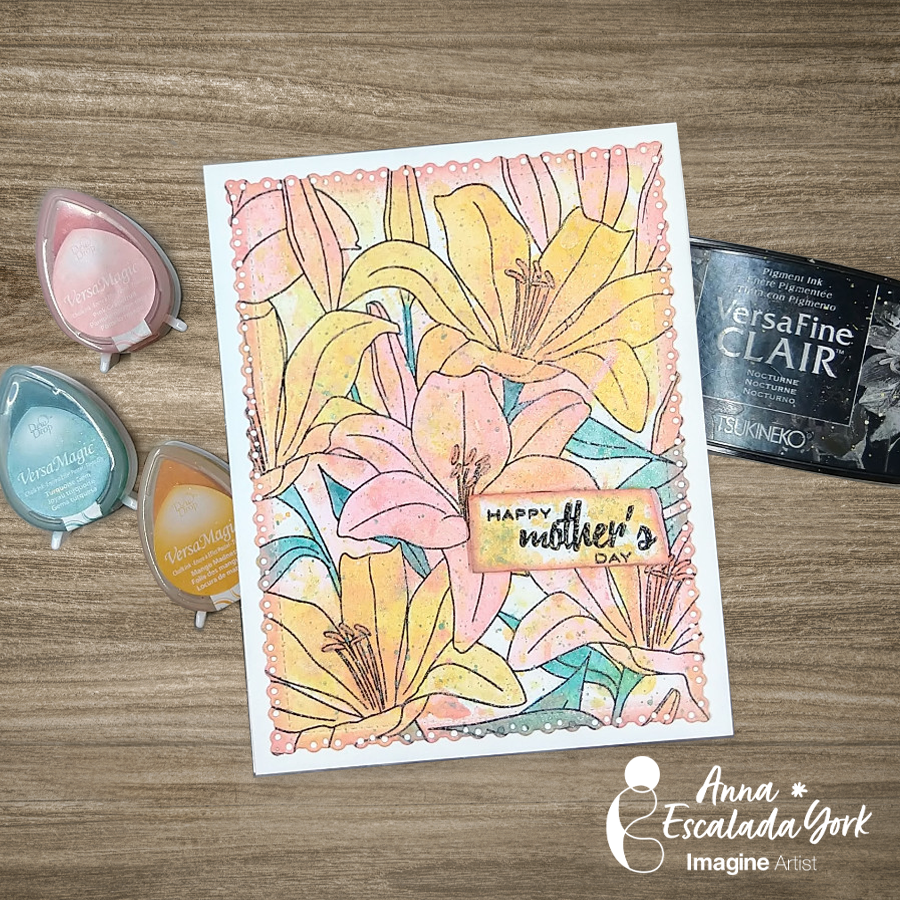
Let’s Make A Happy Mother’s Day Card

By Anna Escalada York

In today’s tutorial, I am sharing the card I made for my mom for Mother’s Day, using sprays and ink
mixed with Sheer Shimmer spray to watercolor the images.

Skill: Intermediate
Time: 1.5 hours

Directions:
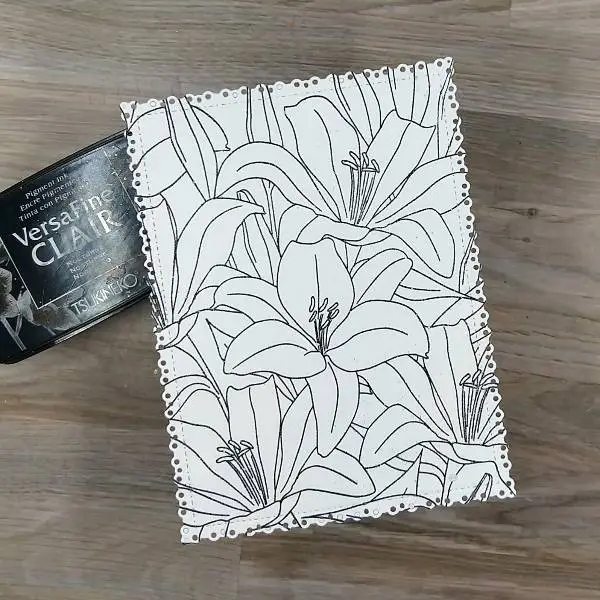
Step 1:
Use a die cut to create a watercolor paper panel and then stamp a large flower stamp with Nocturne VersaFine Clair Ink. Heat emboss with clear embossing powder
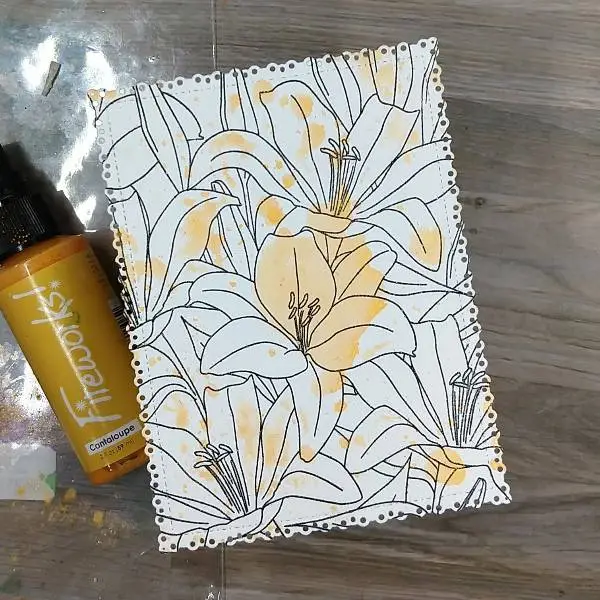
Step 2:
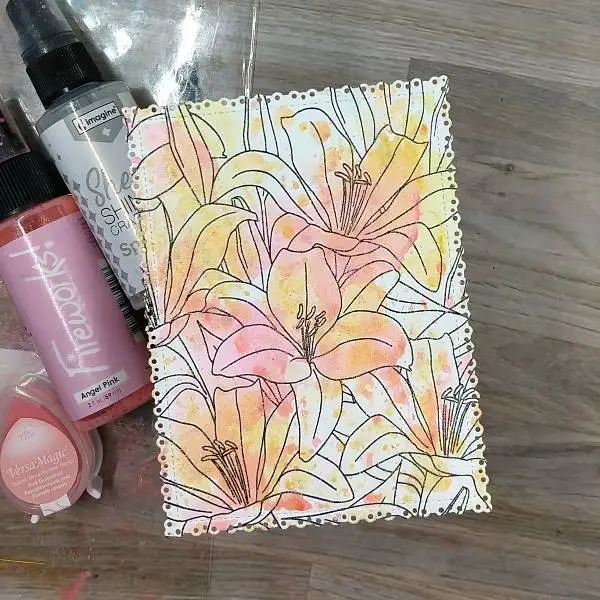
Spray Cantaloupe Fireworks! Spray onto a piece of scrap acetate packaging, and press the
sprayed acetate onto the stamped panel, making sure to get spray on multiple parts of the
stamped panel. Let dry.
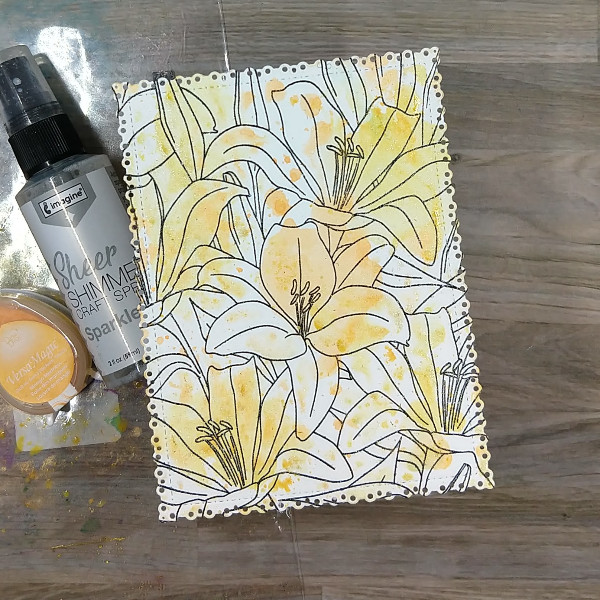
Step 3:
Press the Mango Madness VersaMagic Chalk Ink pad onto the acetate packaging. Then spray
Sparkle Sheer Shimmer Craft spray onto the ink to give it a watery consistency. Then press this
color of yellow ink onto the stamped panel to add interest and a variety of colors. Let dry.
Step 4:
Repeat the process with pink inks. Spray Angel Pink Fireworks! Spray onto the acetate
packaging and press the packaging onto the stamped panel. After the spray dried, press Pink
Grapefruit VersaMagic Chalk Ink onto the acetate and spray it with more of the Sparkle Sheer
Shimmer Craft spray and press that onto the stamped panel as well. Again, let dry.
Step 5:
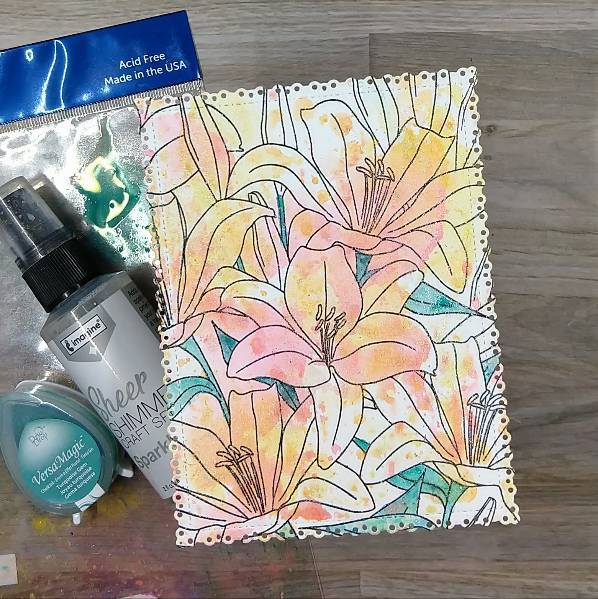
Press the Turquoise Gem VersaMagic Chalk Ink pad onto the acetate packaging and spray the ink with more of the Sparkle Sheer Shimmer Craft Spray to create a watercolor consistency. Then use a thin paintbrush to paint the leaves and stems of the flowers turquoise. Let dry.

Step 6:
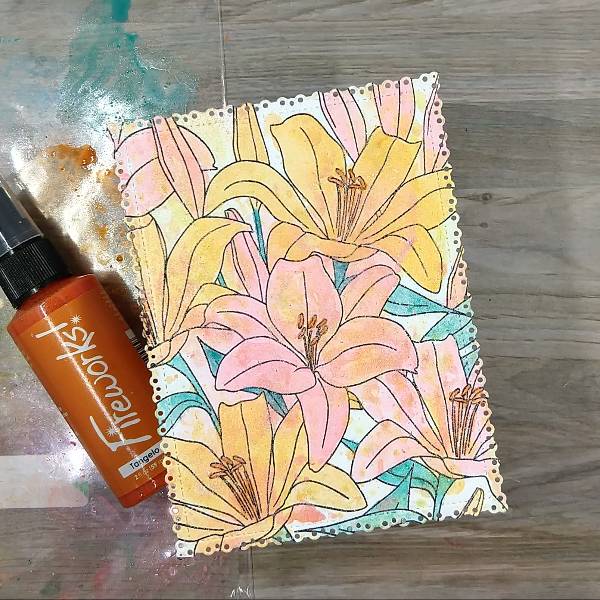
Spray more of the Cantaloupe Fireworks! Spray onto the acetate packaging and use the spray to watercolor about half of the flowers yellow. Let dry.

Step 7:
Spray more of the Angel Pink Fireworks! Spray onto the acetate packaging and then paint the rest of the flowers pink. Again let the spray dry.
Step 8:
Spray Tangelo Fireworks! Spray onto the acetate packaging, and use it to paint the anthers and filaments (center parts) of the flowers. Let dry.
Step 9:
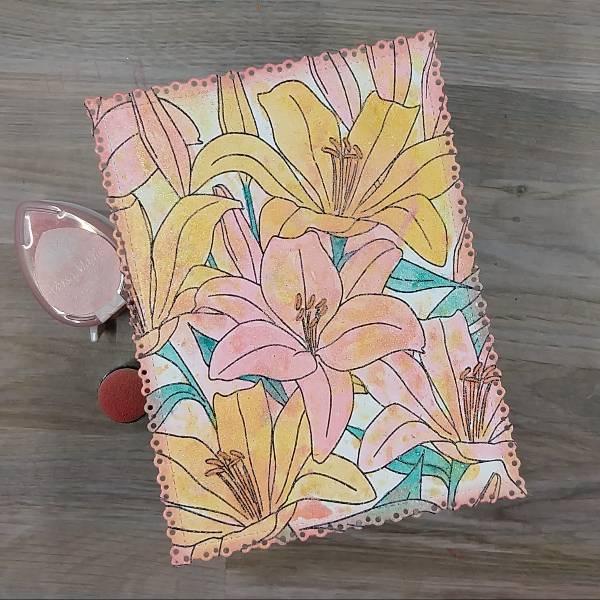
Use an ink dauber to ink blend the edges of the panel with Pink Grapefruit VersaMagic Chalk Ink.
(I ended up touching up the leaf on the bottom edge by painting a second layer of the Turquoise Gem VersaMagic Chalk Ink mixed with water to make sure the turquoise color wasn’t lost.)
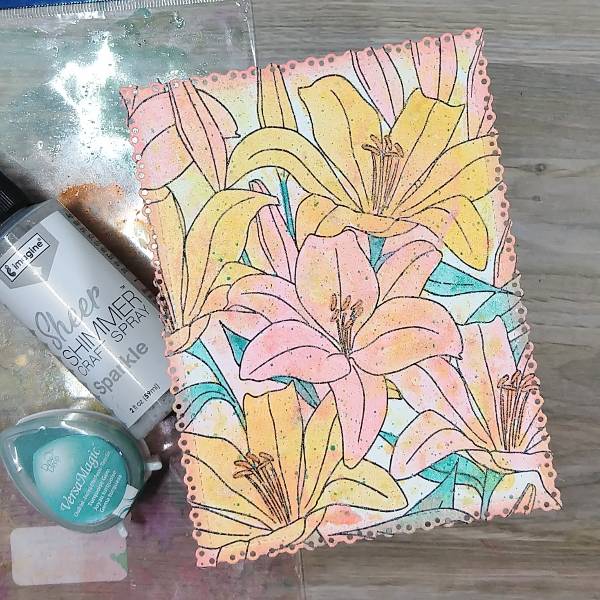
Step 10:
Press the Turquoise Gem VersaMagic Chalk Ink pad onto the acetate packaging and spray the ink with more of the Sparkle Sheer Shimmer Craft Spray to create a watercolor consistency a second time. (In my case, I had leftover from step 5, so I used that.)

Hold a paintbrush saturated with the turquoise watercolor parallel to the panel and tap it against your finger. Repeat if needed and let dry.
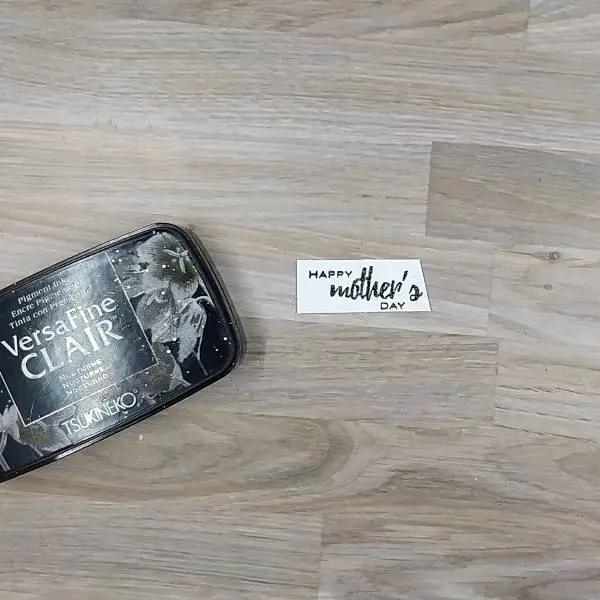
Step 11:
Stamp a sentiment onto a piece of watercolor paper with Nocturne VersaFine Clair ink. Heat emboss with clear embossing powder and trim with scissors or a paper trimmer.

Ink blend around the edges of the stamped layer with more of the Canary VersaColor ink with an ink dauber.
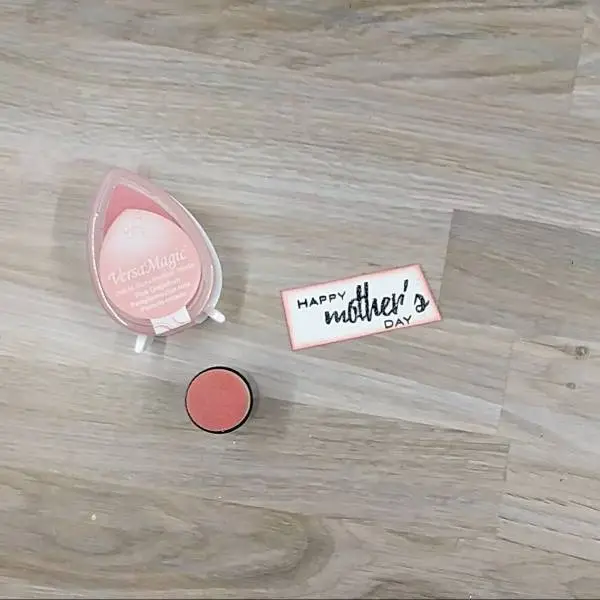
Step 12:
Use an ink dauber to ink blend the edges of the sentiment strip with Pink Grapefruit VersaMagic Chalk ink.

Step 13:
Spray one part of the acetate packaging with Cantaloupe Fireworks! Spray and press Turquoise Gem VersaMagic onto another part of the acetate before spraying it with more Sparkle Sheer Shimmer Craft spray. Alternate pressing the sentiment strip into both colors of spray before splattering the strip with more of the turquoise ink. Let dry.
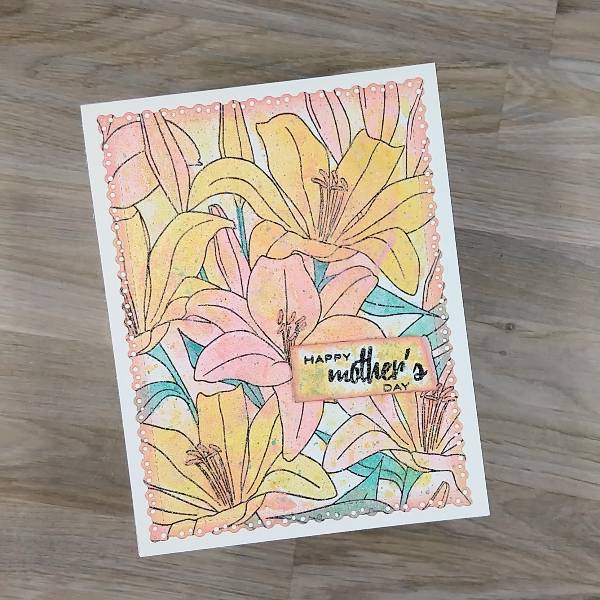
Step 14:
Glue the panel onto an A2-sized white card base and attach the sentiment onto the card with some foam tape for dimension to finish the card.

Craft Supplies

Imagine
• Fireworks! Shimmery Craft Spray – Angel Pink
• Fireworks! Shimmery Craft Spray – Cantaloupe
• Fireworks! Shimmery Craft Spray – Tangelo
• Sheer Shimmer Spray – Sparkle
• VersaFine Clair Ink – Nocturne
• VersaMagic Chalk Ink – Mango Madness
• VersaMagic Chalk Ink – Pink Grapefruit
• VersaMagic Chalk Ink – Turquoise Gem
• Sponge Dauber

Other
• Altenew – Stamp – Extra Special stamp set
• Altenew – Tape – Instant Dimension Foam Tape
• Gina Marie Designs – Die – Pleated Lace Rectangles die set
• The Ton Stamps – Stamp – Lily Fields
• Clear embossing powder Scissors
• Glue

Let’s Make a Pantone Peach Fuzz Colored Card

By Anna Escalada York

In today’s blog post, I will show you how to incorporate sprays and markers to change or
enhance the color of colored cardstock to help you stretch your supplies.

Skill: Advanced
Time: 2 hours

Directions:

Step 1:
Color a piece of teal or green patterned paper with green markers–College Ivy Memento marker
and Emerald Fabrico marker.

Step 2:
Die cut the colored patterned paper to form the leaves of the flower die cut.
Optional step: Spray the colored patterned paper with Sparkle Shimmer Spray.

Step 3:
Spray a die cut panel of watercolor paper with Angel Pink and Cantaloupe Fireworks! Sprays.
After it dried, I sprayed both sprays again. This combination of the two colors almost achieved
the peach fuzz color.

Step 4:
Using a piece of peach cardstock, die cut the small flowers for the floral die cut three times.

Step 5:
Stamp Pink Shimmer Delicata ink onto the flowers using a stamp. (On the card, you can see a
little shine on the flowers, but it ins’t visible in pictures.)

Step 6:
Add Pink Shimmer and Gold Glitz Delicata Ink onto parts of a large background stamp. Make
sure to leave parts of the stamp uninked (such as the lower left corner of the stamp).
Optional step: Add holographic embossing powder onto the stamped image.

Step 7:
Use Tangelo and Morocco Memento markers to color a smaller stamp and repeatedly stamp
card base to add texture.

Step 8:
Die cut the main sentiment out of more of the peach colored cardstock and the shadow die out
of some peach patterned paper. Spray the sentiment with Sparkle Sheer Shimmer spray and
the shadow paper with Cantaloupe and Angel Pink Fireworks! sprays. After the sprays dry, glue
the two layers together.

Step 9:
Glue the floral die cut pieces together.

Step 10:
Create the matte layer of the card by die cutting a piece of orange patterned paper and then
spraying it with more of the Cantaloupe and Angel Pink Fireworks! Sprays and Sparkle Sheer
Shimmer spray to mute the bold orange color.

Step 11:
Glue the floral die cut and the sentiment onto the upper card base. Trim off the right edge of the
sentiment so that it doesn’t overhang the upper card panel. Then glue the matte (orange) panel
behind the upper panel.

Step 12:
Stamp the sub sentiments with by coloring them again with more Morocco Memento marker.
(The sub sentiments came in 3 parts “I am,” “you are” and “going through this.” Since the last
sentiment wouldn’t fit on the card without a little help, I performed “stamp surgery” where the
stamp was cut before stamping to create two smaller stamps. If you are uncomfortable with this,
you can mask part of the stamp and stamp the sentiment a couple of times if you are trying to
create something similar.)

Step 13:
Glue the card panel onto an A2-sized white card base and then glue a few rhinestones around
the flowers and the sentiment.

Art Supplies

Imagine:

Other:

  • Simon Says Stamp – die cuts – Fine Foxglove
  • Simon Says Stamp -stamp- Document It
  • Honey Bee Stamps – stamp – With Sympathy
  • Honey Bee Stamps – die cuts – With Sympathy
  • HAI Supply – gem embellishments – Crystalline Grapefruit
  • My Colors Cardstock – paper – Peach
  • Echo Park – paper – Easter Tweetings
  • Embossing powder in my stash
  • Patterned paper (orange and teal) in my stash
  • Watercolor paper
  • Scissors
  • Glue

Learn to Make a Textured Spring Card

By Martha Lucia Gomez

Hello there! Today’s tutorial is about texture with Fireworks and Embossing Powder! Do you know that you can create a splattered effect with the embossing powder? Let me share the project with you.  

Skill: Beginning

Time: 60 minutes

Directions:

Step 1:

Take a selection of Fireworks! colors of your preference to create the first part of the splatter effect. First, spray a single color over your craft mat. Grab a piece of white smooth cardstock or any type of cardstock and press softly over the mat. Let the paper dry naturally or speed the process with the heat tool if you don’t want to wait a few minutes.

Repeat the above process with all the colors that you wanted to use on your background. In my sample, I used Potter’s Clay, Paris Dusk and Bamboo Leaves.

Step 2:

While the background is in drying process, you can work on the card base. Select a color of VersaFine Clair that coordinates with your background. Stamp lineal images over it. If you want, you can emboss it with clear embossing powder. In my sample, I used VersaFine Clair Shady Lane and don’t emboss de leaves.

Step 3:

In a separate piece of White Smooth Cardstock, I stamped a floral image with VersaFine Clair Glamorous and then covered it with Clear Embossing Powder. Additionally, with a tiny spoon or spatula, I sprinkle Gold Embossing Powder over the flowers and leaves, trying to keep the powder inside of the lines.

Step 4:

With a paint brush, I removed the excess of the powder around the borders of the flower and then, melted the powder with the heat tool.

As you may have noticed, to create the splattered effect, I didn’t use ink, just the powder.

Step 5:

To continue with the process, I resized the background layer in angle. Then, I die cut the floral image with a coordinated die. Additionally, I pasted all the pieces over the card base using crafty foam tape to add more

dimension to the card.   

Step 6:

As final touch, stamp a sentiment in a different color and paste over the decorated card with crafty foam.

Thanks for stopping by and don’t forget that you can use different types of ink and embossing powders to create your own look!

Art Supplies:

Imagine:

Other:

  • Stamping Tool
  • Crafty Foam Tape.

Let’s Make A Winter Wonderland Thank You Card

by LeeAnn McKinney

Hey there friends and fellow crafters. I’m here today making a fun quick paper crafting project — Thank You card with a Winter Theme! In this project, I create this card with a stencil, shimmery ink sprays, stamping, and heat embossing. Change the theme to make a thank you card for any holiday year-round.

Sending a handmade card is a thoughtful practice. Give someone a Thank You when they have invited you to a special party, gathering or gave a special gift.

Skill: Intermediate
Time: 15 minutes

Directions

Art Supplies Used

Imagine
Other
  • Echo Park Snowflake Stencil
  • Vellum
  • LetterIt Stamp Set
  • Recollections 110lb card stock