Make a Fun Pair of Embossed Skull Earrings with StazOn

By Alison Heikkila –

Hello! I’ve got a fun YouTube video for Imagine today that shows a fun way to use embossing folders…for jewelry! We’ll be using Sheet Metal pieces and StazOn to make fun earrings. This is a simple technique that can really be jazzed up depending on how you finish the jewelry.

Skill Level: Intermediate
Time to Complete: 20 minutes

Supplies:
Imagine:
SHEET Metal Assorted Pack
StazOn: Plum
StazOn: Caribbean Green

GlazOn: Original
Other:
Cuttlebug Midnight Hauntings Embossing Folder: No longer available. Use what you have!
Beads, eye pins, ear wires (fish hook style), jump rings, pliers.

I made them pretty long, but again, make your jewelry however you like! I love wearing long earrings with lots of movement.

I just love how these came out. I’ll definitely be wearing them all year round. I hope you give this a try and expand the use of your embossing folders. Thanks so much for stopping by. Have an inspiring day!

Get Messy With Embossing – St. Patty’s Day Card

By LV Handcrafted –

Hello friends! This is Linh (or LV Handcrafted on all the socials). I’ve made this St. Patrick’s Day card featuring some messy embossing techniques. Embossing powders aren’t just for stamped images. They are fun for creating a distressed, mixed media effect as well! 

Here I’ve swiped clear VersaMark ink on the border of black cardstock and embossed with gold. In my video, you’ll also see me use gum arabic and water to create a splatter effect and emboss with gold as well. (There’s some beautiful gold splatter beneath the leprechaun).

Skill: Advance

Time: 45 minutes

Supplies Used:

Imagine:

• VersaColor Green Tea

• VersaMark

• StazOn

• Mboss Gold Powder

Other Products Used

• Creative Crafts Double Gatefold Die Set

• Creative Crafts Nested Oval Dies

• Tonic Studios Handmade Cotton Paper

• Astrobright 80lb Black Cardstock

• Artful Angel Leaping Leprechaun Stamp Set

• Hammermill 100lb white card stock (card base)

• Ohuhu Alcohol Markers

Stamp and Color on Cork to Make a Birthday Card


2021-sep-kyriakos-cork-birthday-card-700

By Kyriakos Pachadiroglou

– Use a piece of cork sheet as a base to stamp with StazOn inks and color with MEMENTO markers to create a Birthday greeting card. Add cork round shapes and a wooden heart to embellish the card.


Skill: Beginner

Time: 30 Minutes


Directions:

2021-sep-kyriakos-cork-birthday-card-step1

Step 1

Cut a 4x5in piece of the cork sheet. Stamp with the wood slice stamp and the StazOn Black Cherry to cover the surface.


2021-sep-kyriakos-cork-birthday-card-step2

Step 2

Color the heart in the center of the stamp design with the MEMENTO Love Letter marker.


2021-sep-kyriakos-cork-birthday-card-step3

Step 3

Use a palette knife to spread some structure paste and let it set.


2021-sep-kyriakos-cork-birthday-card-step4

Step 4

Cut thin slices of the wine cork and stamp them with the wood slice stamp and the StazOn Timber Brown ink pad.


2021-sep-kyriakos-cork-birthday-card-step5
Step 5

Color the lines of the stamped cork slices with the MEMENTO markers


2021-sep-kyriakos-cork-birthday-card-step6
Step 6

Stamp and color the wooden heart with the StazOn Black Cherry ink pad and the MEMENTO Love Letter marker.


2021-sep-kyriakos-cork-birthday-card-step7

Step 7

Stamp with the StazOn BlackCherry ink pad the happy birthday stamp and cut around.


2021-sep-kyriakos-cork-birthday-card-step_8

Step 8

Glue the colored cork slices on the card first to work as a base for the wooden heart.


2021-sep-kyriakos-cork-birthday-card-step9

Step 9

Continue by adding the rest of the embellishments.


Art Supplies:

Imagine

StazOn – Timber Brown, Black Cherry

MEMENTO Markers – Love letter,  Dandelion, Cottage Ivy, Pine

Palette Knife


Other

Card base

Cork sheet

Wine cork

Wooden heart shape

Structure paste

Crackerbox and Suzy stamps – wood slice

Happy birthday stamp


Make a Beautiful Pink Embossed Card

2021-aug-kyriakos-pink-wish-card-900-wm

By Kyriakos Pachadiroglou

– Stamp with Radiant Neon ink and partially cover with Mboss embossing powder to make a flourish background on a denim color paper. Add layers with the same design, stamped with VersaFine CLAIR inks on white card stock.


Skill: Beginner

Time: 1 Hour


Directions:

2021-aug-kyriakos-pink-wish-card-step1

Step 1

On a 4.5×6 inch piece of the denim color paper stamp the poppy pattern with the Radiant Neon ink. Ink the stamp well and press it firmly on the paper holding it for a few seconds on the paper pressed.


2021-aug-kyriakos-pink-wish-card-step2

Step 2

Sprinkle Mboss Metallic Berry embossing powder (don’t fully cover the pattern), remove the excess and heat set.


2021-aug-kyriakos-pink-wish-card-step3

Step 3

On a 3×4 ¼ inch piece of white card stock, stamp with the VersaFine CLAIR Purple delight positioning the design to the middle left on the paper. Stamp with VersaFine Charming Pink on a second piece of paper and cut along the poppy flower.


2021-aug-kyriakos-pink-wish-card-step4

Step 4

Stamp a wish sentiment with VersaFine Nocturne and tear the paper on all sides.


2021-aug-kyriakos-pink-wish-card-step5
Step 5

Set the stamped card stocks on a card base with Tear It! Tape and add a layer of it vertically on the left side to set the white satin ribbon. Repeat horizontally for the pink one.


2021-aug-kyriakos-pink-wish-card-step6
Step 6

Add foam tape to the back of the flower and set it on the card.


Art Supplies:

Imagine

VersaFine CLAIR – Charming Pink, Purple Delight, Nocturne

Radiant Neon – Electric Coral

Mboss – Metallic Berry

Tear It! Tape


Other

Card stock – white and denim color

Card base

Foam tape

Penny Black – Poppy pattern stamp

White and pink ribbons

Heat tool


How to Make Stunning Bookmarks Using Ancient Dynasty Coins

2021-jul-kyriakos-oriental-bookmarks-horizontal-main-wm

By Kyriakos Pachadiroglou

Make oriental theme bookmarks by distressing paper with Walnut Inks, stamping and embossing with Gold Mboss Embossing Powder and adding a Ancient Dynasty Coins that holds a tassel.

Skill: Intermediate

Time: 1 Hour

Directions:

2021-jul-kyriakos-oriental-bookmarks-step1

Step 1

Place a few Walnut Ink Crystals on a piece of natural color card stock and spray with some water. Dilute the crystals and dry well.


2021-jul-kyriakos-oriental-bookmarks-step2
Step 2

Cut 8×1.5″ pieces of the card stock.


2021-jul-kyriakos-oriental-bookmarks-step3

Step 3

Score 1″ from the top.


2021-jul-kyriakos-oriental-bookmarks-step4

Step 4

Stamp with the leaves stamp and the VersaMark ink pad, cover with Mboss Gold Embossing Powder and heat set.


2021-jul-kyriakos-oriental-bookmarks-step5

Step 5

Stamp with letters stamp and the VersaFine CLAIR ink pads.


2021-jul-kyriakos-oriental-bookmarks-step6

Step 6

Distress the edges of the paper with VersaColor Black ink.


2021-jul-kyriakos-oriental-bookmarks-step7

Step 7

Place an Ancient Dynasty Coin to the score, leaving the hole of the coin above it, and mark around the coin to the long side. Cut around the marked half circle and the scoring line (only to the part of the long side of the bookmark).


2021-jul-kyriakos-oriental-bookmarks-step8

Step 8

Cover with Creative MEDIUM clear to protect the paper.


2021-jul-kyriakos-oriental-bookmarks-step9

Step 9

Turn the bookmark backside and add Tear It! Tape on the short only part of it and glue on the long one.


2021-jul-kyriakos-oriental-bookmarks-step10

Step 10

Add the Ancient Dynasty Coin on the gap and tie a tassel.


Art Supplies

Imagine

• Ancient Dynasty Coins – Prosperity

• VersaFine CLAIR – Glamorous, Warm Breeze, Tulip Red

• VersaMark Ink Pad

• VersaColor Black

• Mboss – Gold

• Creative MEDIUM – Clear

• Walnut Ink Crystals

• Tear It! Tape

• Sponge Dauber

• Palette Knife

 
Other materials

Card stock natural

Moking travel stamp – Forest Whispers

Kaisercraft stamp set – Lush

Tassels

Water sprayer

Heat tool


Learn How to Make a Textured Metallic Wedding Card

2021-Jun-Neva-Metallic-Wedding-Card_blog

By Neva Cole 

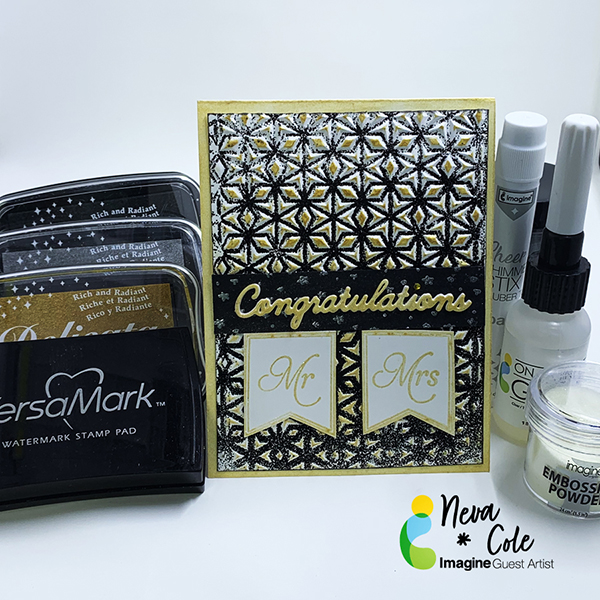
In today’s card making tutorial, I will show you how to make a Textured Metallic Wedding Card using VersaMark, Delicata, and Embossing Powder.  This is a stunning card to make for a bride and groom as they celebrate their wedding day.

Skill:  Intermediate

Time:  2 hours

Directions:

2021-Jun-Neva-Metallic-Wedding-Card-Step1

Step 1

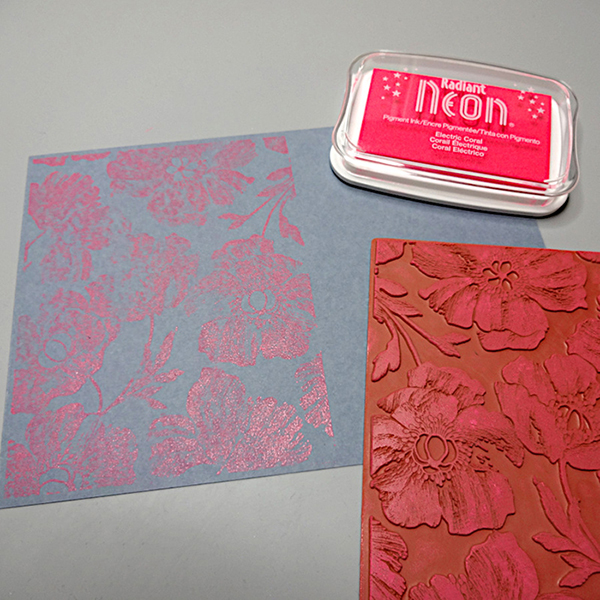
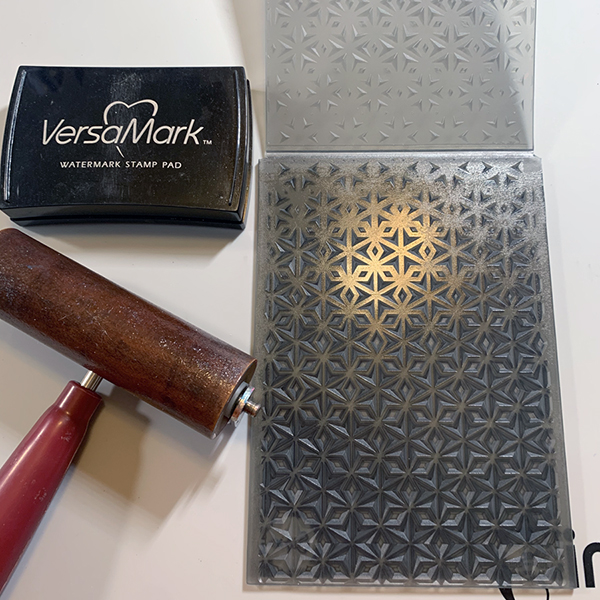
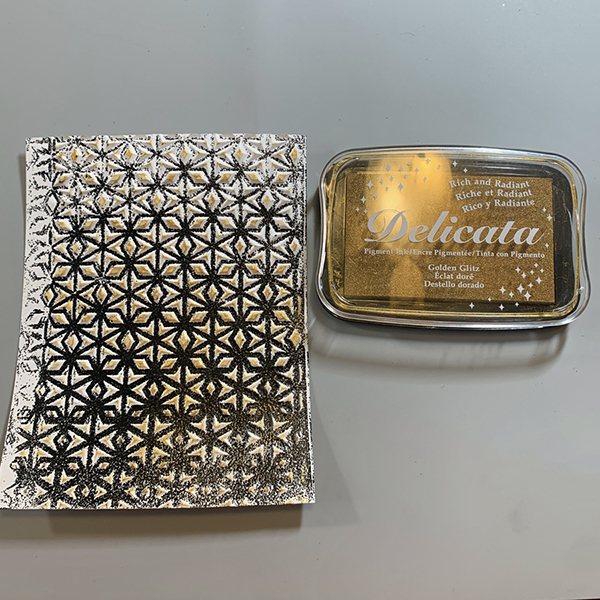
This technique involves inking the FLAT side of an embossing folder for either 2-D or 3-D folder.  This folder is 3-D with both indentations and slight protrusions.  Ink the folder well using a brayer and VersaMark ink.  Place white cardstock in folder and pressure emboss.

2021-Jun-Neva-Metallic-Wedding-Card-Step2
Step 2

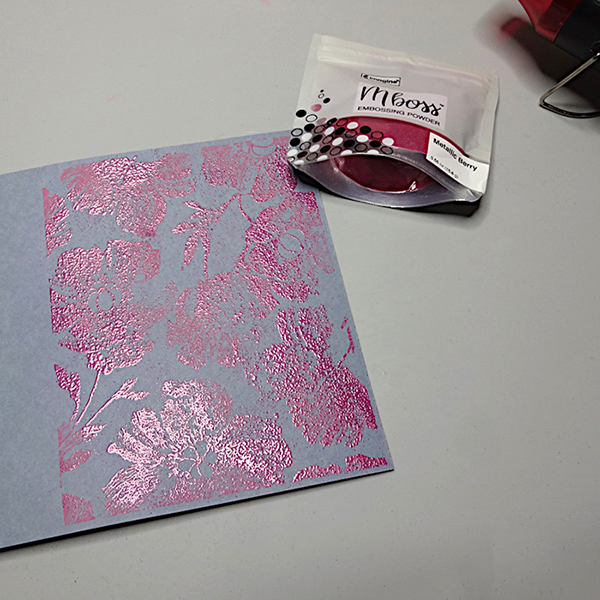
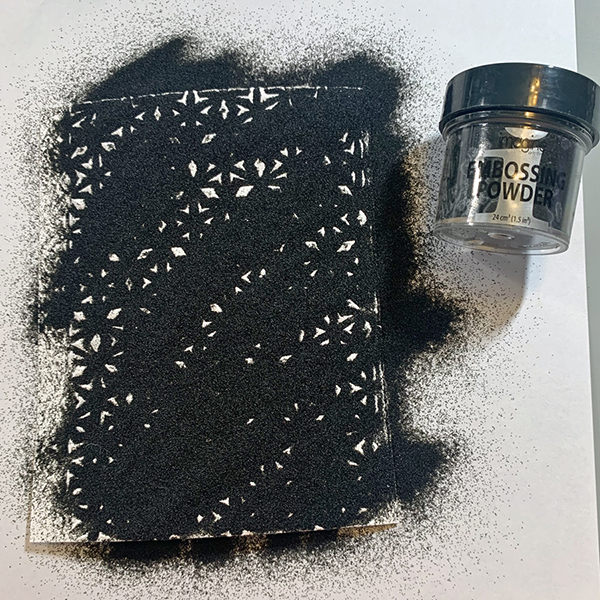
Sprinkle liberally with Black Embossing Powder and heat the card from below with a heat embossing gun.  Allow cardstock to cool.

2021-Jun-Neva-Metallic-Wedding-Card-Step3

Step 3

Lightly rub Delicata Golden Glitz over the surface of the cardstock.  The high areas will pick up the ink.  This creates a great three dimension look of black, white, and gold.  Trim the finished panel to 4” x 5 ½”.

2021-Jun-Neva-Metallic-Wedding-Card-Step4

Step 4

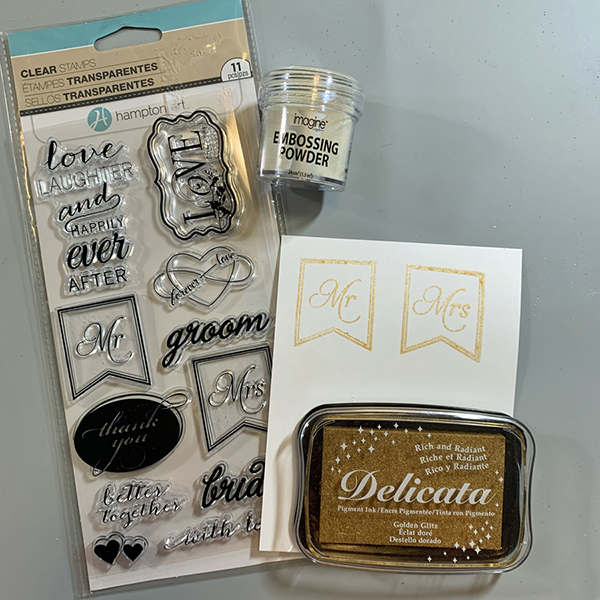
Stamp “Mr.” & “Mrs.” in Delicata Golden Glitz and heat emboss with Iridescent Embossing Powder.  Fussy cut the banners with scissors

2021-Jun-Neva-Metallic-Wedding-Card-Step5

Step 5

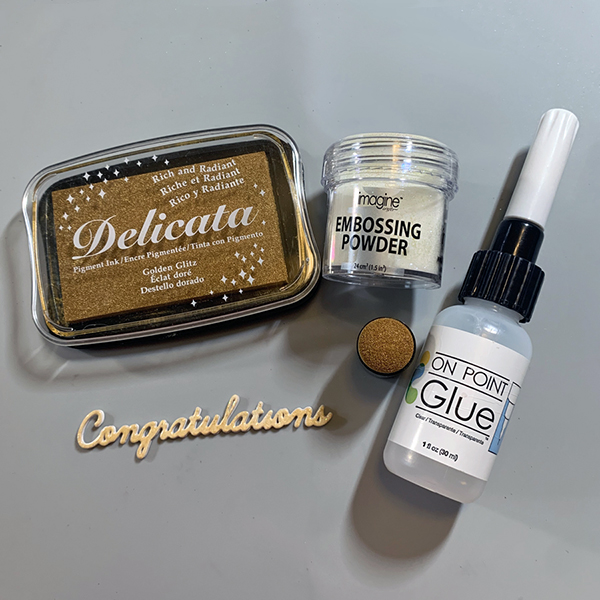
Die cut four “Congratulations” die cuts from white cardstock with Spellbinders Phrase Set One.  Use an ink dauber to color the top die cut then heat emboss with Iridescent Embossing Powder.  Use very small dots of On Point glue around the letters of the die cut to glue the layers together.

2021-Jun-Neva-Metallic-Wedding-Card-Step6

Step 6

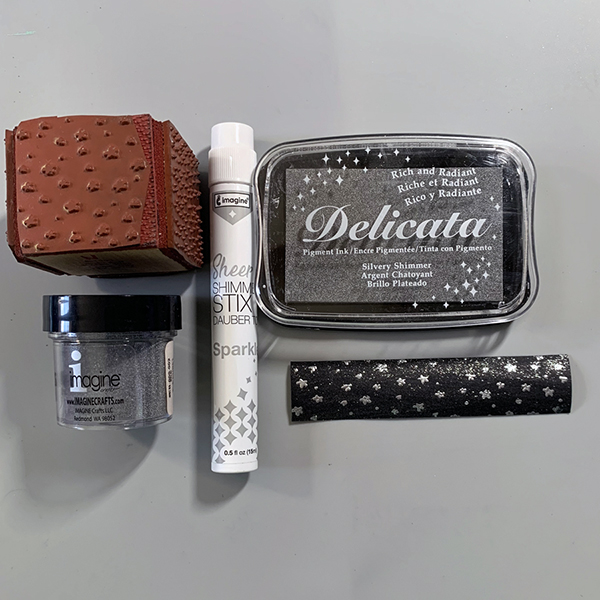
Trim a strip of black cardstock to 7/8″ x 4″.  Stamp with a background stars stamp in Delicata Silvery Shimmer and heat emboss with Silver Embossing Powder.  Once cool add shine with Sheer Shimmer Stix in Sparkle.
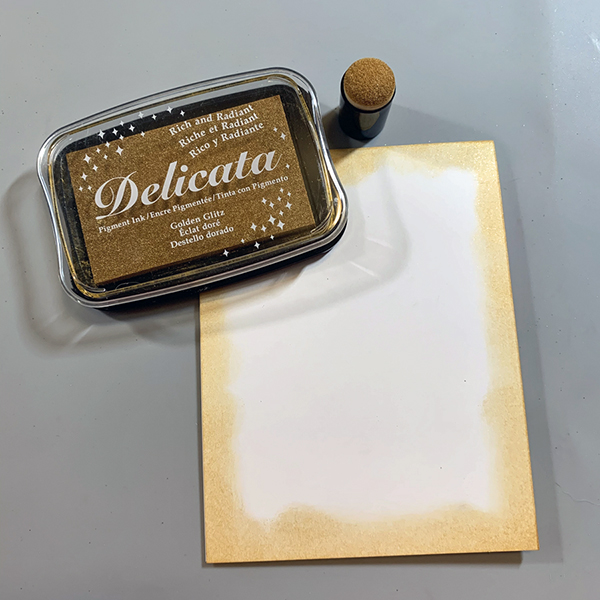
2021-Jun-Neva-Metallic-Wedding-Card-Step7

Step 7

Trim cardstock to 4 1/2″ x 11″ and fold in half for a top fold card.  Using and ink dauber add Delicata Golden Glitz ink around the outer 1/4″ of the card base.
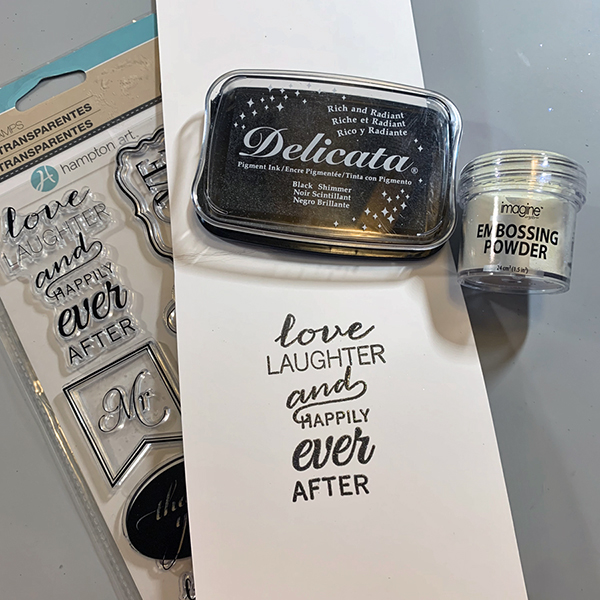
2021-Jun-Neva-Metallic-Wedding-Card-Step8

Step 8

Stamp the sentiment inside the card with Delicata Black Shimmer and heat emboss with Iridescent Embossing Powder.

2021-Jun-Neva-Metallic-Wedding-Card-Step9

Step 9

Adhere card layers together with TearIt Tape, and adhere die cut with On Point Glue.  The small little dot (tittle) of the letter “i” is replaced with a small gold adhesive rhinestone.  The original tittle was too small to layer together.

Art Supplies

Imagine

• VersaMark

• Embossing Powder – Black, Iridescent, Silver

• Delicata – Golden Glitz, Silvery Shimmer, Black Shimmer

• Sheer Shimmer Stix -Sparkle

• On Point Glue

• Sponge Daubers

• Tear-It! Tape

Other

• Sizzix- 3-D Textured Impressions by Georgia Evans Star Fall

• Hampton Art-Bride and Groom Stamp Set

• Spellbinders-Phrase Set One-Congratulations

• Neato Stuff-Background cube stamp stars

• Brayer

• Scissors

• Gold adhesive rhinestone