Congratulations Card Using VersaFine Clair Ink With 3D Embossing Folders

By Katy Ingram

Hello Friends! Katy here and today I am sharing a super quick technique using VersaFine Clair.

In todays video tutorial I am sharing how I use VersaFine Clair in the color Chianti and some cream card stock with a 3D Embossing folder to create a quick, but elegant card. In the video I also share cleaning up the embossing folder so you have minimal to no staining. All this in just over 3 minutes! Check it out below.

Katy

Skill: Beginner

Time: 5 minutes

Art Supplies

Imagine Products

VersaFine Clair – Chianti

Sheer Shimmer Spray – Sparkle

Tear It! Tape

Other Products Used

Cream Card Stock (Embossed Panel)

Gina K Designs Card Stock Soft Stone (Layering Panel)

Simon Says Stamp Card Stock Slate (Card Base)

Curious Translucent Pearl Vellum (Circle)

Tim Holtz Metallics-3 (Congrats Die Cut)

Spellbinders 3D Embossing Folder Beautiful Blooms

Spellbinders Congrats (Word Die) Simply Perfect Mix & Match Sentiments Die Set

Gold-Embossed Ombre Effect Congrats Card

By LVHandcrafted

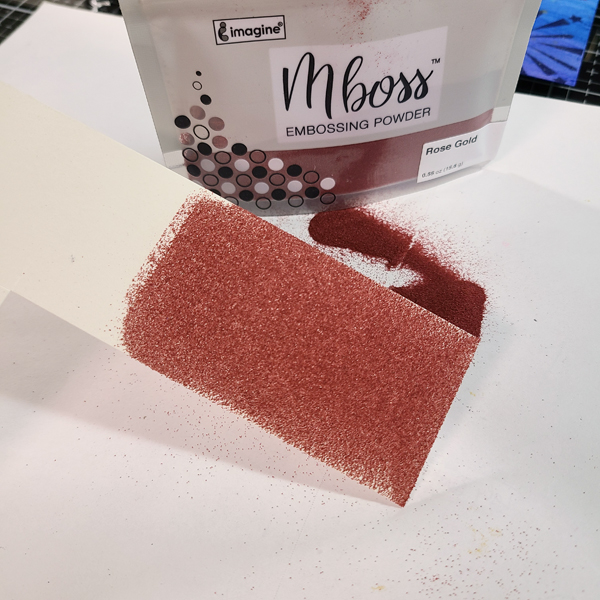
Hello friends! This is Linh (or LV Handcrafted on all the socials). This is a fun way to create your own heat embossed ombre effect. I used Delicata ink, which is a pigment ink and remains sticky for period of time to swipe across a white cardstock panel. I made a very solid swatch of ink. Before the ink dried, I covered one end (the bottom) with Mboss powder in gold. I aimed for about 25% of the way up with solid coverage. Then I tipped the panel so the letter “C” is at the bottom and the letter “S” is at the top. Then spooned more Mboss powder from one and and further tipped the panel so it runs down the panel to create that graduated, ombre effect. 

When I make panels like this, I really want the panel and the effect to shine, so I like to keep the rest of the card really simple. These word dies are wonderful because they are so big, they nearly take up the entire card. And with a panel this beautiful, I save everything and made a second card using the negative effect of the word die. 

NOTE: In the video, you will actually see me create a smaller panel that I decided against using. I used a Sakura glue pen to draw a design over the Delicata-inked panel and then poured Mboss powder over it. The glue pen lets you draw or write anything you want and have that lovely embossed effect.

Skill: Intermediate

Time: 15 minutes

Supplies Used

Imagine:

• Mboss Powder in Gold

• Delicata Ink in Pink Shimmer

• On Point Glue

Other Products Used

• Spellbinders Congrats Die

• Hammermill 100lb white card stock (card base)

Learn to Make a Rose Themed Congratulations Card 

2022-Annie-Aug-700x700

By Annie Collins

– Hello Crafty Friends – Annie here with a fun summer themed card featuring a variety of Imagine Crafts products.

Skill Level: Beginner

Time to Complete: 30 Minutes

Art Supplies:

Imagine:

VersaMagic Inks: Pixie Dust, Pink Petunia, Red Brick, Sage, Oasis Green, & Hint of Pesto

• Memento Ink: Summer Sky

• magine Crafts: Tear It! Tape

• Imagine Crafts: On Point Glue

• Imagine Crafts: Craft Mat

Other products

• Hero Arts Stamps: Color Layering Set: Layering Rose CM243

• Recollections Brand 110# Cardstock: White

• Accent Ultra Smooth 80# Cardstock: Opaque White

• Lifestyle Crafts Embossing Folder: Lattice

• Blending Brush

• Tiny Acrylic Bubbles: Clear, Pink and Light Blue

Gorgeous Wedding Card with Memento and Ink Potion No. 9 


By Katy Ingram –

Hello Friends! Katy here and today I am sharing an easier way to color your own cardstock using Memento Inks andInk  Potion No. 9 blending solution. 

In todays video tutorial I use our newly colored cardstock to create some 3D flowers for a beautiful summer wedding card. Thanks for joining me today. I hope you enjoy.

Skill: Beginner, Intermediate, Advanced
Time: 30 minutes

Art Supplies:

Imagine:

Memento Inks – 

Angel Pink, Rose Bud, New Sprout, Cottage Ivy, Northern Pine, Bamboo Leaves and Dandelion

Ink Potion No. 9

1/4 inch Tear-It! Tape 

Other Products Used:

Spellbinders Double and Single Peonies Die 

Susan’s Garden Tool Kit

Watercolor Paper

PVA Glue or Hot Glue

Heavyweight White Cardstock

Kat Scrappiness Quilted Background Die

Essentials By Ellen Hutson Rectangle Dies

The Greetery Sentiments Suite Love Stamp Set

The Greetery Pretty Postmarks

Clear Box A2 Size  4 1/2 inches x 1 inch x 5 7/8 inches

Follow Katy Here:

Youtube: https://youtube.com/c/eastwickspaperandink 

facebook: fb.me/eastwickspaper 

Instagram: https://www.instagram.com/eastwickspaperandink/ 

Blog: https://www.eastwickspaperandink.com/

Make a Congrats Card with Fireworks!

Fireworks-1-Full

By Alison Heikkila –

Hello! Alison Heikkila here. It’s getting close to fireworks season, and I am pretty stoked about it. My kids and I love watching fireworks, and I get so happy to see their faces light up, literally and figuratively. I decided to make a fireworks card for Imagine this month…not necessarily for a specific holiday, but as a congratulatory card instead. 

Skill Level: Beginner
Time to Complete: 30 minutes

Directions:


Fireworks 2
Step 1:

Shake up your Fireworks Spray (I chose 3 colors). Choose your lightest color (Bahama Blue for me) and open the spray bottle. Dip a brush into the bottle and apply the color to watercolor paper. Cover around 1/3rd of the paper. 

*My paper was cut to 4” x 5 1/4.” 

Fireworks 3

Step 2:

Repeat this with the other two colors. I used Danube Blue, then Paris Dusk. Try to blend the colors together where they meet. Let dry.

Fireworks 4

Step 3:

With a Sponge Dauber, apply VersaMark Ink through the stencil. I opted to use the Dazzle version, but you can use the regular one. 

Fireworks 5

Step 4:

After you apply each firework, sprinkle on some Mboss embossing powder and heat set. Fill the panel with embossed fireworks. 

Fireworks 6

Step 5:

Shake up the Sheer Shimmer Spritz in Gold, open the cap, and tap on to the card panel. Let dry. 

Fireworks 7

Here you can see how shimmery the panel is. It’s even prettier in person. 

Fireworks 8

Step 6:

Apply VersaMark to a scrap of cardstock. Sprinkle on some Mboss embossing powder, shake off excess, and heat set.

Fireworks 9

Step 7:

Die cut your sentiment from the embossed cardstock. I used vellum for my shadow layer. Glue together with On Point Glue. 


Step 8:

Adhere your sentiment and panel to a white card base. 

Step 9:

Optional: Add some sequins to the card front with On Point Glue. 

Fireworks 10

Finished!


Art Supplies:

Imagine:

Fireworks! Spray in Bahama Blue, Danube Blue, and Paris Dusk

Sheer Shimmer Spritz in Gold

Mboss in Rose Gold, Silver, and Shimmering Night Sky

VersaMark Ink: Regular or Dazzle

On Point Glue

Sponge Dauber


Other:

Brutus Monroe: Fireworks Stencil

Doodles Paper Playground: Flags and Fireworks Sparkle Blend

White Cardstock

Watercolor Paper

Paintbrush

Vellum


Make a Colorful Card Perfect for Advancing to the Next Grade

2021_Jul_JowilnaNolte_School_1

By Jowilna Nolte 

– I dream in color literally. This was the case the other night when I dreamt about some alcohol ink that wasn’t alcohol ink. And so experimenting started. I used my VersaFine Clair ink pads on Yupo paper. Now technically this will never dry but here is the trick how to create that gorgeous look.

Skill Level: Beginner/Intermediate

Time: 30 minutes

Directions:

2021_Jul_JowilnaNolte_School_step1

Step 1

gorgeous colorful card perfect for advancing to the next grade.

2021_Jul_JowilnaNolte_School_step2
Step 2

I used 200gsm Yupo paper in white. Swipe the first color of ink across the paper once or twice depending on how wide you would like your strip.

2021_Jul_JowilnaNolte_School_step3

Step 3

Now continue with the second and third color of ink.

2021_Jul_JowilnaNolte_School_step4

Step 4

While the ink is still nice and wet use your blending solution and add quite a bit of it onto the ink. Let it sit for a while and then swirl the paper around to mix the colors a bit.

TIP: I also added some into a misting bottle and sprayed the inks to create small little drops of texture on it.

2021_Jul_JowilnaNolte_School_step5
Step 5

Leave to dry. I left mine to dry for a while and still had some thicker areas where the ink pooled that stayed tacky, so I simply used a clear sealant and sprayed that over the paper and left it again. It dried nicely and now all I have to do is use this gorgeous Faux alcohol ink piece of a project.

Trim your panel to fit onto the front of a folded card and adhere the panel using Tear It! Tape.

Add a vinyl decal and stamped sentiment, then finish off your card with a few scattered diamante. And in a few minutes you created this gorgeous colorful card perfect for advancing to the next grade.

Art Supplies

Imagine

VersaFine Clair Paradise
VersaFine Clair Charming Pink
VersaFine Clair Summertime
VersaFine Clair Nocturne
Tear It! Tape
On Point Glue

Other

Yupo paper
Alcohol blending solution
Die-cut: Cricut
Gold vinyl: Cricut
Die-cut machine: Cricut Maker
Embellishments
Stamps: Joy Clair