Make a FABULOOOS Halloween Card

2022---September---Martha-Lucia-Gomez---Halloween-Card-1_700x700

By Martha Lucia Gomez –

Hello there! Todays tutorial is a quick project that you can make using your Halloween stamps and the heat embossing techniques. On this, I am combined VersaFine Clair, VersaMark and Memento Inks with our traditional Embossing Powders.

Skill Level: Beginner
Time to Complete: 30  Minutes


Directions:

2022 - September - Martha Lucia Gomez - Halloween Card Step 1

 
Step 1

Stamp a Halloween background onto your colored card stock using VersaFine Clair Nocturne. 

2022 - September - Martha Lucia Gomez - Halloween Card Step 2
Step 2:

Cover the inked area with Embossing Powder and melt it with a heat tool. On this step, you can use clear embossing powder or black embossing powder.   

2022 - September - Martha Lucia Gomez - Halloween Card Step 3
Step 3:

With an Ink Blusher or sponge apply Memento Ink Grape Jelly around the stamped background.  

TIP: You can stamp your background onto white smooth cardstock and then ink all the area with your selection of Memento Ink. 

2022 - September - Martha Lucia Gomez - Halloween Card Step 4
Step 5:

With VersaMark Ink stamp the sentiment on the center of the card and covered it with White  Embossing Powder. Melt the powder with the heat tool.

2022 - September - Martha Lucia Gomez - Halloween Card Step 6
Step 6:

Ink the center or your card using Memento Tangelo Ink.

2022 - September - Martha Lucia Gomez - Halloween Card Step 7
Step 7:

According with the stamps and colors of card stock that you used you can enhance some details using additional colors of Memento Ink. In my sample, I used purple card stock and three different colors of Memento Ink: Grape Jelly around the card, Tangelo for the Center and Paris Dusk for the corners.

2022 - September - Martha Lucia Gomez - Halloween Card Step 8
Step 8:

To embellish the card, you can use a coordinated die cut. I am using a witch die that I cut onto Silver Metallic cardstock three times. I layered pasted all the die cut images with On Point Glue to add more dimension. And as final touch, I gave an additional color to the face on the pumpkin using Memento Dual Tip Markers.

2022 - September - Martha Lucia Gomez - Halloween Card_700x700
Step 9:

Assemble your card pasting all the layers with Tear It! Tape or Crafty Foam Tape.

Art Supplies:

Imagine:

• VersaFine Clair – Nocturne

• VersaMark – Clear

• Memento – Grape Jelly, Tangelo and Paris Dusk

• Memento Dual Tip Markers

• Ink Blushers

• Tear it! Tape

• Craft Mat

Other:

  Joy Clair Designs – Spiderweb Background Clear Stamp 

  Crackerbox Stamps – Faboolous Rubber Stamp

  Die Cut Machine

  Positional Stamp Tool.

  Scrapbook Adhesives Crafty Foam.

• Heat Tool

• Brayer

Be a Star with New Embossing Techniques

2022-June-Martha-Lucia-600x600_1

By Martha Lucia Gomez –

Hello there! In today’s crafting tutorial, I will be sharing two easy ways to upgrade the basic embossing techniques using a Brilliant Ink and embossing power or MBoss.  This is a great idea for any occasion, however like summer is around the corner, I created a Patriotic Card honoring 4th of July.

Skill Level: Intermediate
Time to Complete: 1 hour

Directions:


2022-June-Martha Lucia - Patriotic Card - Step 1
Step 1:

Select a piece of card stock and embossing folder. Use a piece of cardstock larger than the folder. Dry emboss it in the normal way using your die cut machine. 

2022-June-Martha Lucia - Patriotic Card - Step 2

Step 2:

Pick a brayer or any type of roller to add ink to the emboss design. Noticed that you can use any face of the embossed piece to develop this technique. I am using Brilliance Pearlescent Sly Blue and Shimmer White Cardstock.

2022-June-Martha Lucia - Patriotic Card - Step 3

Step 3:

Ink your brayer completely and apply the Brilliance Ink over the surface with a soft movement. You don’t want to transfer the ink to the debossed part.


2022-June-Martha Lucia - Patriotic Card - Step 4

Step 4:

Repeat the step 3, until you are satisfied with the color of the layer. In my sample, I made this step three times to have a great covering.

2022-June-Martha Lucia - Patriotic Card - Step 5

Step 5:

Create the card base and layers that you wanted to use. In this model I am using white card base, and blue die cut layer to create a contrast. Resize your inked embossed piece to use it as top layer over the die cut piece. Select a shadow die set with a sentiment or any other type of image to create a window over your inked layer. Don’t paste your layers yet.

2022-June-Martha Lucia - Patriotic Card - Step 6

Step 6:

With the shadow or die base of your die cut, create a window over the inked layer. If you want you can save the die cut layer to use in another project.

2022-June-Martha Lucia - Patriotic Card - Step 7

Step 7:

Paste the inked embossed layer over the die cut layer using your favorite adhesive. If you want to have more dimension, you can use foam tape. Paste the decorative piece over the card base. 

Cut the word or image according with the die cut that you selected.


2022-June-Martha Lucia - Patriotic Card - Step 8

Step 8:

With masking tape, cover the half of the die cut word and made a partial hot embossing using VersaMark Ink and your favorite color of embossing powder or MBoss. In my model, I am using the Metallic Berry. 

Don’t remove the masking tape if you want to repeat the above step and obtain shinier and dimension with the hot embossing. I repeated this step twice.


2022-June-Martha-Lucia-600x600

Step 9:

Paste the embossed word and decorate with a complement sentiment and/or embellishments. I used a tiny sentiment stamped with Memento Paris Dusk and a few die cut stars in white cardstock.


Art Supplies:

Imagine:

• Brilliance – Pearlescent Sky Blue

• VersaMark – Clear

• MBoss – Metallic Berry


Other:

• Whimsy Stamps – Slimline Embossing Folder Wave Length

• Joy Clair Designs – White Smooth Cardstock and Loopy Rectangle Slimline Dies.

• Birch Press Design – Big Sending Sugar Scrip

• Scrapbook Adhesives – Crafty Foam Tape

• Die Cut Machine

• Heat Tool

• Brayer


• Heat Tool

• Brayer


Make a Congrats Card with Fireworks!

Fireworks-1-Full

By Alison Heikkila –

Hello! Alison Heikkila here. It’s getting close to fireworks season, and I am pretty stoked about it. My kids and I love watching fireworks, and I get so happy to see their faces light up, literally and figuratively. I decided to make a fireworks card for Imagine this month…not necessarily for a specific holiday, but as a congratulatory card instead. 

Skill Level: Beginner
Time to Complete: 30 minutes

Directions:


Fireworks 2
Step 1:

Shake up your Fireworks Spray (I chose 3 colors). Choose your lightest color (Bahama Blue for me) and open the spray bottle. Dip a brush into the bottle and apply the color to watercolor paper. Cover around 1/3rd of the paper. 

*My paper was cut to 4” x 5 1/4.” 

Fireworks 3

Step 2:

Repeat this with the other two colors. I used Danube Blue, then Paris Dusk. Try to blend the colors together where they meet. Let dry.

Fireworks 4

Step 3:

With a Sponge Dauber, apply VersaMark Ink through the stencil. I opted to use the Dazzle version, but you can use the regular one. 

Fireworks 5

Step 4:

After you apply each firework, sprinkle on some Mboss embossing powder and heat set. Fill the panel with embossed fireworks. 

Fireworks 6

Step 5:

Shake up the Sheer Shimmer Spritz in Gold, open the cap, and tap on to the card panel. Let dry. 

Fireworks 7

Here you can see how shimmery the panel is. It’s even prettier in person. 

Fireworks 8

Step 6:

Apply VersaMark to a scrap of cardstock. Sprinkle on some Mboss embossing powder, shake off excess, and heat set.

Fireworks 9

Step 7:

Die cut your sentiment from the embossed cardstock. I used vellum for my shadow layer. Glue together with On Point Glue. 


Step 8:

Adhere your sentiment and panel to a white card base. 

Step 9:

Optional: Add some sequins to the card front with On Point Glue. 

Fireworks 10

Finished!


Art Supplies:

Imagine:

Fireworks! Spray in Bahama Blue, Danube Blue, and Paris Dusk

Sheer Shimmer Spritz in Gold

Mboss in Rose Gold, Silver, and Shimmering Night Sky

VersaMark Ink: Regular or Dazzle

On Point Glue

Sponge Dauber


Other:

Brutus Monroe: Fireworks Stencil

Doodles Paper Playground: Flags and Fireworks Sparkle Blend

White Cardstock

Watercolor Paper

Paintbrush

Vellum


Create A Quick Set of Ink Blended Note Cards with Embossing Powders

2022-feb-katy-ingram-card-set-IG_700x700


By Katy Ingram –

Hello Friends! Katy here with another quick project for you. I don’t know about you, but I am always looking for quick card ideas to save me some time and in today’s video, I have a simple card that is easy to replicate and all you need is some inks (VersaFine Clair in this case) some Mboss embossing powders a background stamp and some word dies. I made 6 cards in about an hour and what I love about them is that they can be used for anyone or any occasion. I hope you enjoy the video. Thanks so much for watching.

Skill: Beginner, Intermediate, Advanced

Time: 25 minutes

Art Supplies:

Imagine

VersaFine Clair

Glamorous 

Monarch

Verdant 

Green Oasis 

Twilight 

Morning Mist 

Charming Pink 

Purple Delight 

Fantasia 

Warm Breeze 

Paradise 

Blue Bell

Cheerful 

Summertime 

VersaMark Dazzle Frost 

VersaMark Ink Pad 

Mboss Embossing Powder – White 

Mboss Embossing Powder – Gold 

Point On Point Glue

Tear It! Tape

 
Other Supplies Used:

Concord & 9th Barnwood Background Stamp

Spellbinders Simply Perfect Mix & Match Sentiments

Fabriano Artistico Cold Pressed Watercolor Paper

Classic Crest Epic Black 130lb Card Stock

Accent Opaque 110 lb Card Stock

Misti Stamping Tool

Kaolin Clay Powder Tool


Learn How to Make an Astrological Card

Astrological-Chart-Card-1200

By Alison Heikkila –

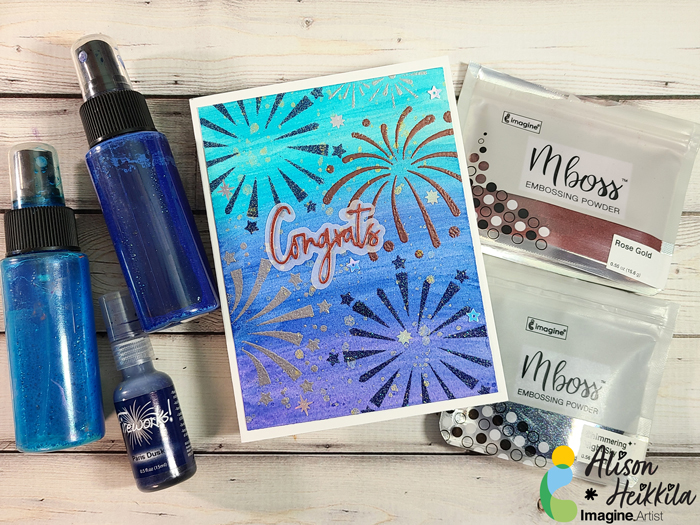
Hello! It’s time for my newest post for Imagine, as an official part of the 2022 Design Team. After the hustle and bustle of the holidays, many of us are wiped out, or even burnt out from making cards and gifts all season. Because of that, I decided to come up with a fast card that doesn’t take a ton of effort, but looks like it did because of the layering.

Skill Level: Beginner
Time: 15 to 20 Minutes

Directions:

Astrological Chart Card 2

Step 1:

Adhere your 3″ x 5″ Gel Press to an acrylic block. While you can adhere it to your work surface, but if it’s attached to a block, you can control where it goes on your printing plate.


Astrological Chart Card 3

Step 2:

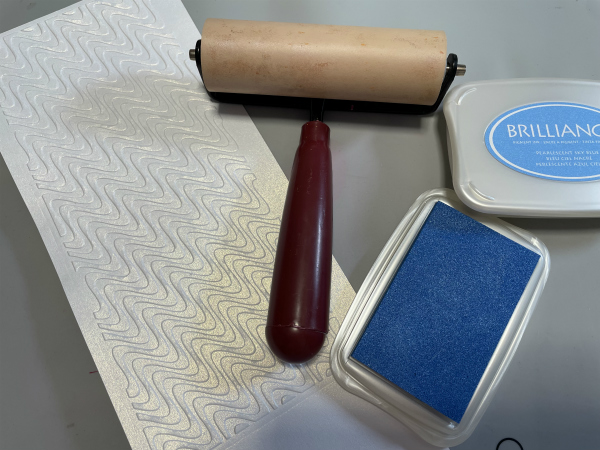
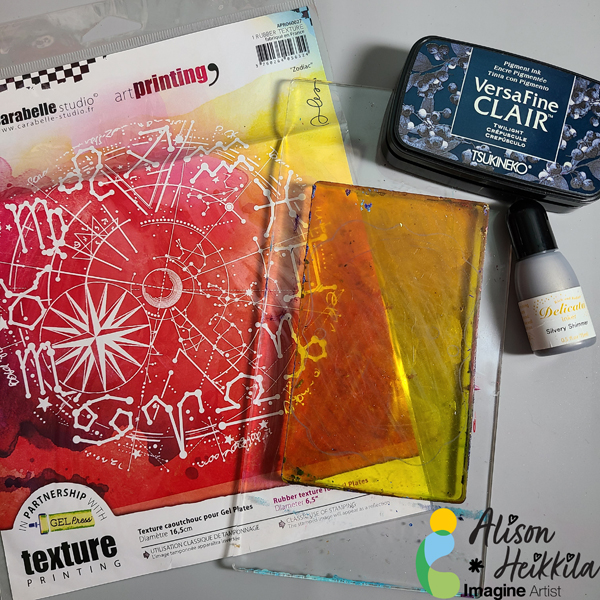
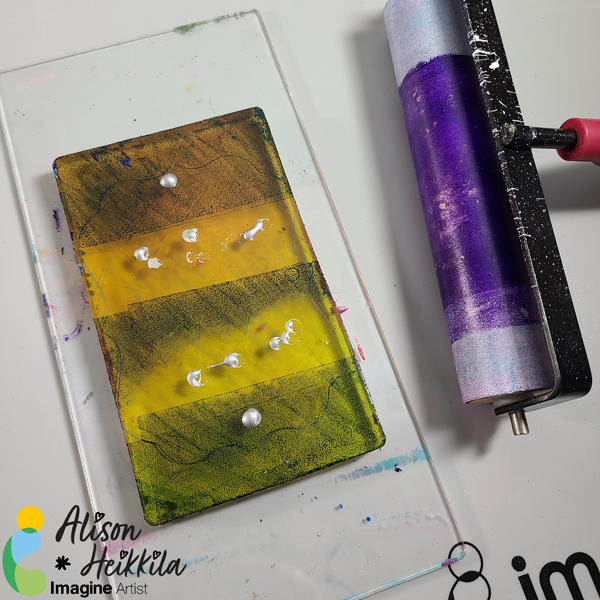
Apply Versa Fine Clair Ink in Twilight to the Gel Press Plate. I applied it in rows, but you can do it however you like.

Step 3:

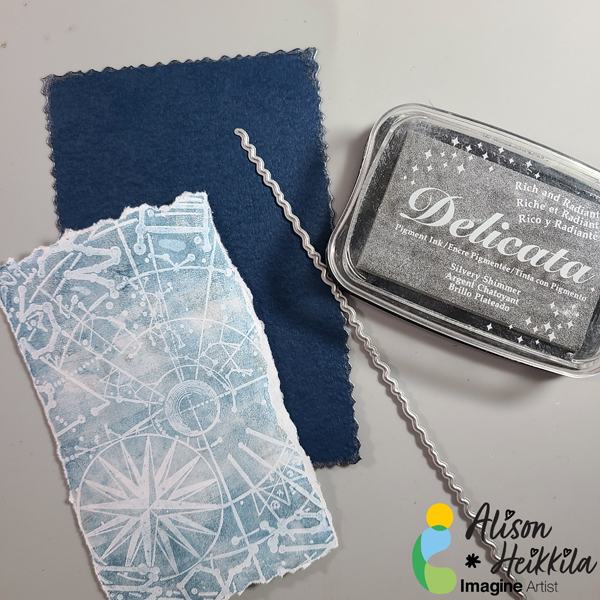
Squeeze on a bit of Silvery Shimmer Delicata reinker. You don’t need too much.


Astrological Chart Card 4

Step 4:

Using a brayer, roll the colors together. Try not to overmix them.


Astrological Chart Card 5

Step 5:

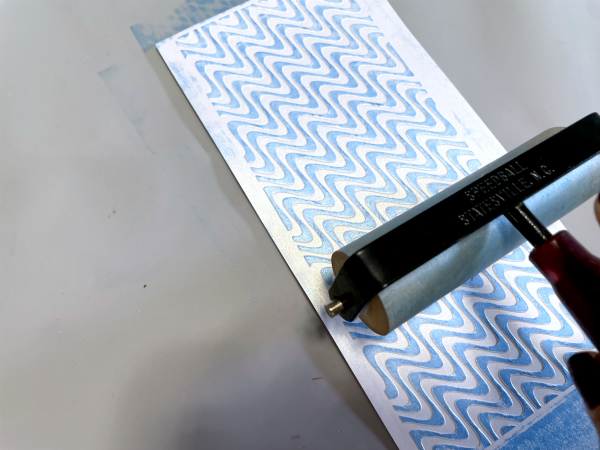
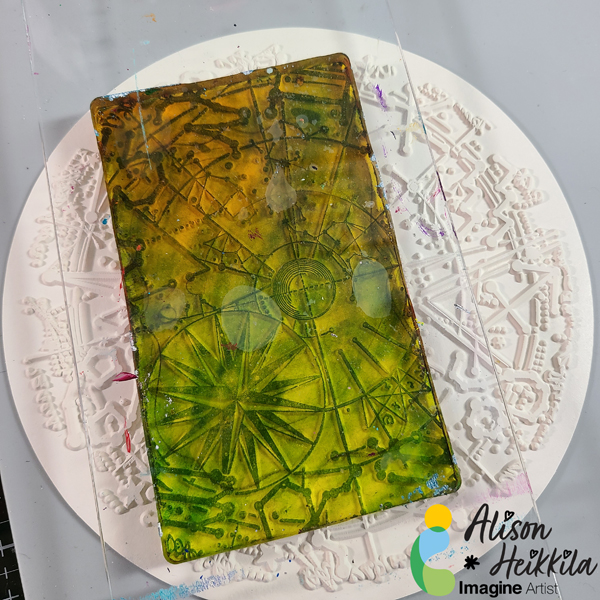
While the inks are still wet, flip the Gel Press Plate on to the printing plate. Since it’s on an acrylic block, you can place the Gel Plate wherever you want easily. Press the Gel Press into the printing plate firmly.

Step 6:

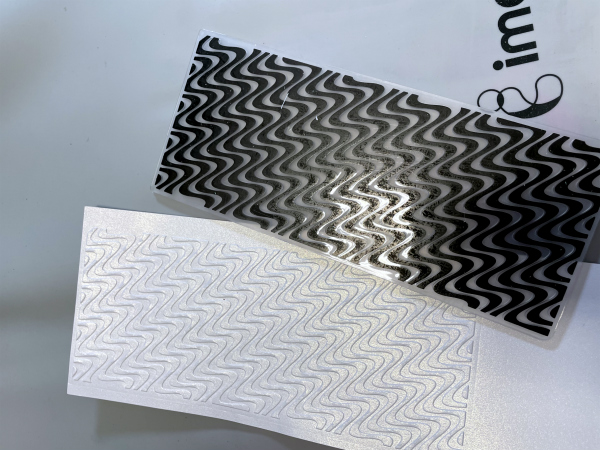
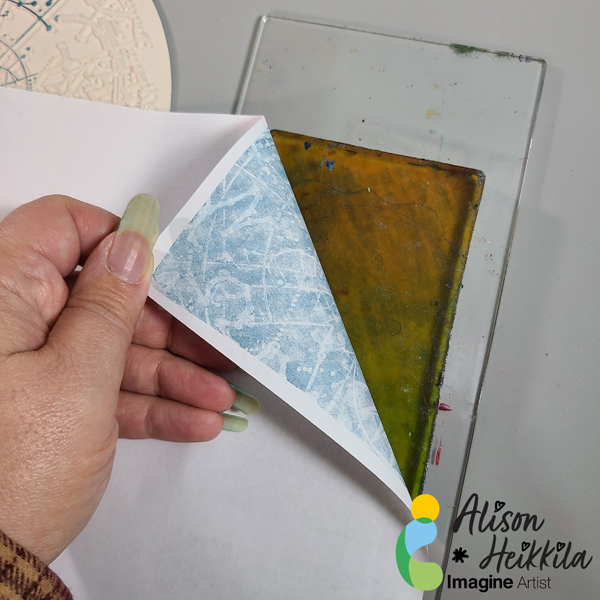
Flip the Gel Press back over, and lay a piece of copy paper on top. This will create your print. Press the paper firmly and evenly all over the plate to get a good transfer.


Astrological Chart Card 6

Step 7:

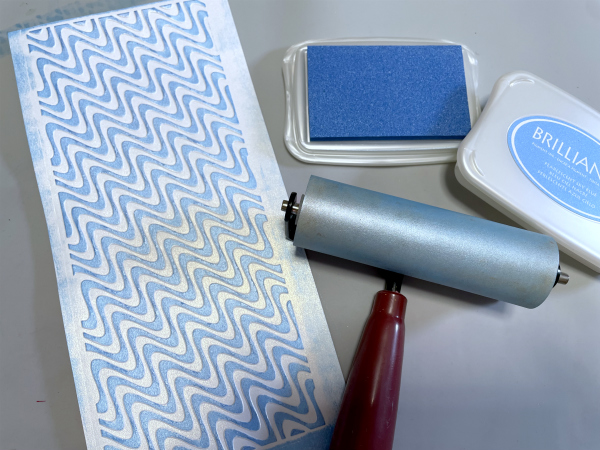
Carefully peel back the paper to reveal your print. You can place the paper back down before you peel up the entire thing if you feel that you need to transfer the ink more.


Astrological Chart Card 7

Step 8:

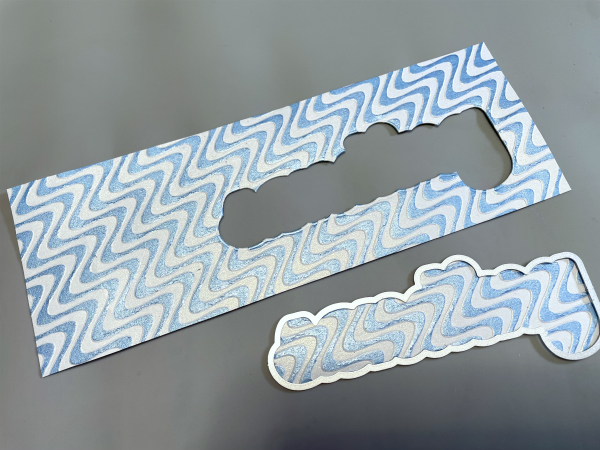
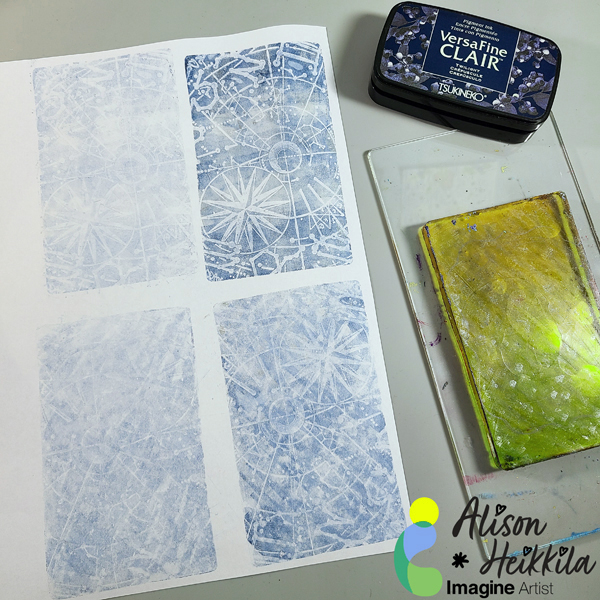
After I made 3 more prints, I chose the one I wanted to use on my card. I went with my first print, which is the upper right. I tore the edges around the print instead of trimming it smoothly.


Astrological Chart Card 8

Step 9:

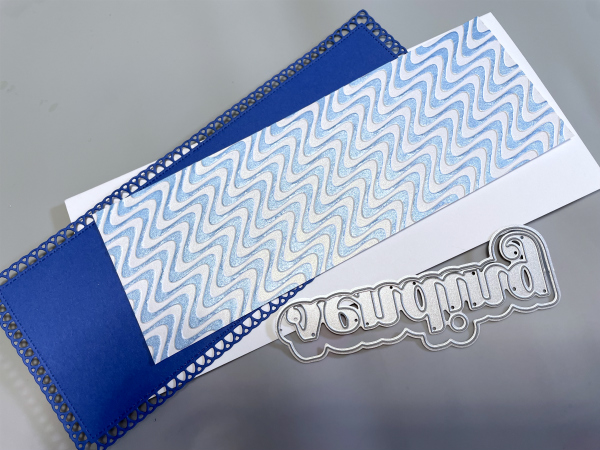
Using an edger die, trim a piece of navy colored cardstock to create a mat around your print.

Step 10:

Using Silvery Shimmer Delicata Ink, ink up the edges of the die cut mat.


Astrological Chart Card 9

Step 11:

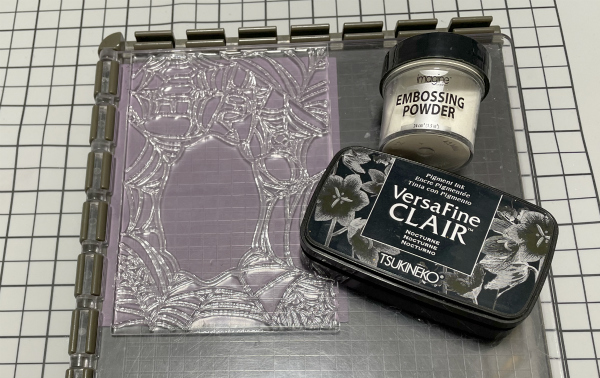
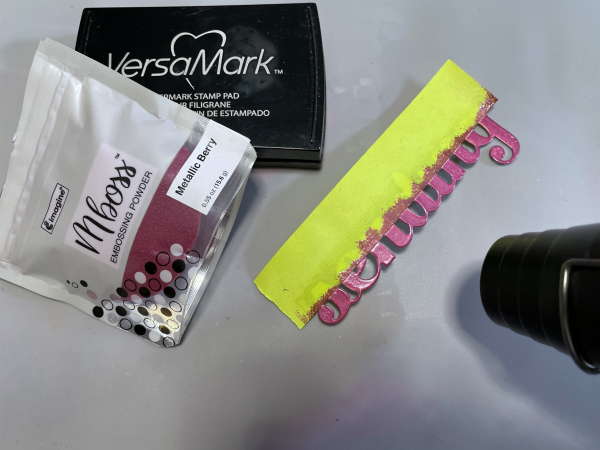
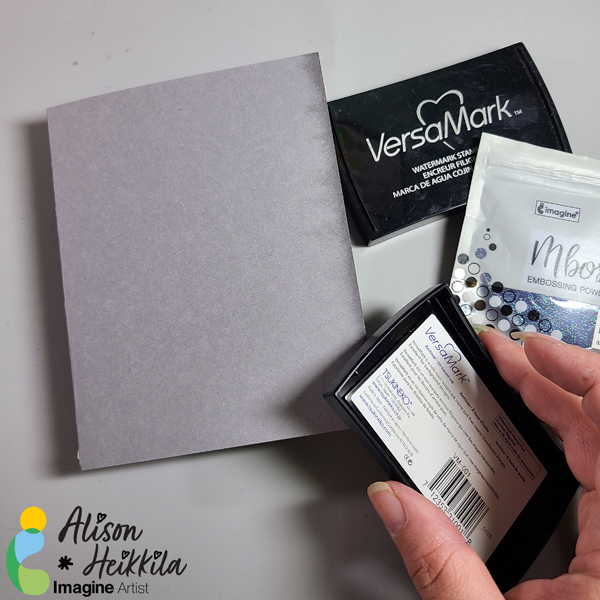
On a gray card base, ink the right side with VersaMark ink. Try to not make it even, so that it has a more organic feel.
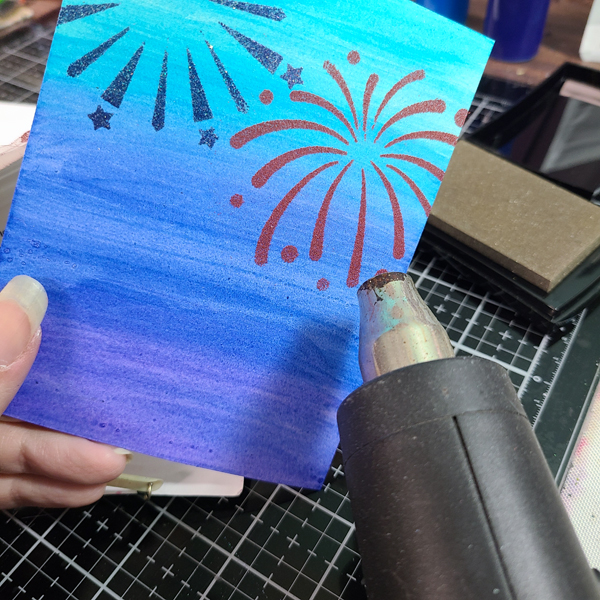
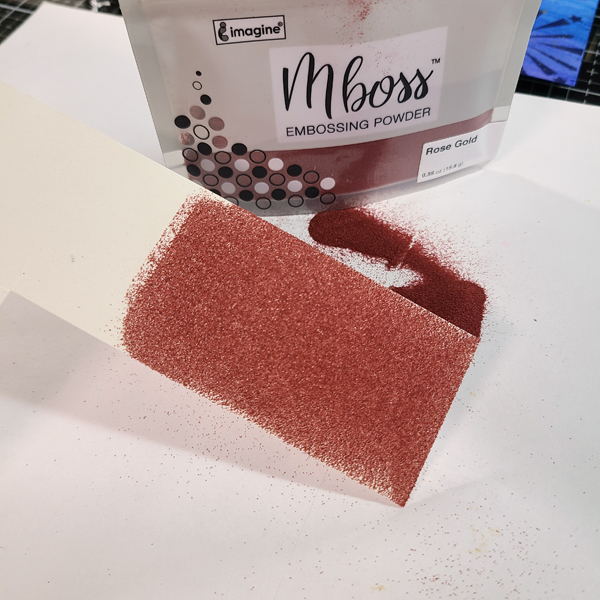
Step 12:

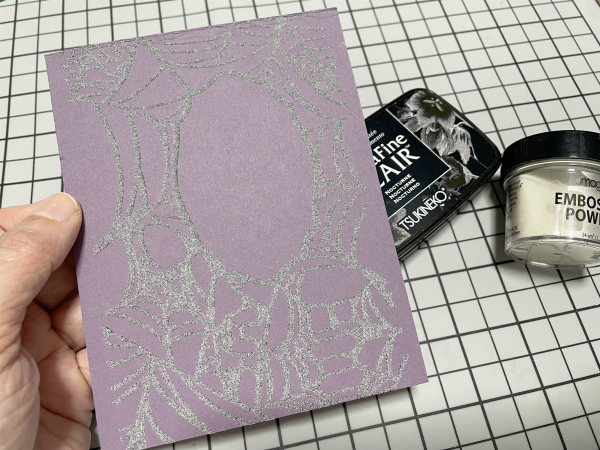
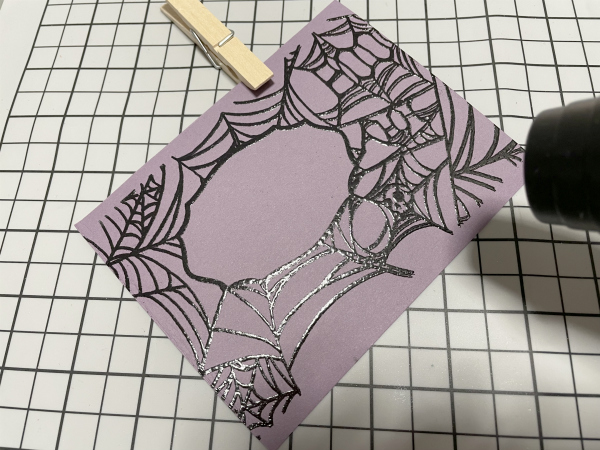
Sprinkle Mboss in Shimmering Night Sky on to the wet ink. Shake off excess, and heat set with a heat tool.
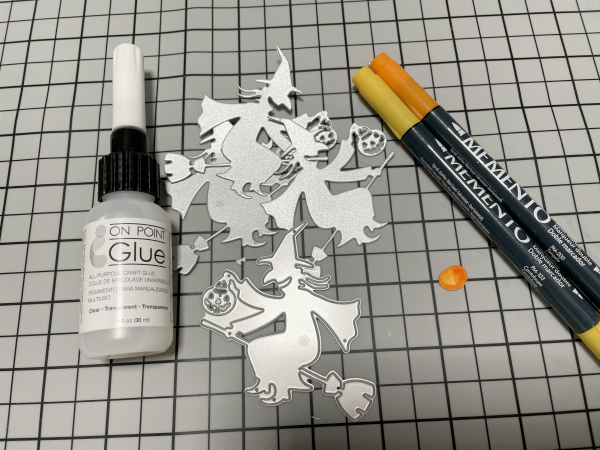
 

Astrological Chart Card 10

Step 13:

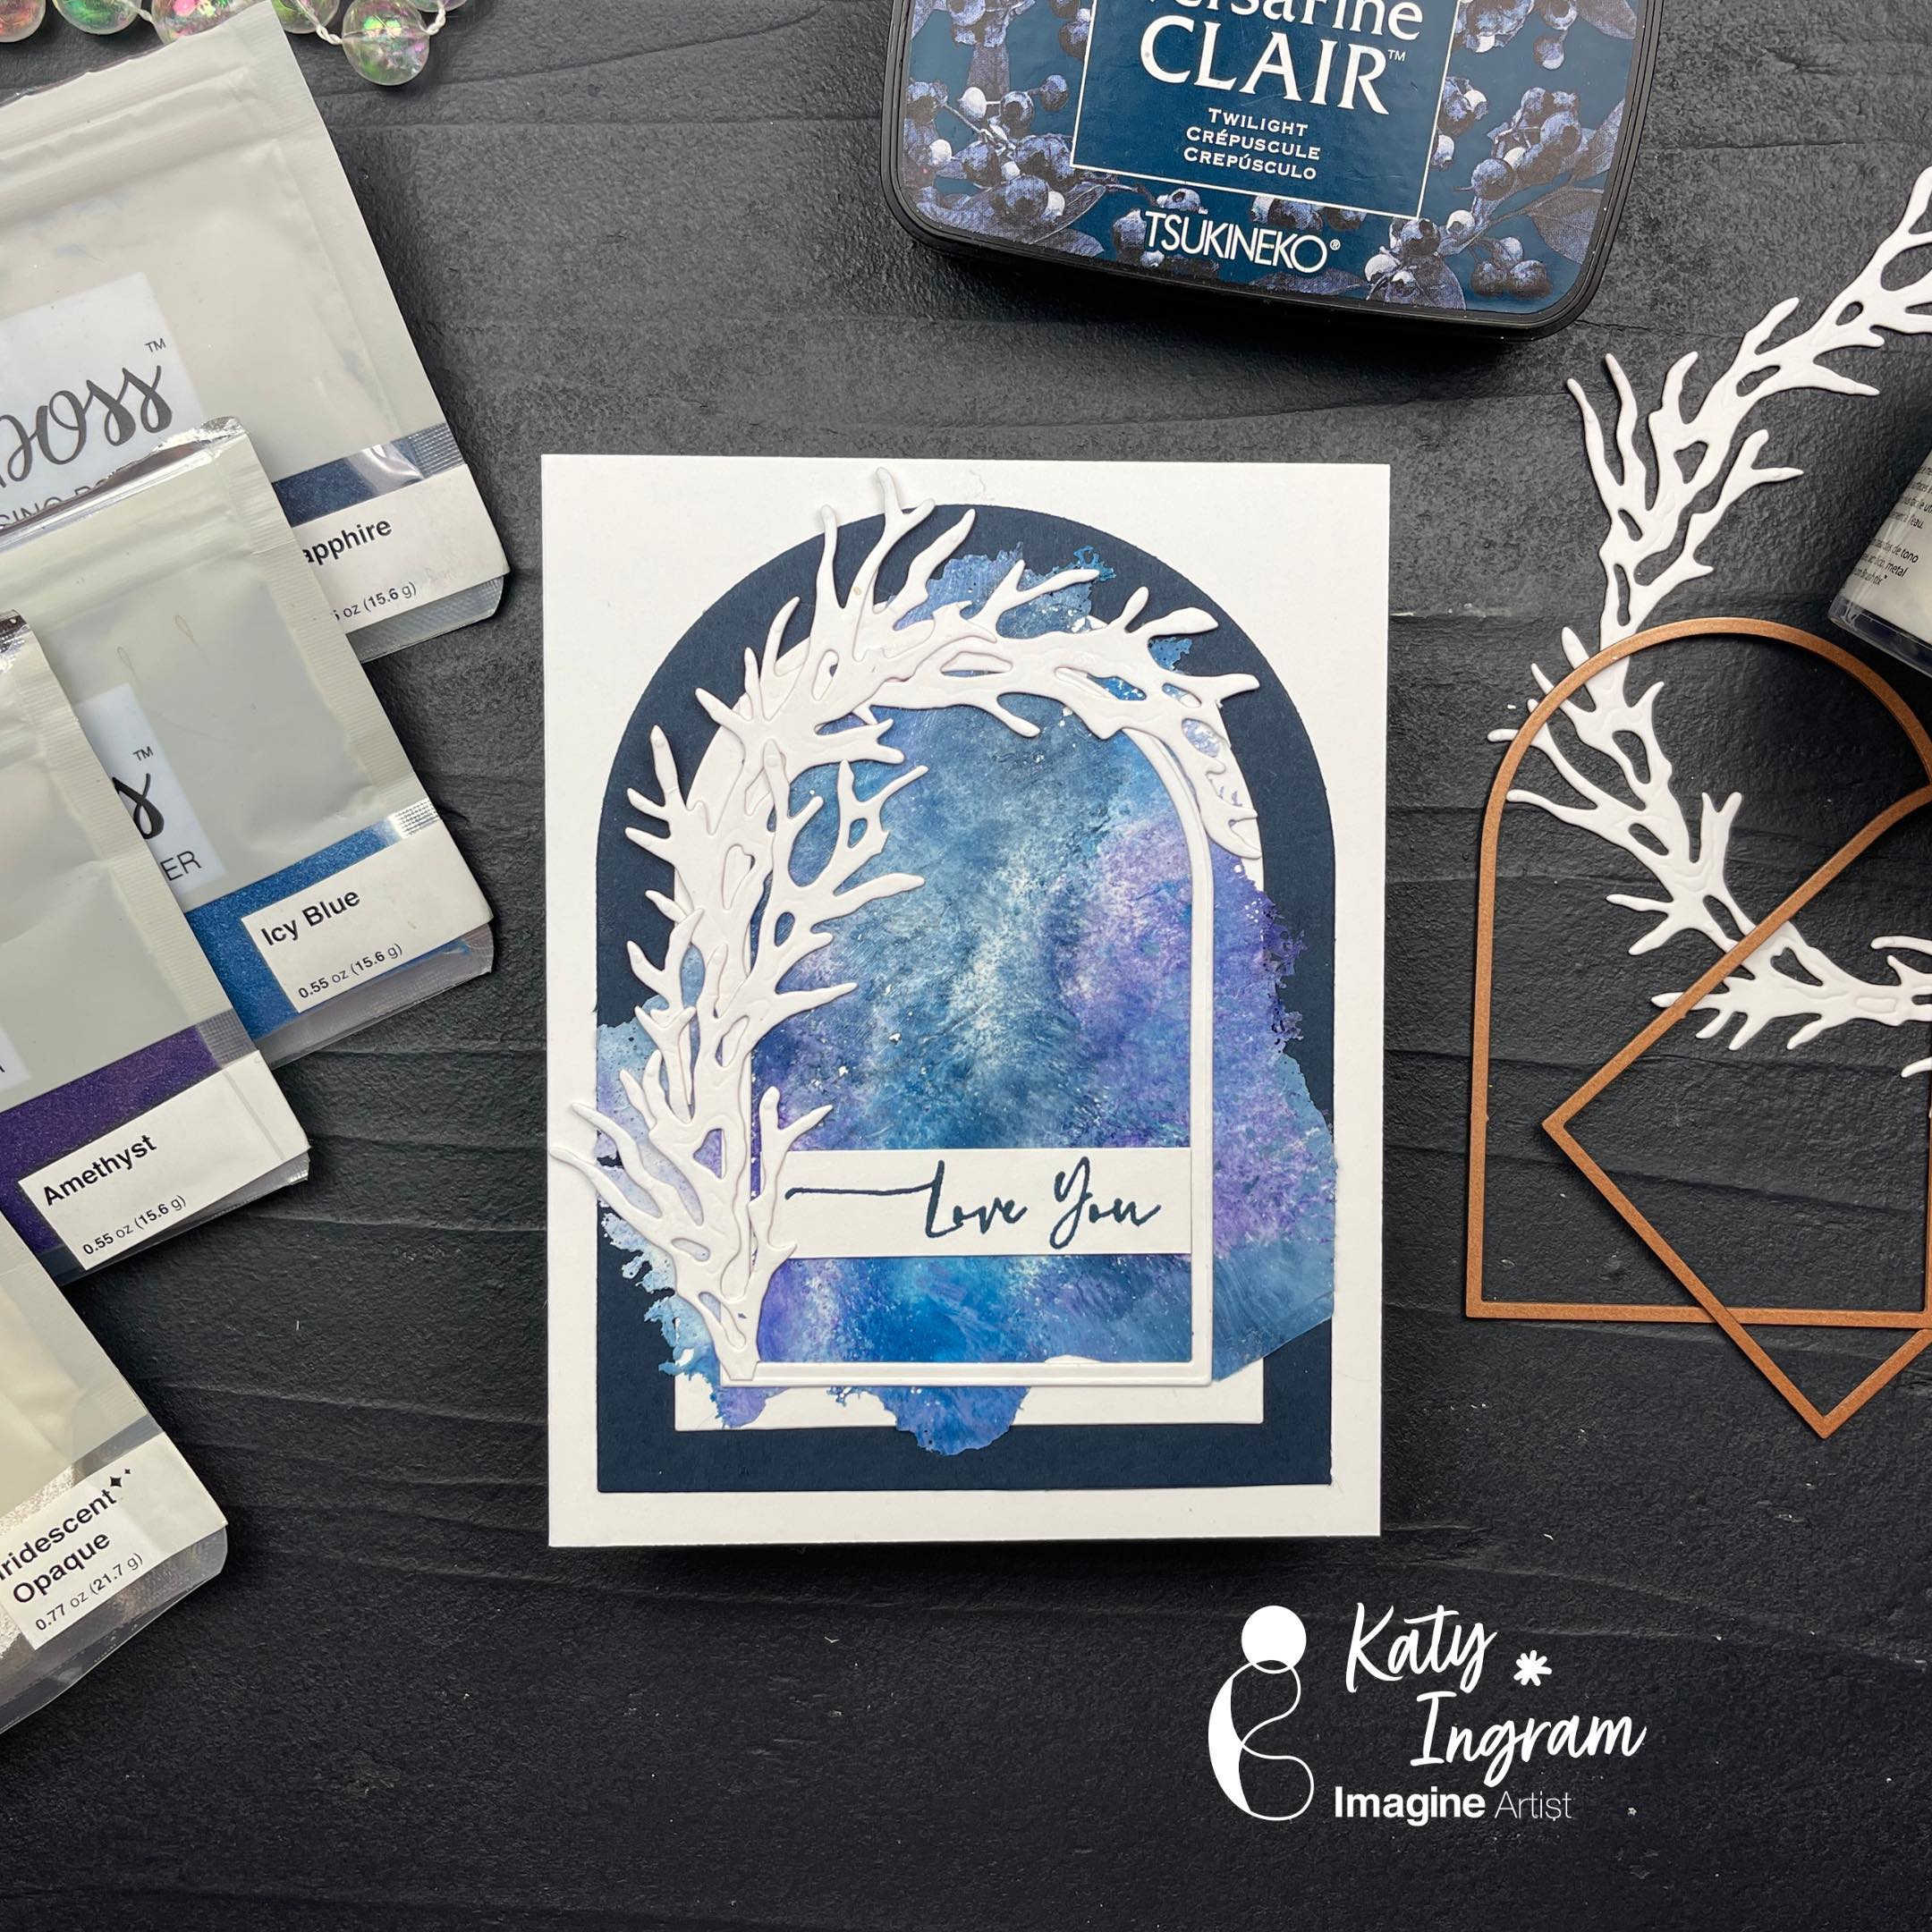
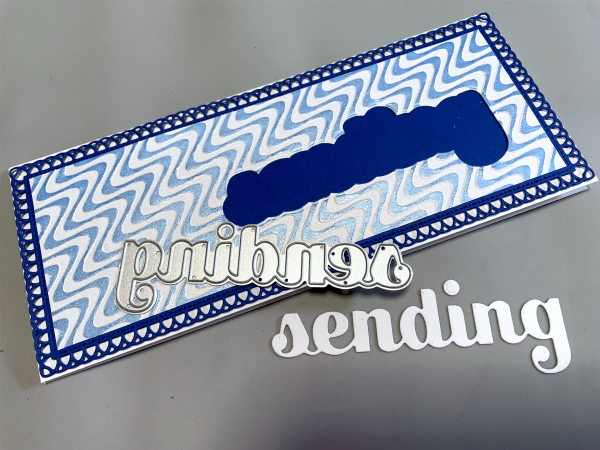
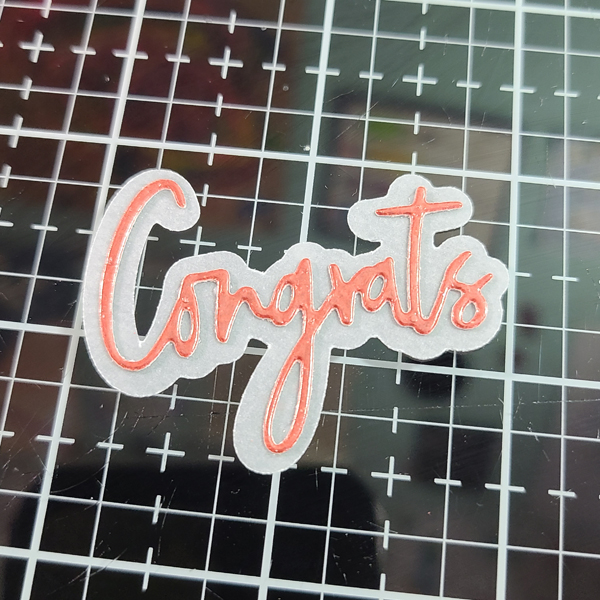
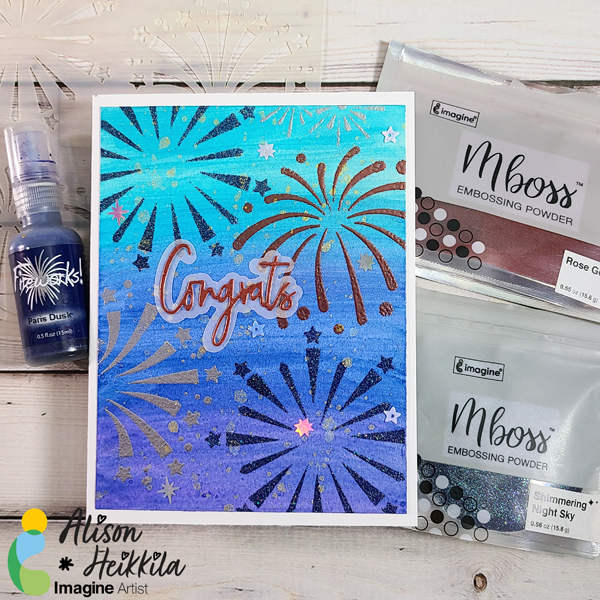
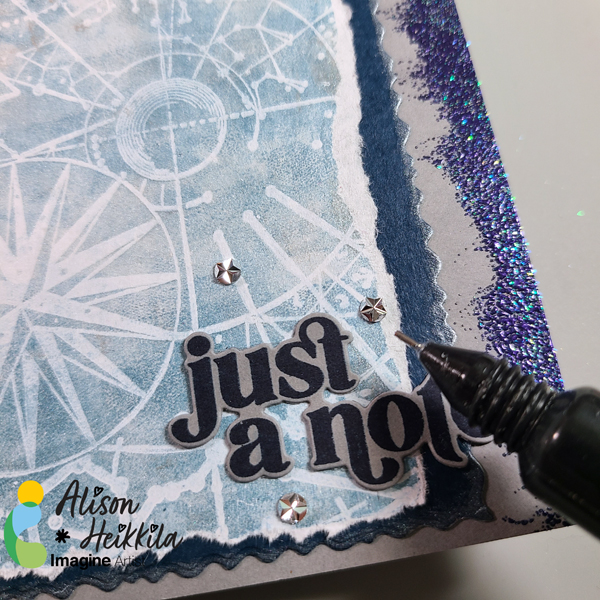
Adhere your layers. I added a stamped and die cut sentiment, as well as some jewels. For the jewels, I used On Point Glue.


Astrological Chart Card 11 600

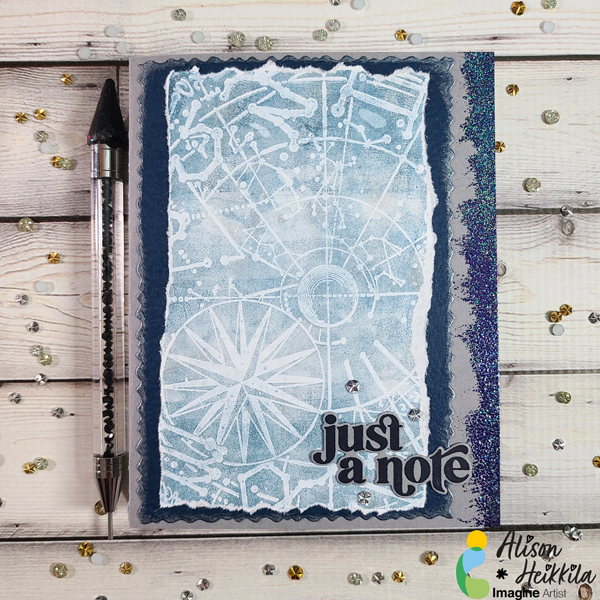
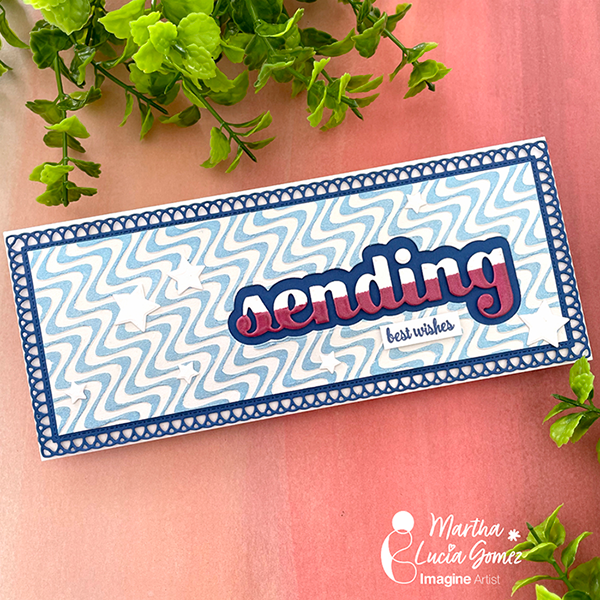
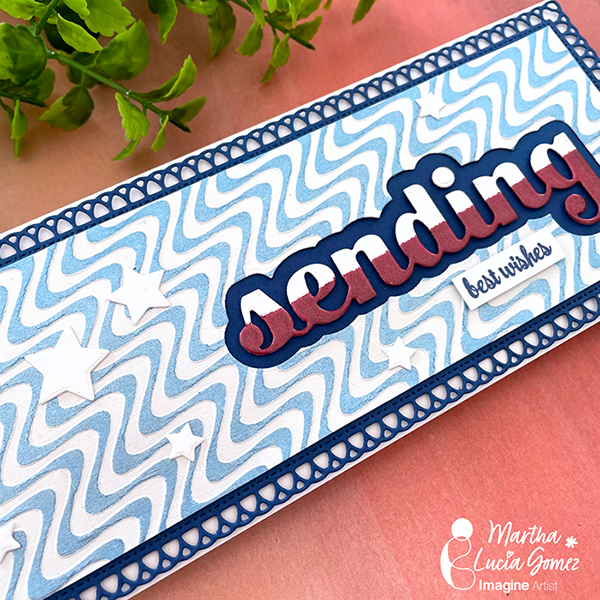
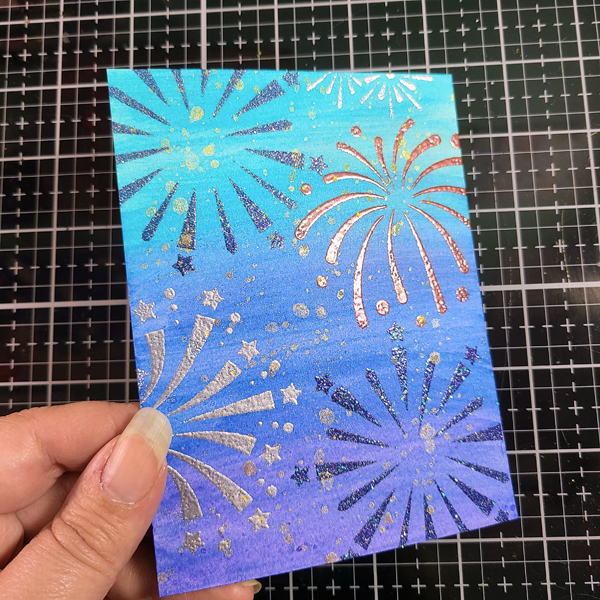
The finished card has lots of shine and cool texture. Using your inks and reinkers on a Gel Press Plate gives you the ability to mix colors from different lines and get beautiful, soft effects.


Astrological Chart Card 13 600

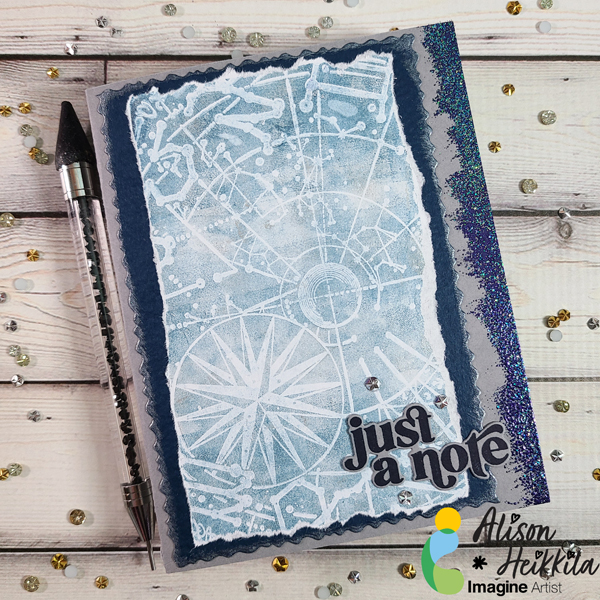
Again, using all of these layers may make it seem that this card took a lot of time, but it really didn’t because making the print is such a fast process. And you can choose to use a larger Gel Press Plate to cut down on some of the layers.


Art Supplies:

Imagine:

• VersaFine Clair Ink in Twilight
• Delicata Ink Pad & Reinker in Silvery Shimmer
• VersaMark Ink Pad
• MBoss in Shimmering Night Sky
• On Point Glue
• Craft Mat

Other:

• Gel Press: 3″ x 5″ Plate
• Carabelle Studio: Zodiac Printing Plate
• Speedball: Brayer
• Stampendous: Deckle Die Set, Slim Acrylic Handle
• Pinkfresh Studios: Perfect Sentiments stamp & die set
• Doodles Paper Playground: Silver Starburst Rhinestones
• Gray card base, white copy paper, navy cardstock
• Heat Tool

Easy to Make Christmas Napkin Holders

2021-Dec_19-kyriakos-xmas-table-decoration-main-wide-wm

By Kyriakos Pachadiroglou –

Stamp on Vertigo sheets to make sparkling napkin rings using Mboss Valentine embossing powder. Repeat stamping on white card stock to make little tags to decorate your festive table.


Skill: Beginner

Time: 1 Hour


Directions:

2021-dec-kyriakos-xmas-table-decoration-step1

Step 1

Cut 2 ½ x 5 in pieces of the Vertigo sheets and stamp with VersaMark watermark ink.

Cover with Mboss Valentine embossing powder and heat set.


2021-dec-kyriakos-xmas-table-decoration-step2

Step 2

Use an ink blusher to color around the stamped image with the StazOn Studio Glaze gold.


2021-dec-kyriakos-xmas-table-decoration-step3

Step 3

Stamp stars with the StazOn Black Cherry ink pad.


2021-dec-kyriakos-xmas-table-decoration-step4

Step 4

Punch one hold at the middle left and right long side edges and place satin ribbon.


2021-dec-kyriakos-xmas-table-decoration-step5
Step 5

Stamp the nutcracker stamp on white card stock with VersaMark watermark ink pad. Cover with Mboss Valentine embossing powder and heat set. Cut around. Repeat with the Mboss Sparkling Champagne Embossing Powder. 


Art Supplies:

Imagine

StazOn – Black Cherry

VersaMark – Original

StazOn Studio Glaze – Gold

Mboss – Valentine, Sparkling Champagne

Vertigo Sheet – Pebbles

Ink Blushers

Other

• Nutcracker Stamp

• Heat Tool

• Gold Satin Ribbon

• White Card Stock

• Hole Punch