How to Make a Lunar Cat Greeting Card

2021-oct-kyriakos-moon-cat-card-700-wm

By Kyriakos Pachadiroglou –

Create a dark sky background by blending MEMENTO inks on white card stock and adding details with sprinkles of All-Purpose ink White and Wisteria colors. Use the On Point glue to set little rhinestones and the Tear It! Tape to attach the background to a card base.

Skill: Beginner

Time: 1 Hour

Directions:

2021-oct-kyriakos-moon-cat-card-step1

Step 1

Cut a 4x6in piece of heavy card stock and using a jumbo Sponge Dauber heavily distress it with the MEMENTO Paris Dusk ink pad.

2021-oct-kyriakos-moon-cat-card-step2

Step 2

Repeat with the MEMENTO Grape Jelly ink pad.

2021-oct-kyriakos-moon-cat-card-step3

Step 3

Use a small Sponge Dauber to add more detail with VersaColor Indigo ink pad.

2021-oct-kyriakos-moon-cat-card-step4

Step 4

Sprinkle All-Purpose White and Wisteria inks on the card piece and let it dry.

2021-oct-kyriakos-moon-cat-card-step5
Step 5

Cut a 3 /14″ circle and color with VersaFine CLAIR Golden Meadow, while pressing the Sponge Dauber a bit on some place creating spots imitating the moon surface.

2021-oct-kyriakos-moon-cat-card-step6
Step 6

Stamp the face of the cat with the VersaFine CLAIR Nocturne.

2021-oct-kyriakos-moon-cat-card-step7

Step 7

Glue the moon on the background card using the On Point Glue and add small dots of it to set the rhinestones around.

2021-oct-kyriakos-moon-cat-card-step8

Step 8

Add some ribbon and the quote chip.

Art Supplies:

Imagine

• VersaColor – Indigo

• VersaFine CLAIR – Golden Meadow, Nocturne

• MEMENTO – Grape Jelly, Paris Dusk

• All-Purpose Ink – White, Wisteria

• Tear It! Tape

• Sponge Daubers

• On Point Glue

Other

• White Card Stock

• Cat Themed Stamps

• Orange Color Mesh Ribbon

• Orange Color Rhinestones

• Tim Holtz Ideology Quote Chips

• Hot Glue

How to Make Purr-fectly Fun Cat Fairy Lights

2021-oct-kyriakos-cat-fairy-lights_wm_700

By Kyriakos Pachadiroglou

-Decorate your home with a cat themed fairy light string with stamped designs on tracing paper using StazOn inks and creating paper lamp shades. Attach the paper lamp shades on a battery powered led string and place them in any corner for the house.

Skill: Beginner

Time: 1 Hour

Directions:

2021-oct-kyriakos-cat-fairy-lights-step1

Step 1

Cut 2×5 ½ ” pieces of cad stock. Score on 2 ½ ” from each edge to the short side.

2021-oct-kyriakos-cat-fairy-lights-step2

Step 2

Make an X cutting to the center of the card stock cuttings (this will be the opening that will the lights)

2021-oct-kyriakos-cat-fairy-lights-step3

Step 3

Use the circle punch to create openings to one side of the card stock cuttings.

2021-oct-kyriakos-cat-fairy-lights-step4

Step 4

Color with the VersaFine CLAIR Summertime ink pad and a Sponge Dauber.

2021-oct-kyriakos-cat-fairy-lights-step5
Step 5

Distress with the MEMENTO Grape Jelly ink pad.

2021-oct-kyriakos-cat-fairy-lights-step6
Step 6

Stamp the cat design on the tracing paper using StazOn Jet black.

2021-oct-kyriakos-cat-fairy-lights-step7

Step 7

Cut along the designs, (about 2″ squares), turn to the back the tracing paper and color with StazOn Iris ink pad.

2021-oct-kyriakos-cat-fairy-lights-step8

Step 8

Place Tear It! Tape in the blank side (inner side to be) of the card stock cuttings, above and below the circular opening.

2021-oct-kyriakos-cat-fairy-lights-step9

Step 9

Set the tracing paper cuttings, stamped with the cat designs, to cover the circular opening and fold to attach the short edges.

2021-oct-kyriakos-cat-fairy-lights-step10

Step 10

Place led lights on the X opening made earlier.

2021-oct-kyriakos-cat-fairy-lights-step10

Art Supplies:

Imagine

• StazOn – Jet Black, Iris

• VersaFine CLAIR – Summertime

• MEMENTO – Grape Jelly

• Tear It! Tape

• Sponge Daubers

Other

• White Card Stock

• Tracing Paper

• Cat Themed Stamps

• 1.5in Circle Punch

• Battery Operated Lights String

• Kraft Knife

Make a Beautiful Pink Embossed Card

2021-aug-kyriakos-pink-wish-card-900-wm

By Kyriakos Pachadiroglou

– Stamp with Radiant Neon ink and partially cover with Mboss embossing powder to make a flourish background on a denim color paper. Add layers with the same design, stamped with VersaFine CLAIR inks on white card stock.


Skill: Beginner

Time: 1 Hour


Directions:

2021-aug-kyriakos-pink-wish-card-step1

Step 1

On a 4.5×6 inch piece of the denim color paper stamp the poppy pattern with the Radiant Neon ink. Ink the stamp well and press it firmly on the paper holding it for a few seconds on the paper pressed.


2021-aug-kyriakos-pink-wish-card-step2

Step 2

Sprinkle Mboss Metallic Berry embossing powder (don’t fully cover the pattern), remove the excess and heat set.


2021-aug-kyriakos-pink-wish-card-step3

Step 3

On a 3×4 ¼ inch piece of white card stock, stamp with the VersaFine CLAIR Purple delight positioning the design to the middle left on the paper. Stamp with VersaFine Charming Pink on a second piece of paper and cut along the poppy flower.


2021-aug-kyriakos-pink-wish-card-step4

Step 4

Stamp a wish sentiment with VersaFine Nocturne and tear the paper on all sides.


2021-aug-kyriakos-pink-wish-card-step5
Step 5

Set the stamped card stocks on a card base with Tear It! Tape and add a layer of it vertically on the left side to set the white satin ribbon. Repeat horizontally for the pink one.


2021-aug-kyriakos-pink-wish-card-step6
Step 6

Add foam tape to the back of the flower and set it on the card.


Art Supplies:

Imagine

VersaFine CLAIR – Charming Pink, Purple Delight, Nocturne

Radiant Neon – Electric Coral

Mboss – Metallic Berry

Tear It! Tape


Other

Card stock – white and denim color

Card base

Foam tape

Penny Black – Poppy pattern stamp

White and pink ribbons

Heat tool


Create Beautiful Appreciation Card for Your Teacher

Grow-1-600

By Alison Heikkila

Hello! It’s getting close to the end of the school year, and between last year and this year, teachers have been champions, in my opinion. They’ve done so much for our students, learned so many new things themselves over the past year, that honoring them with a handmade card is a simple way to thank them for all of their dedication. I decided to combine Memento Markers with the Calypso Kaleidacolor Ink Pad and the March 2021 My Monthly Hero Kit to create a special card that’s perfect for any teacher.

Skill Level: Beginner

Time: 45 Minutes, plus drying time

Directions:

Grow-2

Step 1

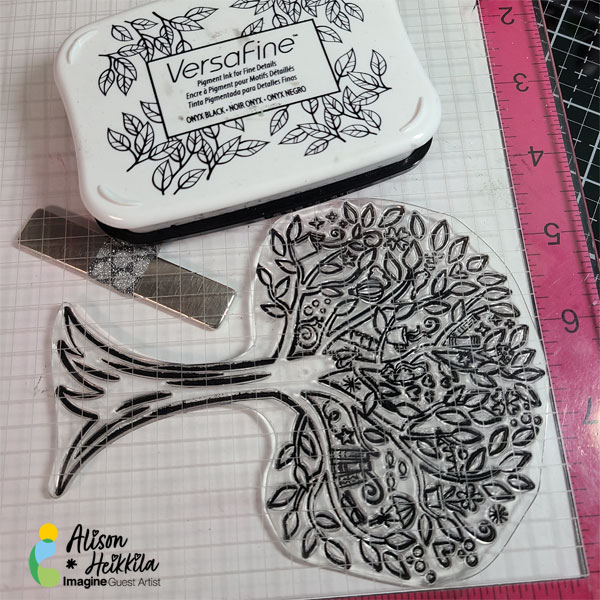
Stamp the tree from the My Monthly Hero March 2021 kit on to Memento-friendly paper with VersaFine Ink. I used Smooth Bristol Cardstock.


Grow-3

Step 2

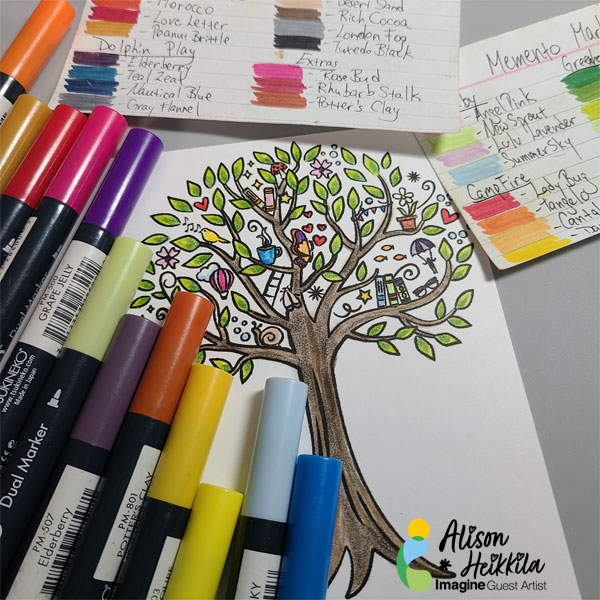
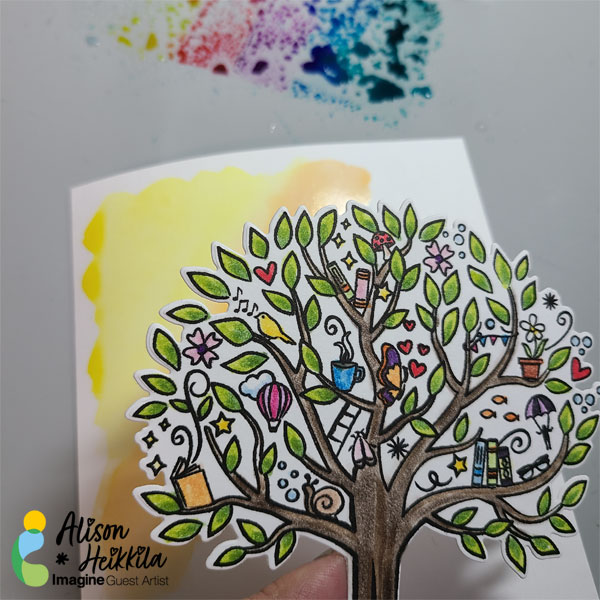
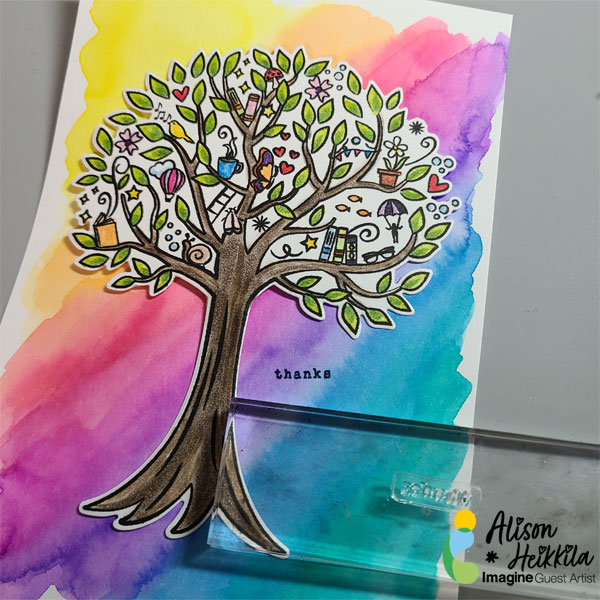
Color the tree using Memento Markers. My list of colors is below.

Step 3

Die cut the tree.


Grow-4

Step 4:

Cut an additional piece of Smooth Bristol cardstock, cut to 4 3/4″ x 6 3/4.”
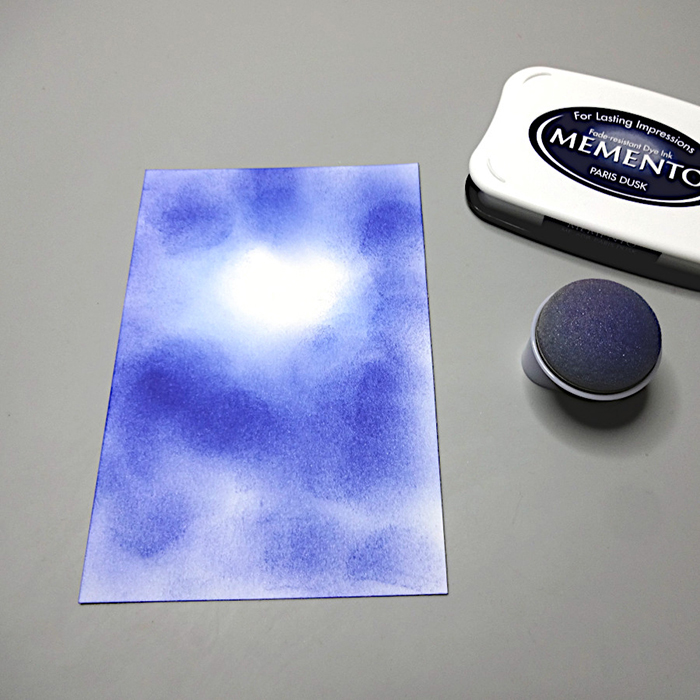
Step 5

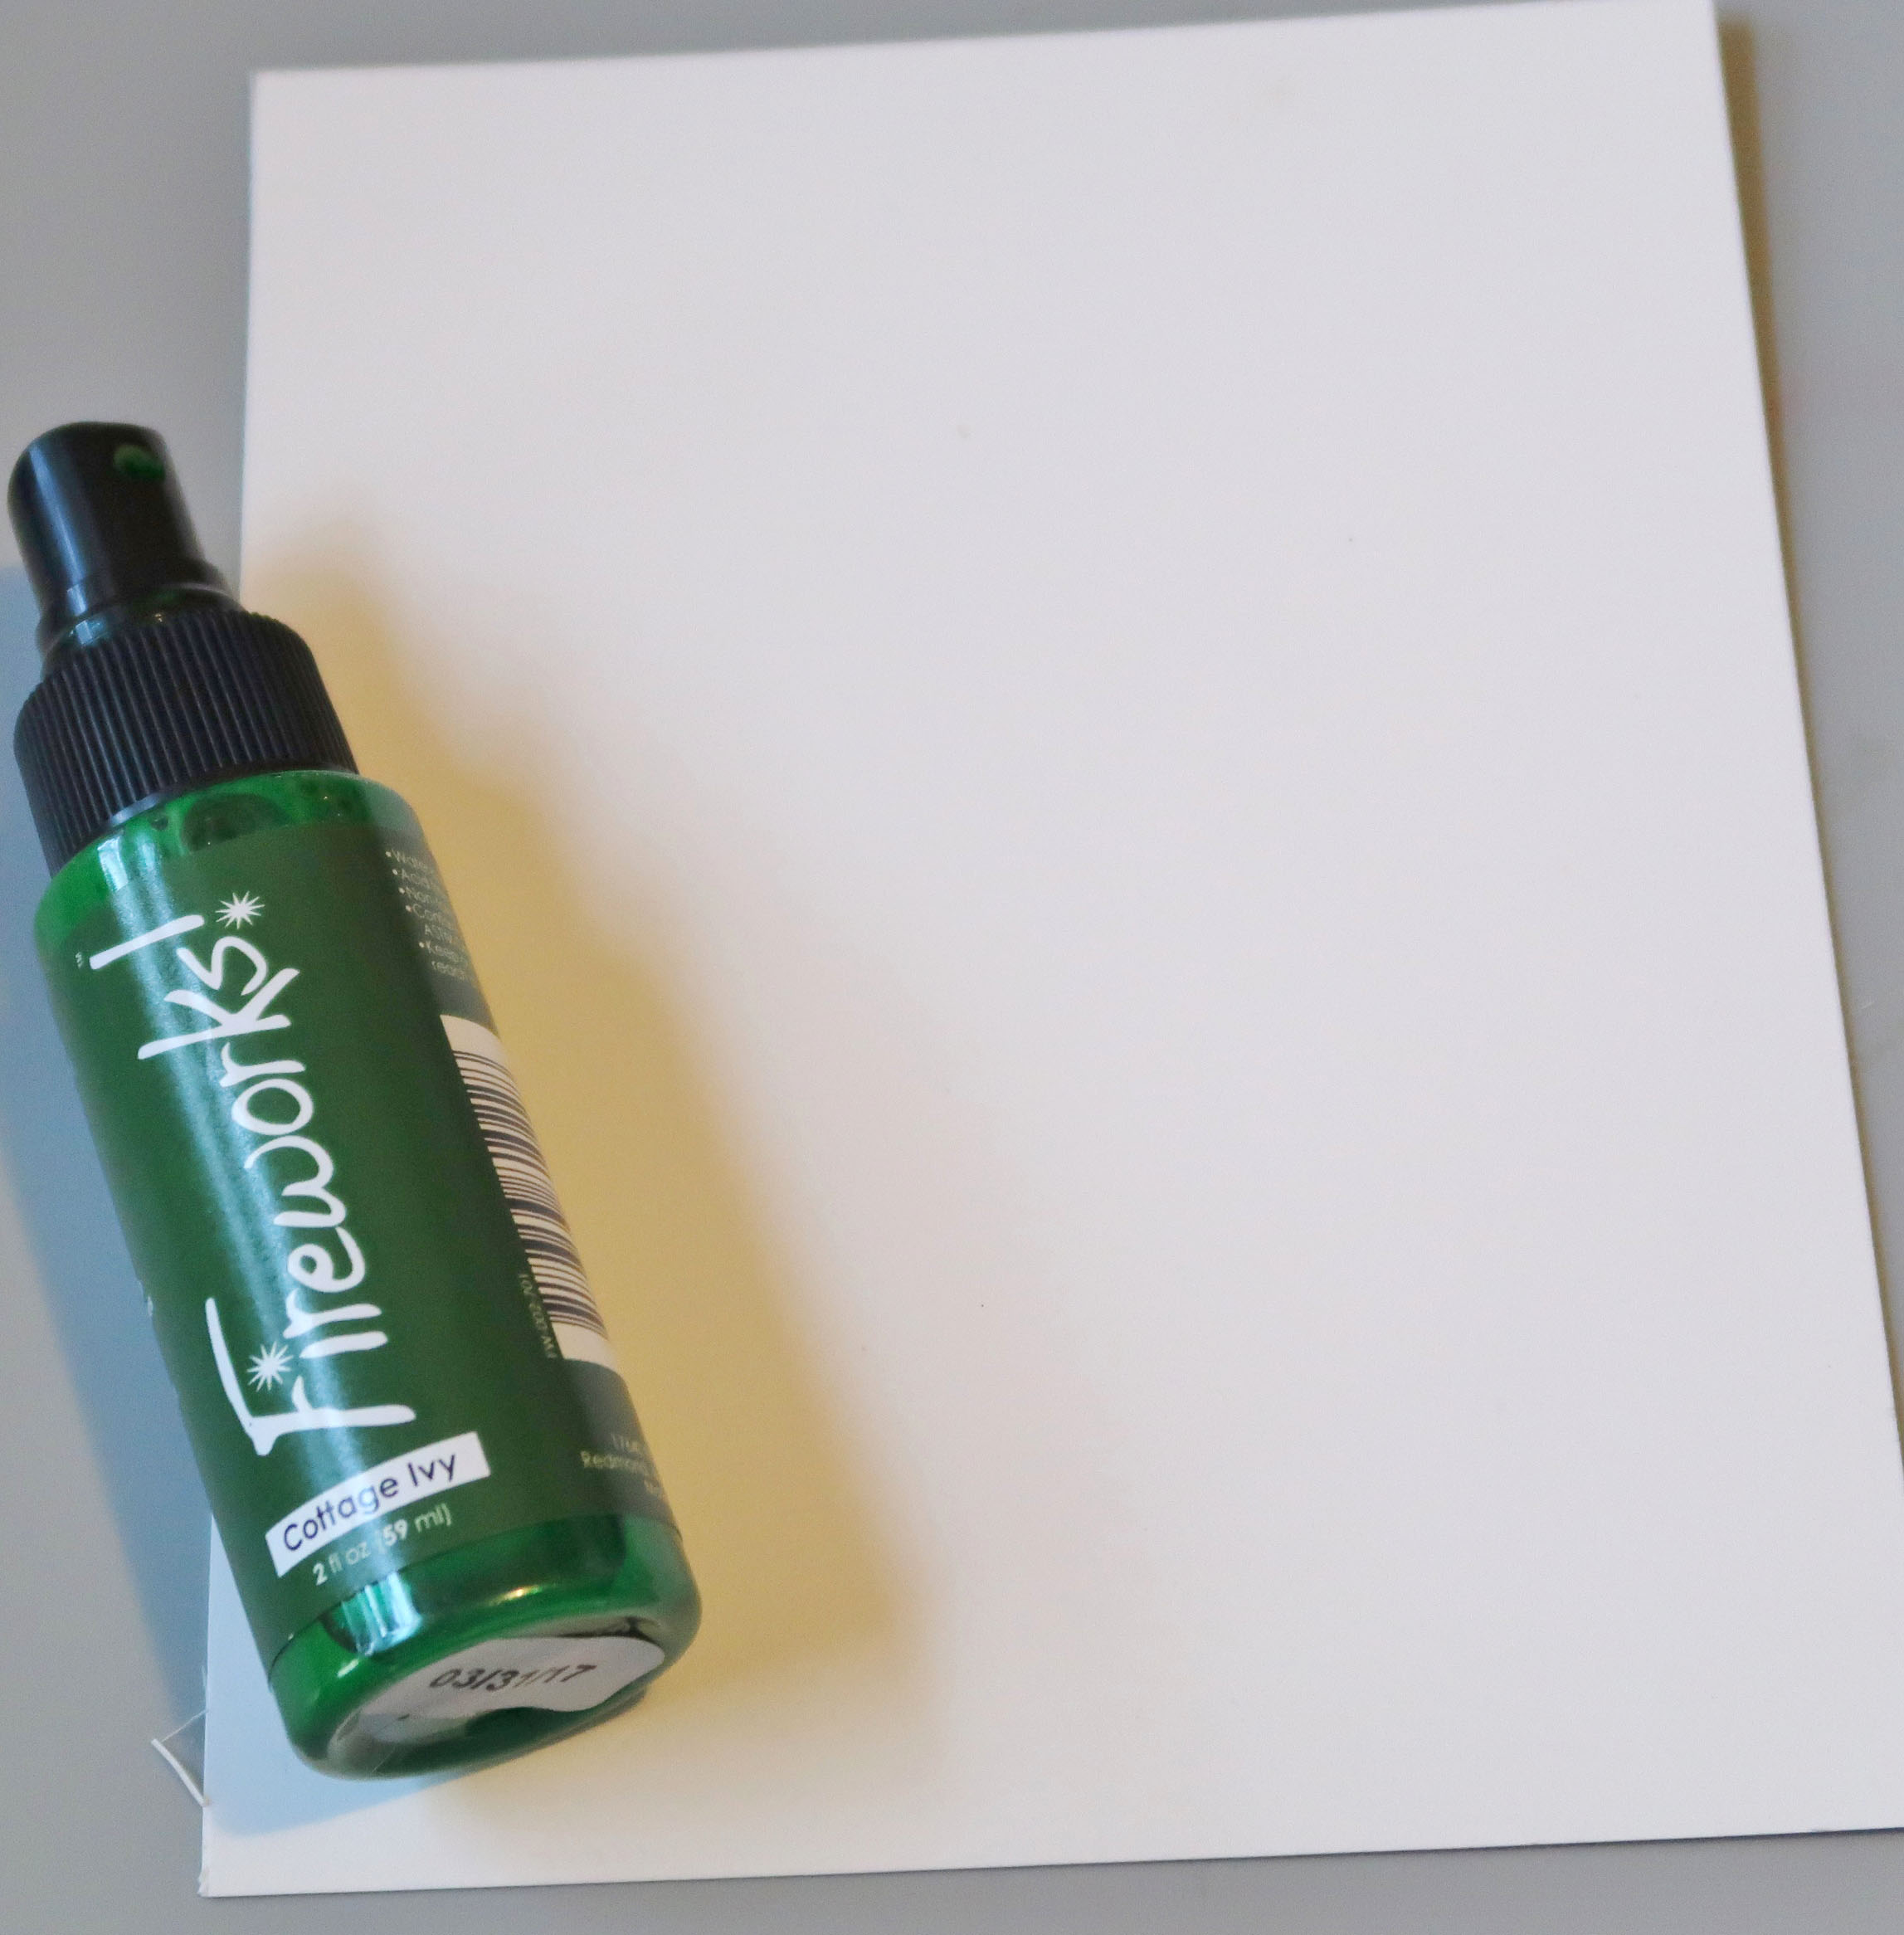
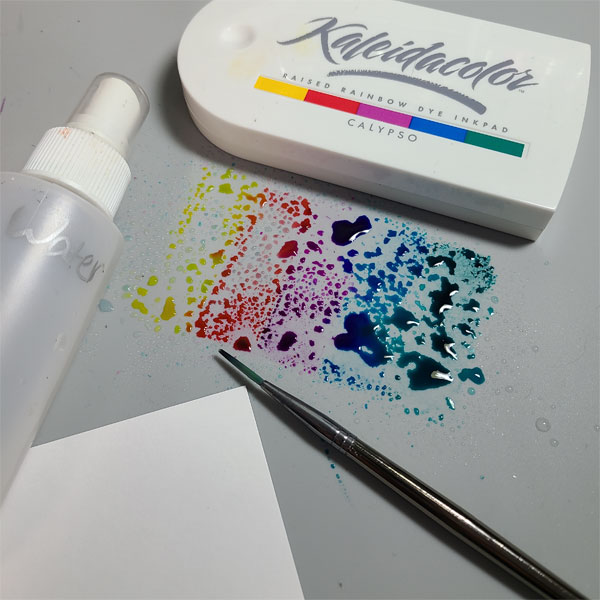
Push the Calypso Kaleidacolor Ink pad directly into your Imagine Craft Mat and spray with water. *Please note, I opted to use a larger brush than the one pictured here. Please see the supplies list for details.


Grow-5

Step 6

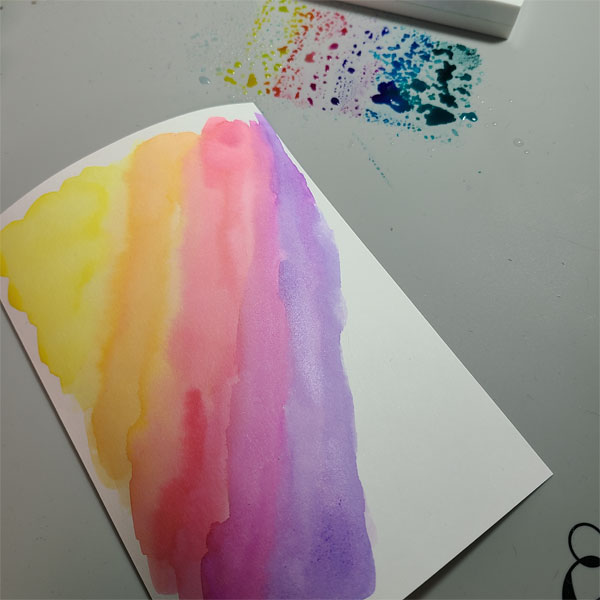
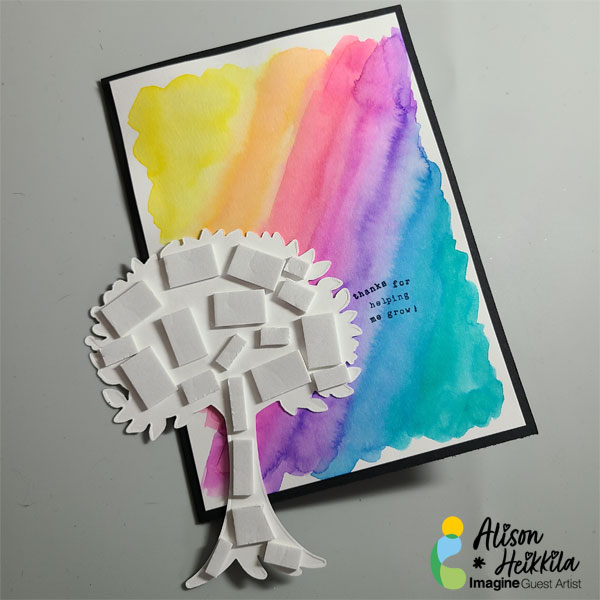
Begin painting the Calypso inks on to the Bristol cardstock. Use waters to help blend colors, and hold the tree up to the cardstock occasionally to see if you like your placement of colors. I worked diagonally, in the order the colors are in the ink pad.
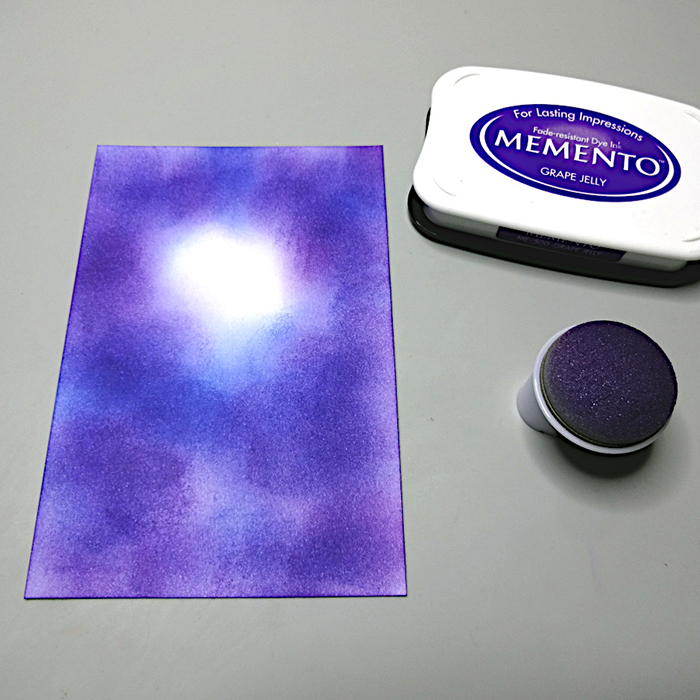
 

Grow-6

Step 7

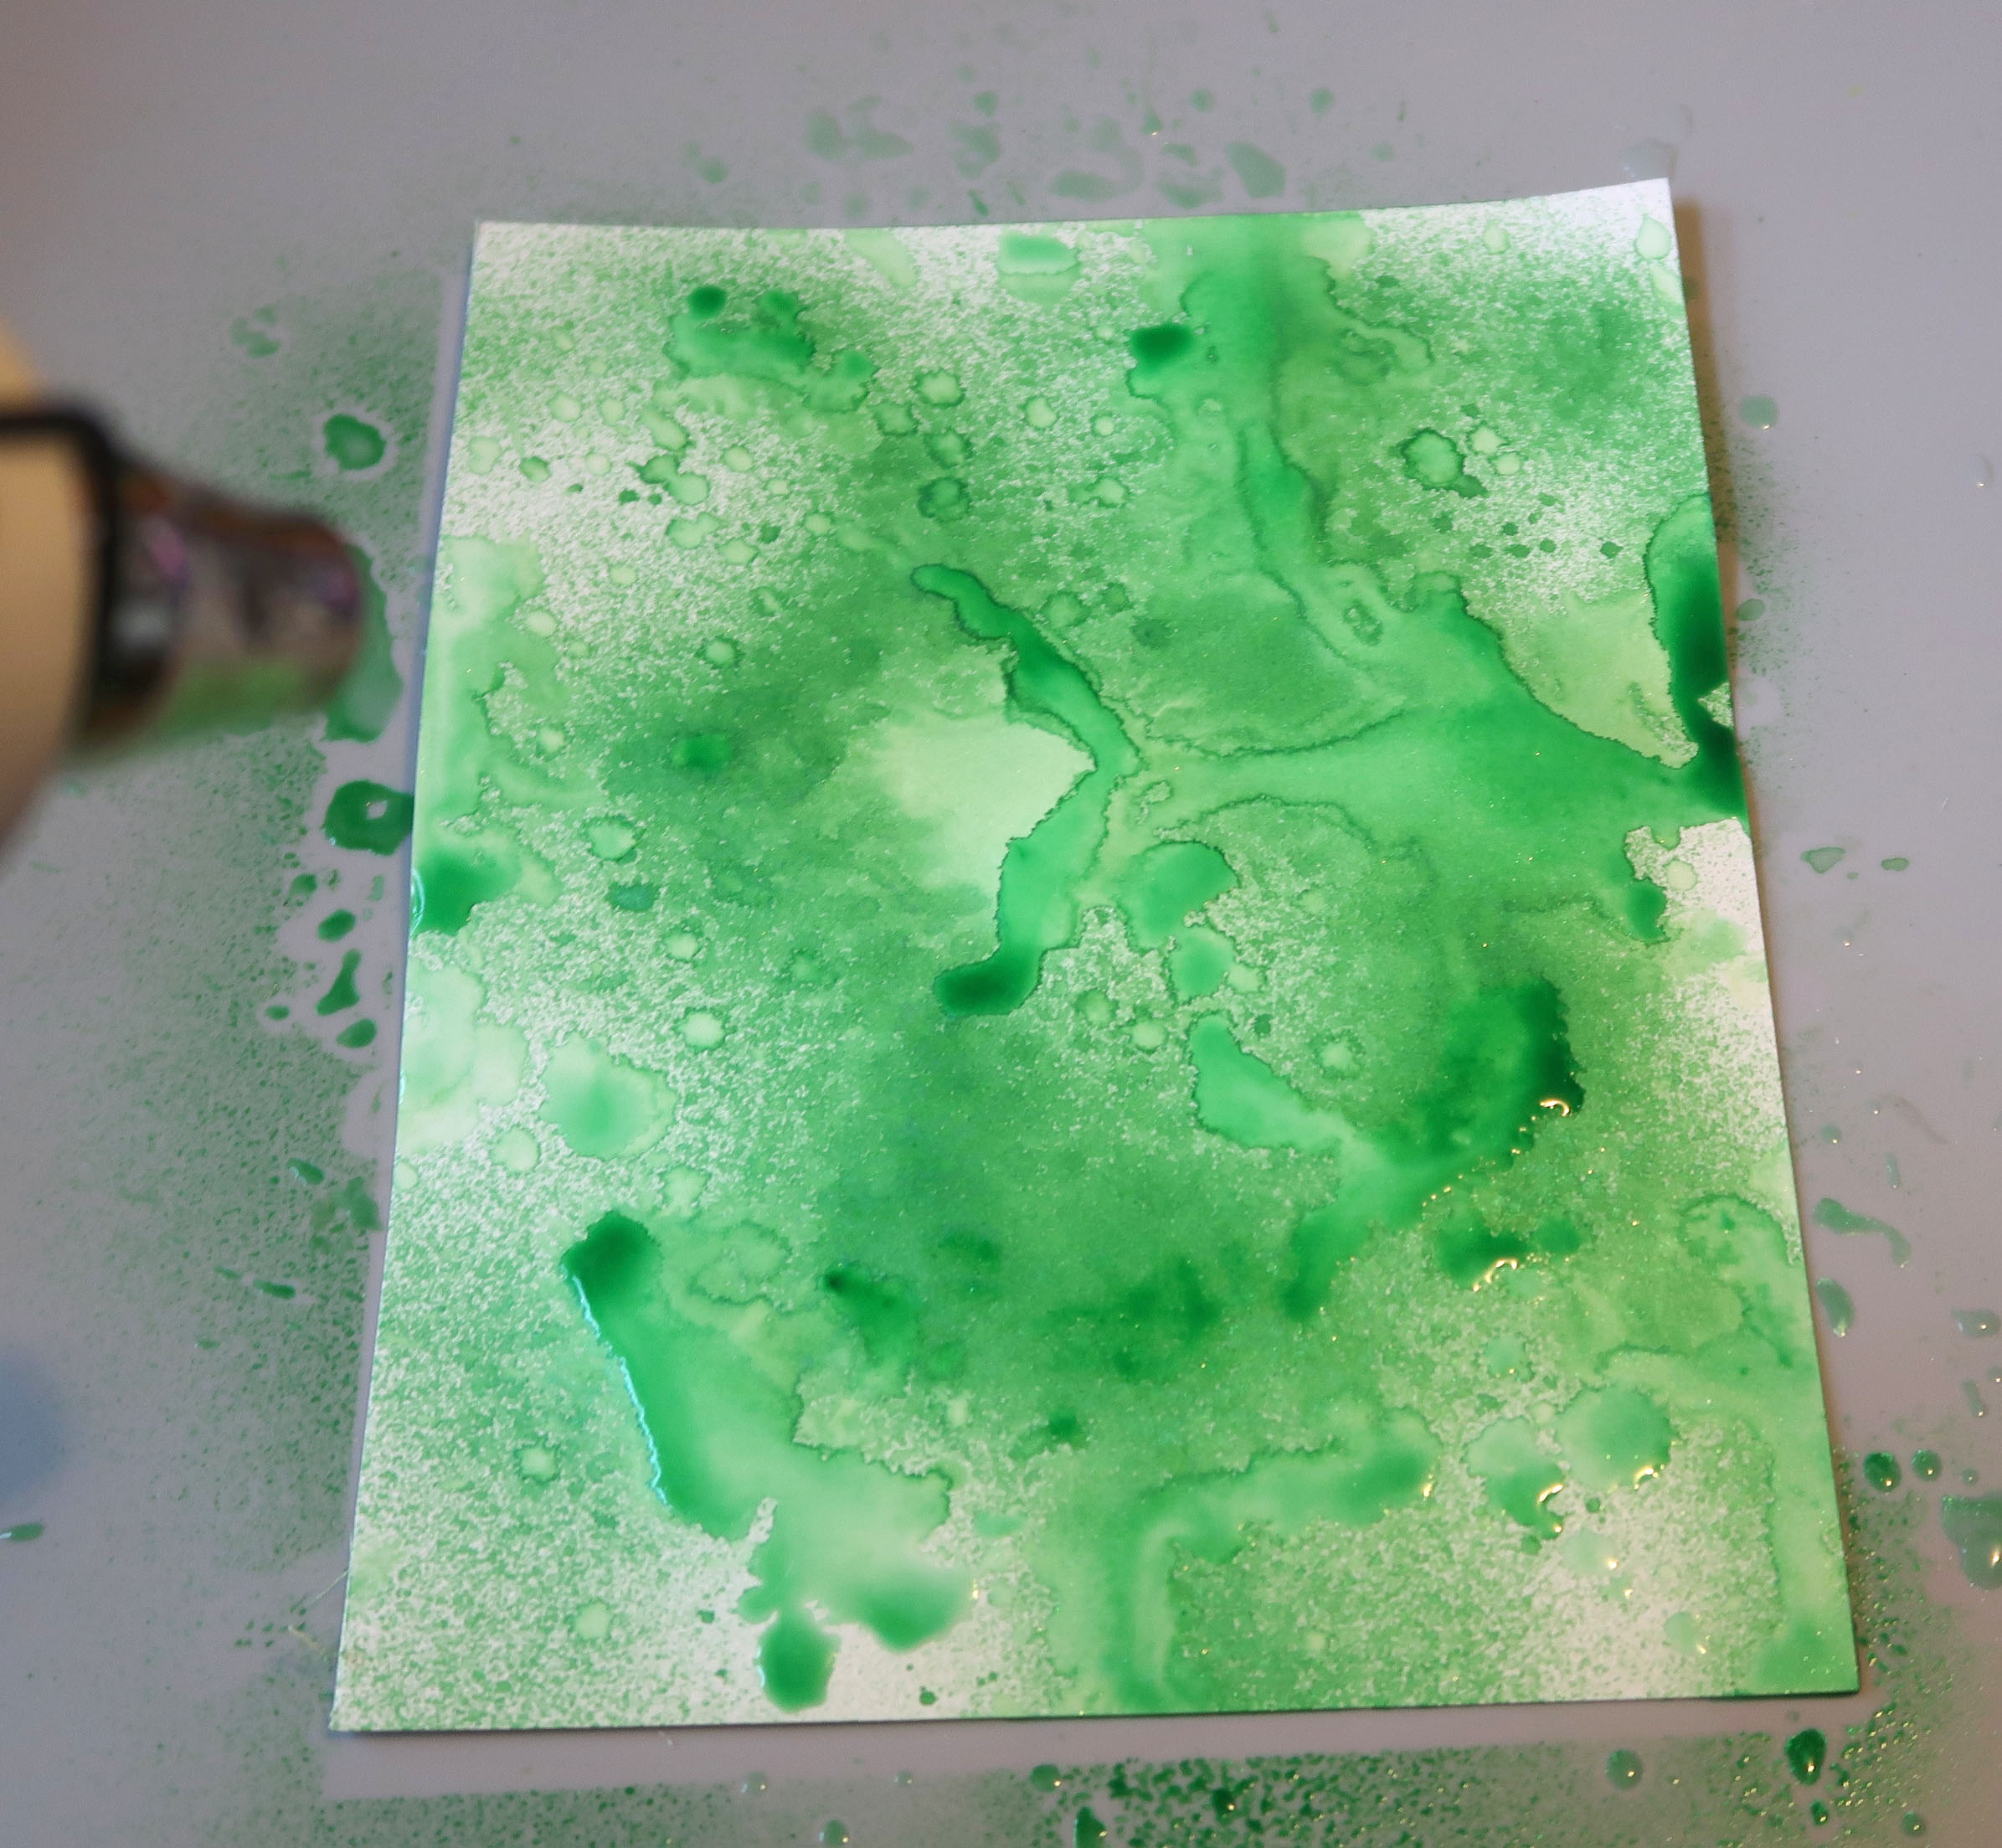
Continue working your way down the cardstock, blending colors as you go. I left a bit of a border around the edge of (most) of the Bristol.


Grow-7

Step 8

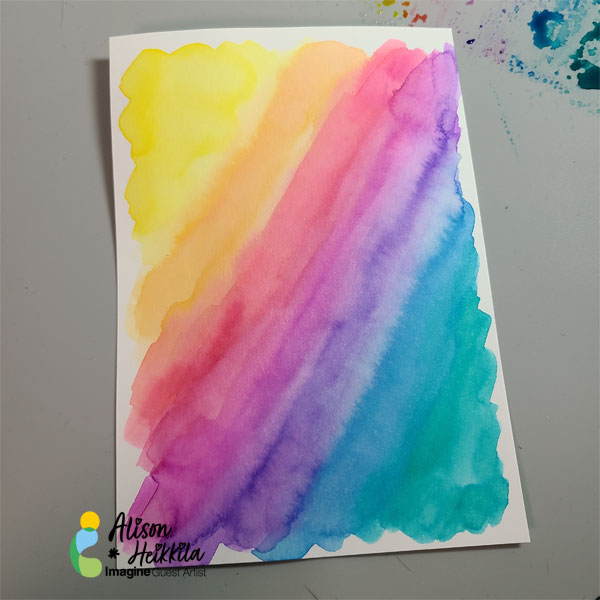
Once the panel is fully painted, let dry. Or, you can speed up the process with a heat tool. You can see how beautiful and vibrant the colors are, even after they’ve been watered down.
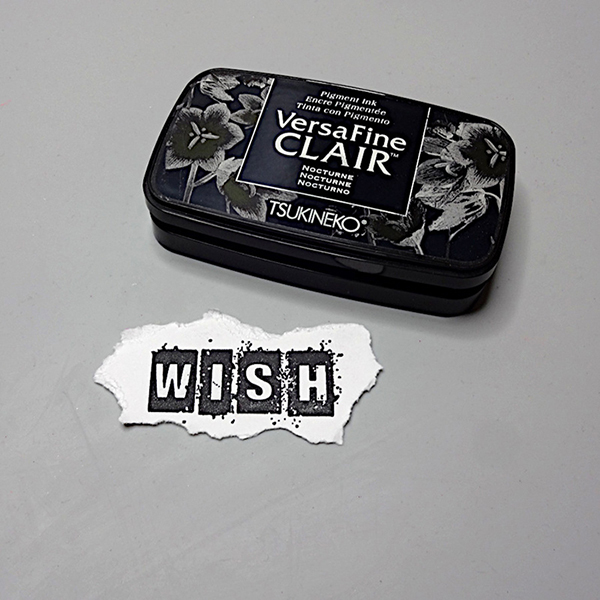
 

Grow-8

Step 9

Stamp your sentiment with VersaFine Clair Ink in Twilight. I assembled my sentiment with words from a Recollections stamp set.


Grow-9


Step 10

Create your card base out of black cardstock, cut to 10″ x 7.”

Step 11

Adhere the painted panel to the card base.

Step 12

Apply foam tape or pop dots to the back of the tree and adhere it to the card.


Grow-10

Step 13

Adhere Sparkle Blends to the card using On Point Glue.


Art Supplies

Imagine

VersaFine Ink in Onyx Black

Memento Markers in Rick Cocoa, Toffee Crunch, Bamboo Leaves, Pear Tart, Ladybug, Potter’s Clay, Dandelion, Summer Sky, Desert Sand, Angel Pink, Rose Bud, Lulu Lavender, Tangelo, Elderberry, Grape Jelly, Cantaloupe, Bahama Blue. 

Kalediacolor Ink in Calypso

VersaFine Clair Ink in Twilight

On Point Glue


Other

Hero Arts: My Monthly Hero March 2021 Kit

Doodles Paper Playground: Clearly in Love

Canson: Smooth Bristol Cardstock

Princeton: Snap! Size 10 Round Watercolor Brush

Recollections: Sentiment stamps and Black 110 lb cardstock


Learn How to Make a Wooden Wall Art Family Tree

2021_04_Roni_MothersDay_FamilyTree_WM 002

By Roni Johnson

Since Mother’s Day is quickly approaching I thought it would be fun to make a different type of gift Mom could enjoy all year long. I decided to make a fun and beautiful Family Tree using a wooden tree from Creative Embellishments paired with Imagine’s Walnut Ink Crystals and Cottage Ivy Fireworks! Shimmery Craft Spray.

Skill: Beginner

Time: 1 hour + dry time

Directions:

2021_04_Roni_MothersDay_FamilyTree (1)

Step 1

Gather up your supplies, you will need a wood tree, Walnut Ink Crystals, Cottage Ivy Fireworks! Shimmery Craft Spray, VersaFine Clair Pinecone ink, Memento Dual Tip Marker and a bit of heavy duty cardstock.


2021_04_Roni_MothersDay_FamilyTree (2)

Step 2

Use a craft knife to make small cuts in the wood to separate the leaves from the branches.


2021_04_Roni_MothersDay_FamilyTree (3)

Step 3

Sprinkle a small amount of Walnut Ink Crystals into a cup and add a bit of water.


2021_04_Roni_MothersDay_FamilyTree (4)

Step 4

Paint the walnut ink onto the tree trunk and branches.


2021_04_Roni_MothersDay_FamilyTree (5)

Step 5

Paint the Cottage Ivy Fireworks! spray onto each of the leaves.


2021_04_Roni_MothersDay_FamilyTree (6)

Step 6

If desired, paint a second coat of ink where necessary and let the tree dry completely.


2021_04_Roni_MothersDay_FamilyTree (7)

Step 7

Spray a sheet of Bristol Cardstock with Cottage Ivy Fireworks! Shimmery Spray; add a spritz of water here and there.


2021_04_Roni_MothersDay_FamilyTree (8)

Step 8

Use a heat gun to mix the water and ink around on the cardstock.


2021_04_Roni_MothersDay_FamilyTree (9)

Step 9

Once dry, die cut desired number of leaves from the cardstock.


2021_04_Roni_MothersDay_FamilyTree (10)

Step 10

Ink the edges of each leaf with Pinecone VersaFine Clair Ink and a sponge dauber.


2021_04_Roni_MothersDay_FamilyTree (11)

Step 11

Use a Tuxedo Black Memento Dual Tip Marker to write the names of each family member on a leaf.


2021_04_Roni_MothersDay_FamilyTree_WM-IG


Step 12

Adhere the leaves to the tree as desired. You could add them in the form of a traditional family tree or place them randomly over the tree.


Art Supplies:

Imagine
Other
  • Creative Embellishments Home Décor Wood Tree
  • Paint Brush
  • Bristol Cardstock
  • Heat Tool
  • Craft Knife
  • Spellbinders – Leaf Dies
  •  

Learn How to Make a Faux Blue Delft Bunny Rabbit

By Roni Johnson

Welcome in Spring with this lovely Faux Blue Delft Bunny Rabbit to brighten up your home. Originating in the city of Delft in the Netherlands in the 1600s, this pottery which consists of blue decoration over a white background is a breath of fresh air and the perfect start of this season of renewal. This technique looks daunting but once you break it down into easy-to-follow steps it’s fun and rewarding. The finished project looks stunning and will delight everyone who comes in contact with it.

This technique combines wide-open geometric stamped patterns with areas of saturation to give the piece defined areas to enhance and highlight certain areas of the animal. For this example, I used the more concentrated stamping on the face, ears and a medallion of sorts on its back. You will come to see how this turns a plain paper mache rabbit into a beautiful Blue Delft Bunny sure to please.

Skill: Intermediate
Time: 2 hours + dry time


Directions:

Step 1

Gather up your supplies, you will need a paper mache animal – I choose a rabbit for Spring, tissue paper, Medieval Blue VersaFine Clair ink and Creative Medium (Clear or Shimmer).


Step 2

You will also need to gather a few small stamps. For this project I am using roses, leaves and vine peg stamps from Rubber Stamp Tapestry.


Step 3

Prepare the paper mache animal by painting it with white acrylic paint. Set it aside to dry.


Step 4

To create the concentrated stamped sections place a sheet of tissue paper over the desired area, in this case the back and trace the shape you wish to create. For this example I wanted a nice sized oval medallion over the back. You can see the faint pencil marking on the tissue paper in the photo.


Step 5

Create the medallion by stamping the border along the pencil line from the previous step.


Step 6 – Stamp additional images to fill in the medallion.


Step 7 – Once the medallion has been completed let the ink dry completely.


Step 8 – Use a ruler to stamp a small rose at 1” intervals in a diagonal line.


Step 9 – Continue stamping at 1” intervals until the entire piece of tissue paper has been covered.


Step 10 – Repeat steps 4-9 for any additional areas you wish to cover with a concentrated stamping. For this example I made pieces for the back sides of the rabbit ears and one for the top of the nose and forehead.


Step 11 – Stamp extra pieces of tissue paper with the diagonal 1” pattern to cover any areas which are not going to be covered with the concentrated pieces.


Step 12 – Stamp more tissue paper than you think you’ll need just in case. You don’t want to run out in the middle of covering the project and have to stop gluing to stamp more.


Step 13 – Apply a layer of Creative Medium over the section of the paper mache you want to begin with and carefully place the piece of tissue paper over the glue.


Step 14 – Pick up more Creative Medium on the paintbrush and gently dab the tissue paper and press it onto the paper mache form. Once in place cover the entire piece of tissue paper with a generous layer of Creative Medium.


Step 15 – Continue covering the areas where you want the concentrated stamping, next the ears, one at a time.


Step 16 – Again gently layer the tissue paper over the Creative Medium base coat then cover with a top coat of Creative Medium. Gently pull away the excess tissue paper and smooth the edges with the paintbrush. Let these areas dry before continuing.


Step 17 – Once all of the concentrated areas have been applied (back medallion, ears, and forehead), use the diagonal stamped tissue paper to fill in any additional areas that need covering in the same fashion. Apply a foundation layer of Creative Medium; add the diagonal tissue paper and gently press into the glue then apply a top coat of Creative Medium.


Step 18 – Let the Creative Medium dry completely, I left this example dry overnight.


Step 19 – Use a sponge dauber to apply a bit of color around the edge and inside of the ear.


Step 20 – (Optional) – Glue a bit of marabou feather boa to the tail area.


Step 21 – Dye rayon seam binding with Fireworks! Spray ink to create a bow around the bunny’s neck.


Art Supplies:

Imagine
Other
  • Paper Mache Rabbit
  • Tissue Paper
  • Rubber Stamp Tapestry – Roses, Leaves, Vine peg stamps
  • Ruler
  • Paint Brush
  • Rayon Seam Binding
  • DecoArt Americana Acrylic Paint – Titanium White
  • (optional) Marabou Feather Boa