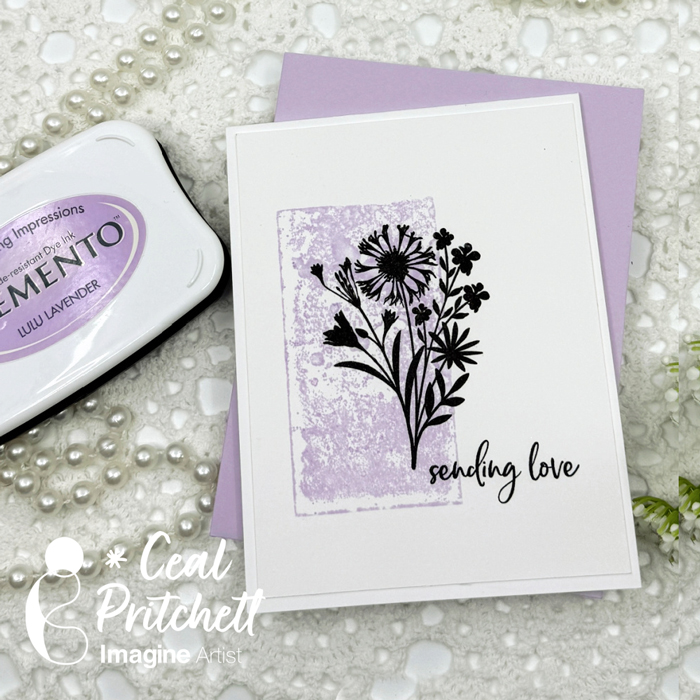
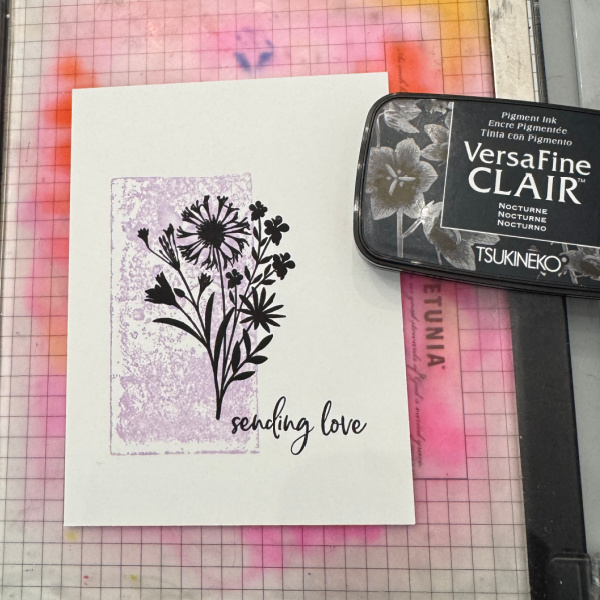
Hey there crafty friends! Hi, it’s Ceal! Today I’m sharing a simple ink technique to create a beautiful card.
Skill Level: Beginner Time: 30 minutes
Directions:
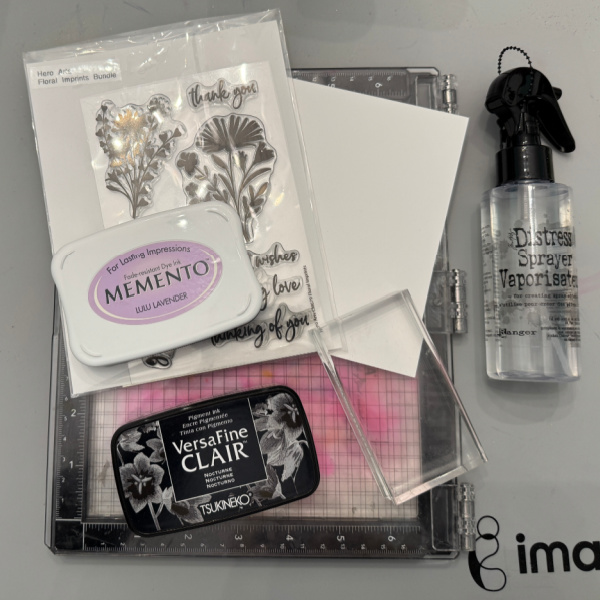
Gather your supplies. You will need an acrylic block of any size, silhouette stamp (could be any stamp but Silhouettes look best with the technique), any color of ink pad that is water based, VersaFine Nocturne ink pad and a water spritzer bottle.
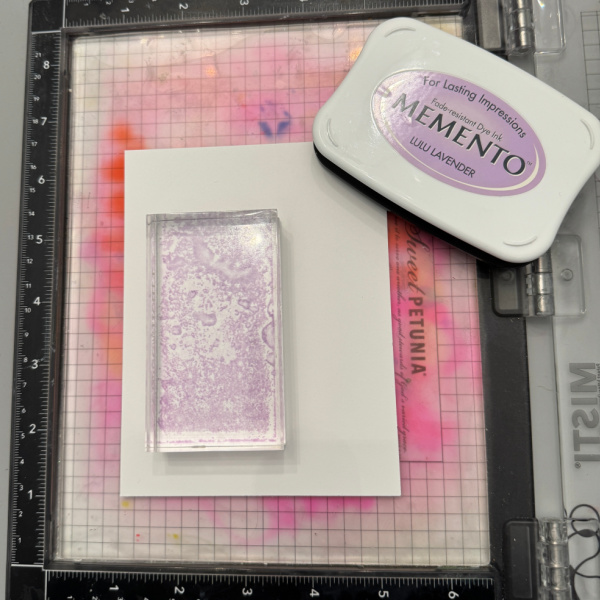
Step 1 : Ink up the block with water-based ink and spritz with water.
Step 2: Place inked block down on a water friendly panel of paper. The paper I used is Tim Holtz’ white Heavystock.
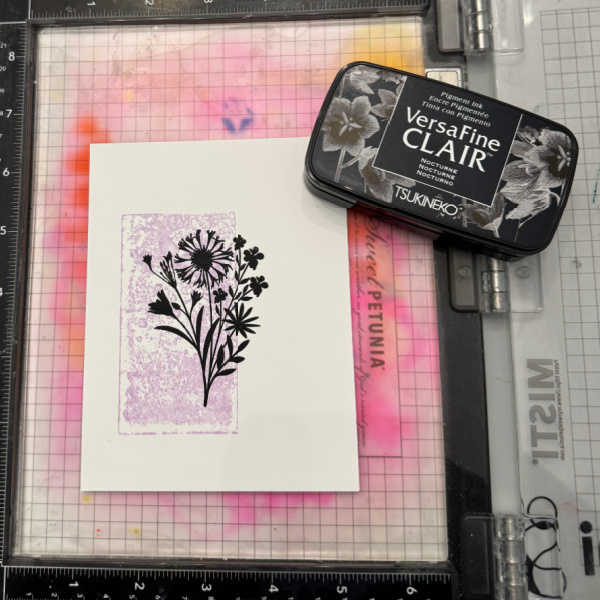
Step 3: Ink up the silhouette stamp with a black ink that gives good coverage like VersaFine Clair Nocturne and stamp image partially over the background.
Step 4: Ink up the sentiment with VersaFine Clair Nocturne and stamp to the left of the image underneath it.
Other Products Neenah Classic Crest Solar White – Simon Says Stamp White Heavystock – Tim Holtz/Ranger Floral Imprints Stamp set – Hero Arts Acrylic Block
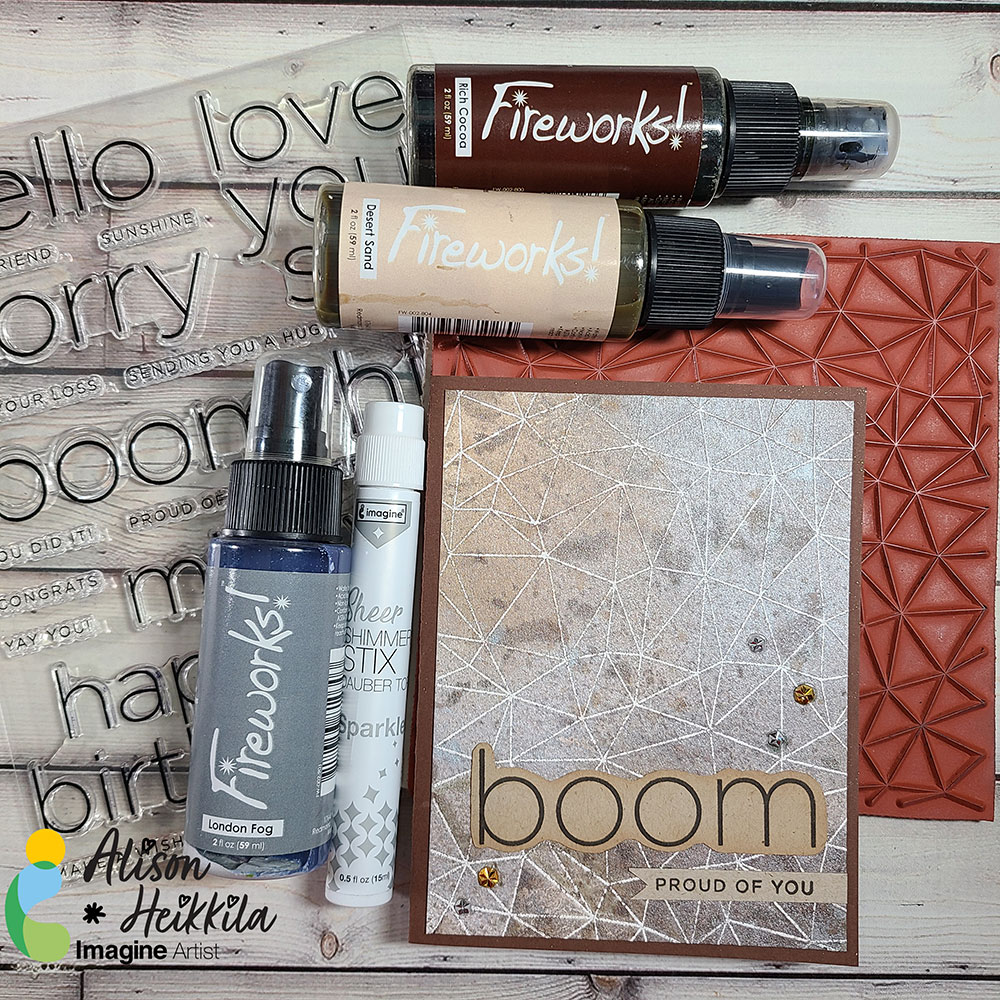
– Hello! It’s Alison Heikkila. Today we’re going to play with some Fireworks! Sprays on an emboss resist background. It’s a great masculine card, but I prefer to call it non-gendered. By changing up the background stamp and/or the colors, you can make this card as unique as the person you’re giving it to.
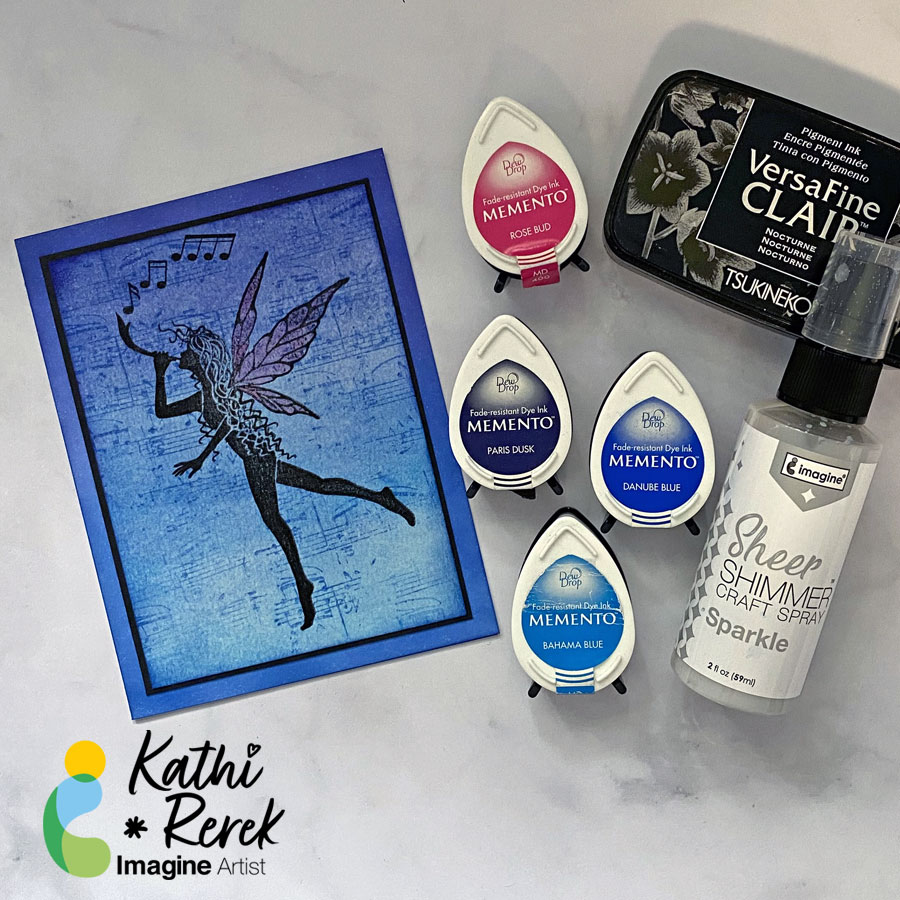
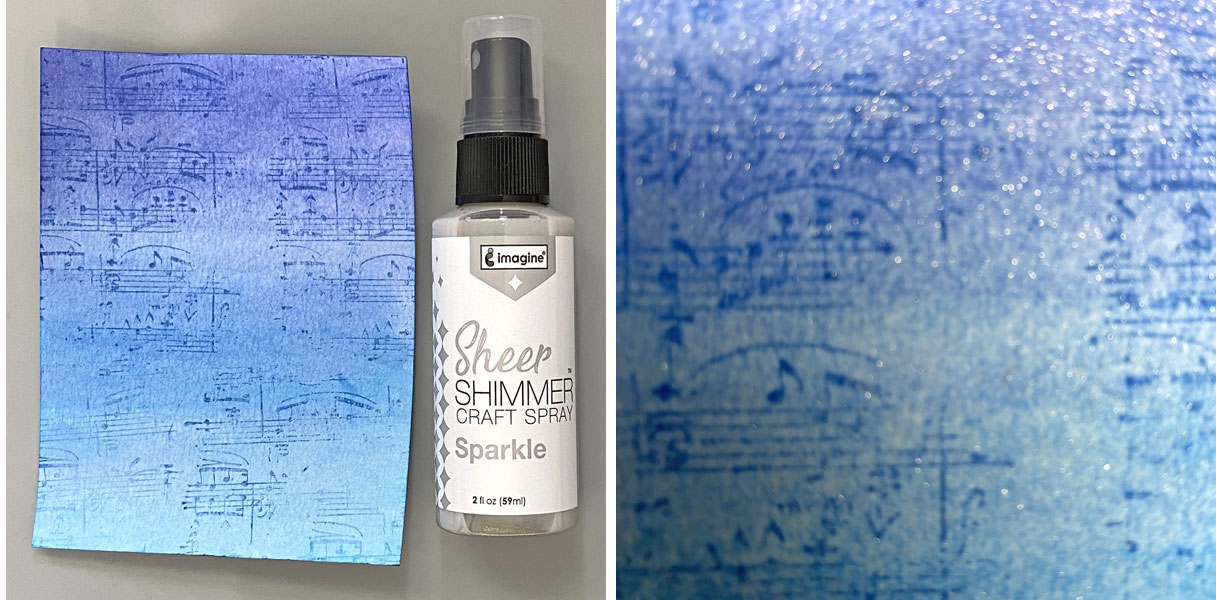
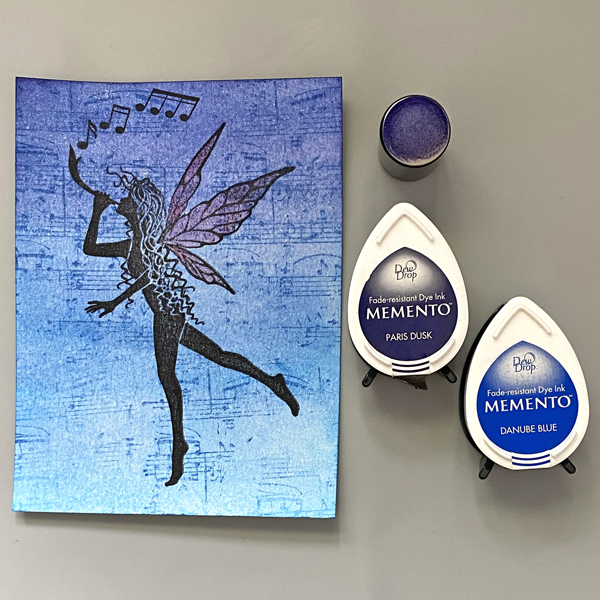
Greetings! It’s Kathi here to show you how to create fairy card with a magical shimmer using Memento Inks and Sheer Shimmer Sparkle Spray.
Skill Level: Beginner to Intermediate
Time: 1.5 hours
Instructions:
Step 1:
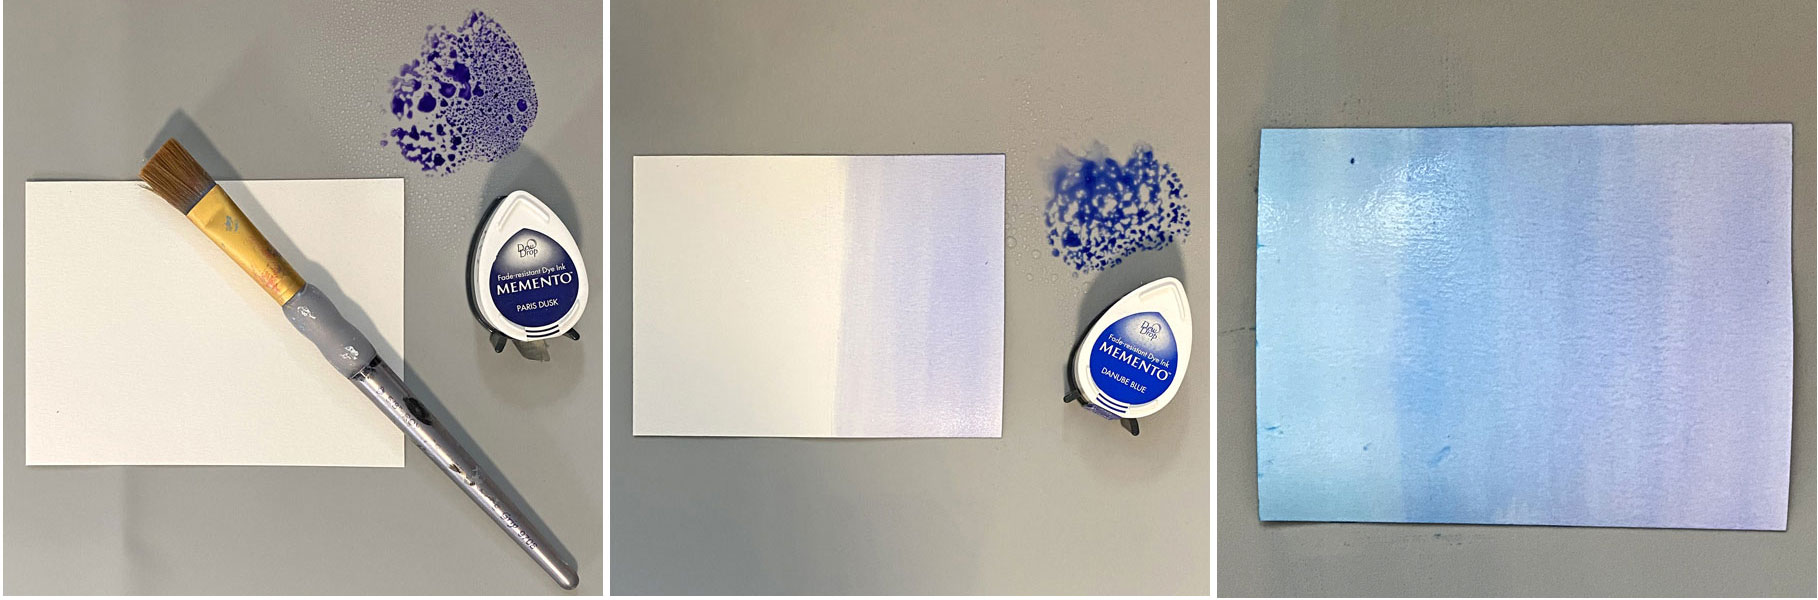
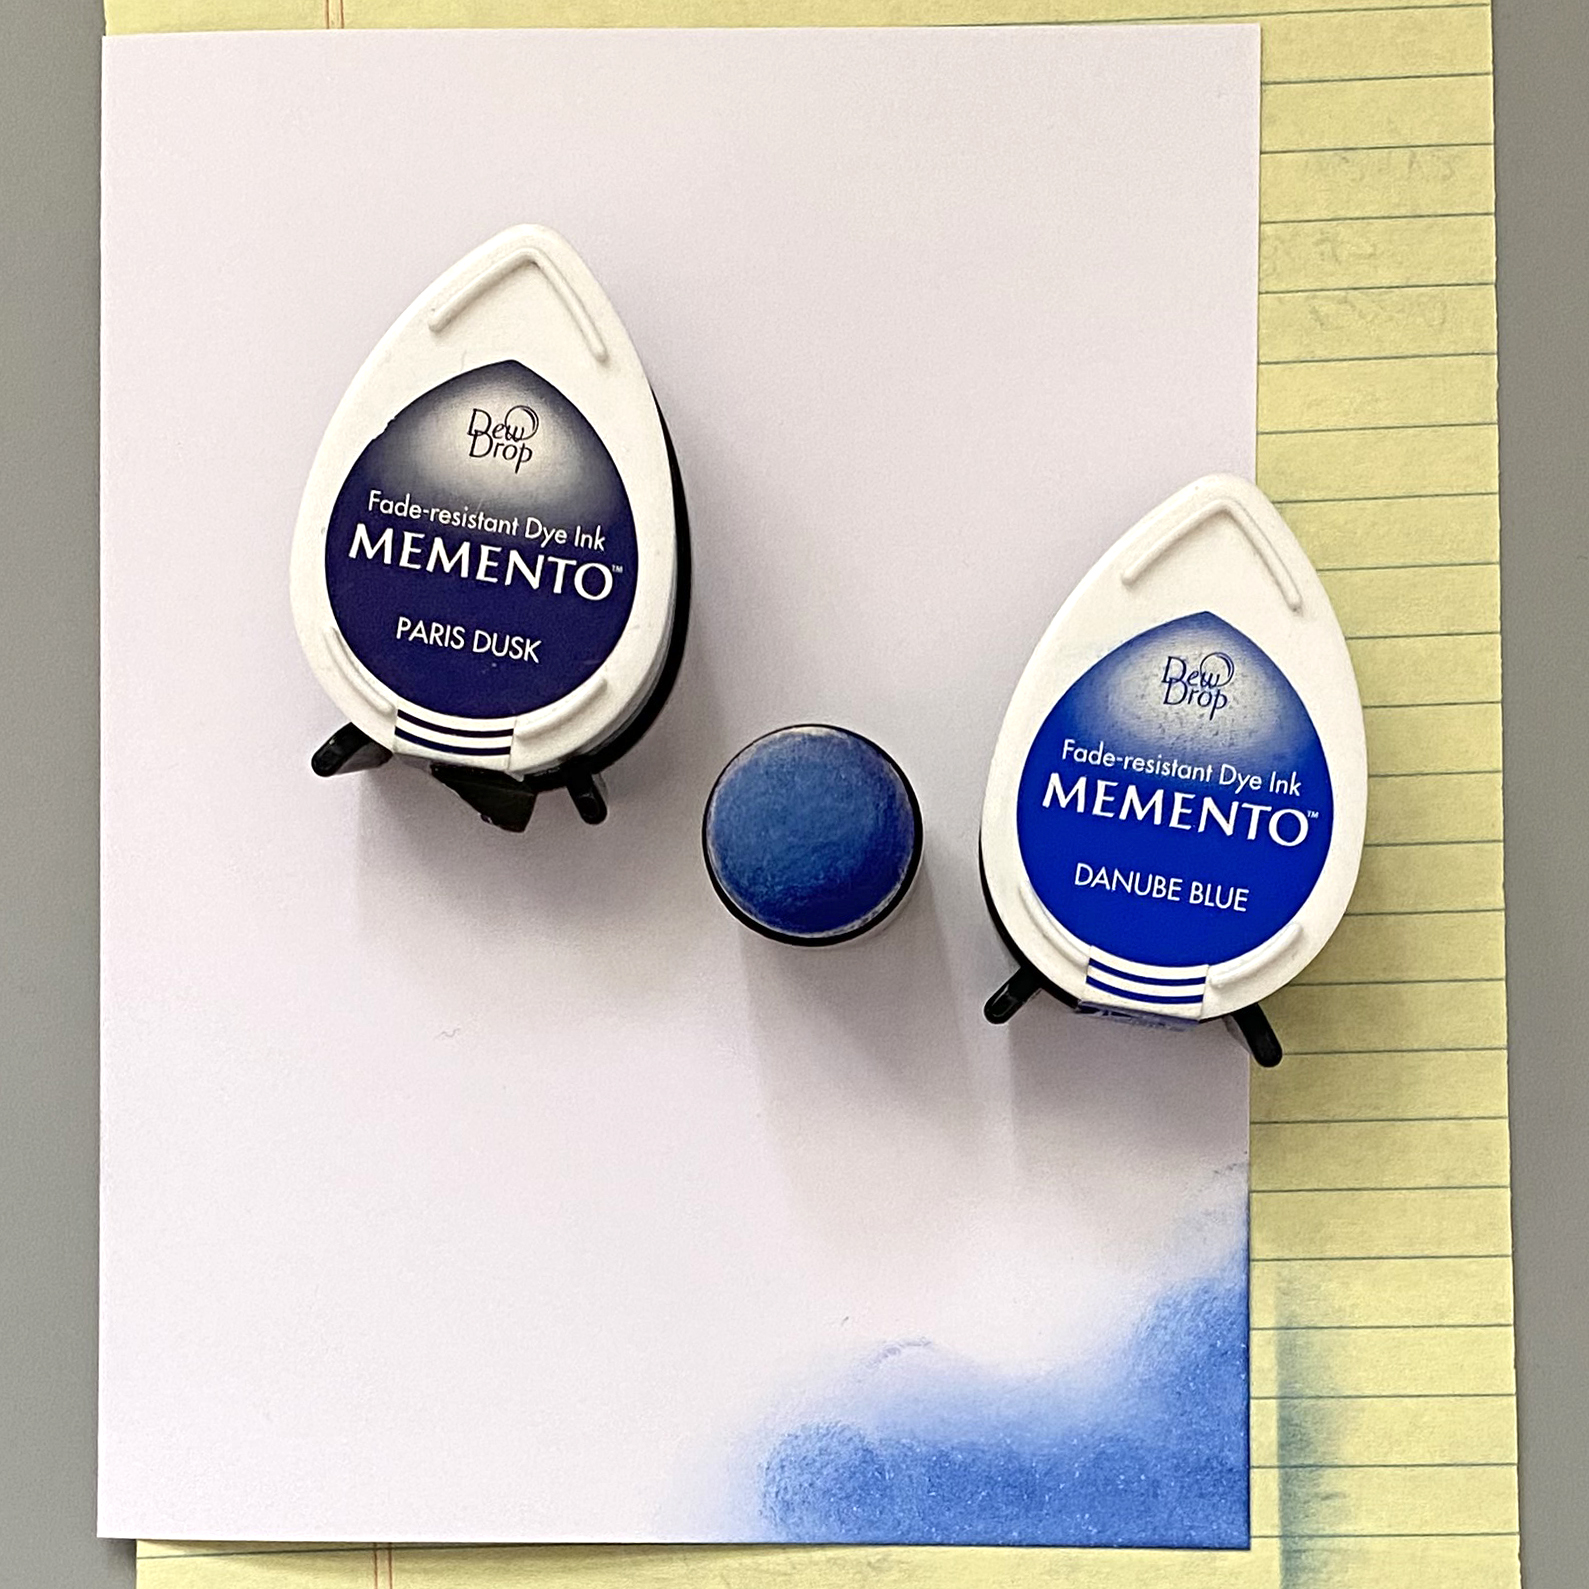
Smoosh Paris Dusk Memento Dew Drop Ink onto the craft mat. Mist with water and use a paint brush to apply diluted ink to the right edge of a 5.25” x 4” panel of watercolor paper.
Repeat with Blue Danube and then with Bahama Blue Memento Dew Drop Ink Pads until the entire panel is inked. Heat set the panel.
Step 2:
Ink the Sheet Music Texture Red Rubber Cling Stamp with Blue Danube Dew Drop Ink and randomly stamp onto the panel.
Step 3:
Spray the panel with Sheer Shimmer Sparkle Spray. Heat Set and admire the sparkle!
Step 4:
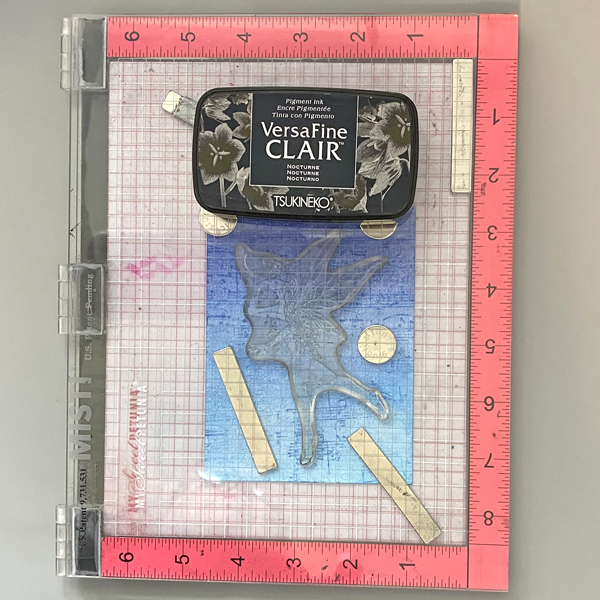
Using a stamping platform, position the Trinity Fairy Clear Stamp onto the image panel. Ink with Nocturne VersaFine Clair Ink and stamp. You might need to re-ink and stamp to achieve a clear impression.
Remove the panel from the stamping platform and heat set.
Step 5:
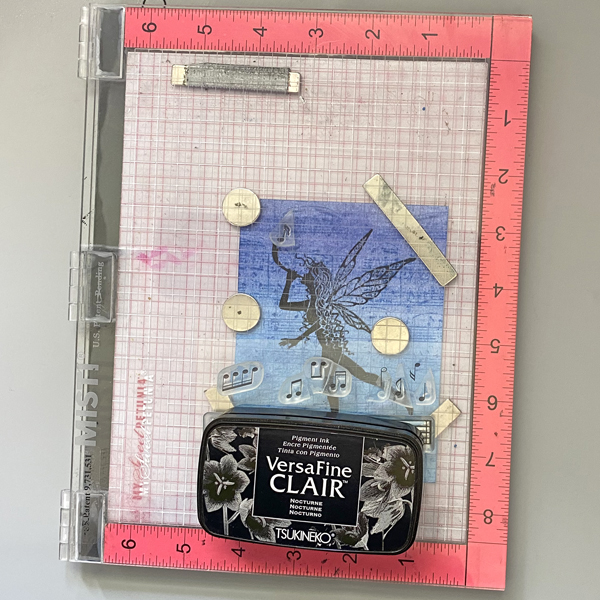
Place the image panel back onto the stamping platform. Position one of the notes from the Music Notes Small Clear Step Set facedown above the fairy’s horn. Ink the stamp with Nocturne VersaFine Clair Ink and stamp.
Remove the note stamp from the stamping platform. Place another note stamp from the same set, slightly to the right of the previously stamped note. Ink and stamp with Nocturne VersaFine Clair Ink and stamp.
Remove the second note stamp from the stamping platform. Place the four notes stamp to the right of the other notes. Ink the stamp with Nocturne VersaFine Clair Ink and stamp.
Heat Set the notes.
Step 6:
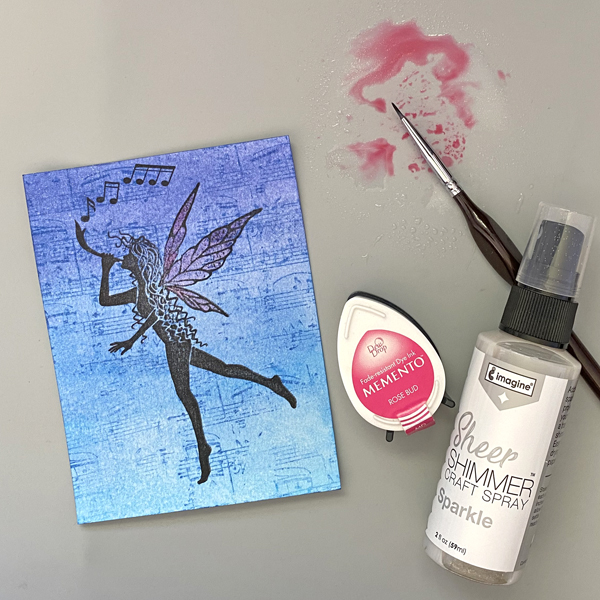
Smoosh the Rose Bud Memento Dewdrop Ink pad onto the craft mat. Mist with Sheer Shimmer Sparkle Spray.
Use a paint brush to apply the shimmery pink ink to the fairy’s wings. Heat set.
Step 7:
Trim the image panel to 3 5/8” x 4 7/8”.
Use a Sponge Dauber and Paris Dusk Memento Ink to edge the top part of the image panel. Use the Sponge Dauber and Blue Danube Memento Ink to edge the bottom part of the image panel.
Step 8:
Create an A2 card from white cardstock. Insert a piece of scrap paper into the card.
Use Sponge Daubers to ink the periphery of the white card with Paris Dusk and Blue Danube Memento Inks.
Step 9:
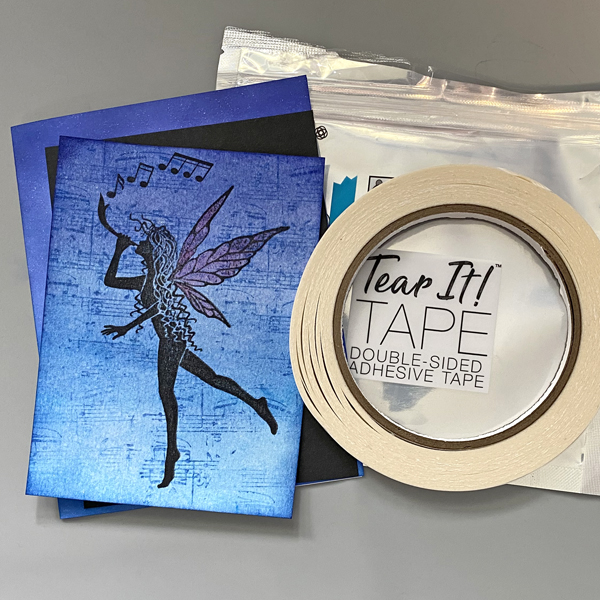
Cut a piece of black cardstock to 3 3/4” x 5”.
Use Tear It! Tape to mat the image panel with the black cardstock panel, then use the tape to adhere the matted panel to the inked card.
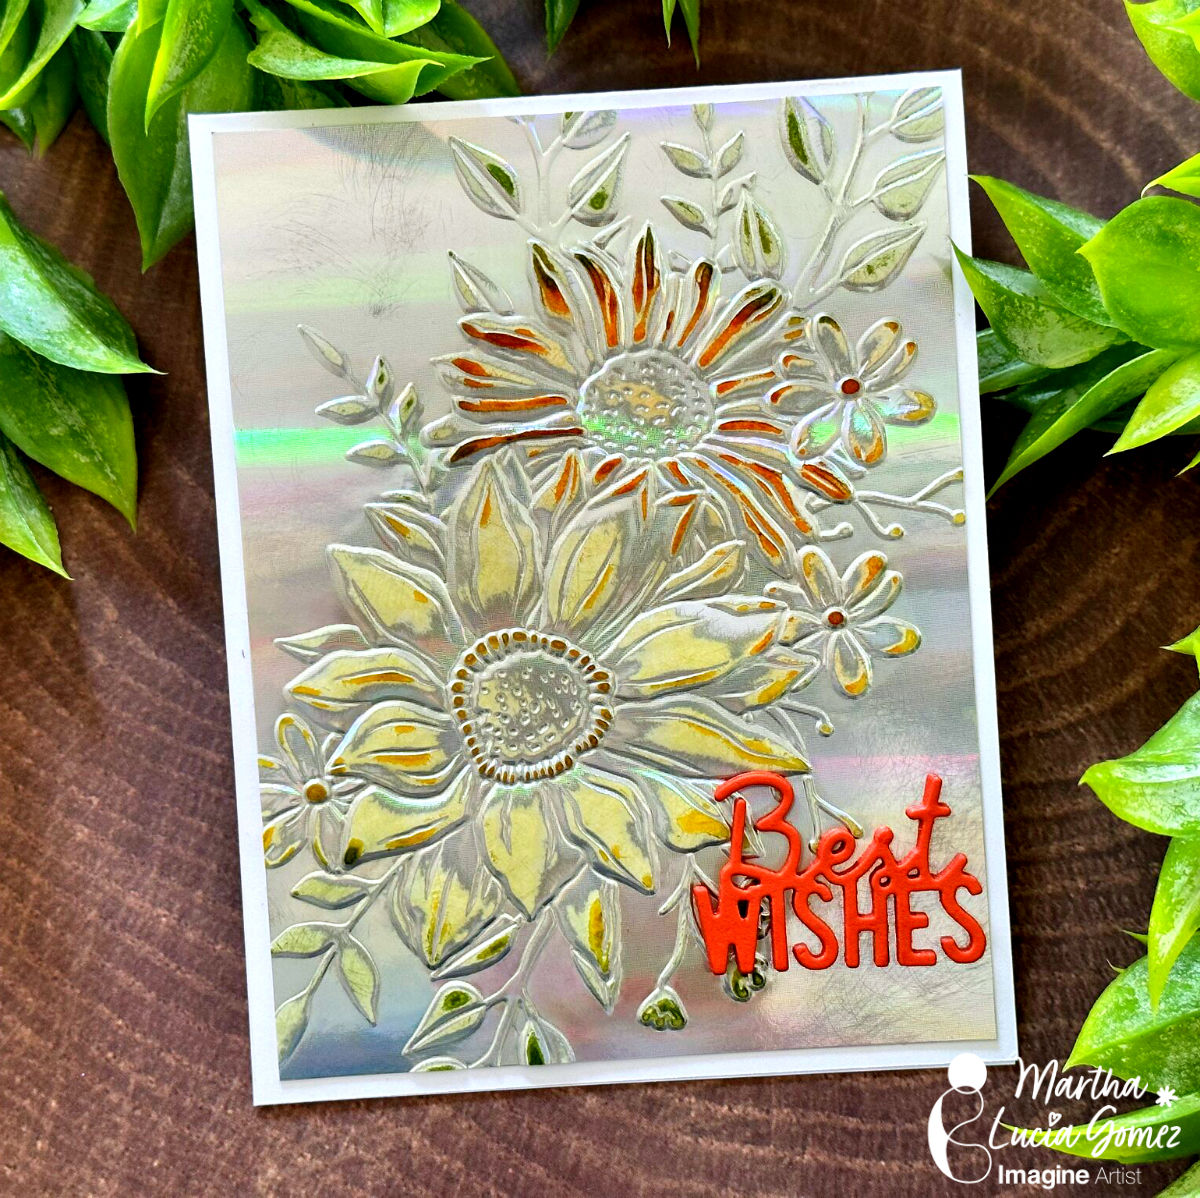
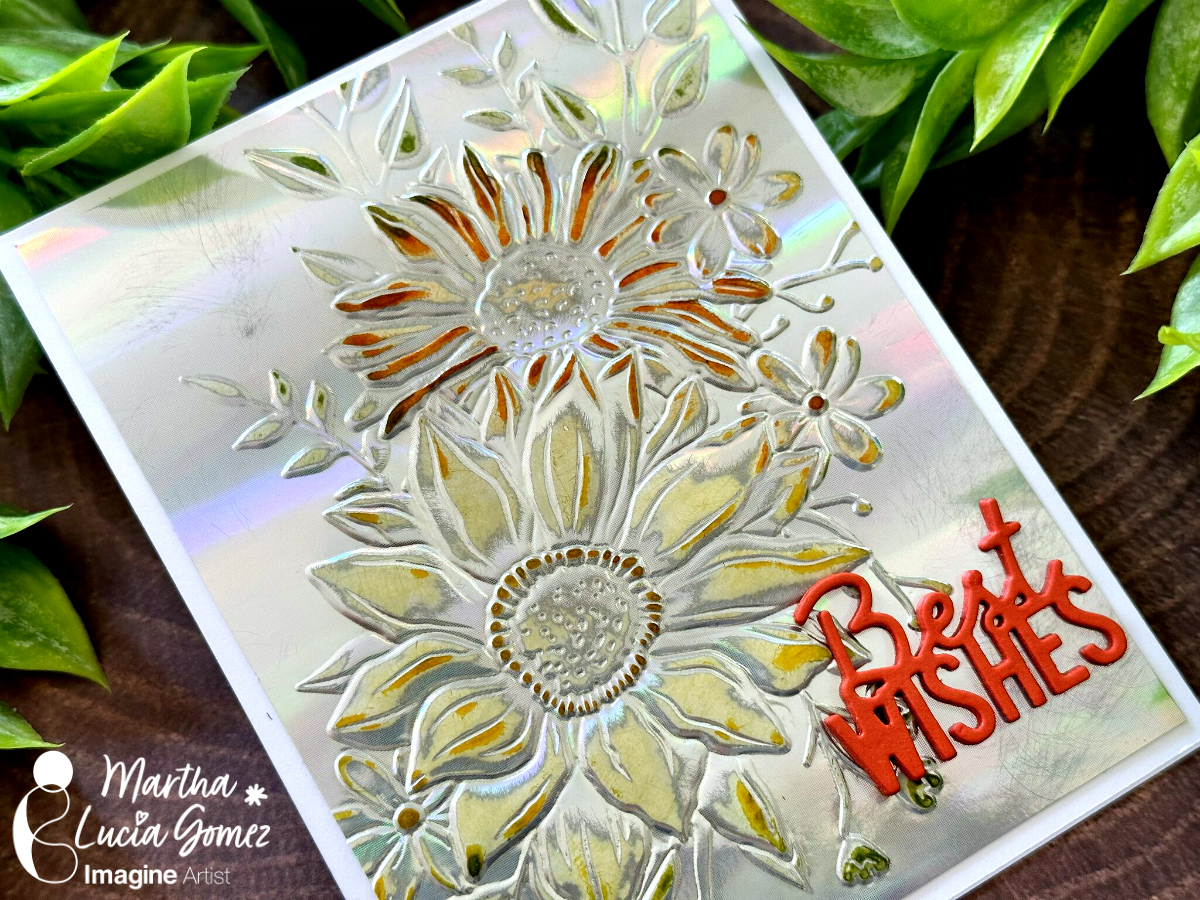
Hello crafty friends! Today, I have a fun tutorial to make a unique congratulations wedding card. Let me share the project with you.
Skill Level: Beginning Time: 60 minutes
Directions:
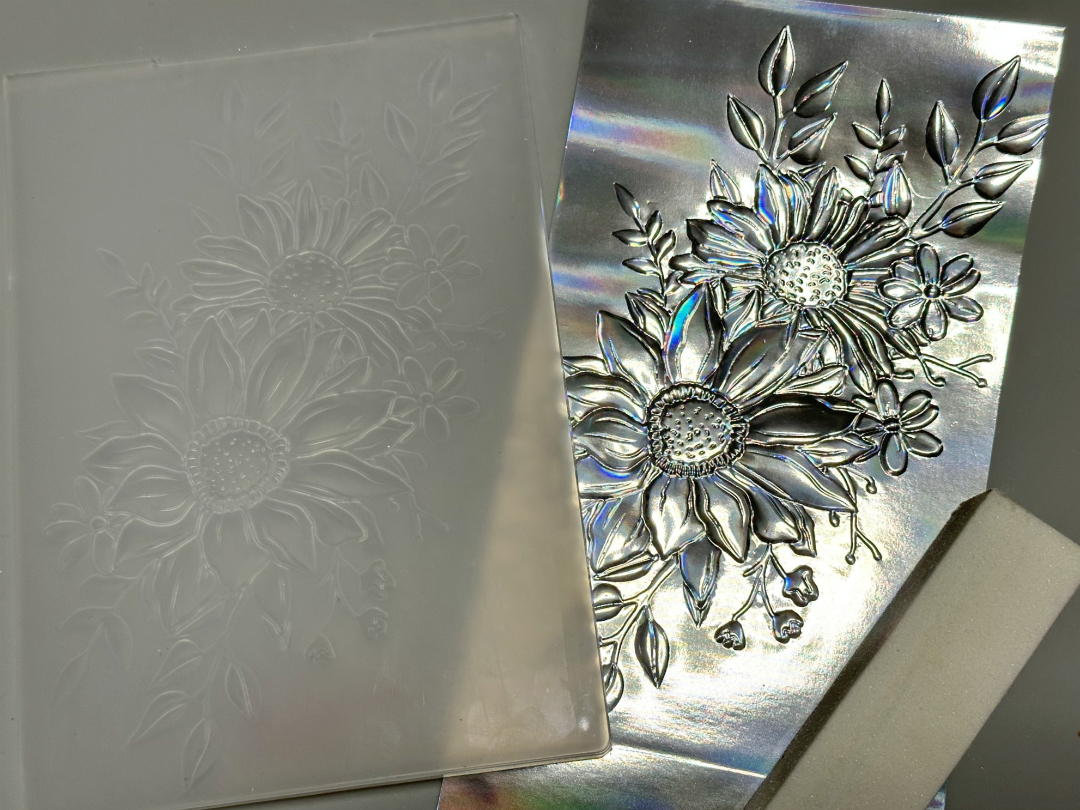
To make this card is important that you use one side metallic cardstock with an embossing folder. This cardstock can be glossy or matte.
Step 1:
Take a piece of one side glossy silver cardstock and dry emboss it with the embossing folder of your preference.
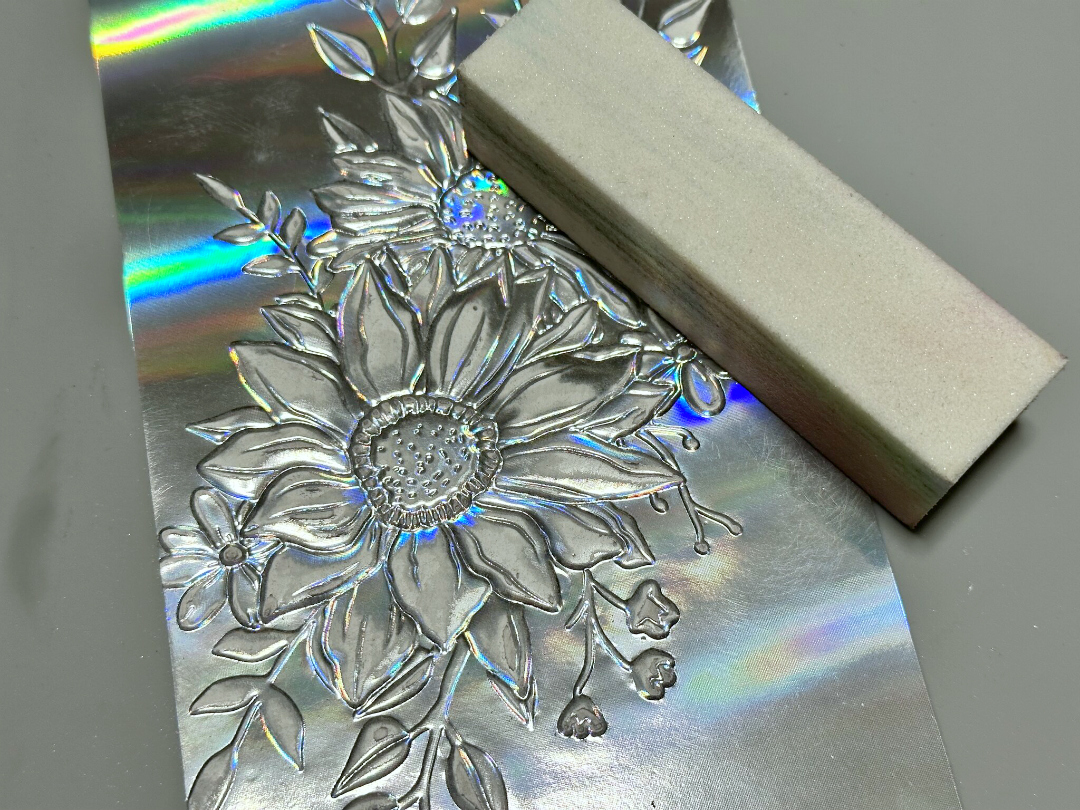
Step 2:
Remove the metallic color over the embossing with a sanding block. Make it soft so that it doesn’t break the cardstock. Clean with a dry cloth.
Step 3:
Select the colors of ink that you want to give to the embossing design. In my sample, I am using Memento Ink in colors Dandelion, Tangelo and Bamboo Leaves. Then, apply the colors directly over the sanded areas or use a sponge dauber.
When you are satisfied with the colors, pass a dry cloth over the embossed area to remove the excess ink. Resize the layer and paste it over the card base.
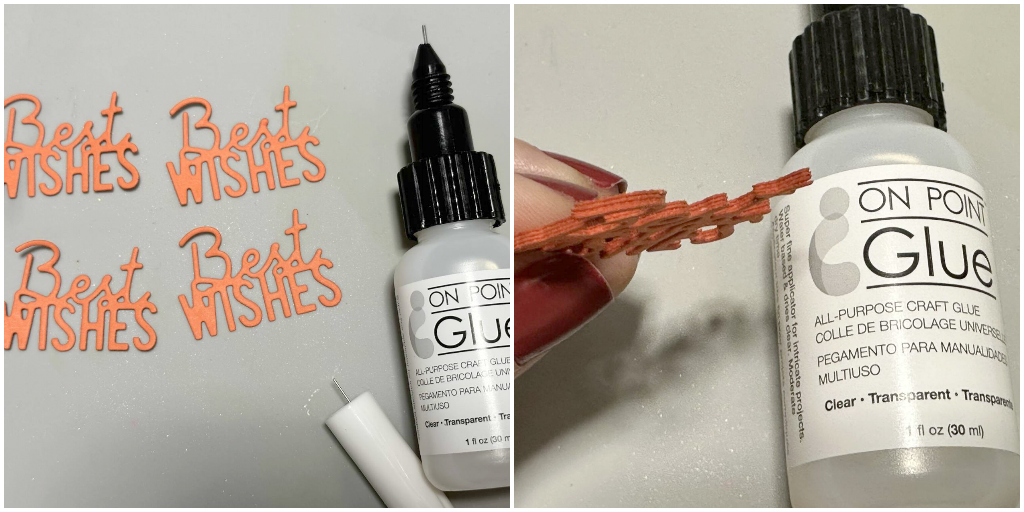
Step 4:
To finalize the card, you can use a die cut sentiment with more dimensions. In my sample, I die cut four times the Best Wishes sentiment using the same color of cardstock and then I paste all of them with OnPoint Glue.
Step 5:
Adhere the sentiment over the card base using the same adhesive.
Thanks for stopping by and remember, you don’t need to create complicated projects. Just use the best inks and let your creativity shine!
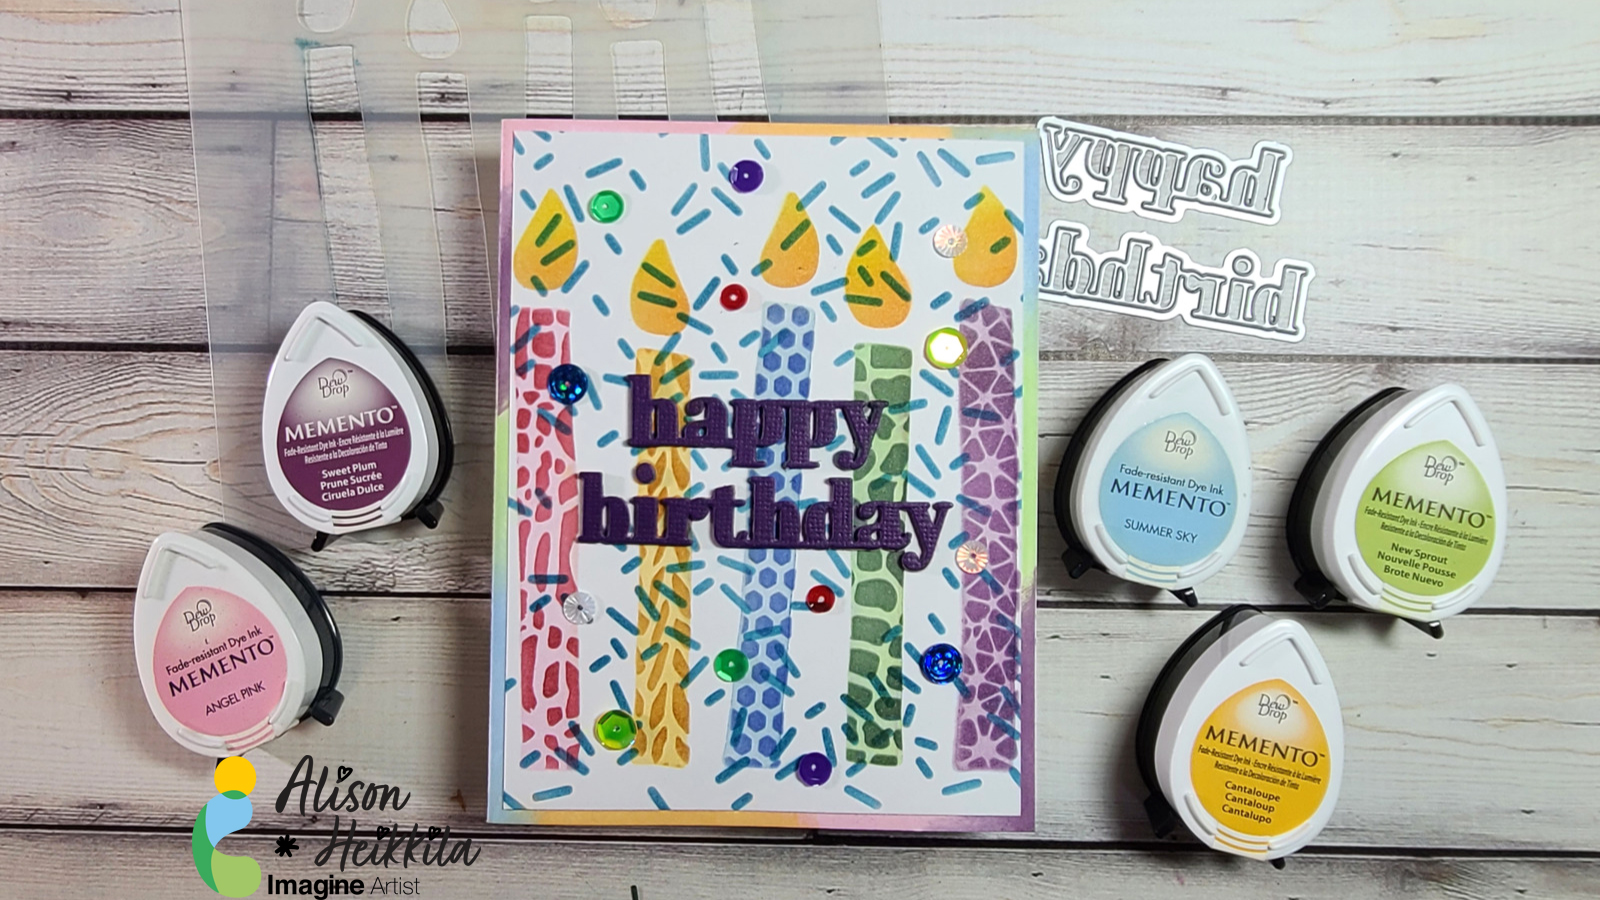
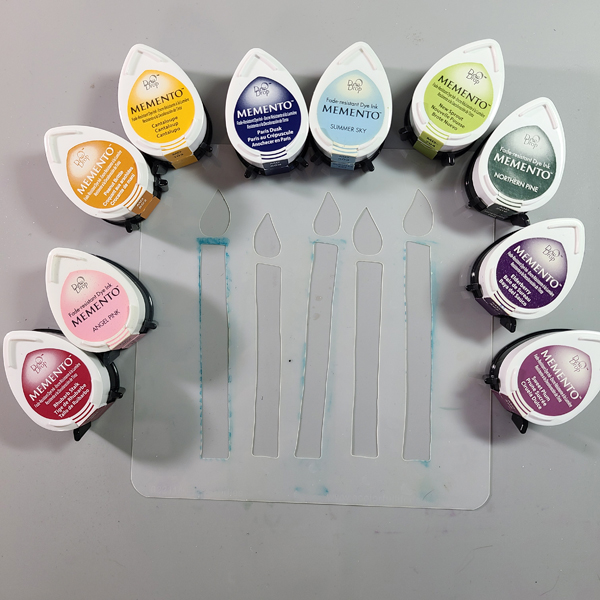
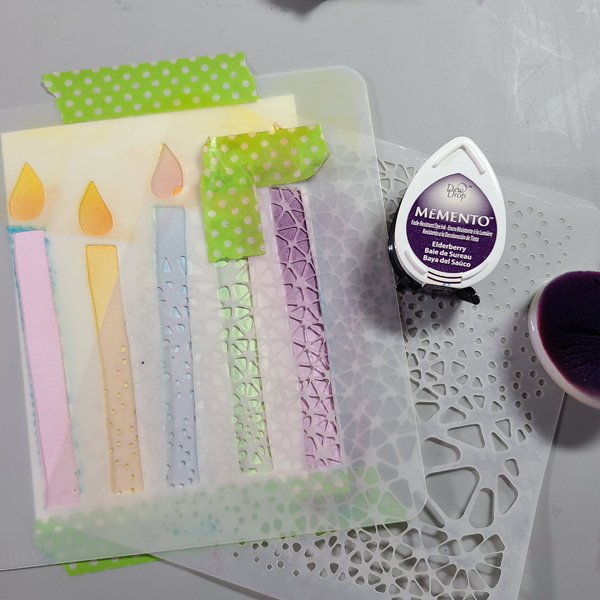
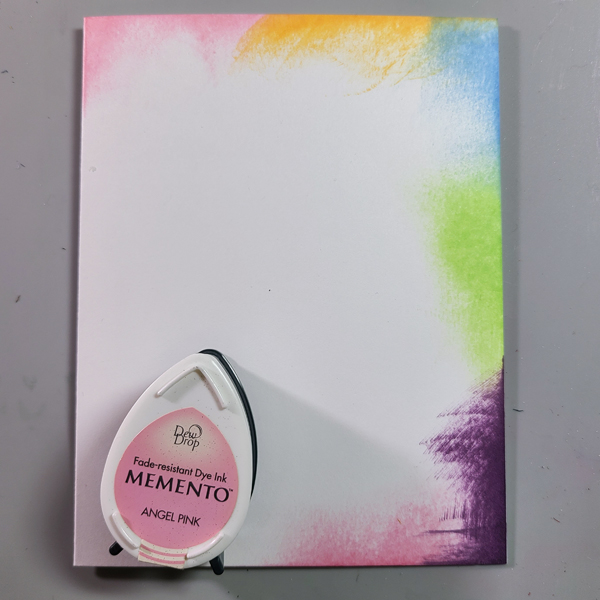
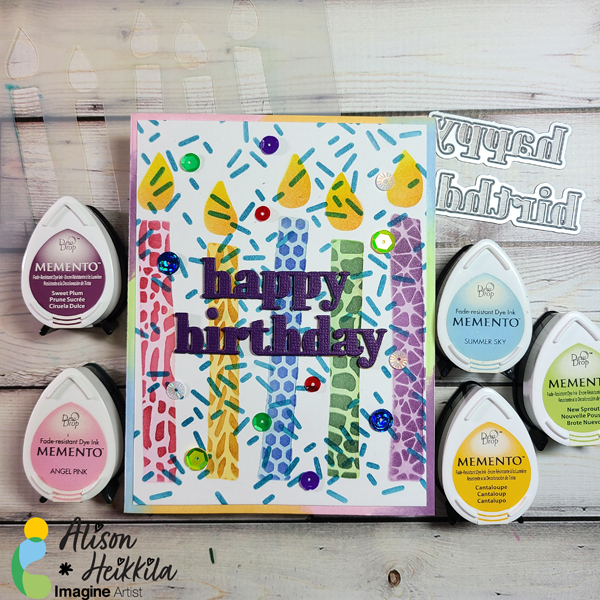
Hello! Since birthdays happen all year, it’s good to have a big stash of birthday cards at the ready for whenever you need one. Since I love to use stencils, I thought I would use a bunch of them together with many colors of Memento Inks from Imagine.
*Some affiliate links are used in this post. That means that if you shop through these links, I may receive a small compensation, at no cost to you.For more information, please see my Affiliates page, where I also have some coupon codes.
I chose a light color and a dark color Memento Ink for each candle of the Big Candle stencil.
Step 1:
Step 1: Use washi or low tack tape to stick down your cardstock and stencil. Mask off any areas that you don’t want your first color of ink on. I masked off the second candle and the flames.
Step 2:
Ink the candles with the lighter color from the pairs you chose. Be sure to mask off the areas that you don’t want your ink to go.
Step 3:
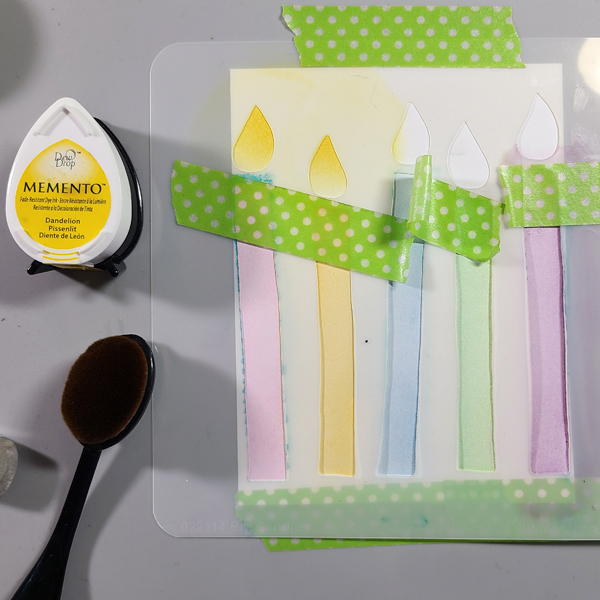
Mask off the candles so that you can ink the flames. I used Dandelion on the entire flame, and then Tangelo on the lower area of the flame.
Step 4:
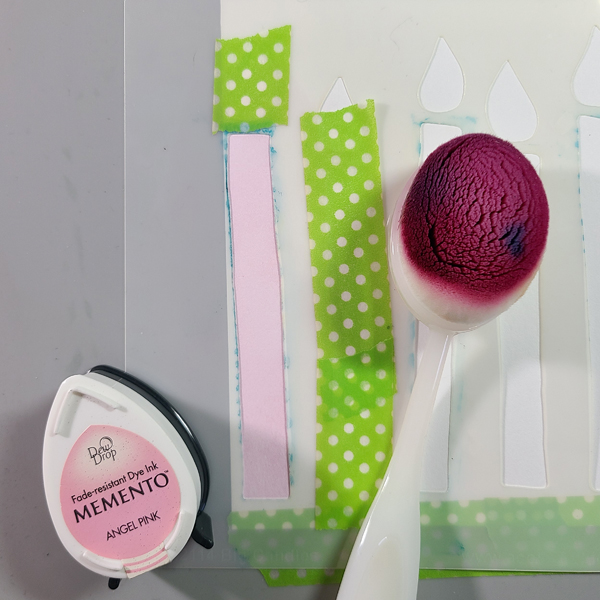
Choose the stencils you want to decorate each candle with and ink with the darker shades you chose. You must keep the original candle stencil in place so that you only ink the candle. Slip the patterned stencil under the candle stencil to make inking easy. Be sure to mask off the other areas again!
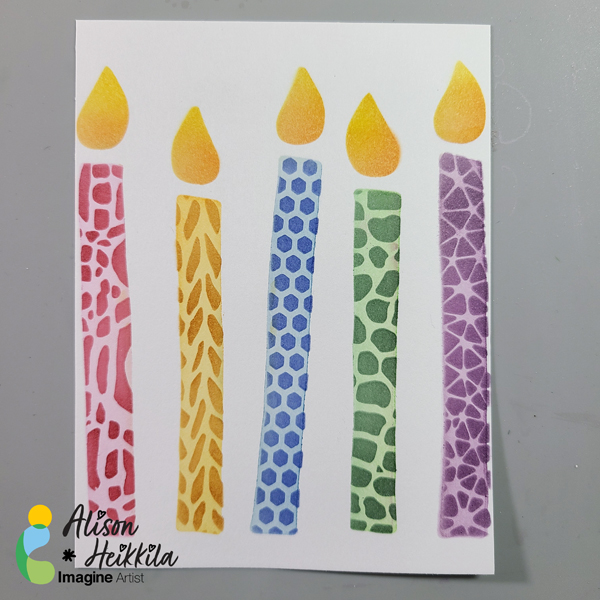
This is what the completed candles look like. You can stop here, if you want, but I kept going to make it even more festive!
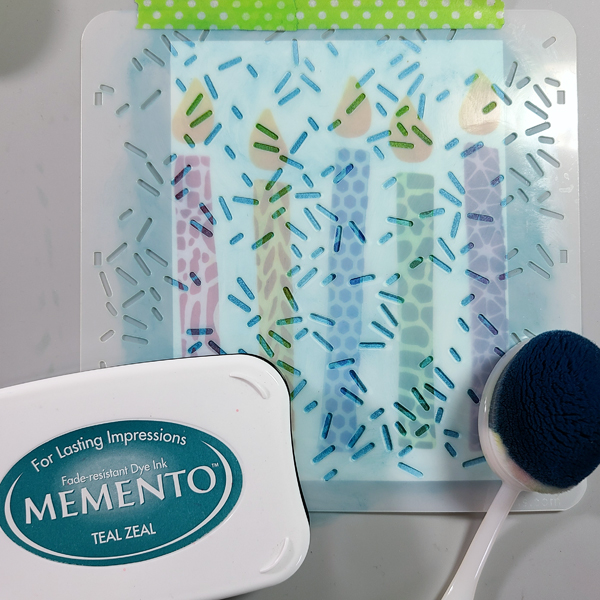
Step 5:
Ink a stencil that looks like confetti or sprinkles on top of the entire panel.
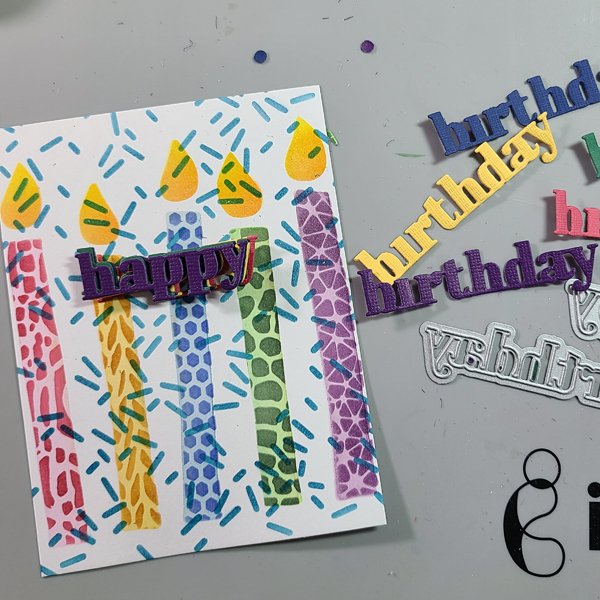
Step 6:
Die cut your sentiment. First, I was only going to die cut my “happy birthday” out of purple, but I decided to cut one sentiment out of each main candle color so that I can have a stacked, 3D embellishment. You can glue these together with On Point Glue.
Step 7:
Ink your card base using the lighter colors of Memento Ink, directly from the pad. I worked my way around my palette of colors two times.
Step 8:
Glue the card front and sentiment on to the card base. Optional: Add sequins or rhinestones to the card front with On Point Glue.
Here is the finished card! I love how happy it is, and it can easily work for anyone. It’s fun to work with so many colors and so many patterns of stencils, all on one project. I hope that you break out some of your stencils and try this technique! Thanks for stopping by. Have an inspiring day!
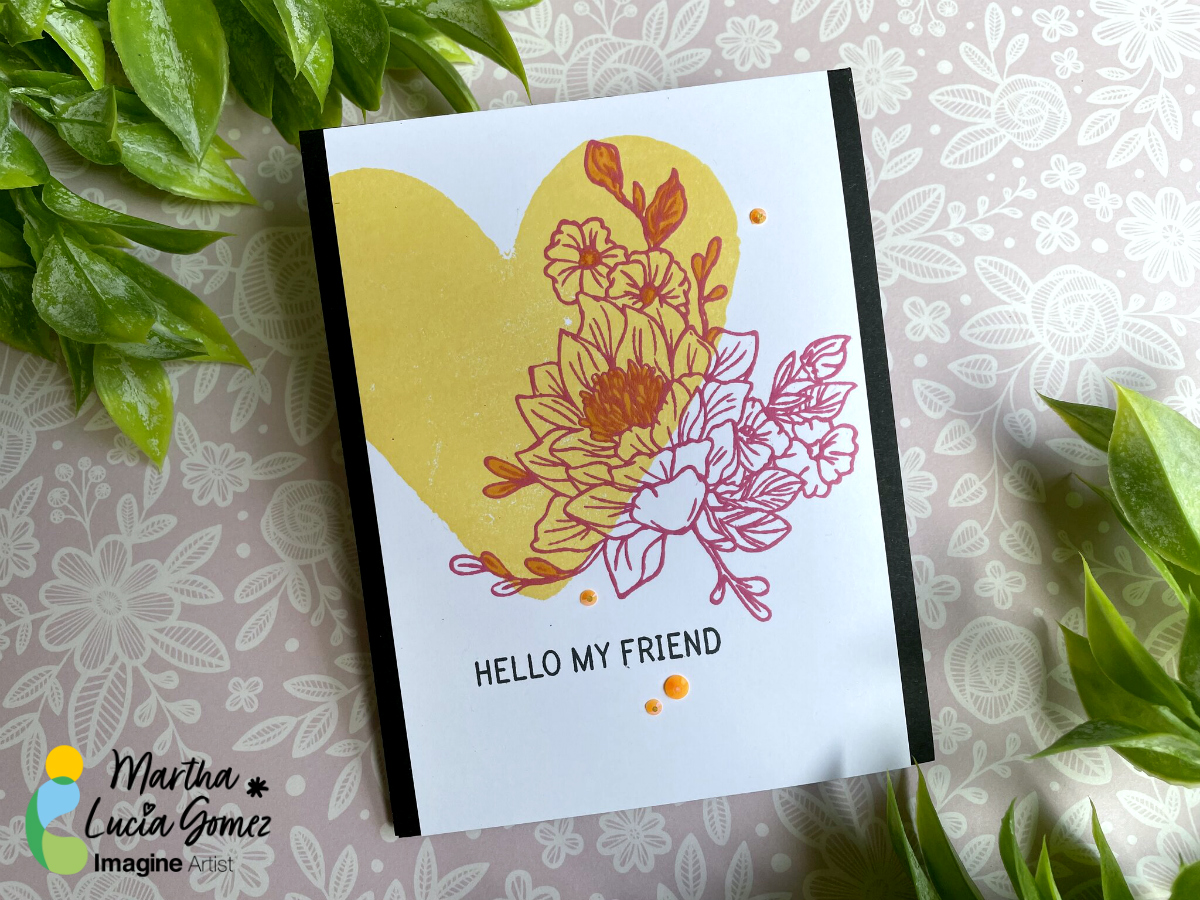
Hello there! Today’s tutorial is using only one type of ink, the Memento. It is one of the most versatile and secure ink that you can use. Memento Ink is ideal to use with alcohol markers or simply to stamp, with solid or lineal stamps. It is also available in markers and liquid, like Fireworks! Shimmery Craft Sprays.
Skill Level: Beginning
Time to Complete: 45 minutes
Directions:
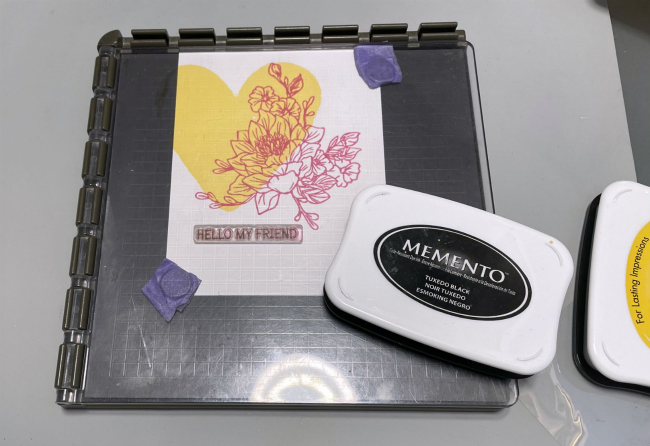
Step 1:
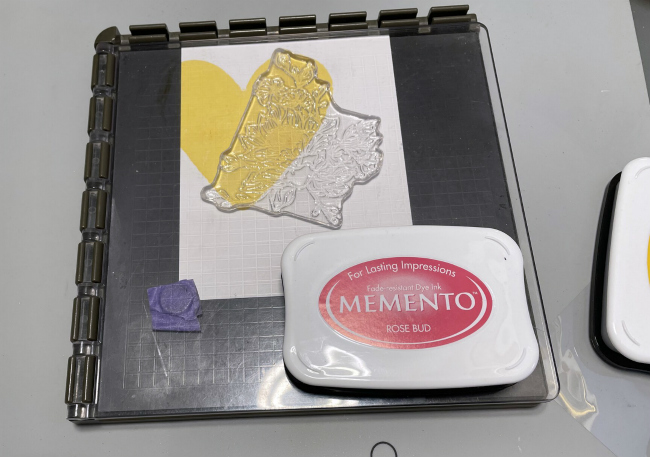
Take a piece of white smooth cardstock and ink well your solid stamp with Memento Ink. In my sample, I am using the Dandelion color. If you want you can use a stamping tool to have a better result or obtain a crispy image.
Step 2:
Select a lineal stamp and place it covering partially the image previously stamped. You can use a different color of Memento Ink to create a contrast. I am using the Rose Bud Memento Ink.
Step 3:
Stamp your sentiment with Memento Tuxedo Black.
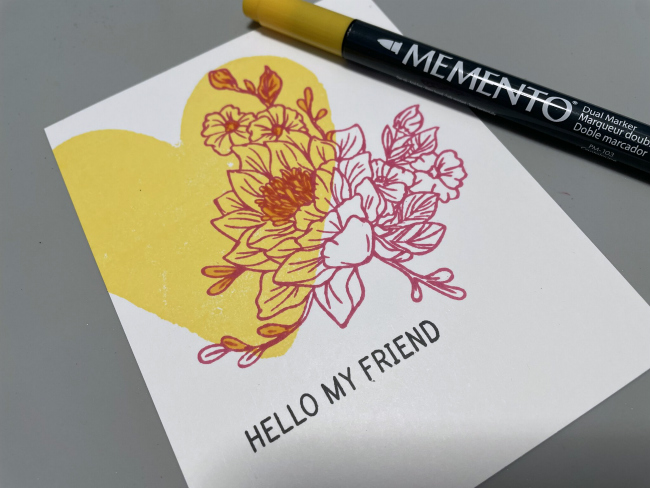
Step 4:
To enhance special details of your stamped image you can use Memento Markers. I used the same Dandelion color just in a small spaces on the floral image to enhance the details.
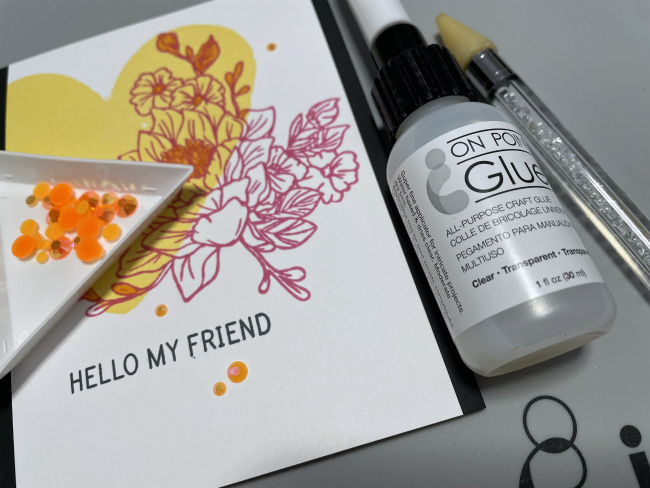
Step 5:
As final step, you can embellish your card using Diamonds on different colors. To paste it, I used On Point Glue.
Step 6:
Resize the decorative layer and paste it over a card base using Tear It! Tape.