Make a Friendship Card Using Memento Inks

By Martha Lucia Gomez

Hello there! Today’s tutorial is using only one type of ink, the Memento. It is one of the most versatile and secure ink that you can use. Memento Ink is ideal to use with alcohol markers or simply to stamp, with solid or lineal stamps. It is also available in markers and liquid, like Fireworks! Shimmery Craft Sprays. 

Skill Level: Beginning

Time to Complete: 45 minutes

Directions:

Step 1:

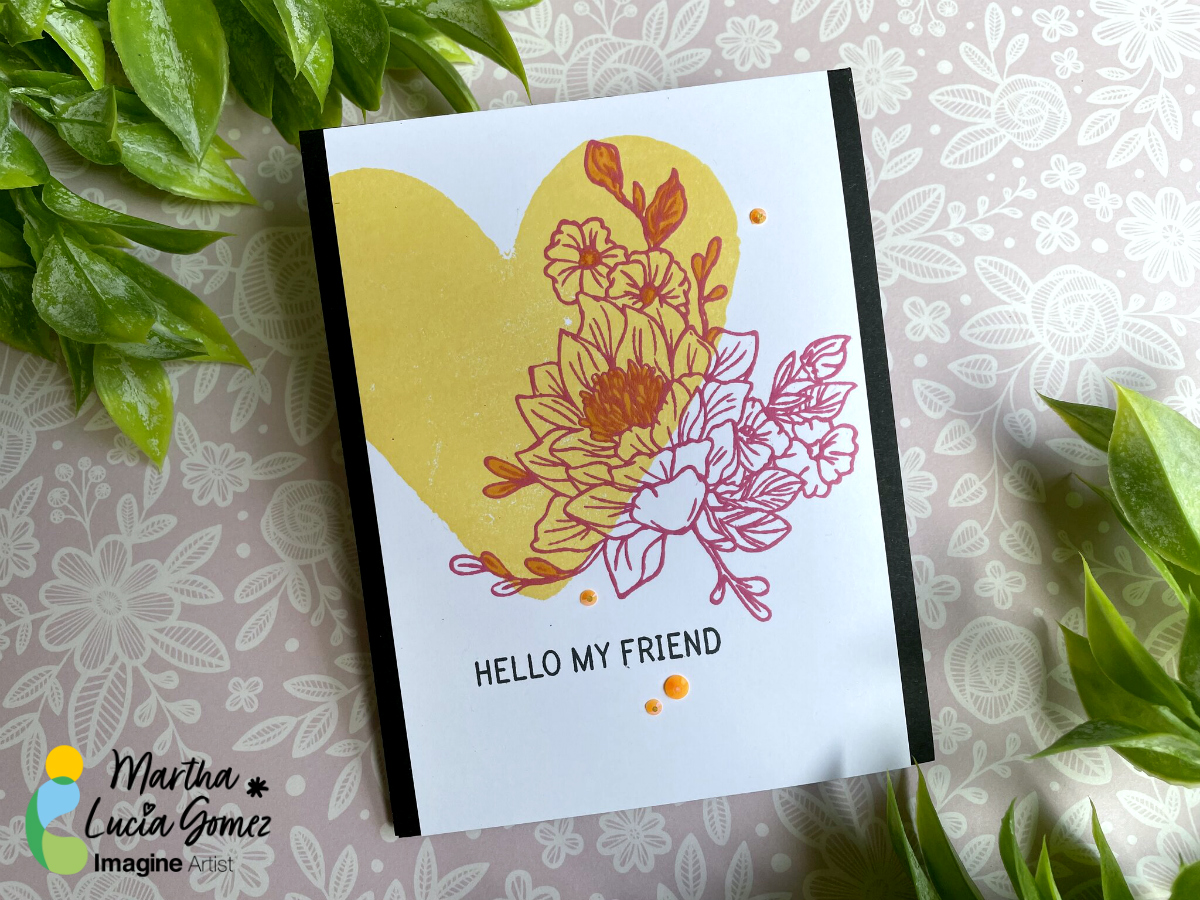
Take a piece of white smooth cardstock and ink well your solid stamp with Memento Ink. In my sample, I am using the Dandelion color. If you want you can use a stamping tool to have a better result or obtain a crispy image. 
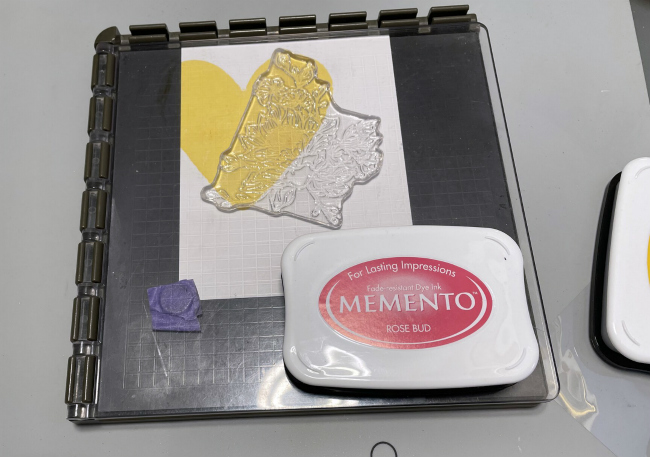
Step 2:

Select a lineal stamp and place it covering partially the image previously stamped. You can use a different color of Memento Ink to create a contrast. I am using the Rose Bud Memento Ink. 
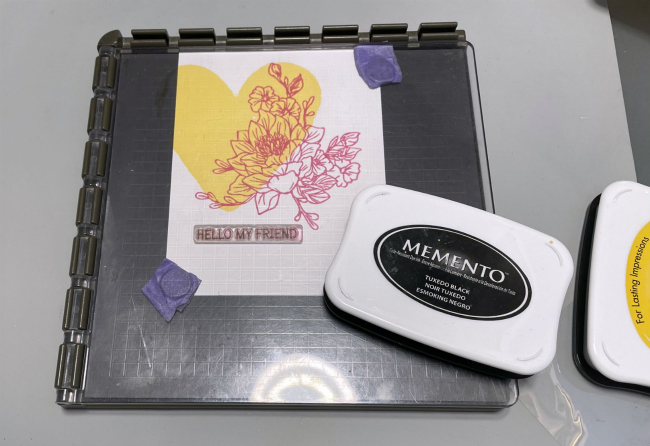
Step 3:

Stamp your sentiment with Memento Tuxedo Black.
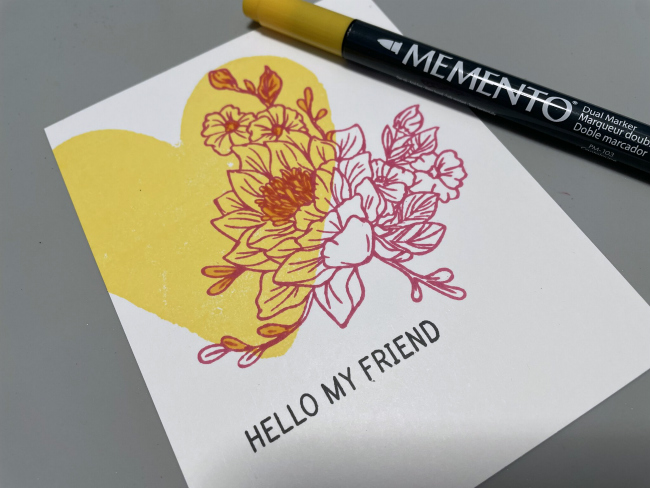
Step 4:

To enhance special details of your stamped image you can use Memento Markers. I used the same Dandelion color just in a small spaces on the floral image to enhance the details.
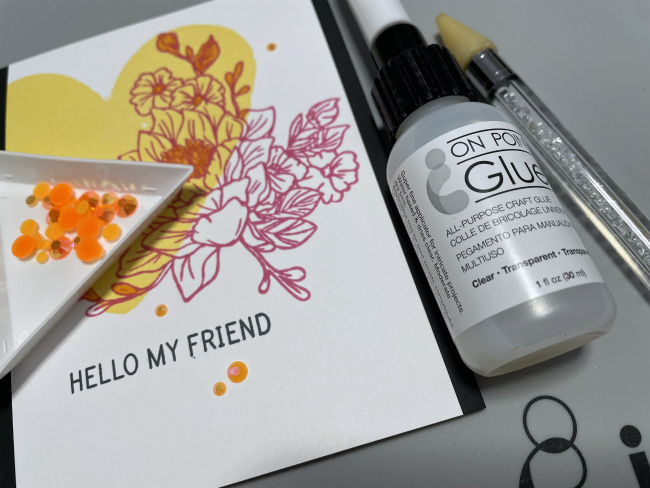
Step 5:

As final step, you can embellish your card using Diamonds on different colors. To paste it, I used On Point Glue. 

Step 6:

Resize the decorative layer and paste it over a card base using Tear It! Tape.

Art Supplies:

Imagine:

• Memento Ink Tuxedo Black, Rose Bud and Dandelion

• Memento Marker Dandelion

• Tear it! Tape

• Craft Mat

• On Point Glue

Other:

• Clear Stamps by Richard Garay Designs

• Stamping Tool

• Diamonds Orange

Create a Woodgrain Theme Friendship Card with Rinea Foil

by Martha Lucia Gomez

Create a Woodgrain Theme Friendship Card with Rinea Foil

Hi there, Martha Lucia here! Today, I have a fun card making project to share with you. I used the stamp piecing with foiled paper as a technique to create this card. To make this stamp piecing card, I used Rinea Foiled paper in pink, green and gold colors with StazOn Pigment Ink Piano Black to create a dynamic look. A single stamp with flowers coming out of an envelope suddenly takes on a new life.

Skill: Beginner
Time: 30 minutes

Directions


Step 1

Prepare your card by cutting the base of your card to 4-1/4″x11″ with a score in 5-1/2″. Cut the second layer using Mocha/Gold Glossy Rinea Foiled Paper. I cut this layer using the Stitched Woodgrain Cover Up Die from Lil’Inker Designs. Stamp the image of the stamp set Gift Enclosures from Catherine Scanlon Stamps using one single color of Rinea foiled paper and StazOn Pigment Piano Black Ink.


Step 2

Stamp the same image using different colors and textures of Rinea Foiled paper. I used gold/gold glossy for the envelope, blush starstruck for the flowers and emerald starstruck for the leaves. With scissors cut the different parts of the stamped image and paste them over the image stamped using On Point Glue and Double-sided Foam Tape.


Step 3

Resize and paste the Mocha Woodgrain layer over the card base.


Step 4

Create the sentiment for your card using a layered die set. I used the word “friend” that I cut from Gold/Gold Glossy Rinea Foiled Paper for the word mat and Fuchsia/Gold Glossy for the detailed word. Paste the two parts of the die with On Point Glue and then paste it over the decorated card base.


Step 5

Paste the gift envelope stamp over your decorated card using Double-sided Foam Tape. 

Supplies

Imagine
Other
  • Rinea Foiled Paper – Mocha Gold Glossy, Gold/Gold Glossy, Fuchsia/Gold Glossy, Blush and Emerald Starstruck
  • Card Stock
  • Catherine Scanlon Stamps – Stamp Set Gift Enclosures
  • Lil’Inker Designs – Stitched Woodgrain Cover Die
  • Simon Says Stamp – Word Die Cut Friend