Babies are born all year, so why not ghost themed Hello Baby cards? And all things are better with a little bling. Let’s use Imagine Tear it! Tape and Creative Medium to add some shiny foil to a couple Hello Baby cards.
Have you ever stamped with your Fireworks! Shimmery Craft Sprays?
This was totally new to me and I loved it! I ended up creating several cards, including a full panel shaker with recycled packaging. Oh! And I used Creative Medium to add transfer foil to a project. Let’s jump into it for loads of fun!
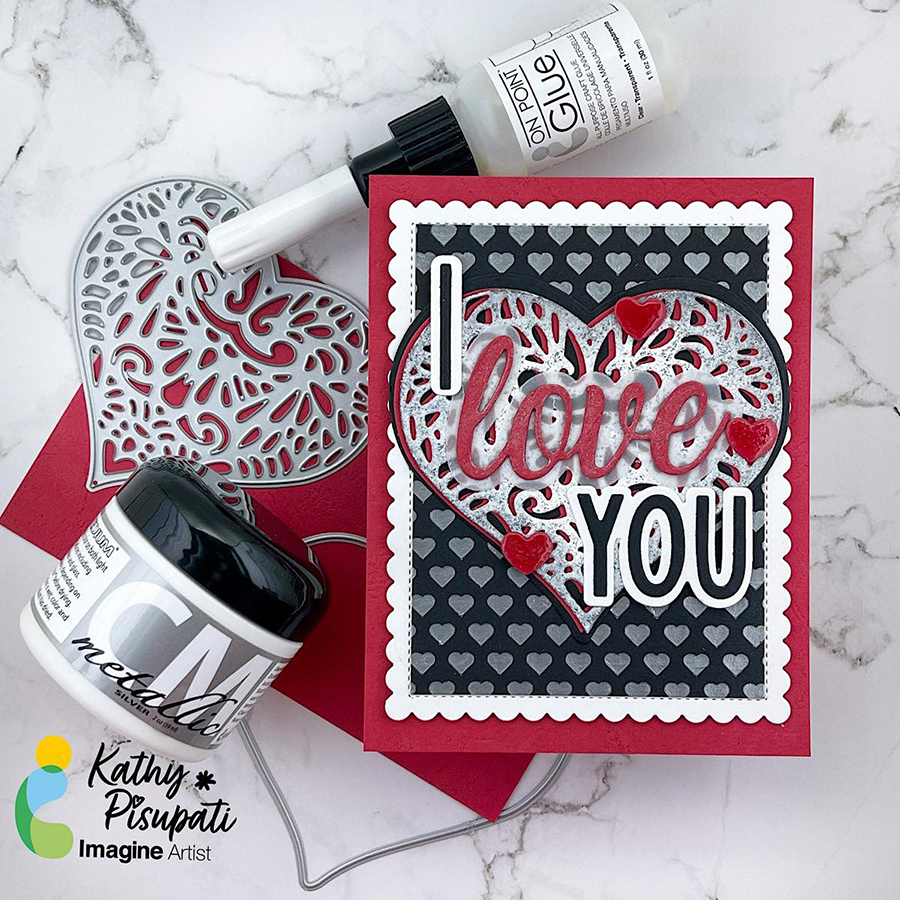
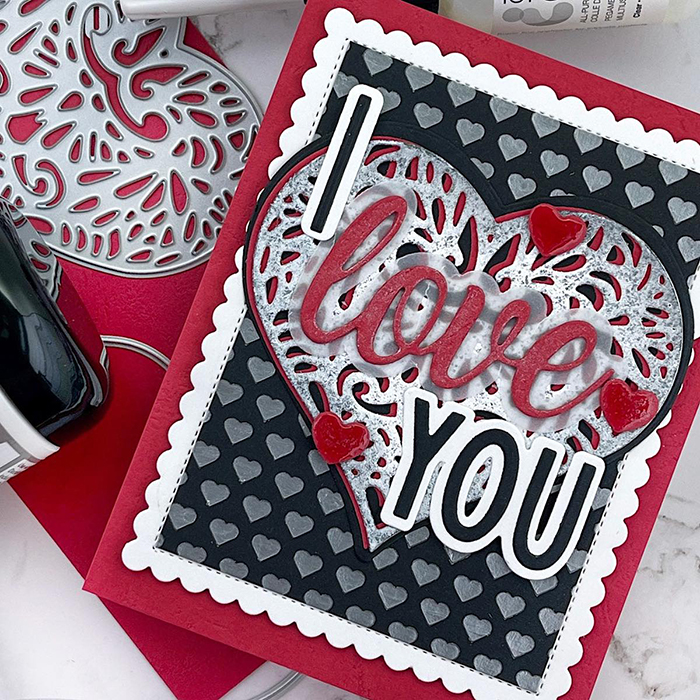
Good morning! I have a new tutorial for you using the beautiful Silver Metallic Creative Medium. It is the perfect medium to add dimension to your cards, scrapbooks, journals or any paper craft! Today I am creating a Valentine’s Day card for you so let’s get started!
Skill Level: Medium
Time to Complete: 1.5 hour
Directions:
Step 1
Cut, score and fold a piece of red card stock to create an A2 top-folding card base. Die-cut a piece of white card stock using the scalloped rectangle from the Gina K Design’s Master Layout 4 die set. Cut a piece of black card stock to roughly 4.25” x 5.5”
Step 2
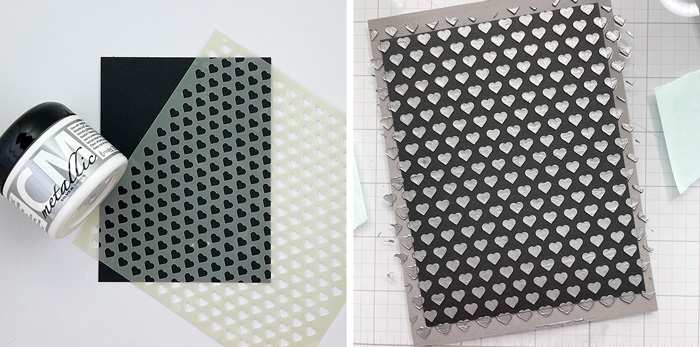
Tape your stencil to the black card panel. Using and Imagine Crafts Spatula and the Silver Metallic Creative Medium, swipe the medium over the entire panel. Remove and clean your stencil and allow panel to dry. Once dry cut the panel to 3 3/8” x 4.5”.
Step 3
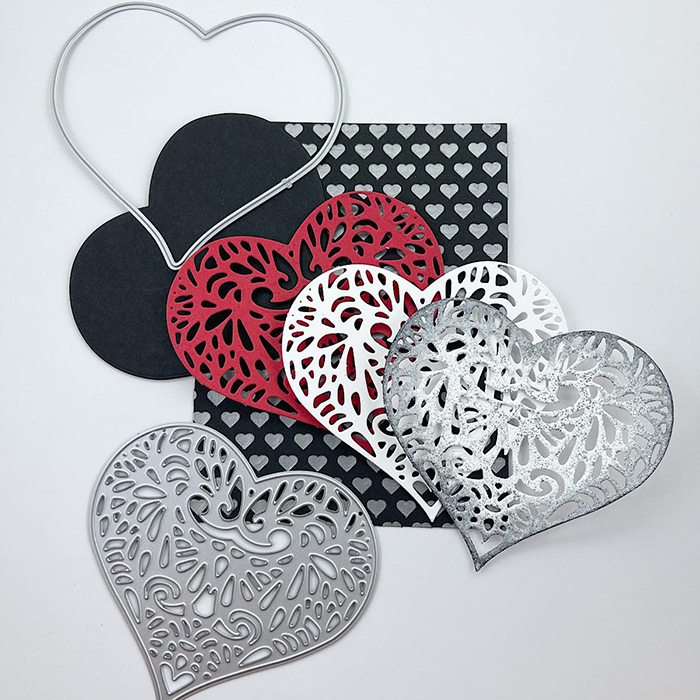
Using the Lacy Layered Heart Die from Kat Scrappiness cut 2 white hearts, 1 red and use the solid heart die to cut a heart from black card stock. Now we will emboss one of the white hearts. Cover the heart with VersaMark watermark ink and then sprinkle with your choice of embossing powder. I used WOW Antique Silver Powder. After heat embossing I glued the two white panels together with On Point. The using Imagine Craft Mixed Media Brush I blended some Versafine Clair Nocturne Ink around the edges. Then offset the red heart and glue it on. This was then glued to the center of the black, solid heart.
Step 4
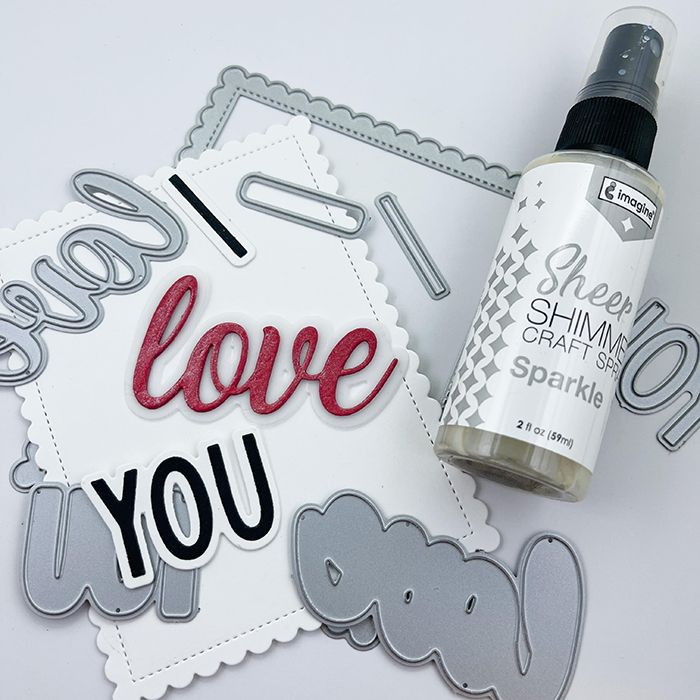
From the same red card stock cut three of the word LOVE from the Kat Scrappiness I Love You Sentiment w/Shadow. I cut the shadow from vellum. I spritzed the word LOVE with Sheer Shimmer Craft Spray in Silver. Cut the I and the YOU from black card stock and the shadows from white. Glue these together.
Step 5
I also cut a few hearts using the die from Concord & 9th’s Sweet Summer die set and the red card stock. I covered them with Glossy Accents and used them as embellishments. For assembly I glued the main heart towards the top of the stenciled panel. the words were glued directly to the heart. For any of the sentiment that hung over the edge, I added a small piece of foam tape. Foam tape was added to the entire panel and then adhered to the red card base.
Thank you so much for stopping by and checking out this tutorial. I hope you have an amazing crafty day and a wonderful Valentine’s Day!
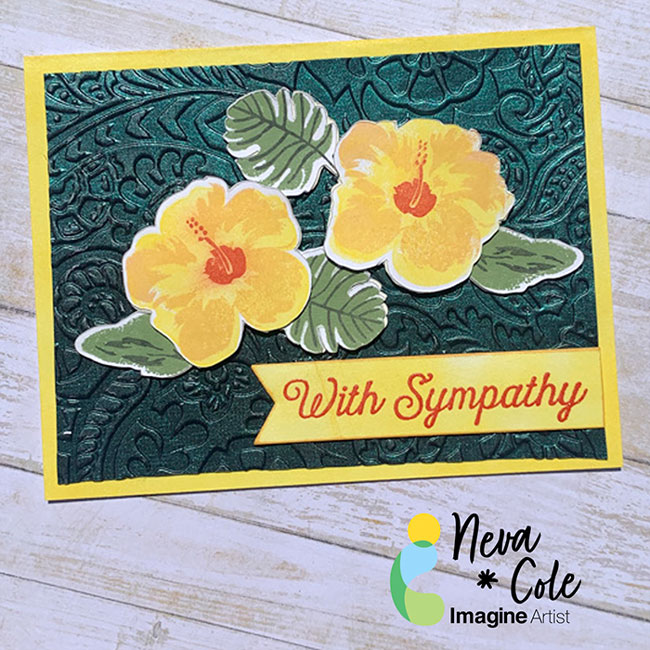
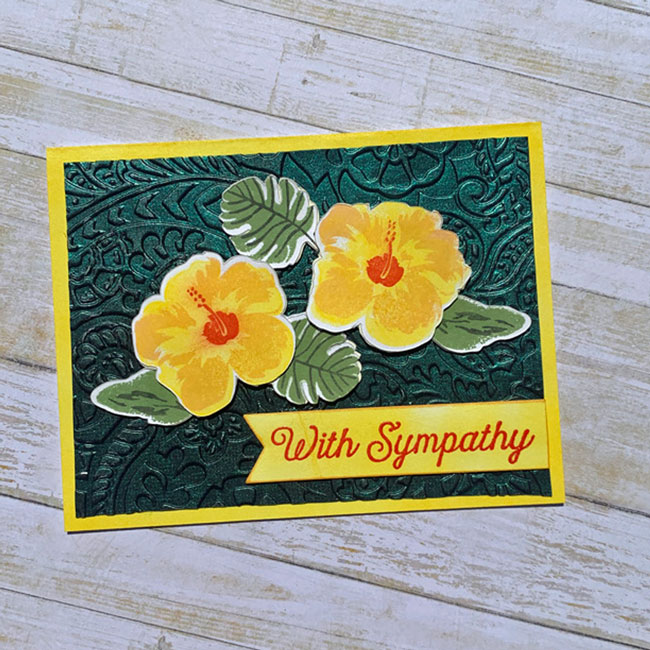
I am always searching for new ways to use supplies and tools.Creative Medium comes in many colors, but the Iridescent Green creates stunning results on black paper.The use of an Embossing Folder helps the layers of the iridescent effect really shine.A few layered stamped images and I have a beautiful sympathy card to send to a dear friend.
Skill: Beginner
Time: 1 Hour plus dry time
Directions:
Step 1
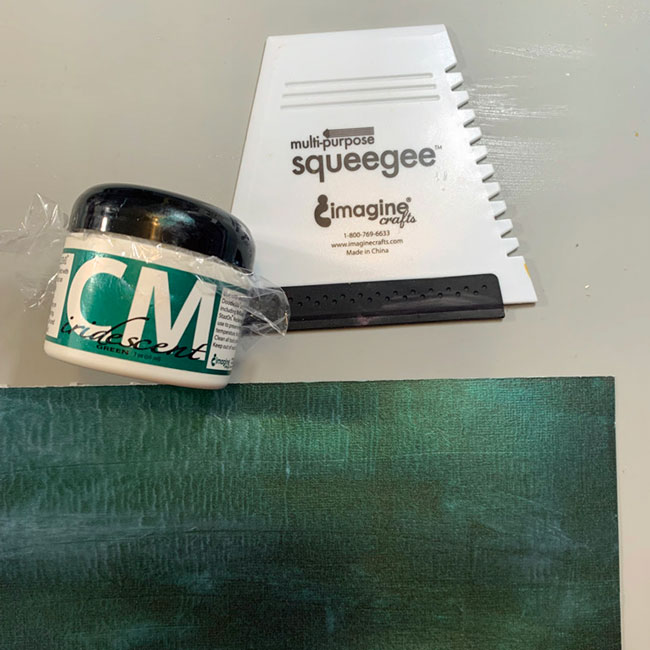
Cover a section of black paper (with or without texture) with a thin layer of Creative Medium in Iridescent Green.I used Imagine’s Squeegee to spread the layer across the paper.The rubber edge was very helpful to get a thin even layer.Set aside to dry, possibly overnight.After it is dry it will still have a slightly rubbery texture.
Step 2:
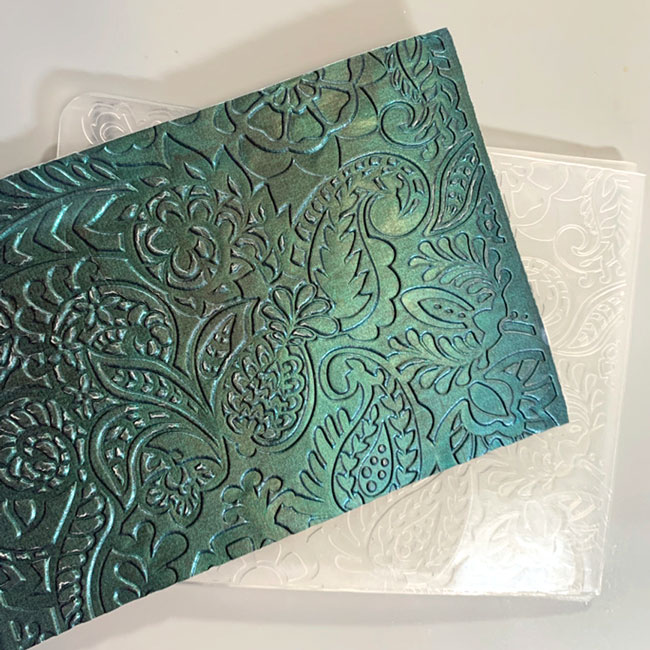
Trim a section of the paper to 4” x 5 1/4” and pressure emboss with Sizzix Tropical Paisley Embossing Folder.You can really see the detail in this photo.
Step 3:
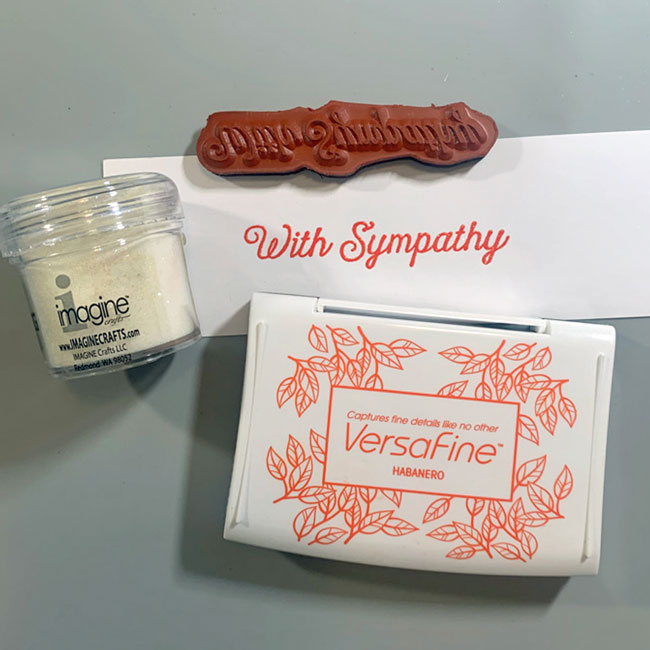
Layer stamp the Hero Arts Hibiscus and leaves images.Start with the lightest ink first.For the Hibiscus–Radiant Neon Electric Yellow, Memento Cantaloupe, Memento Tangelo, and VersaFine Habanero.The leaves are stamped in Memento Bamboo Leaves and Northern Pine.The images are die cut twice more from white and layered under matching die cuts with OnPoint glue.
Step 4:
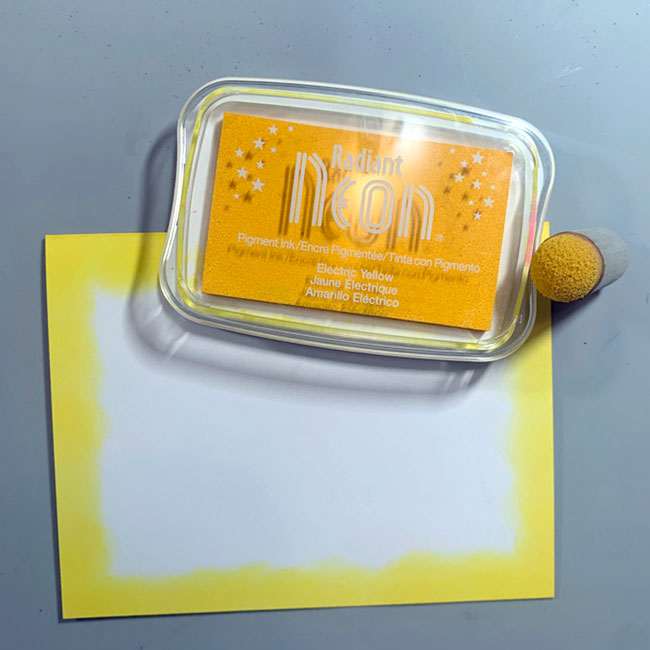
The sentiment from Unity Stamp Company is stamped in Versa Fine Habanero then heat embossed with Iridescent Embossing powder.(Not shown) The image is die cut with Lawn Cuts Everyday Sentiments die.One end is trimmed off square.The banner is inked with an ink dauber and Radiant Neon Electric Yellow.The edges are inked with Memento Cantaloupe.
Step 5:
Ink the edges of a 4 1/4” x 5 1/2” card with Radiant Neon Electric Yellow ink with an ink dauber.
Step 6:
The layers are adhered together with Tear It! Tape.It adheres well with the textured layers of the card.The two Hibiscus flower are lifted a bit with dimensional foam adhesive.
Gather large leaves and stamp them with your favorite stamps and StazOn inks. Protect the leaves with the Creative Medium for a long lasting result. Decorate a holiday table, make an autumn wreath, add them to gift bags or to any seasonal project.
Skill: Beginner
Time: 1 Hour
Directions:
Step 1
Gather leaves that are not completely dry. If they are not flat enough, use paper towels, spray with water and carefully press to flatten.
Step 2
Cover the leaves on both sides with Creative MEDIUM using an Ink Blusher.
Step 3
Stamp with StazOn Jet Black ink and your favorite stamp.
Step 4
Add some color by distressing lightly with StazOn Black Cherry ink pad.
Step 5
Stamp the thank you sentiment and tear the paper on all sides to make tags.