Clean and Simple Mother’s Day Card

By Helen Gullett

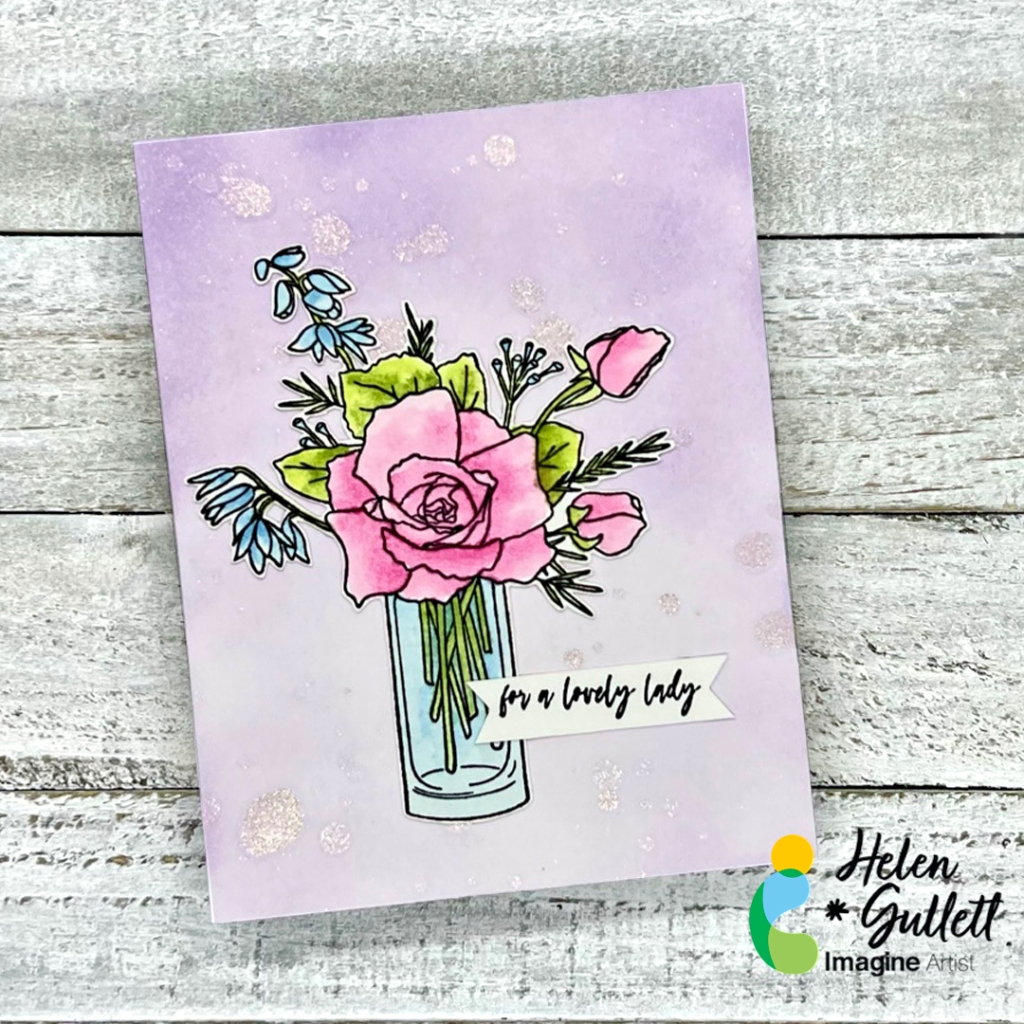
Hello crafty friends! Mother’s Day is coming up soon. Sending out a handmade card is a way to show your love to a lovely mother figure in your life. Today, I would like to share with you how to make this Mother’s Day CAS card using Imagine Crafts products and stamps.

Skill: Beginner
Time: 15-20 minutes

Direction:
Step 1
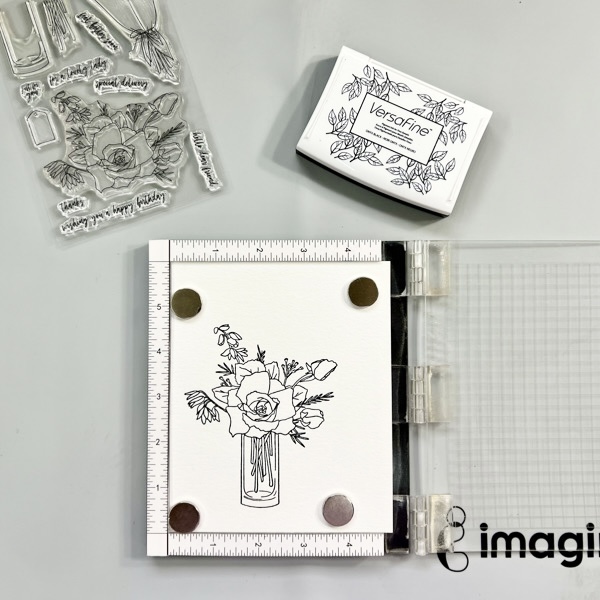
Cut a piece of watercolor paper into 6 inch x 5 inch size. This size fits on my stamping tool. Then, stamp the image on the watercolor paper with Versafine Onyx Black ink pad.
Step 2
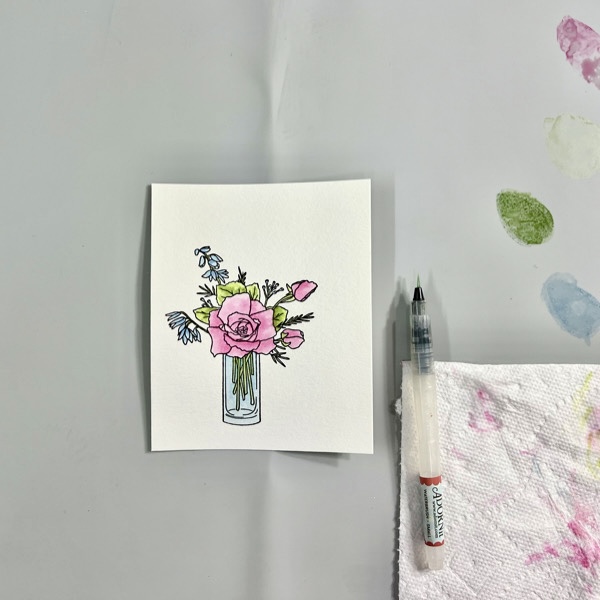
Dab some of the Memento DewDrop Inks (Rose Bud, Bamboo Leaves, New Sprout, and Summer Sky) on the craft mat.

Add a couple drops of water from the waterbrush on the ink to turn it into watercolor paint. Pick up the ink with the waterbrush and paint the flower and vase.

Dry the painted image with a craft heat gun.
Step 3
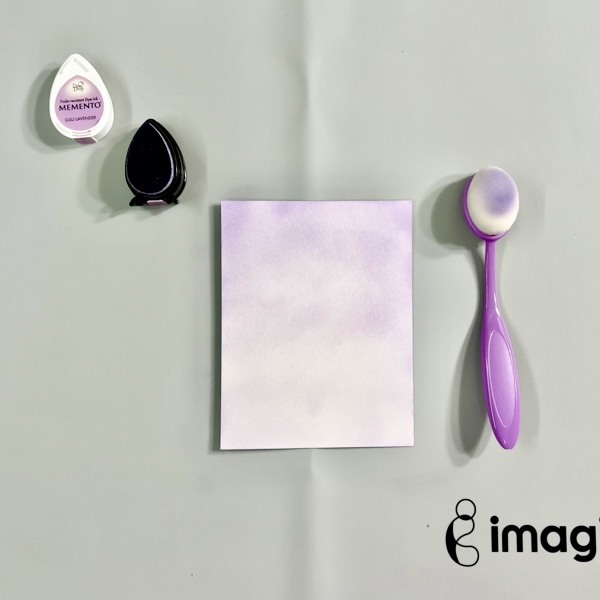
On a piece of white cardstock, add some of the Lulu Lavender ink using the blending brush.
Build up the color from darker to lighter to create the gradient look on the background.
Step 4
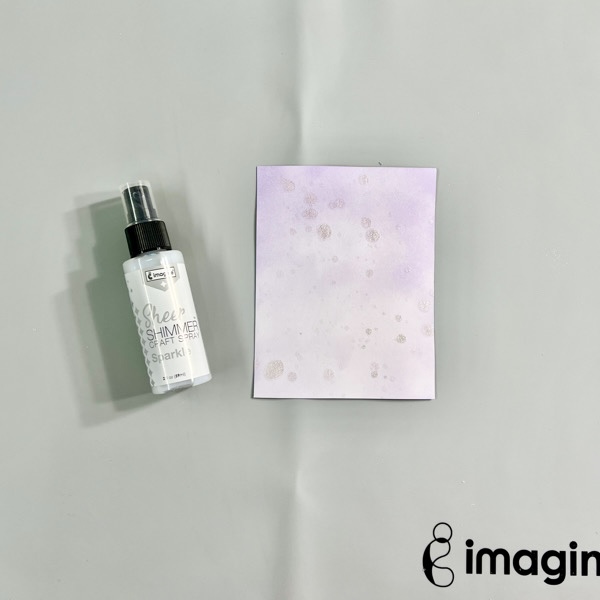
Once done with adding color on the cardstock, lightly spray some of the Sparkle Sheer Shimmer Craft Spray. And then use a small flat brush, add some extra splatter on it for more texture.

Using a craft heat gun, dry the background panel.
Step 5
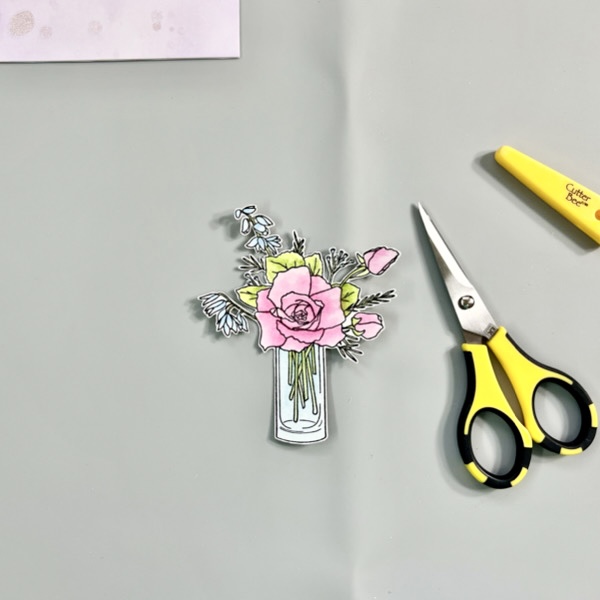
Fussy cut the flower with micro-tip scissors.
Optional: you can use a die if you use a stamp set that has a matching die set.
Step 6
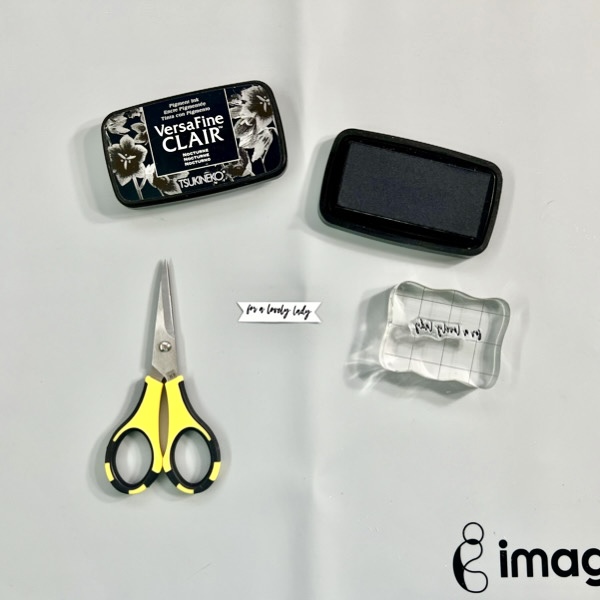
Stamp the sentiment on a white cardstock using the VersaFine Clair Nocturne, dry the ink with a craft heat gun, and then cut it into a sentiment banner with scissors or paper cutter.
Step 7
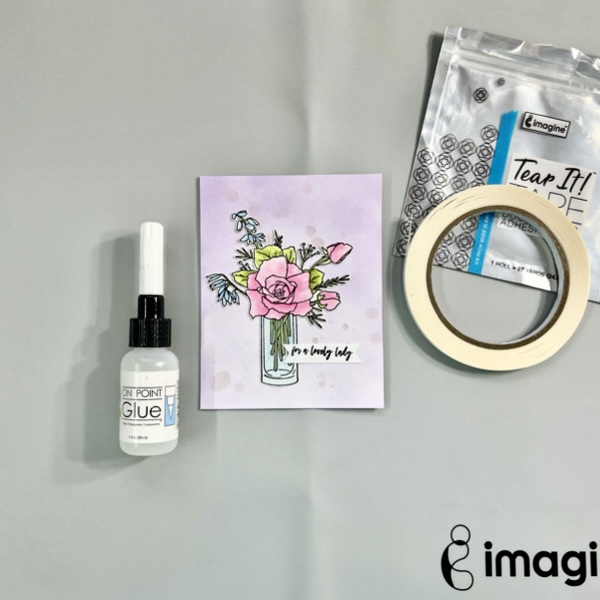
Add the background panel on an A2 card base using the Tear It! Tape.
Add the flower and sentiment to the card using the On Point Glue.
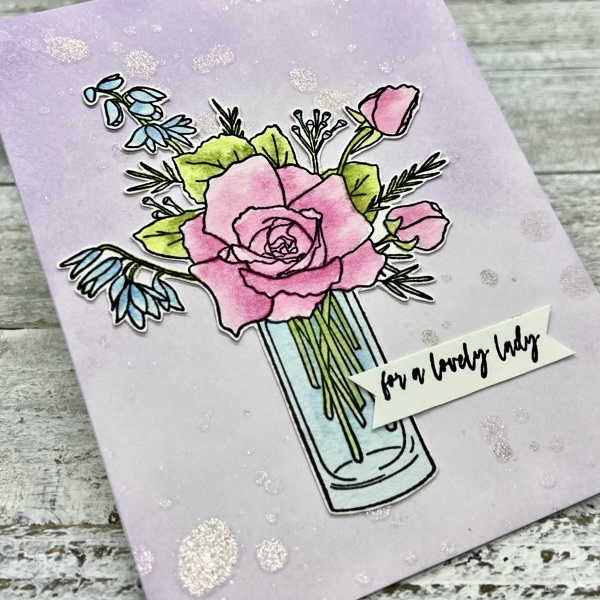
That’s my project for today. Hopefully, you’ll like this project and give it a try. Thanks so much for stopping by our blog today. Have a wonderful day!
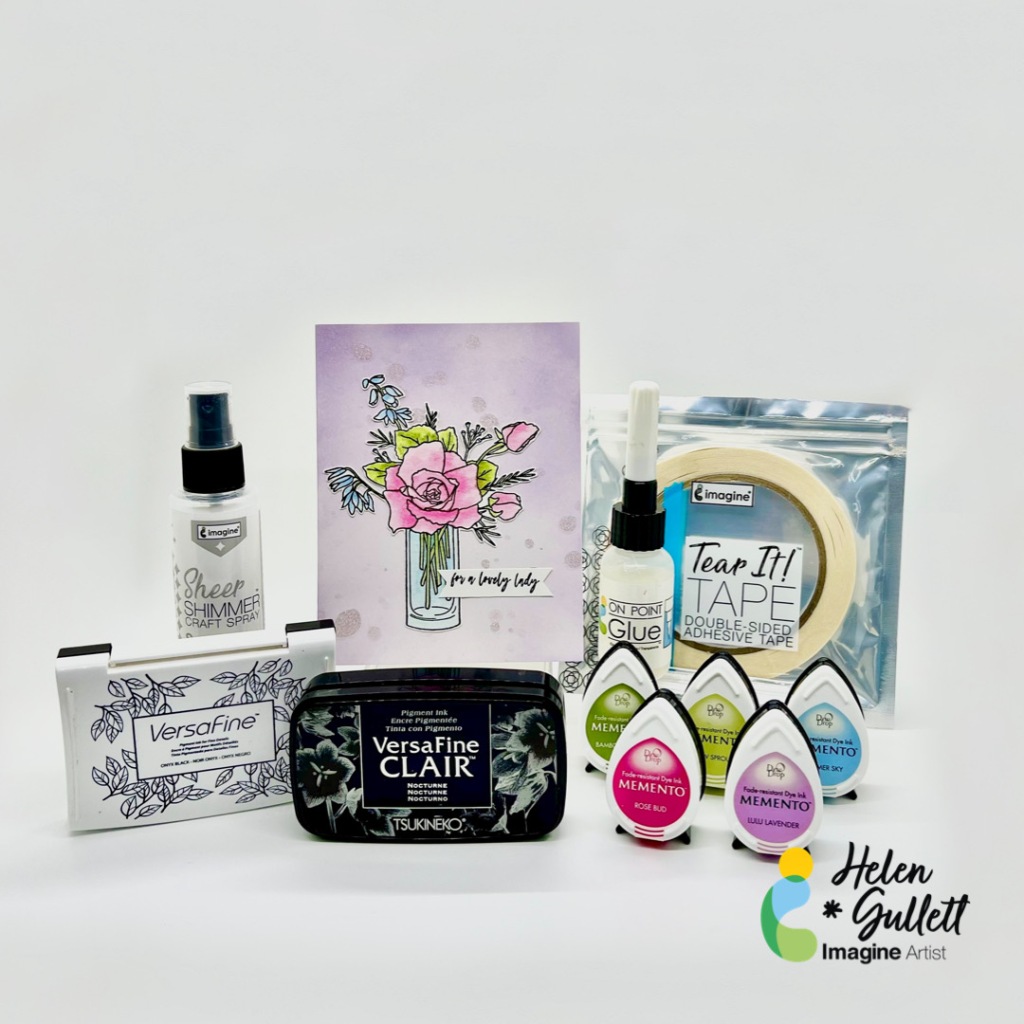
Craft Supplies

Imagine Crafts:

Others:

  • Altenew – Breeze Bouquet Stamp Set
  • Canson Watercolor Paper 140lb
  • Micro-tip Scissors
  • Fiskar paper trimmer
  • Acrylic stamping blocks
  • Small Round Waterbrush
  • Flat paint brush or fan brush
  • Oval Blending Brush
  • Craft Heat Gun
  • MISTI stamping tool

Let’s Make A Happy Mother’s Day Card

By Anna Escalada York

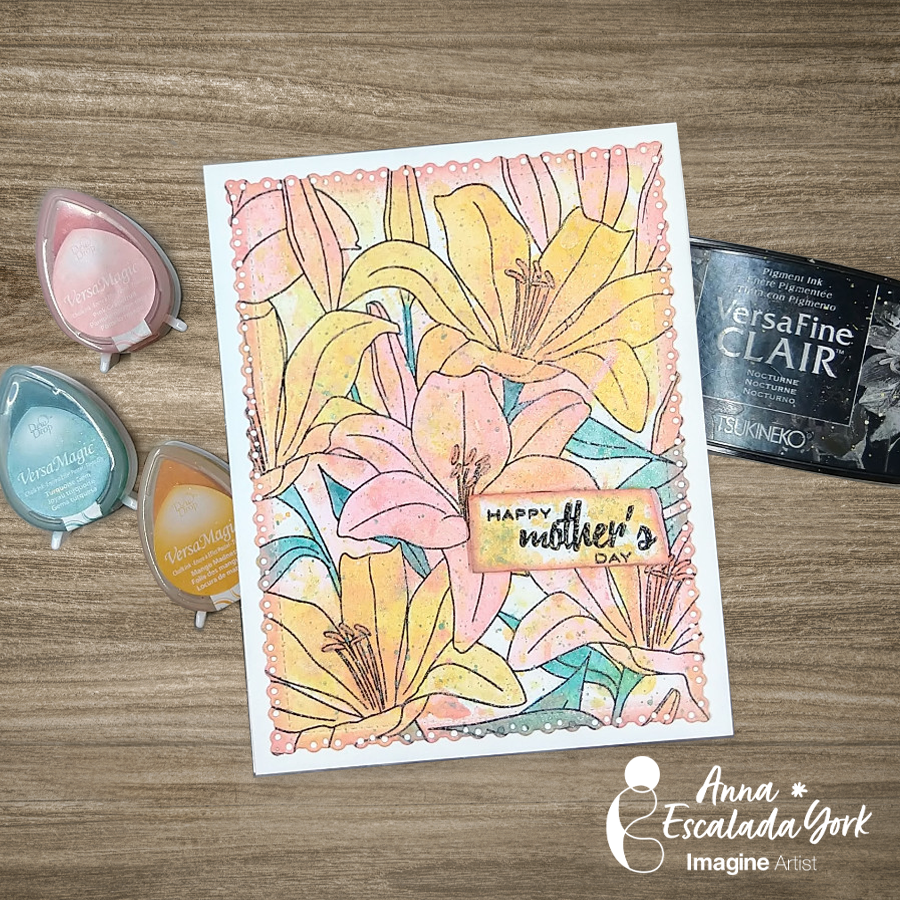
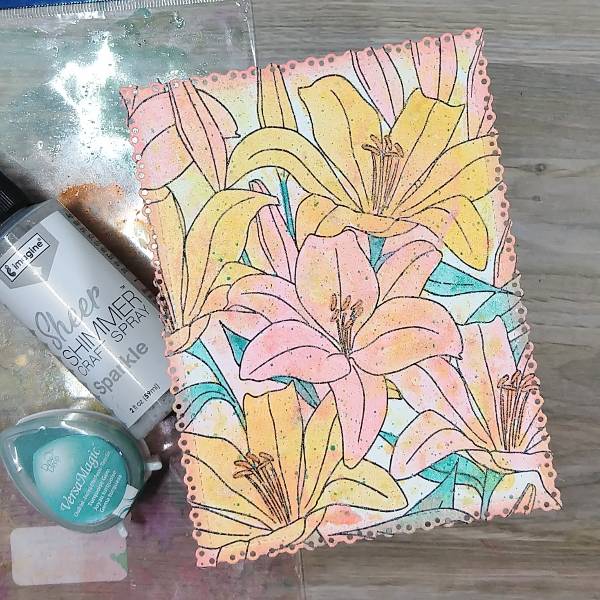
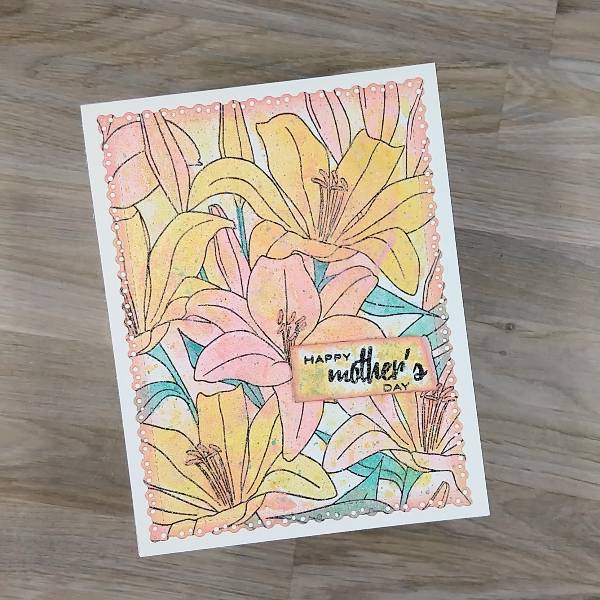
In today’s tutorial, I am sharing the card I made for my mom for Mother’s Day, using sprays and ink
mixed with Sheer Shimmer spray to watercolor the images.

Skill: Intermediate
Time: 1.5 hours

Directions:

Step 1:
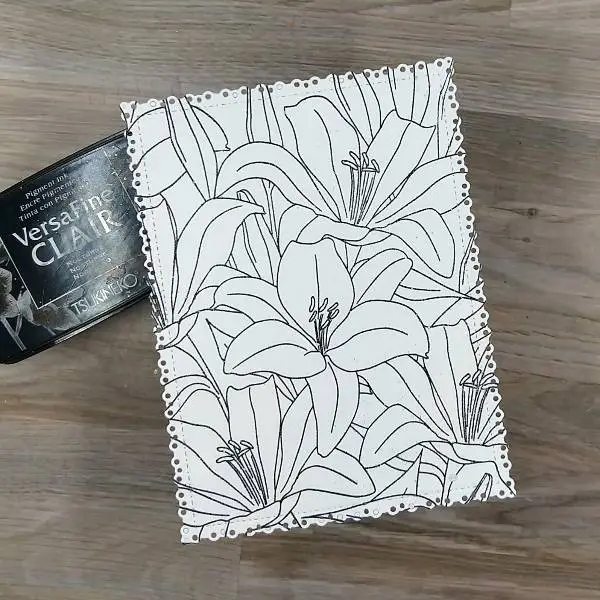
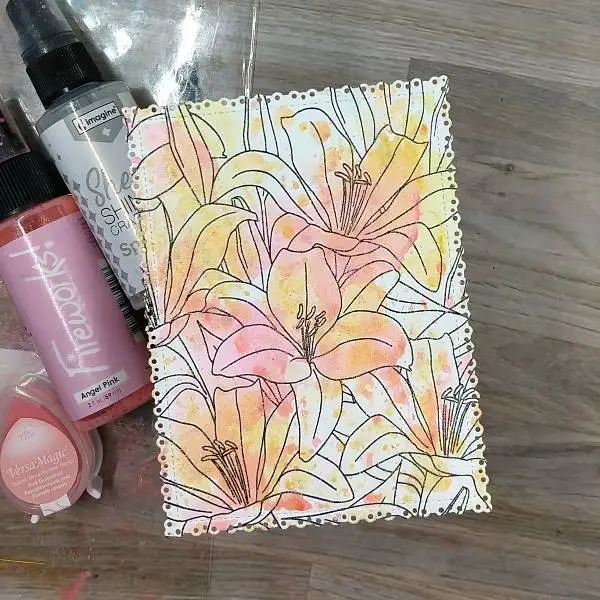
Use a die cut to create a watercolor paper panel and then stamp a large flower stamp with Nocturne VersaFine Clair Ink. Heat emboss with clear embossing powder

Step 2:
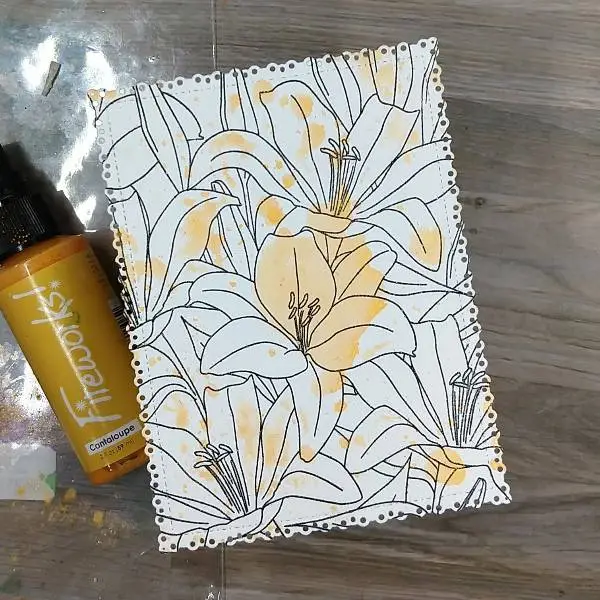
Spray Cantaloupe Fireworks! Spray onto a piece of scrap acetate packaging, and press the
sprayed acetate onto the stamped panel, making sure to get spray on multiple parts of the
stamped panel. Let dry.

Step 3:
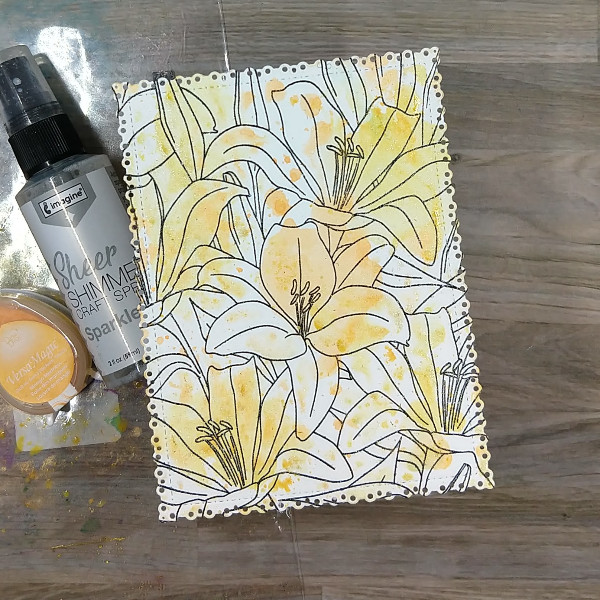
Press the Mango Madness VersaMagic Chalk Ink pad onto the acetate packaging. Then spray
Sparkle Sheer Shimmer Craft spray onto the ink to give it a watery consistency. Then press this
color of yellow ink onto the stamped panel to add interest and a variety of colors. Let dry.

Step 4:
Repeat the process with pink inks. Spray Angel Pink Fireworks! Spray onto the acetate
packaging and press the packaging onto the stamped panel. After the spray dried, press Pink
Grapefruit VersaMagic Chalk Ink onto the acetate and spray it with more of the Sparkle Sheer
Shimmer Craft spray and press that onto the stamped panel as well. Again, let dry.

Step 5:
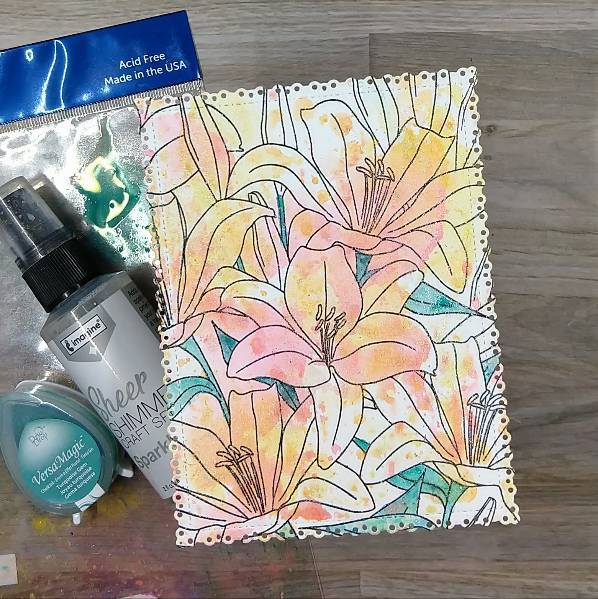
Press the Turquoise Gem VersaMagic Chalk Ink pad onto the acetate packaging and spray the ink with more of the Sparkle Sheer Shimmer Craft Spray to create a watercolor consistency. Then use a thin paintbrush to paint the leaves and stems of the flowers turquoise. Let dry.

Step 6:
Spray more of the Cantaloupe Fireworks! Spray onto the acetate packaging and use the spray to watercolor about half of the flowers yellow. Let dry.

Step 7:
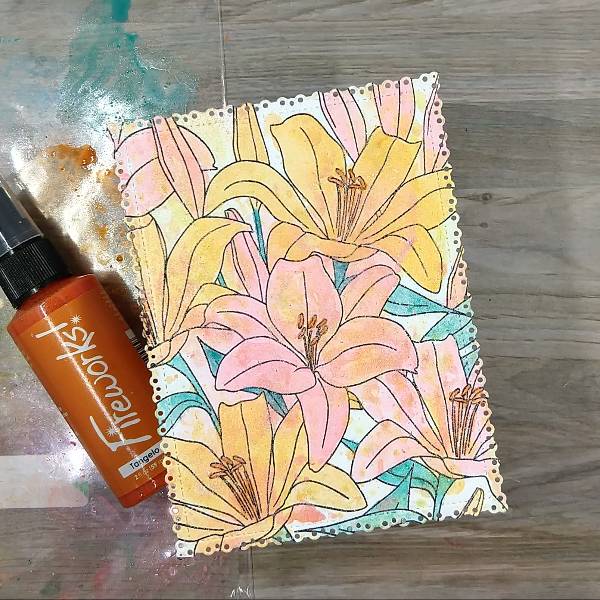
Spray more of the Angel Pink Fireworks! Spray onto the acetate packaging and then paint the rest of the flowers pink. Again let the spray dry.

Step 8:
Spray Tangelo Fireworks! Spray onto the acetate packaging, and use it to paint the anthers and filaments (center parts) of the flowers. Let dry.

Step 9:
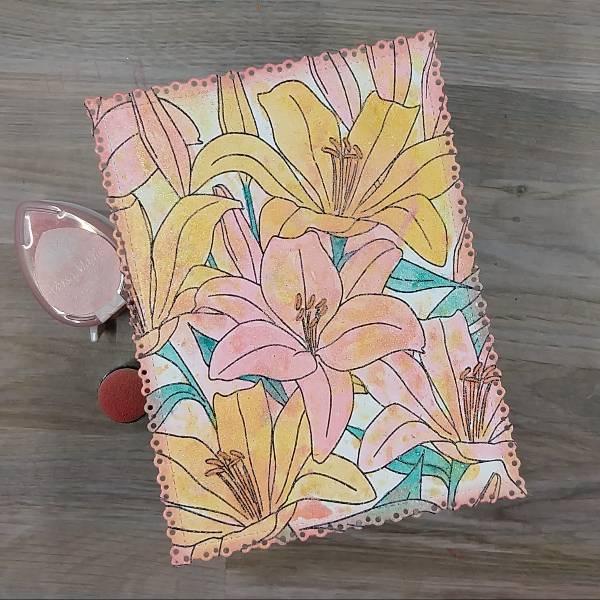
Use an ink dauber to ink blend the edges of the panel with Pink Grapefruit VersaMagic Chalk Ink.
(I ended up touching up the leaf on the bottom edge by painting a second layer of the Turquoise Gem VersaMagic Chalk Ink mixed with water to make sure the turquoise color wasn’t lost.)

Step 10:
Press the Turquoise Gem VersaMagic Chalk Ink pad onto the acetate packaging and spray the ink with more of the Sparkle Sheer Shimmer Craft Spray to create a watercolor consistency a second time. (In my case, I had leftover from step 5, so I used that.)

Hold a paintbrush saturated with the turquoise watercolor parallel to the panel and tap it against your finger. Repeat if needed and let dry.

Step 11:
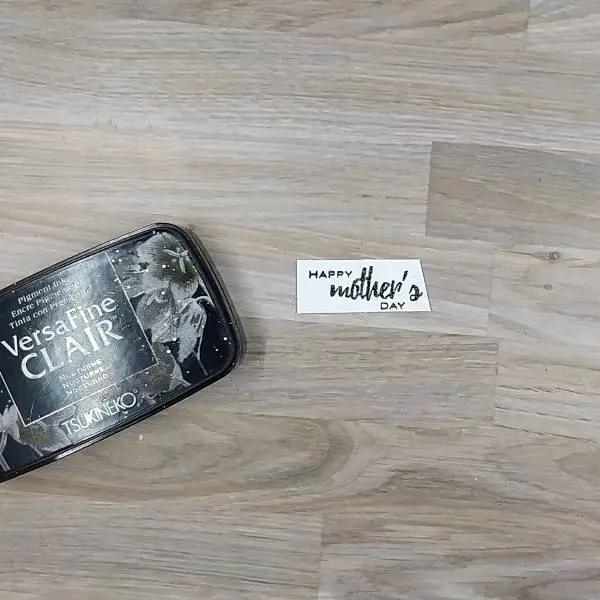
Stamp a sentiment onto a piece of watercolor paper with Nocturne VersaFine Clair ink. Heat emboss with clear embossing powder and trim with scissors or a paper trimmer.

Ink blend around the edges of the stamped layer with more of the Canary VersaColor ink with an ink dauber.

Step 12:
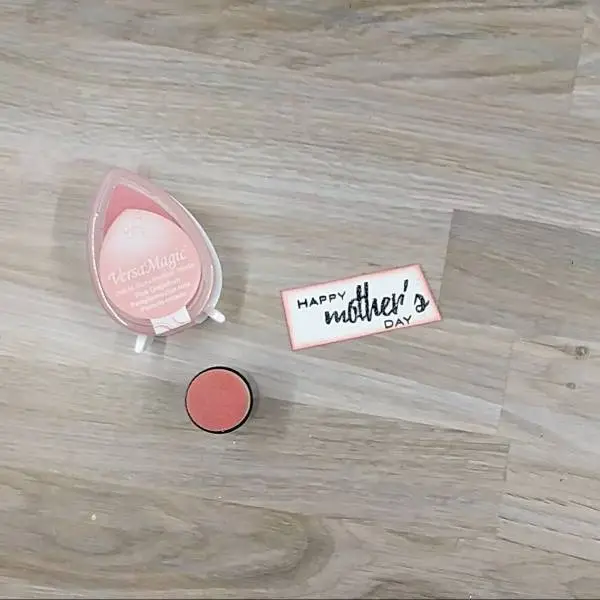
Use an ink dauber to ink blend the edges of the sentiment strip with Pink Grapefruit VersaMagic Chalk ink.

Step 13:
Spray one part of the acetate packaging with Cantaloupe Fireworks! Spray and press Turquoise Gem VersaMagic onto another part of the acetate before spraying it with more Sparkle Sheer Shimmer Craft spray. Alternate pressing the sentiment strip into both colors of spray before splattering the strip with more of the turquoise ink. Let dry.

Step 14:
Glue the panel onto an A2-sized white card base and attach the sentiment onto the card with some foam tape for dimension to finish the card.

Craft Supplies

Imagine
• Fireworks! Shimmery Craft Spray – Angel Pink
• Fireworks! Shimmery Craft Spray – Cantaloupe
• Fireworks! Shimmery Craft Spray – Tangelo
• Sheer Shimmer Spray – Sparkle
• VersaFine Clair Ink – Nocturne
• VersaMagic Chalk Ink – Mango Madness
• VersaMagic Chalk Ink – Pink Grapefruit
• VersaMagic Chalk Ink – Turquoise Gem
• Sponge Dauber

Other
• Altenew – Stamp – Extra Special stamp set
• Altenew – Tape – Instant Dimension Foam Tape
• Gina Marie Designs – Die – Pleated Lace Rectangles die set
• The Ton Stamps – Stamp – Lily Fields
• Clear embossing powder Scissors
• Glue

Let’s Ink Blend With Some Unlikely VersaFine Clair Ink Colors To Create A Clean and Simple Mother’s Day Card

By Katy Ingram

Hello Friends! Katy here and today I am excited to share a really cool color combination using VersaFine Clair inks.

In today’s video tutorial, I am sharing how I use 5 unlikely VersaFine Clair ink colors to create a beautiful background for silhouette stamps and turn it into a clean and simple Mother’s Day Card. Video has all the details.

Katy

Skill: Beginner

Time: 15-20 minutes

Art Supplies

Imagine Products

VersaFine Clair – Paradise, Blue Belle, Warm Breeze, Golden Meadow and Shady Lane https://www.imaginecrafts.com/versafine-clair

Sentiment and silhouette stamping done with VersaFine Clair Nocturne

On Point Glue

Tear It! Tape

Other Products Used

White Card Stock (card base and sentiment strip)

Strathmore 500 Series Hot Pressed Watercolor Paper

The Greetery Lovely Silhouettes Stamp Set

Simon Says Stamp Incredible Woman Stamp Set (happy mother’s day)

Let’s Get Inky! Mother’s Day Card Featuring Different Inking Techniques

By LV Handcrafted

Skill: Advance

Time: 25 minutes

Hello friends! This is Linh (or LV Handcrafted on all the socials). Do you feel like doing something a little abstract?  Try these techniques out for creating some fun backgrounds you can use as panels or die cut out of like I’ve done here.  In my video, I’ll show you 3 techniques for using Imagine inks to turn plain ol’ white cardstock into beautiful, abstract papers. All the techniques are super easy but I’ll list them below in order of what I think is simplest to the most elaborate.

Technique #1 – Swipe your Memento Dew Drop ink pad directly onto your white cardstock. you can create a solid block of color or use a lighter touch to create a more stripy, imperfect effect. Instantly, you’ll have a panel of color cardstock! The benefit to making your own cardstock this way is if you use that ink pad to stamp with, you now have paper that perfectly coordinates with it. 

[Note: I used this technique for the flowers — stems and flower blooms]

Technique #2 – Smear some ink onto a piece of acetate or clear plastic packaging. Spritz with water — more water will dilute the color more, less water will keep the colors strong and vibrant. Smoosh the watered down ink onto a white cardstock panel. Repeat with a single or multiple colors until you have the desired effect.  Tip – if you are using plain cardstock and not watercolor paper, the more water you use, the more your paper will warp.  Try less water or put your panel under a stack of books to flatten it out. 

[Note: I used this technique for the inner heart die cut behind the bouquet of flowers.]

Technique #3 – Start with Technique #1 to lay down a solid block of color. Then, using a Brilliance Dew Drop in Pearlescent finish, make random swipes, swirls, streaks, etc. across your panel.  Brilliance ink is a pigment ink, so it will take a little bit of time to dry, but you can also take a heat gun to the panel or cover with clear Mboss powder and melt it for a lovely shine.  The result is a panel that has some lovely streaks of pearlescent shine.

[Note: I used this technique on the flower blooms to give them an abstract look. I also die cut the word “Mom” and the heart from this panel too.]

Supplies Used

Imagine

Other Products :

Learn How to Make a Kaleidacolor Mother’s Day Card

Triangles-1-600

By Alison Heikkila

Hello! I don’t know about your mom, but my mom is not really into your typical Mother’s Day card. She’s not really into super flowery, extra sentimental cards. She prefers bolder, more graphic things. So I decided to think “outside of the box” and use triangles! This is a fun and simple way to get a unique looking card with dye based inks from Imagine.

Skill Level: Beginner to Intermediate

Time: Approx. 20 minutes.

Directions:

Triangles-2

Step 1

Let’s gather our supplies! Grab a Gel Press Petite (I went with a triangle so that I could rotate them 180 degrees each time to get a cool pattern), your favorite Kaleidacolor inkpad, an additional Memento ink pad, and a stencil. For tools, you’ll want an acrylic block or handle, plus a brayer.

Triangles-3

Step 2

Apply the Gel Press Petite to your block. Click together the Kaleidacolor inkpad. Roll the color on to your brayer. It will not look like there is much color on the surface of the Gel Plate, but don’t worry, it’s there.

Triangles-4

Step 3

Pick up the inked Petite (while it’s on the block) and apply it facedown to your cardstock. I left a 1/4″ border below the triangle. Press the triangle into your paper as you would a clear stamp, then peel it away from the cardstock.

Step 4

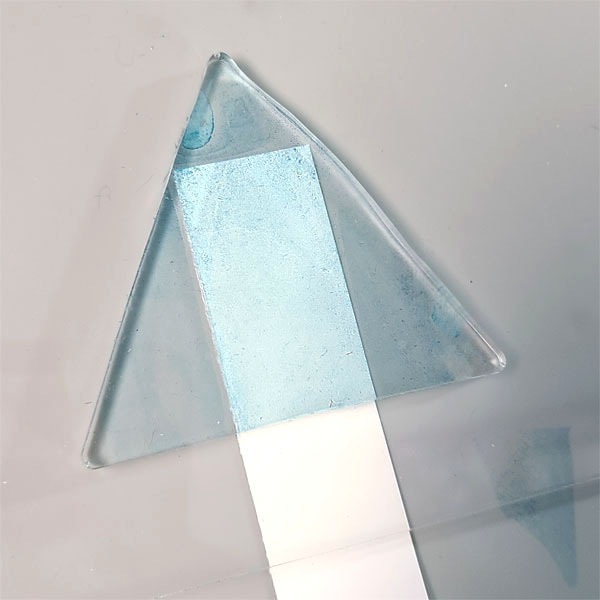
Apply Teal Zeal to the Triangle Gel Press and roll the color out with your brayer.

Triangles-5

Step 5

Place a stencil on top of the inked triangle and gently press it into the Plate. The Plate will hold the stencil in place.

Triangles-6

Step 6

Flip the Plate (with the stencil still attached) on to a piece of scrap paper. I use copy paper. Press into the scrap to remove the ink from the negative areas. You can see in my photo above how it will look.

Step 7

Peel the paper away from the Plate, then remove the Stencil.

Step 8

Place the Plate directly on top of the first Kaleidacolor inked triangle you created. The left over Teal Zeal ink on the Plate that was trapped under the stencil will transfer to the paper.

Triangles-7

Step 9

Repeat applying the Kalediacolor Ink to the Triangle, flip it around and place onto your cardstock, making sure it’s going in the opposite direction of your first triangle.

Triangles-8

Step 10

To make things go faster, I opted to ink and stamp all of my Kaleidacolor triangles before I finished my stenciled layers. I worked my way across the entire piece of cardstock, from end to end.

Step 11

Repeat the process of applying the Teal Zeal to the triangle, applying the stencil, taking off the excess ink, and then applying to the Kaleidacolor layers. Do this until all of the triangles have a stenciled image on them. Then trim the piece, leaving a 1/4″ at the top.

Triangles-9

Step 12

For my “mom” sentiment, I applied more Teal Zeal to my triangle (you can use any Gel Press Plate for this, but since the triangle was already out, I just used that). I placed a strip of paper on it to pull the color off. I repeated this step until I had enough of the strip covered for my dies to fit the “mom.” I could have just inked the paper. But I wanted the paper to have the same look as the rest of the card. Gel Press printing looks very different than applying ink directly to paper, or using some sort of applicator. This kept everything cohesive.

Step 13

I wanted a shadow layer to my “mom” so I repeated the last step, but I reapplied ink to my strip 3 times to get a darker tone. It’s still Teal Zeal, but at a richer strength because I layered the color several times. I adhered these layers together with On Point Glue.

Triangles-11

Step 14

I created my card base from white cardstock, cut to 8 1/2″ x 7.” I applied my Kaleidacolor ink directly to my brayer, sprayed it with Ink Potion No. 9 to help it flow, and rolled it on to the top and bottom of my card base.

Step 15

Adhere the mono-printed layer and the sentiment to the card.

Triangles-12

This was a really fun card to make, and since you can get a huge range of Kaleidacolor inkpads (including a dry one so that you can create your own combination!), you can change up the look of this card easily. Thanks so much for stopping by. Have an inspiring day!

Art Supplies

Imagine

Kaleidacolor Inkpad in Bouquet
Memento Ink in Teal Zeal
On Point Glue

Other

• Gel Press: Petites Set A- Triangle
• AALL & Create: Lotza Trianglez
• Simon Says Stamp: CZ Design- Everett Alphabet Die Cuts
• Brayer
• Acrylic Block/Handle
• Dry Adhesive

How To Make A Quick and Easy Mother’s Day Card

Mom Card - Blog

by Annie Collins

Hello Crafty Friends – Annie Collins here with a fun and easy Mother’s Day card featuring Stazon and VersaMagic Inks.

Directions

Art Supplies

Imagine
Other
  •  
  • Recollections Brand 110# Cardstock: White
  • Accent Brand 80# Cardstock: Opaque White
  • Aspire Pellatics 80# Cardstock: Shimmer Gold
  • AcetateFoam Tape