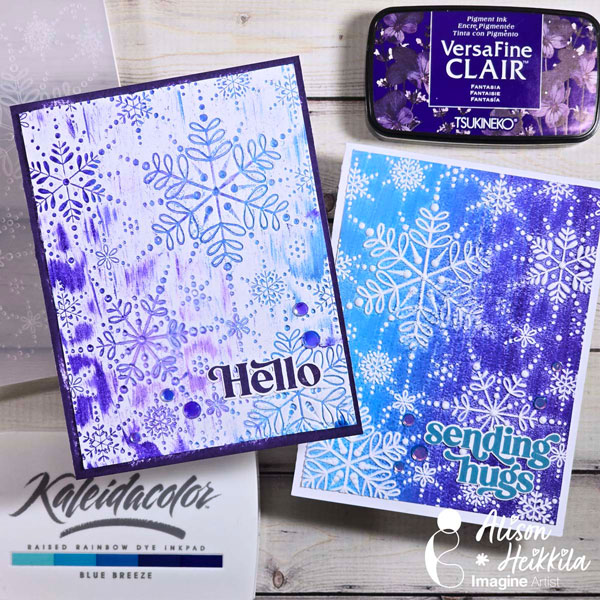
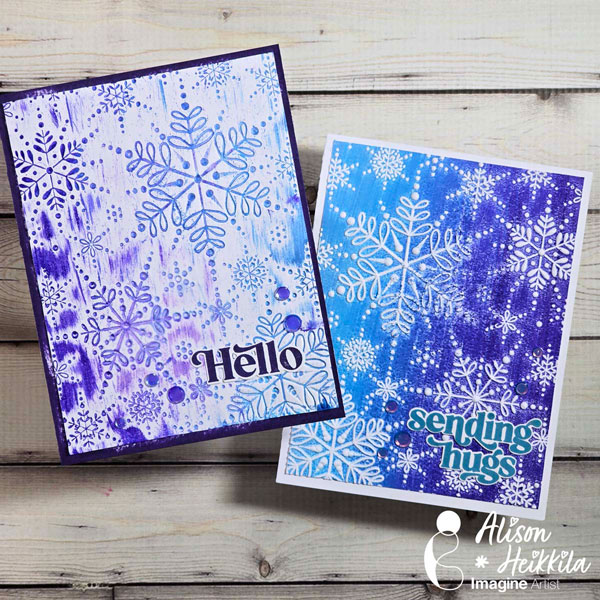
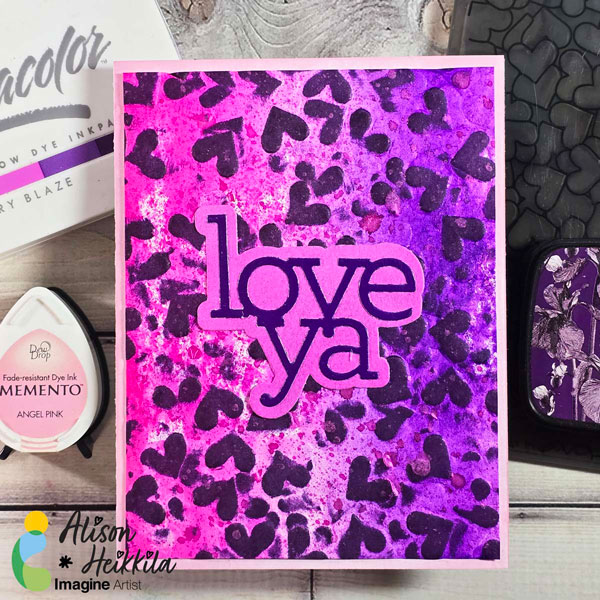
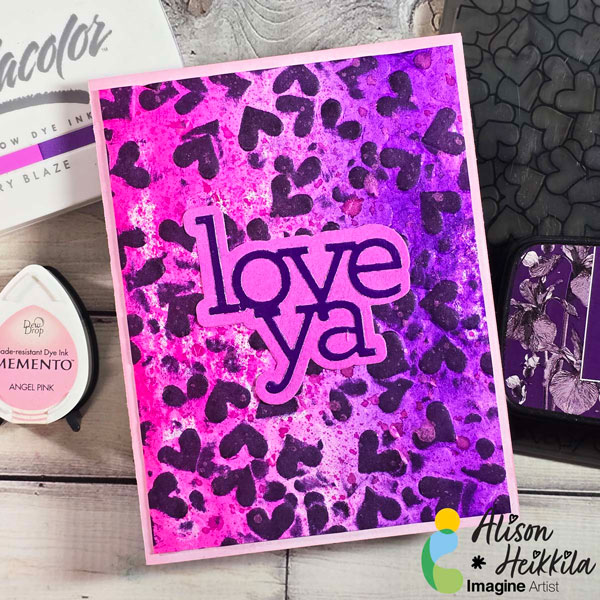
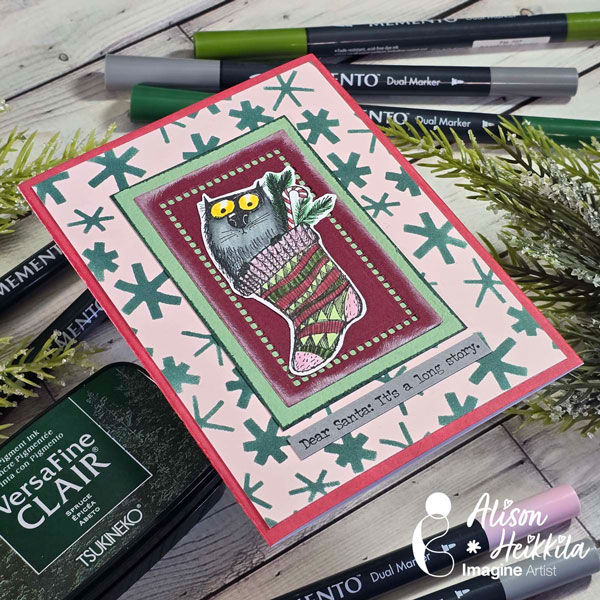
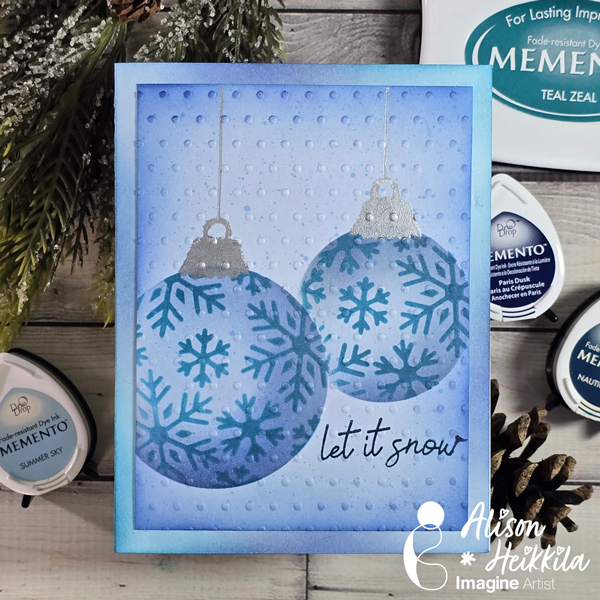
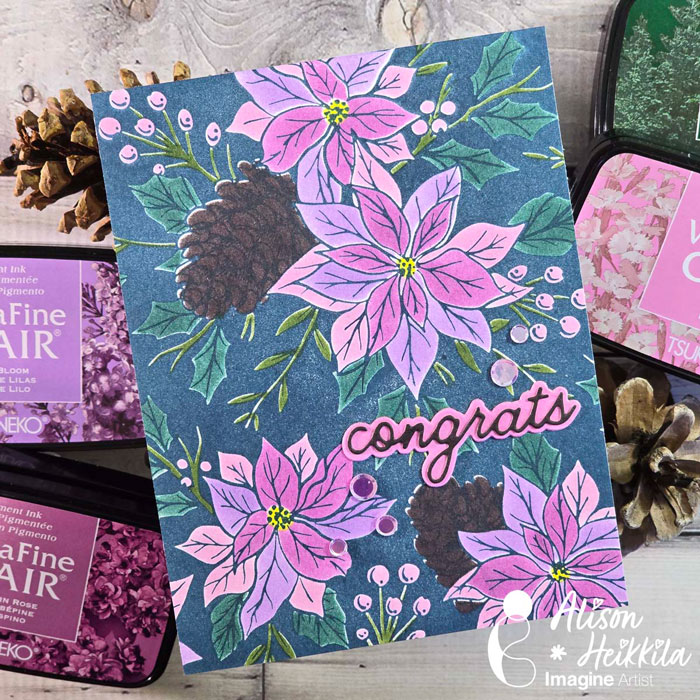
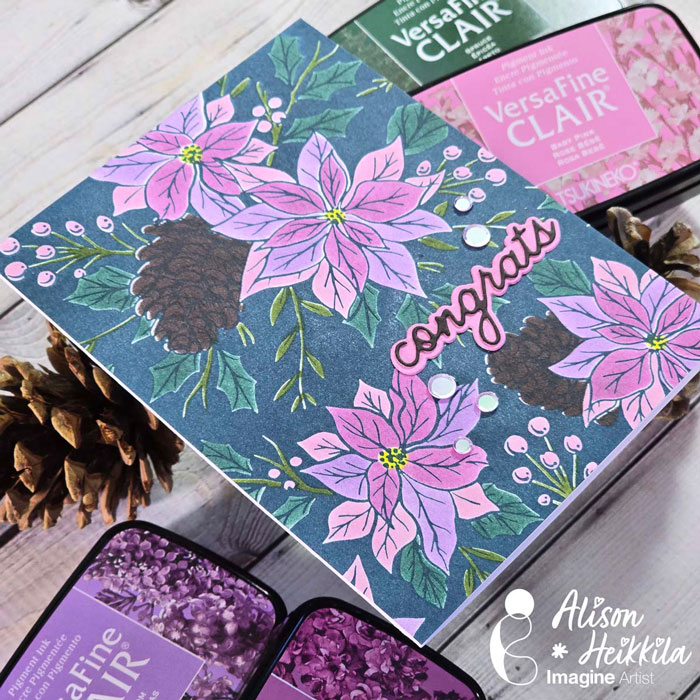
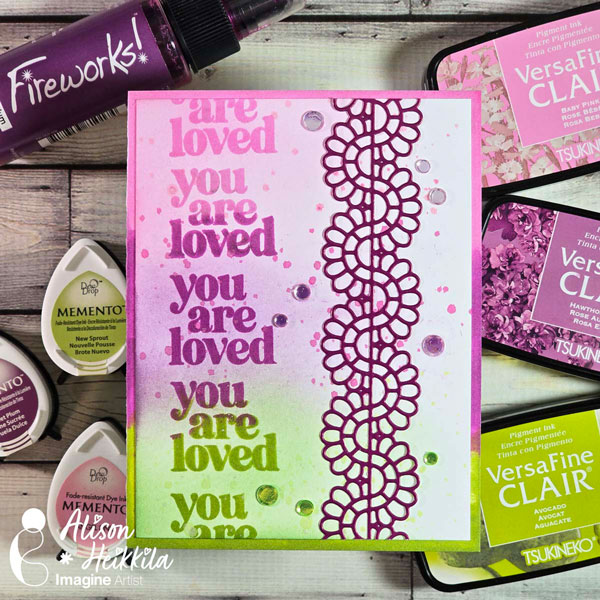
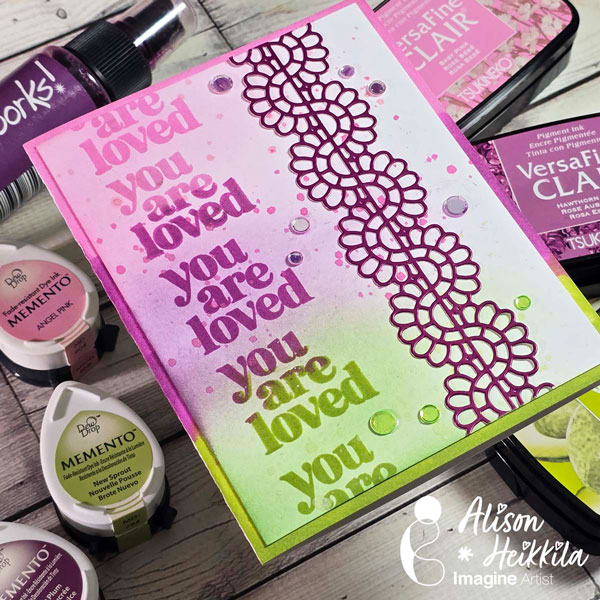
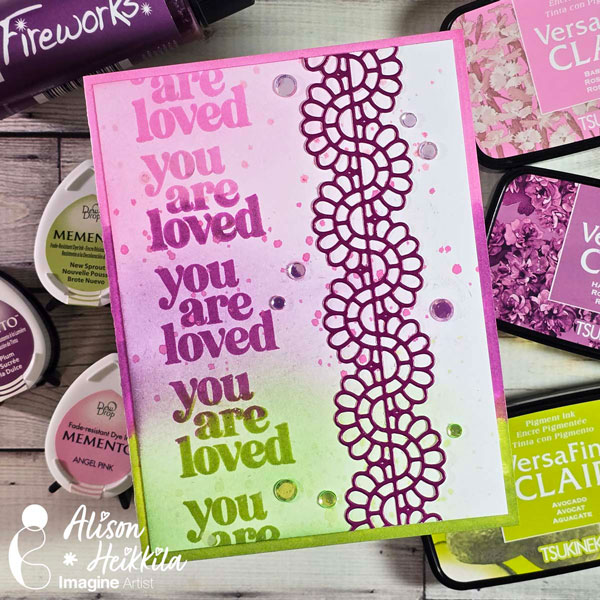
Mushrooms For Mother’s Day

By Alison Heikkila

Hello! My latest project for Imagine is a Mother’s Day theme. Now, perhaps this project may be a style all moms like, but it’s definitely one that my mom loves. I wanted to show how beautiful VersaMagic inks are, and how convenient it is to have them in their Dew Drops shape. They’re beautiful and chalky, and create really nice effects.

*Some affiliate links are used in this post. That means that if you shop through these links, I may receive a small compensation, at no cost to you.

Skill Level: Intermediate
Time to Complete: 20-30 minutes

Supplies:
Imagine:
VersaMagic: Red Brick
VersaMagic: Pink Grapefruit
VersaMagic: Wheat
VersaMagic: Sahara Sand
VersaMagic: Tea Leaves
VersaMagic: Key Lime
VersaMagic: Pumpkin Spice
VersaFine Clair: Nocturne
VersaFine Clair: Fallen Leaves
VersaFine Clair: Shady Lane
Memento Marker: Love Letter

Other:
Sizzix: Painted Pencil Mushrooms
Sizzix: Painted Pencil Leaves
Sizzix: Hello You Sentiments
MISTI Stamping Tool
Whimsical Wishes: Stamp Glider Pressure Tool
Strathmore: Smooth Bristol Cardstock
Neenah: Desert Storm Cardstock
Accent Opaque 100lb. Cardstock
Bearly Arts Glue

I can’t wait to officially give this card to my mom. I know she’s going to love everything about it. If you haven’t played with VersaMagic Inks yet, I hope you’ll give them a try. Thanks for stopping by. Have an inspiring day!

Creative Ways to Use Reinkers With Imagine

By Alison Heikkila

Hello! I’m Alison Heikkila. Today, I’m going to show you some fun ways to use Imagine/Tsukineko’s dye-based reinkers. They can be used for so much more than just reinking your dry pads. My card is pretty graphic and bold, but by changing the colors and the stencil used, you can get a completely different look.

*Some affiliate links are used in this post. That means that if you shop through these links, I may receive a small compensation, at no cost to you. For more information, please see my Affiliates page, where I also have some coupon codes.

Skill Level: Intermediate
Time to Complete: 20-30 minutes, plus drying time

Supplies:
Imagine:
Dye Ink Refills in Pansy, Celeste Blue, Lavender, and Ultramarine
Fireworks! Spray in London Fog
VersaFine Clair in Monarch
On Point Glue

Other:
A Colorful Life Designs: Rotating Rings
Gel Press: 6×6 Plate (5×7 or 8×10 will also work)
Golden: Molding Paste
Honey Bee Stamps: Big Time Kindness Stamps
Honey Bee Stamps: Big Time Kindness Dies
A Colorful Life Designs: Card Bling in Crystal Metallic Splash
Palette Knife
Accent Opaque: 100lb. Cardstock
Bearly Arts Glue

I hope that you’ll try some of these techniques on one of your future projects. Thanks so much for stopping by. Have an inspiring day!

Creative Ways To Use Inks With Dies

By Alison Heikkila

Hello! This is Alison Heikkila. My second video for Imagine this month once again focus on dies and how to use them creatively with inks. We’re making a pretty floral encouragement card, and I hope it gives you some ideas on how to use your dies and inks together.

*Some affiliate links are used in this post. That means that if you shop through these links, I may receive a small compensation, at no cost to you.

Skill Level: Intermediate
Time to Complete: 20-30 minutes

Craft Supplies:


Imagine:
VersaFine Clair: Shady Lane
VersaFine Clair: Morning Mist
VersaMark Ink
Mboss: Violet
Memento Ink: Grape Jelly
Fireworks! Spray: Bamboo Leaves
Tear It! Tape
On Point Glue

Other:
Spellbinders & Simon Hurley: Everyday Foliage
Spellbinders & Simon Hurley: Handwritten Sentiments
Vellum
White Cardstock

I hope this inspires you to make stamps out of your dies. And don’t forget to try double-dipping into embossing powder! The effect is so pretty. Thanks so much for stopping by. Have an inspiring day!

Using Inks to Enhance Die Cuts and Patterned Paper

By Alison Heikkila

Hello! It’s Alison Heikkila. Let’s play with Memento Inks today! I have a bunch of fun ways you can use them to enhance your die cuts. Plus, I’ll explain some ways to use patterned paper with die cuts and inks as well. You can use any dies you have for these techniques, so I encourage you to experiment and play!

*Some affiliate links are used in this post. That means that if you shop through these links, I may receive a small compensation, at no cost to you. For more information, please see my Affiliates page, where I also have some coupon codes.

Skill Level: Intermediate
Time to Complete: 60-75 minutes

Supplies:
Imagine:
Memento Ink: Angel Pink
Memento Ink: Sweet Plum
Memento Ink: Northern Pine
Memento Ink: Nautical Blue
Memento Ink: Olive Grove
Memento Ink: Cottage Ivy
Memento Ink: London Fog
Memento Ink: Rhubarb Stalk
Memento Ink Refill: Angel Pink
VersaFine Clair Ink: Rain Forest
On Point Glue
Sponge Daubers

Other:
Spellbinders: The Botanical Solarium
Spellbinders: Sending Sunshine Sentiment Stamps
Carta Bella: Gather at Home Paper Pad
Kaisercraft: Greenhouse Paper Pad
Assorted Blending Brushes
Watercolor Brush
White Cardstock

Small dies like this can be a little fiddly, but it’s so fun to alter them with color and paper. I hope you enjoy trying some of these ideas! Thanks so much for stopping by. Have an inspiring day!

How to Make a Birthday Shaker Card

By Alison Heikkila 

Hello! Alison Heikkil here. My latest video for Imagine shares how to make a birthday shaker card using a variety of great products. This card can be customized to use any colors you like, and there are different points that you can stop and complete your card, if shakers aren’t your cup of tea.

*Some affiliate links are used in this post. That means that if you shop through these links, I may receive a small compensation, at no cost to you. For more information, please see my Affiliates page, where I also have some coupon codes.

Skill Level: Basic-Intermediate
Time to Complete: 15-20 minutes

Supplies:

Imagine:
Memento Ink in Teal Zeal
Memento Ink in Rose Bud
Memento Ink in Grape Jelly
Sheer Shimmer Spritz in Sparkle
Fireworks! Spray in Grape Jelly
Tear It! Tape
On Point Glue
Craft Mat

Other:
A Colorful Life Designs: Layered Party Stencil Set (Use code AlFan10 to save 10%)
Sizzix/Tim Holtz: Bold Text #1 Die Set
Scrapbook.com: 3 mm Thick Foam Tape
Accent Opaque: 100lb. White Cardstock
Sequins/Shaker Mix
Ribbon

I hope you learned a few new ways to use some of Imagine’s products. Thanks so much for stopping by. Have an inspiring day!

How to Use Amplify! with Stencils

By Alison Heikkila

– Hello! Alison Heikkila here. I am so excited to share today’s video today because we’re using a product I haven’t used in quite a while. If you have never seen Amplify! before, you’re in for a textural treat. We’re going to use it with a cool stencil from A Colorful Life Designs.

*Some affiliate links are used in this post. That means that if you shop through these links, I may receive a small compensation, at no cost to you. For more information, please see my Affiliates page, where I also have some coupon codes.

Skill Level: Intermediate
Time to Complete: 20-25 minutes

Craft Supplies

Imagine:
Radiant Neon Amplify! in Electric Yellow, Electric Orange, and Electric Pink
VersaFine Clair Ink in Sunshine and Nocturne
Fireworks! Spray in Rose Bud
Craft Mat
On Point Glue
Tear It! Tape (not shown)

Other:
A Colorful Life Designs: Aztec Pattern Stencil (use code AlFan10 to save 10%)
Honey Bee Stamps: Enjoy Stamps & Dies- No longer available
Therm O Web: Pixie Spray
Metal Paste Spreader
Palette Knife
Accent Opaque Cardstock: 100lb. White
Recollections: Black Cardstock 110lb.
Bearly Arts Glue

I think you can tell from the video that I had a blast making this card. I plan on making more like this soon, so I hope you’ll check them out. Thanks so much for stopping by. Have an inspiring day!