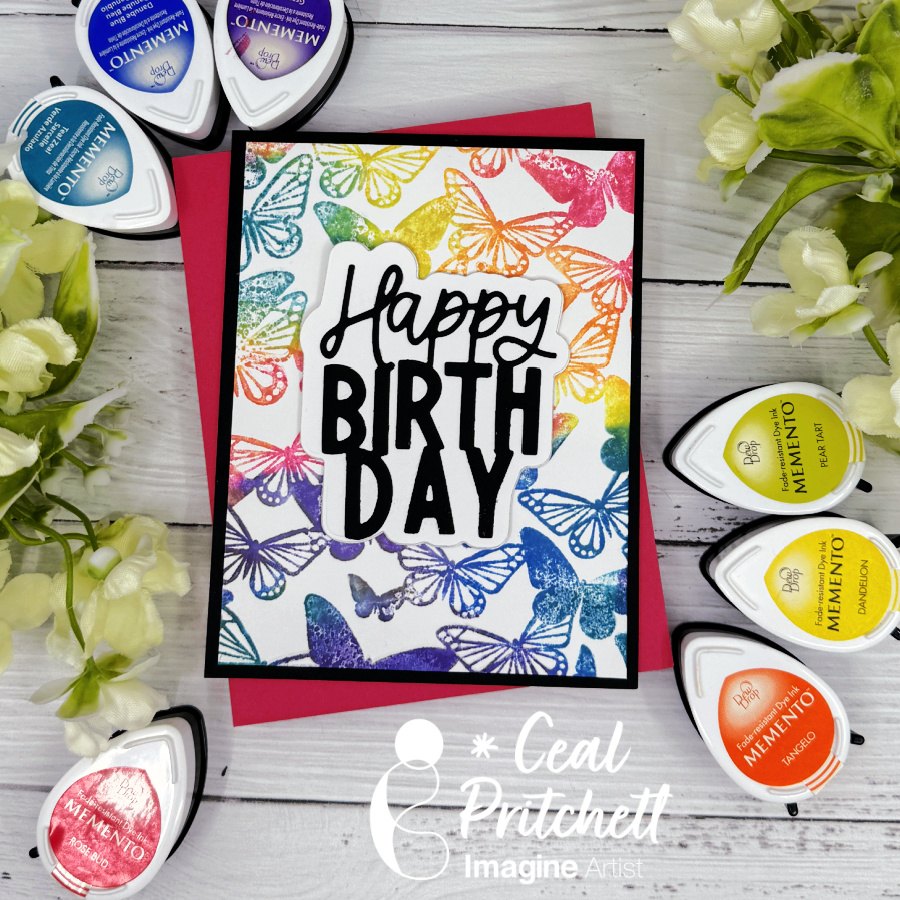
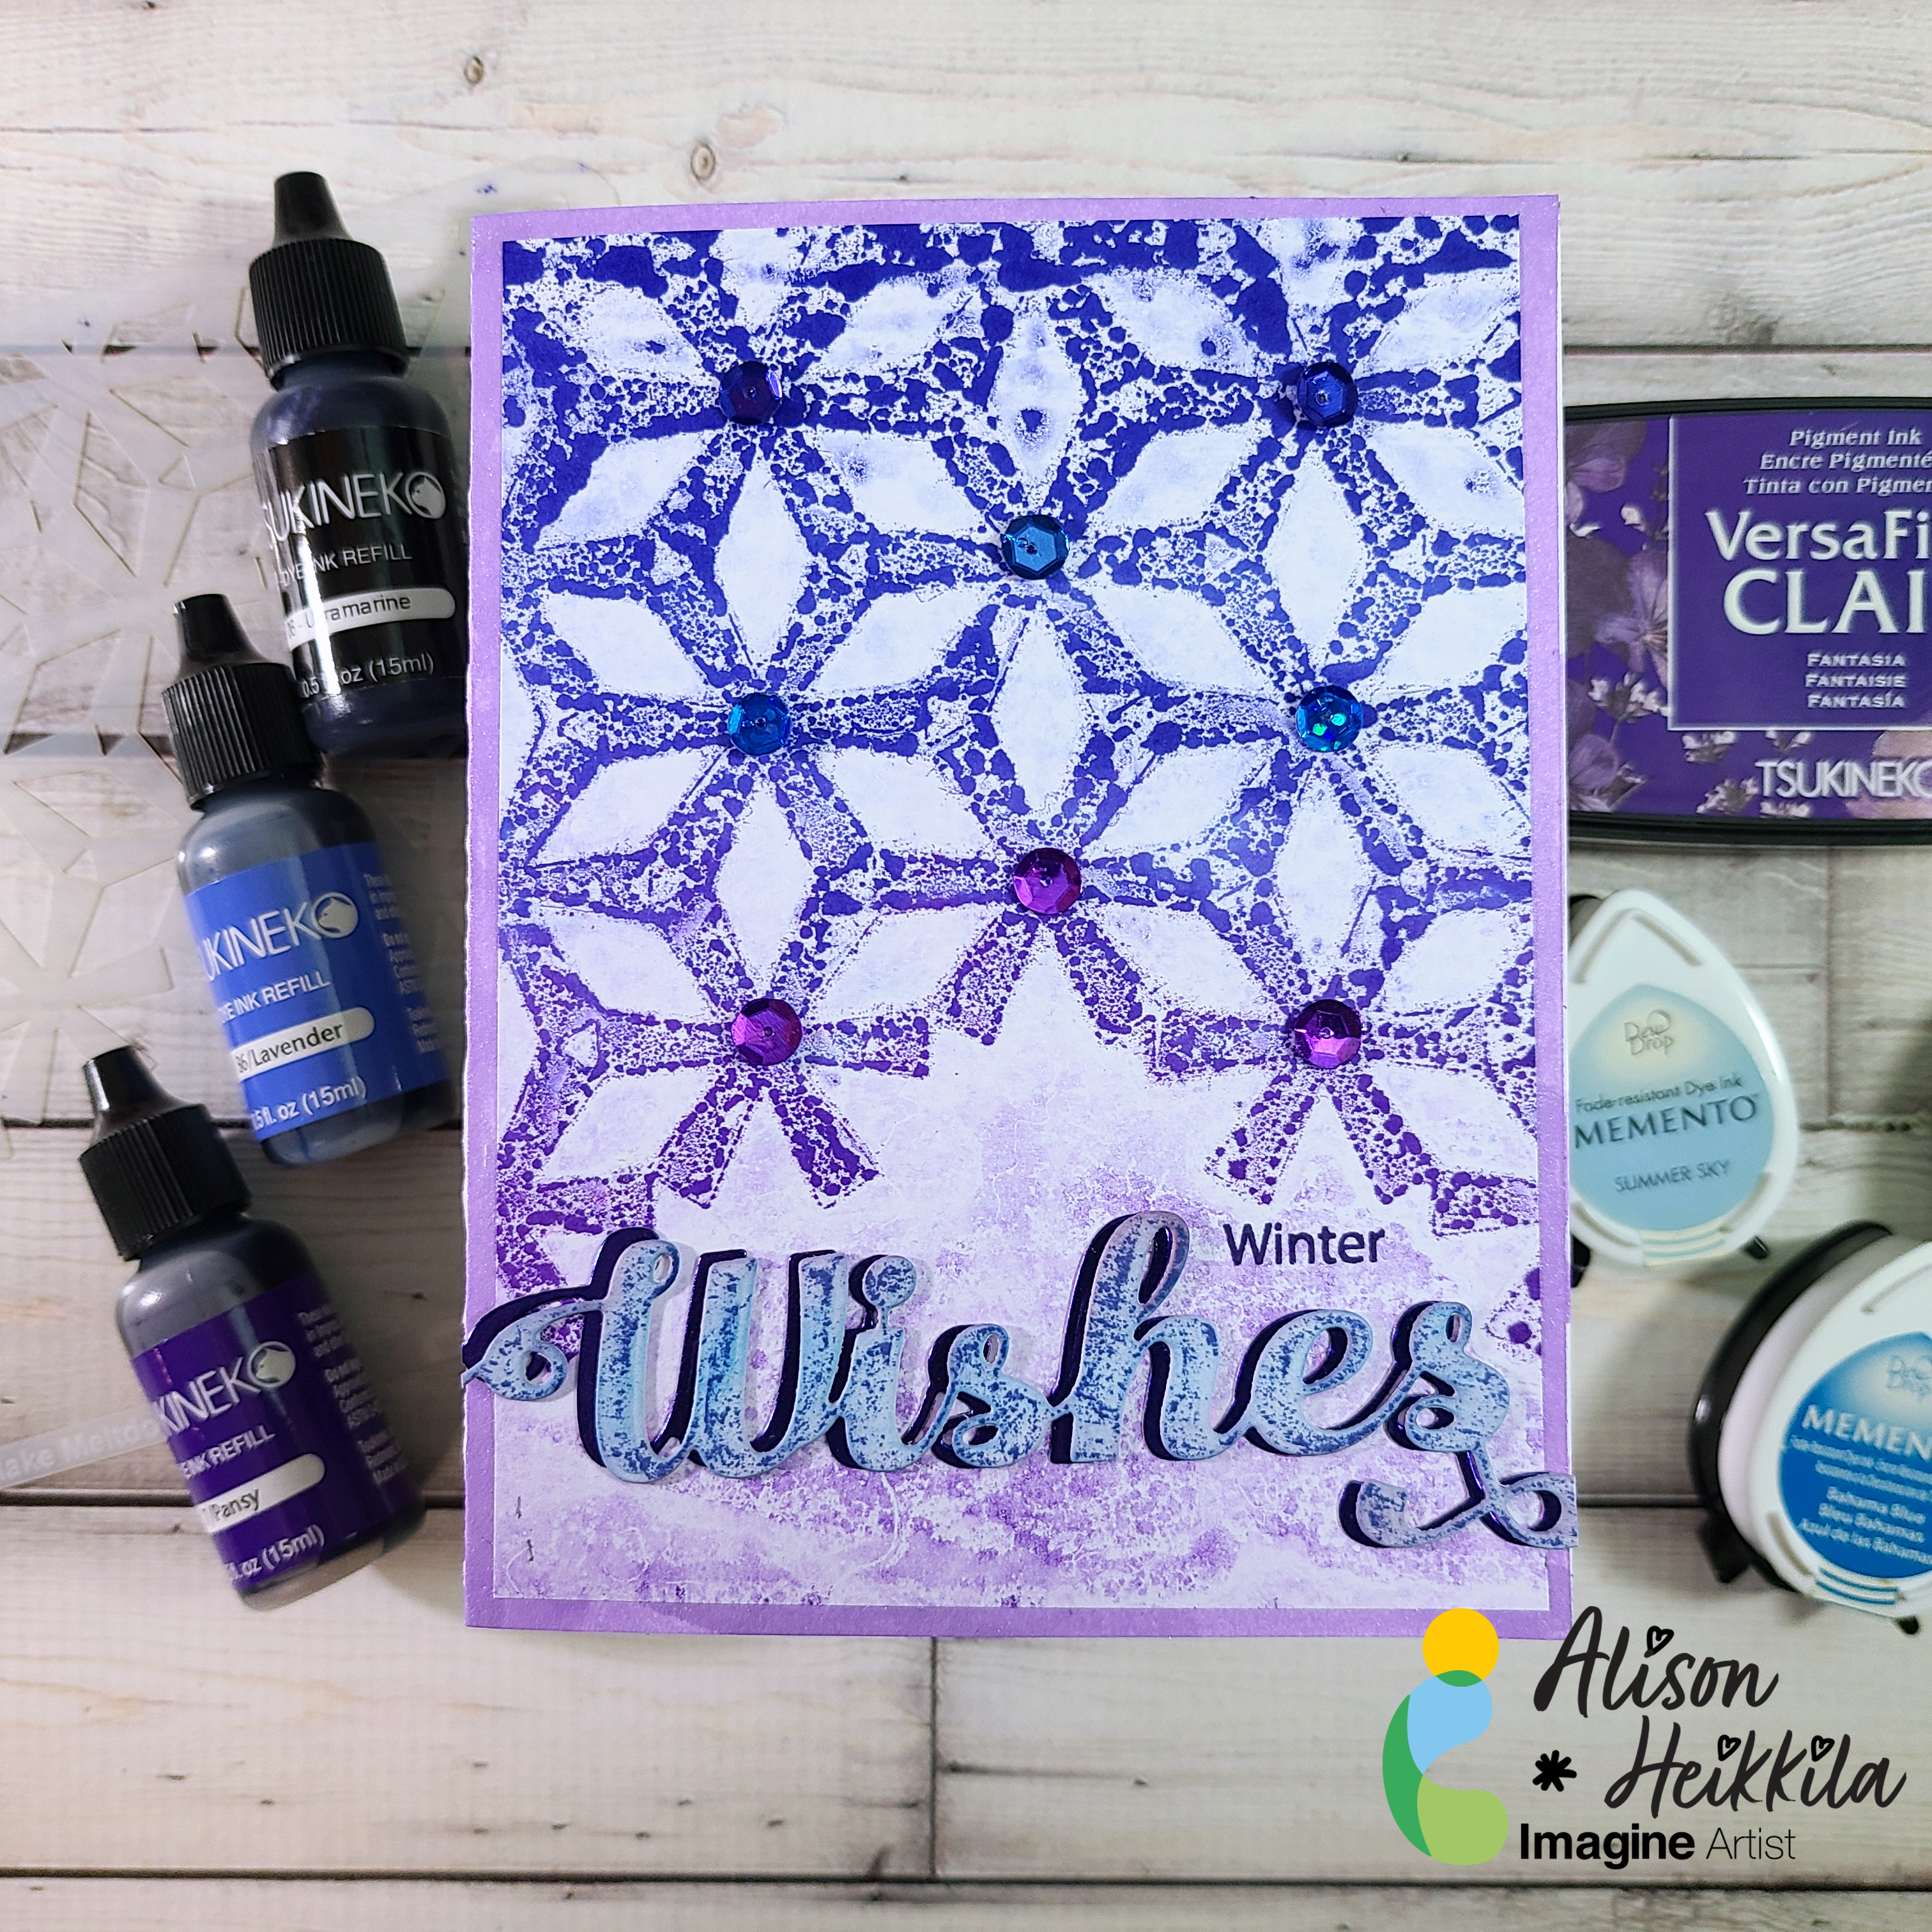
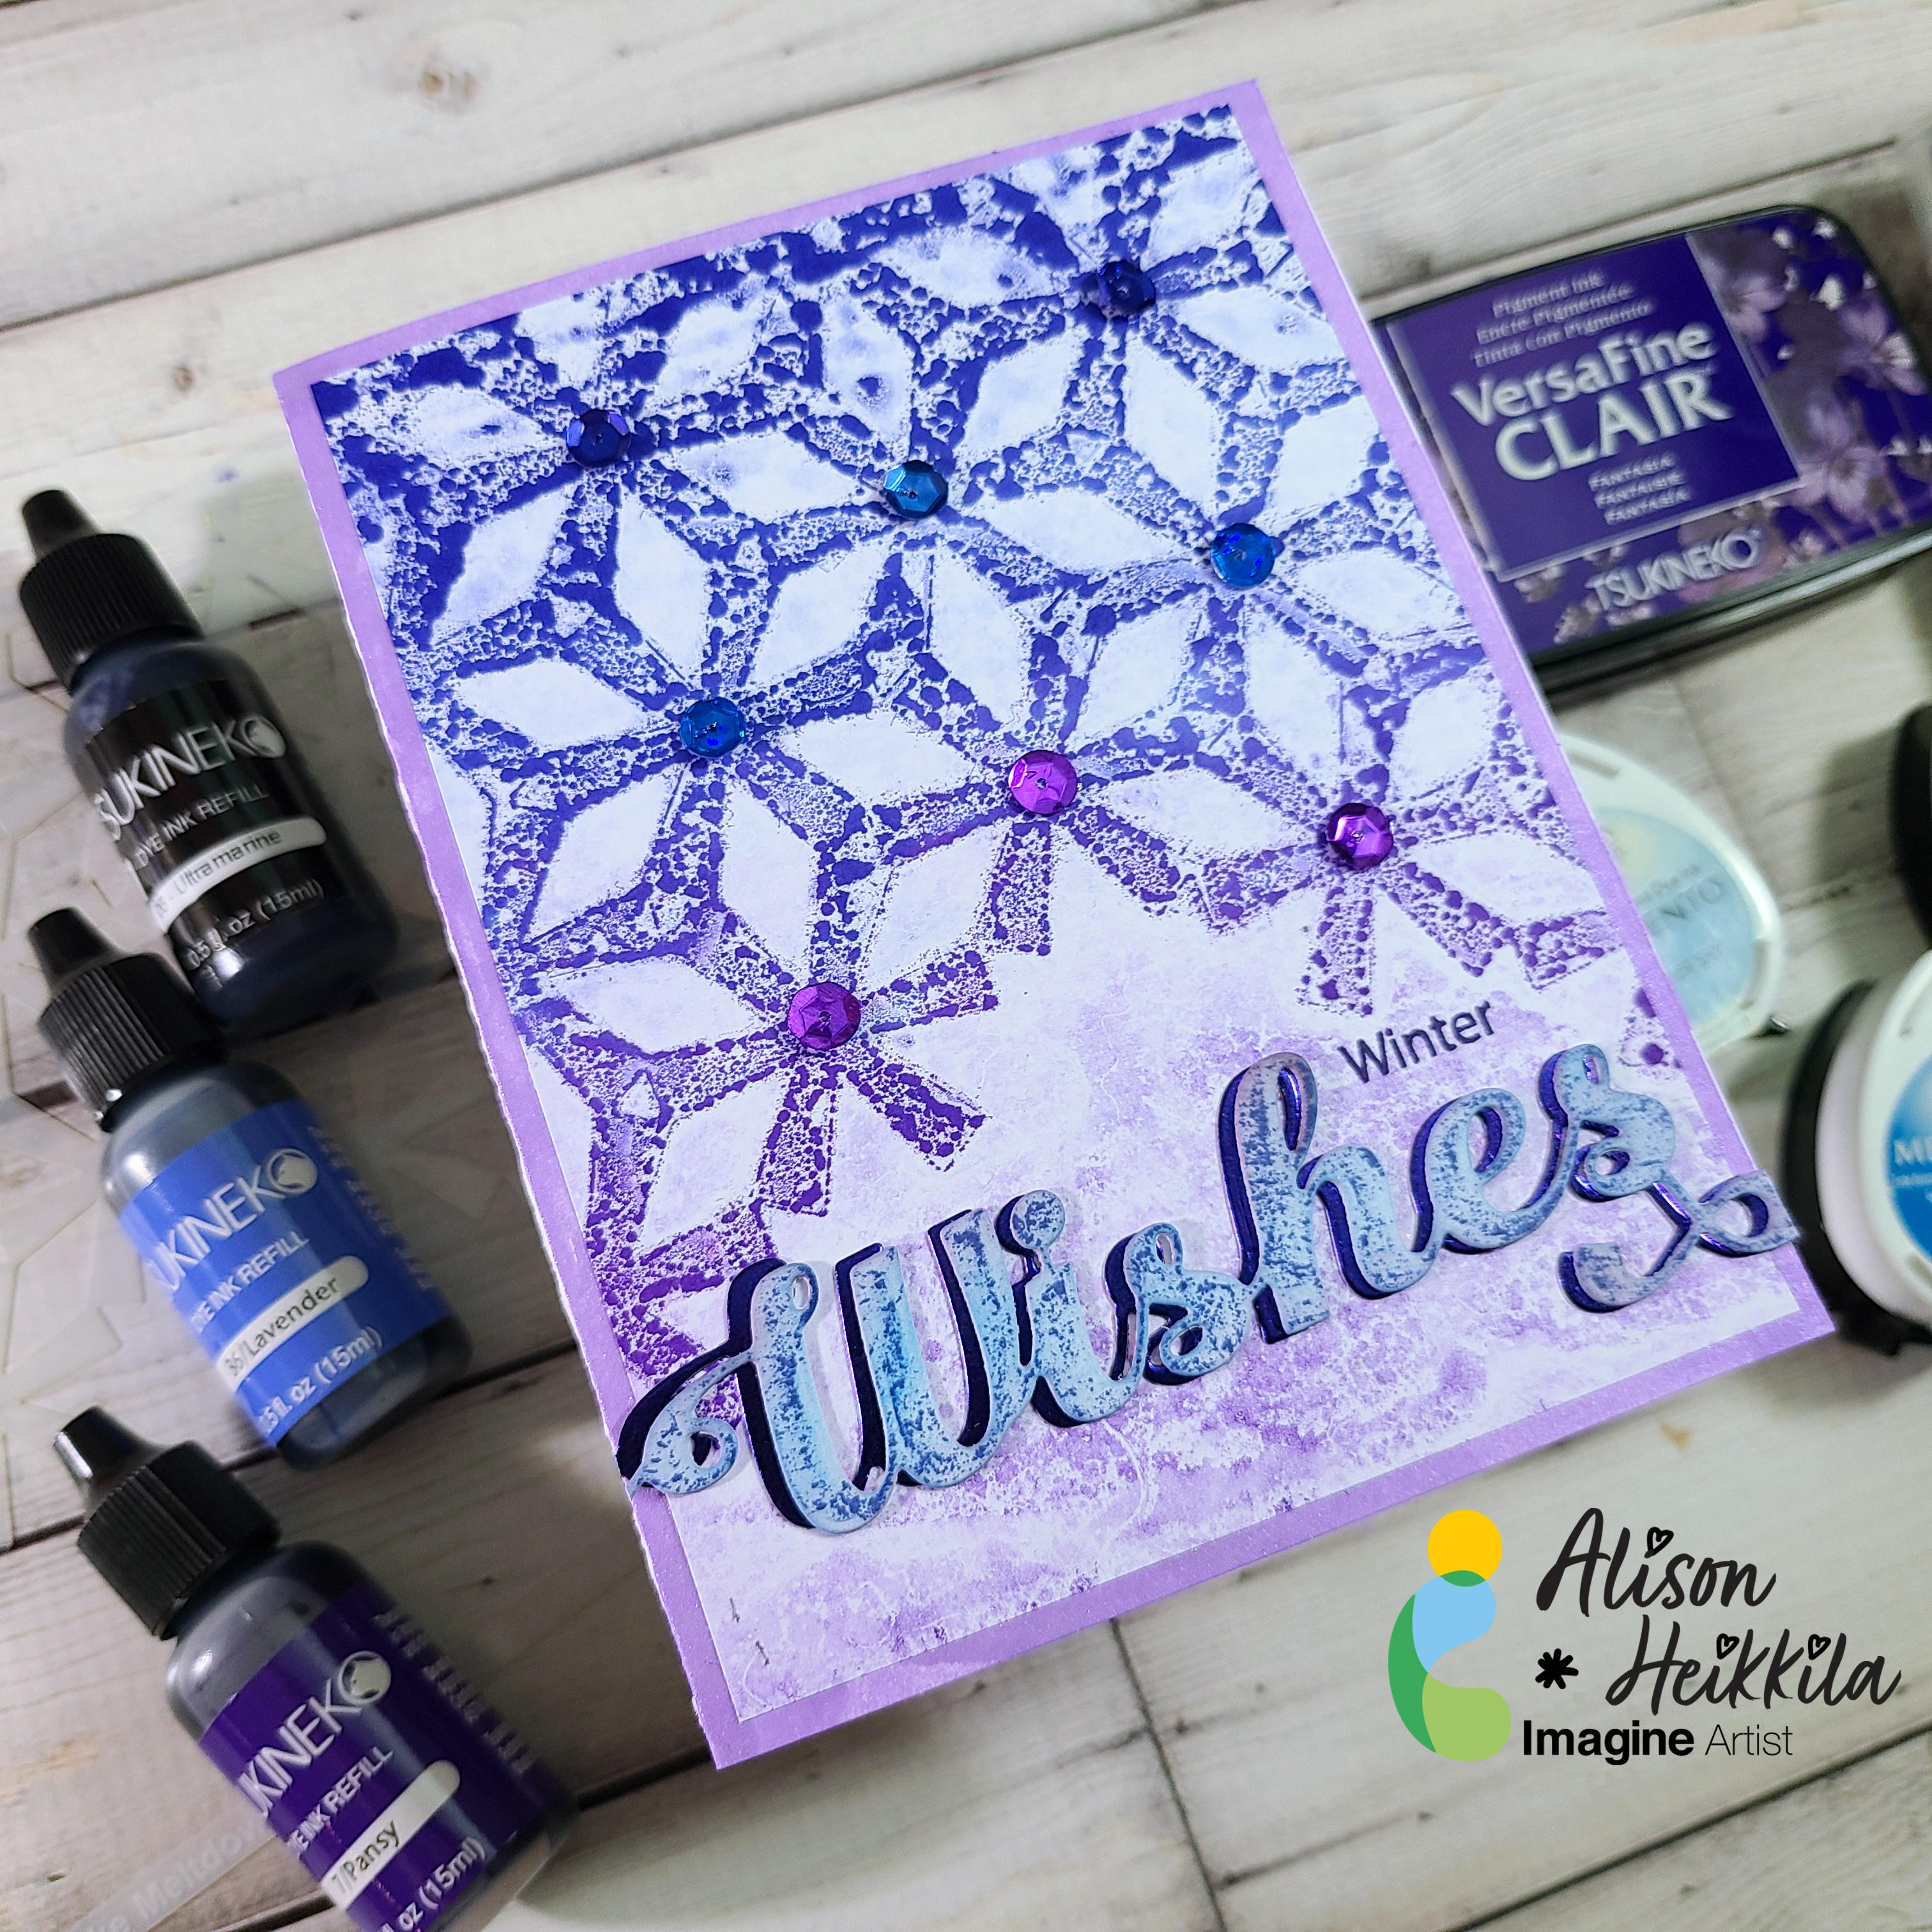
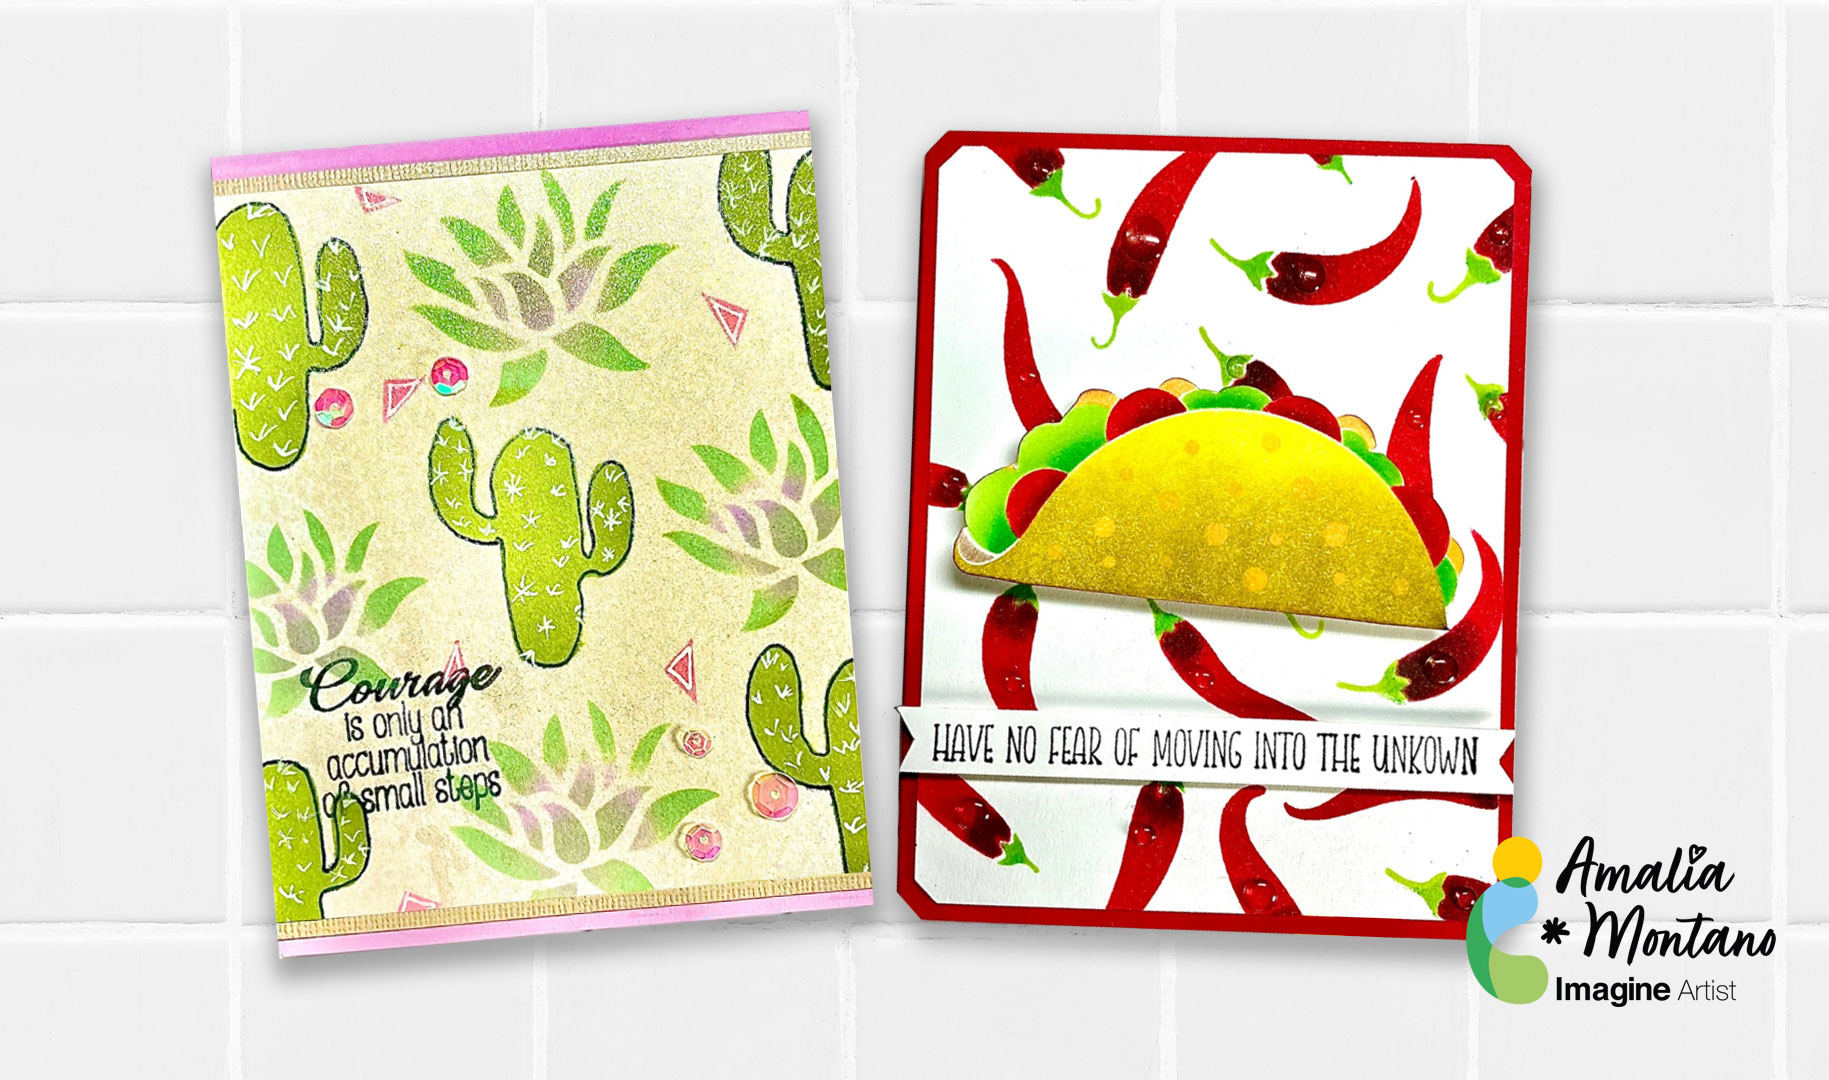
Make a Butterfly Birthday Card

By Ceal Pritchett

Hello crafty Friends!

Today I am sharing some creativity using the Memento Dew Drops in rainbow colors.
To make my card, I used a faux watercolor technique that I will share the steps below.

Skill: Beginner to Intermediate
Time: 30 to 45 minutes

Directions:

For the background, you will need a water friendly piece of cardstock, like Bristol or heavystock which I am using. A background stamp, a rainbow of ink colors and a water mister bottle.

Step 1:
Randomly ink up the background stamp with the different colors of ink and ten spritz with water.

Step 2:
Place your panel of cardstock down on your craft mat, then place the inked background stamp that you spritzed with water over it and press down. Allow it to sit for a few seconds and then lift the stamp off to see the results.

Step 3:
Die cut the sentiment. I cut three of the backers in white and the sentiment once out of black. Adhere them together using On Point glue. 

To finish the card, adhere an A2 black panel of cardstock to the A2 card base. Cut down the butterfly panel to 4 X 5.25 and adhere to black panel. Adhere the die cut sentiment in the center of the butterfly panel.

Products Used:

Imagine:
• Memento Dew Drops
Rose Bud, Tangelo, Dandelion, Pear Tart, Teal Zeal, Danube Blue and Grape Jelly
On Point Glue

Other Supplies:
Butterfly background stamp – Hero Arts
Happy Birthday Die – Honey Bee Stamps
Pitch Black cardstock – Hero Arts
120lb Classic Solar White cardstock – Neenah
Distress White Heavystock – Ranger

Winter Wishes Card with Re-inkers

By Alison Heikkila

Hello! I’m Alison Heikkila and I’ve got my latest YouTube video for Imagine to share with you today. We’re going to use dye re-inkers on a Gel Press Plate with a pretty stencil to make some cool wintery monoprints. This is one of those instances where I wanted to just keep pulling prints, but I thought you’d want to see a finished card this time.

*Some affiliate links are used in this post. That means that if you shop through these links, I may receive a small compensation, at no cost to you. For more information, please see my Affiliates page, where I also have some coupon codes.

Skill Level: Basic to Intermediate
Time to Complete: 20+ minutes, depending on how many prints you pull.

Craft Supplies Used:
Imagine:
Dye Ink Reinkers in Pansy, Lavender, Ultramarine
Memento Inks in Summer Sky, Bahama Blue, Paris Dusk, Elderberry
VersaFine Clair Ink in Fantasia
Fireworks! Spray in Grape Jelly
On Point Glue

Other:
Gel Press: 6×6 Plate
A Colorful Life Designs: Flake Meltdown Stencil
Creative Expressions: Festive Collection: Wishes
The Rabbit Hole Designs: Cotton Tail Blending Brushes
Bearly Arts Glue
Michaels: Blue Foiled Cardstock
Blue and Purple Sequins
Copy Paper
White Cardstock

This is a great card for winter birthdays (like mine!), or perhaps you didn’t get around to sending all of your holiday cards. However, this would make a great holiday card too! I hope you pull out your re-inkers and give this a try with some of your stencils. Thanks so much for stopping by. Have an inspiring day!

Make a “Best Wishes To You” Stenciled Card

By LeeAnn McKinney

~ Hi there friends and fellow crafters, LeeAnn here with a fun wedding card that can really be adapted to any event.

Skill Level: Beginner-Intermediate Level

Time: 25 minutes 

Crafting Supplies:

Imagine

• On Point Glue

• Memento Grape Jelly Dye Ink

• Tear It! Tape

• VersaFine Clair Nocturne

• Memento Dew Drop Bamboo Leaves

• StazOn Stamp Cleaner

• Angel Pink Memento Ink

• LuLu Lavender Memento Ink

• New Sprout Memento Ink

Other Products Used:

STENCIL- Masks and Fillers by Gina K Designs

STENCIL- Curved Floral Layering Stencil by Gina K Designs

DIE- Curved Floral Banner by Gina K Designs

Paper- White and Black Heavyweight Cardstock by Gina K Designs

Create Your Own Plaid Paper with Memento

By LV Handcrafted

– Hello friends! This is Linh (or LV Handcrafted on all the socials). In today’s video I’m showing how to use your Memento Dew Drop inks to create a perfectly coordinated card. First, I created a background using Love Letter and Teal Zeal to create a plaid. I made a custom ink color by over-stamping multiple times with both colors!  I used Teal Zeal to create a coordinating solid color cardstock by just swiping it across white cardstock.  Finally, I smooshed Love Letter and Teal Zeal and used a waterbrush pen to color in my stamped image.  For the skin, I used Peanut Brittle and for the hair I used Espresso Truffle.

Skill: Beginner

Time: 20 minutes

Supplies Used

Imagine:

– Memento Dew Drop – Love Letter, Teal Zeal, Peanut Brittle, Espresso Truffle

Other Products Used:

– The Greeting Farm – Anya Combo Kit 2

Father’s Day Card Using Memento and Fireworks! Craft Sprays

By Katy Ingram

Hello Friends! Katy here and today I am sharing how I blended my Fireworks! Sprays with Memento Ink pads to create some custom colors. 

In todays video tutorial I am use some Fireworks! Pear Tart, Bamboo Leaves and London Fog sprays mixed with Memento inks in greens and blues to create a Father’s Day card. I find any type of leaf foliage works really well for masculine cards and this one is no exception. I added some splatter with remaining blues and London Fog Fireworks! and also used some irRESISTible spray in Wedding Dress to complete the look. The video below has all the details, check it out below.

Katy

Skill: Advanced

Time: 20 minutes

Art Supplies

Imagine Products

Fireworks! Craft Sprays

  • Pear Tart
  • Bamboo Leaves
  • London Fog

Memento Inks

  • Cottage Ivy
  • Northern Pine
  • Olive Grove
  • Teal Zeal
  • Bahama Breeze
  • Nautical Navy
  • Paris Dusk

VersaMark Ink

Mboss Embossing Powder White

irRESISTible Spray Wedding Dress

On Point Glue

Tear It! Tape

Other Products Used

• Arches Hot Pressed Watercolor Paper (Fern Background)

• Simon Says Stamp Card Stock Slate (Card Base)

• Black Card Stock (Sentiment Strip)

• Ivory Twine

• Spray Adhesive

• Watercolor brush #10 round

Let’s Make a Magical Fairy Card

By Kathi Rerek

Greetings! It’s Kathi here to show you how to create fairy card with a magical shimmer using Memento Inks and Sheer Shimmer Sparkle Spray.

Skill Level: Beginner to Intermediate

Time: 1.5 hours

Instructions:

Step 1:

Smoosh Paris Dusk Memento Dew Drop Ink onto the craft mat. Mist with water and use a paint brush to apply diluted ink to the right edge of a 5.25” x 4” panel of watercolor paper.

Repeat with Blue Danube and then with Bahama Blue Memento Dew Drop Ink Pads until the entire panel is inked. Heat set the panel.

Step 2:

Ink the Sheet Music Texture Red Rubber Cling Stamp with Blue Danube Dew Drop Ink and randomly stamp onto the panel.

Step 3:

Spray the panel with Sheer Shimmer Sparkle Spray. Heat Set and admire the sparkle!

Step 4:

Using a stamping platform, position the Trinity Fairy Clear Stamp onto the image panel. Ink with Nocturne VersaFine Clair Ink and stamp. You might need to re-ink and stamp to achieve a clear impression.

Remove the panel from the stamping platform and heat set.

Step 5:

Place the image panel back onto the stamping platform. Position one of the notes from the Music Notes Small Clear Step Set facedown above the fairy’s horn. Ink the stamp with Nocturne VersaFine Clair Ink and stamp.

Remove the note stamp from the stamping platform. Place another note stamp from the same set, slightly to the right of the previously stamped note. Ink and stamp with Nocturne VersaFine Clair Ink and stamp.

Remove the second note stamp from the stamping platform. Place the four notes stamp to the right of the other notes. Ink the stamp with Nocturne VersaFine Clair Ink and stamp.

Heat Set the notes.

Step 6:

Smoosh the Rose Bud Memento Dewdrop Ink pad onto the craft mat. Mist with Sheer Shimmer Sparkle Spray.

Use a paint brush to apply the shimmery pink ink to the fairy’s wings. Heat set.

Step 7:

Trim the image panel to 3 5/8” x 4 7/8”.

Use a Sponge Dauber and Paris Dusk Memento Ink to edge the top part of the image panel. Use the Sponge Dauber and Blue Danube Memento Ink to edge the bottom part of the image panel.

Step 8:

Create an A2 card from white cardstock. Insert a piece of scrap paper into the card.

Use Sponge Daubers to ink the periphery of the white card with Paris Dusk and Blue Danube Memento Inks.

Step 9:

Cut a piece of black cardstock to 3 3/4” x 5”.

Use Tear It! Tape to mat the image panel with the black cardstock panel, then use the tape to adhere the matted panel to the inked card.

Art Supplies:

Imagine Crafts Supplies:

Other Supplies:

  • 140 lb. Watercolor Paper by Canson
  • Solar White Classic Crest Cardstock by Neenah Papers
  • Trinity Clear Polymer Stamp by Lavinia Stamps
  • Music Notes Small Clear Polymer Stamp Set by Lavinia Stamps
  • Sheet Music Texture Red Rubber Cling Stamp by Darkroom Door
  • Misti Stamping Platform by Petunia
  • Heat Gun by EK Success