
by Jowilna Nolte
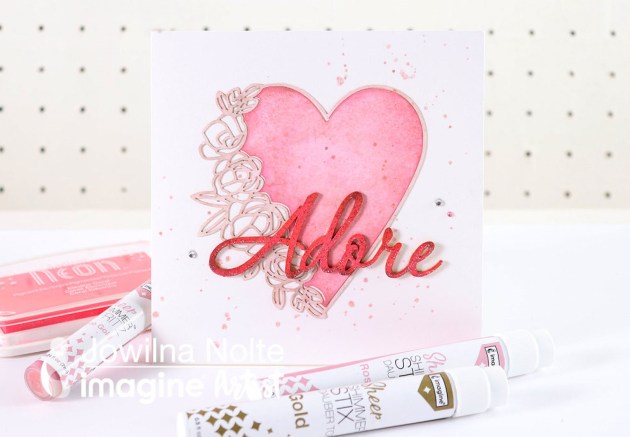
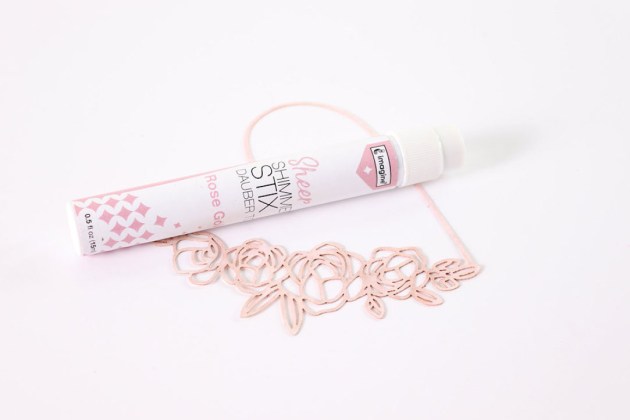
The new Sheer Shimmer Stix shows the range of products from Imagine and how the control of the dauber adds just the right amount of shimmer and shine to any crafting projects. Take a look at how this die-cut element is transformed into the star of the show with a few strokes of genius using the clever new Shimmer Stix.
Skill: Advanced
Time: 20 minutes
Directions
Step 1
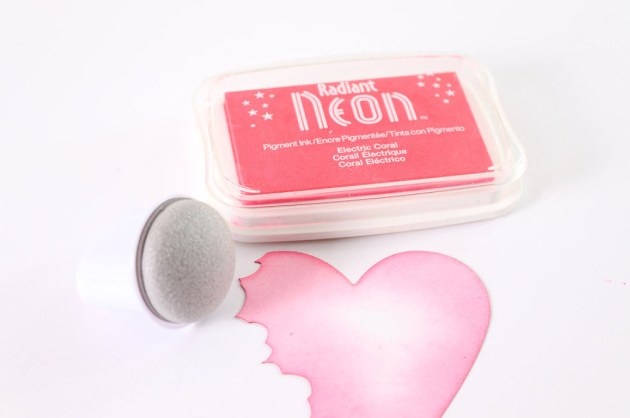
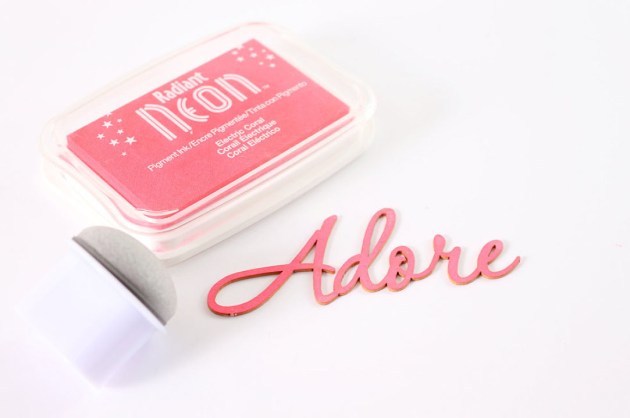
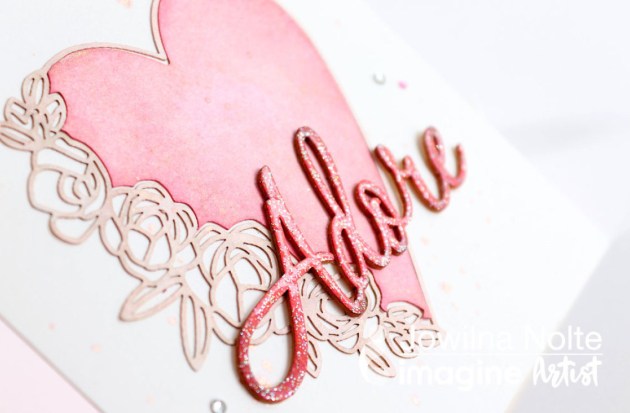
Use a pre-cut heart or download the cut file from the link in the products list below and cut with a Cricut machine. Create the die-cut heart and take it apart. Use a jumbo dauber and blend Radiant Neon Coral around the outside edges.
Step 2
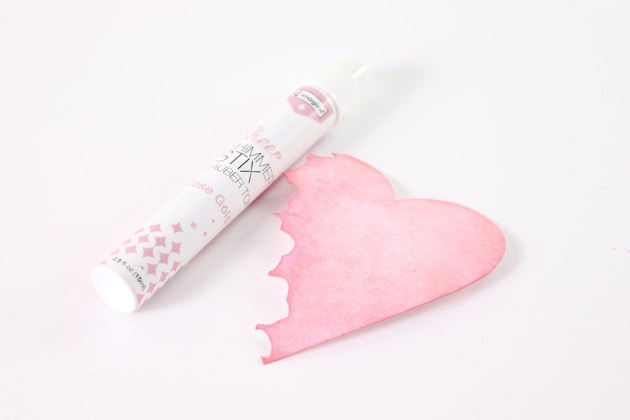
Use the Rose Gold Sheer Shimmer Stix to add shimmer over the inked heart.
Step 3
Use the same Shimmer Stix to add color and shine to the outside of the die-cut heart. Leave to dry.
Step 4
Ink a chipboard sentiment using Radiant Neon Coral ink pad.

Step 5
Ink the chipboard sentiment with VersaMark ink pad and sprinkle with glitter embossing powder. Heat the powder until fully melted with your heat gun. Use On Point Glue to adhere the outside and the inner of the die-cut heart to the front of your folded card.
Step 6
Use Rose Gold Sheer Shimmer Spritz to add colored splats to the background of your card and leave the ink drops to dry. Adhere the embossed sentiment to the front of the card and finish off diamanté. The shimmer created by the embossed sentiment and that of the Sheer Shimmer Stix and Spritz makes for an amazing shiny card.
Supplies
Imagine
- Craft Mat
- On Point Glue
- VersaMark
- Radiant Neon Inkpad – Electric Coral
- Sheer Shimmer Stix – Rose Gold
- Sheer Shimmer Spritz – Rose Gold
- Embossing Powder – Sparkle
- Sponge Dauber
Other
- White cards
- Short Cuts Craft – Paige Evans Heart & Flowers Die-cut Download File
- Celebr8 Chipboard – “Adore” sentiment
- Cricut Machine
