By Jessica Lin
Skill: Beginner
Time: 30 minutes
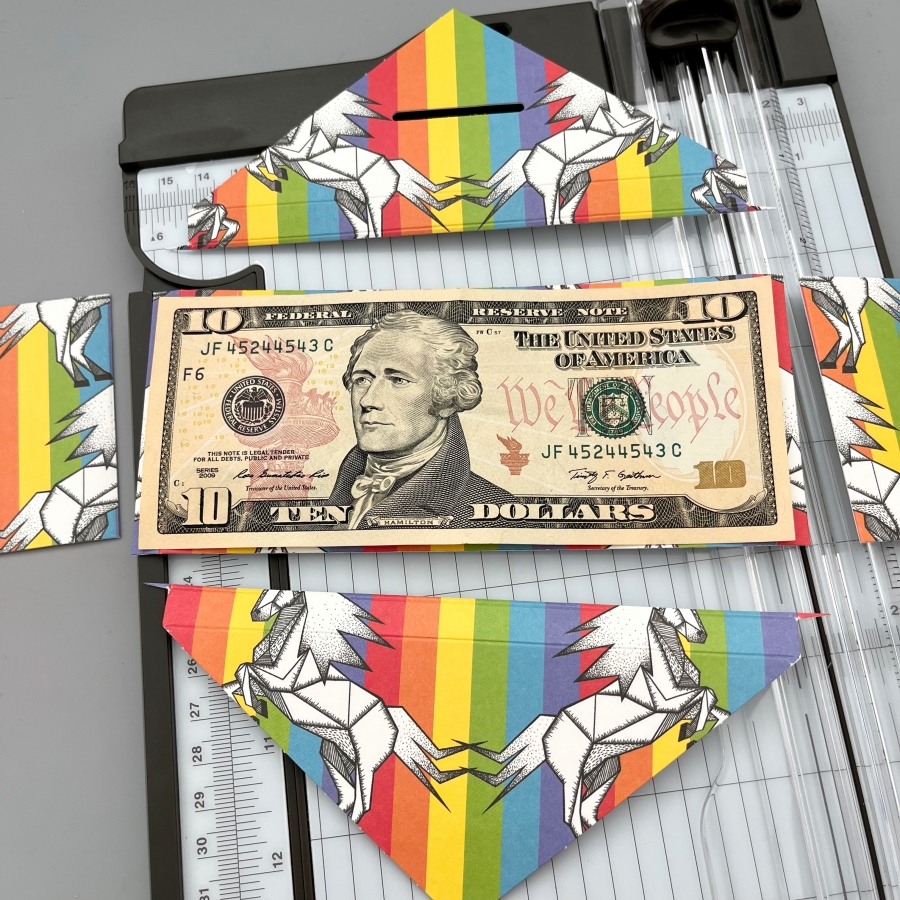
Hi everyone, it’s Jessica here. Christmas is right around the corner. Did you start preparing presents and gifts for the holidays? I recently received several Iceland chocolates and their packaging is so adorable! I decided to upcycle them into money holders which is perfect for the upcoming gift-giving season. If you like this idea, just keep reading!
Step 1:
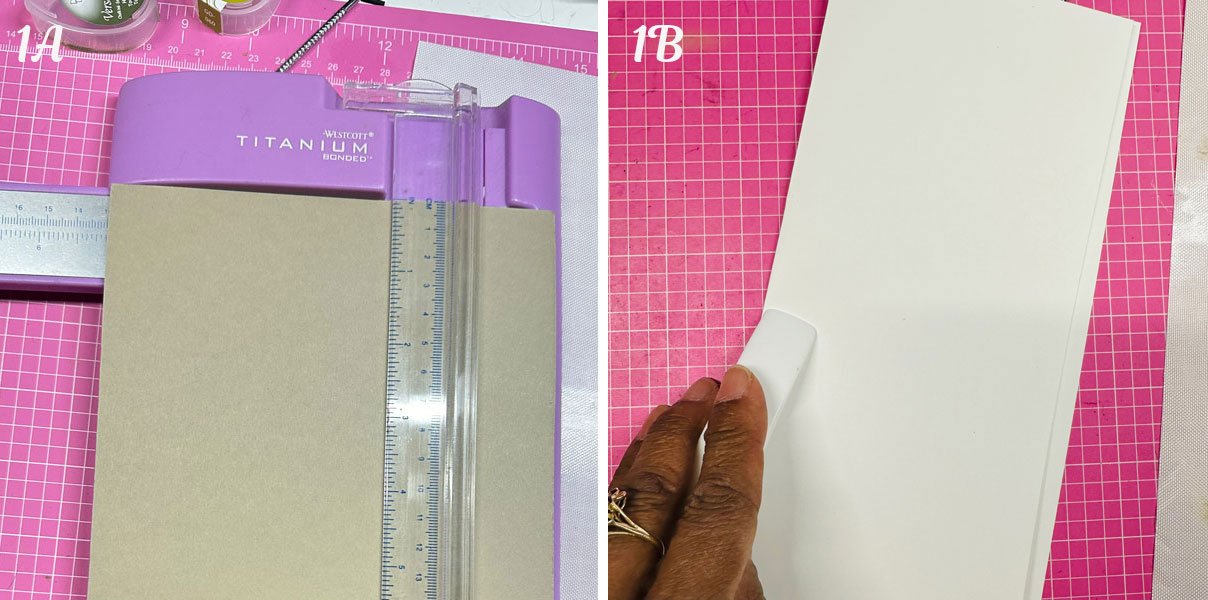
Trim the chocolate bar packaging to size. For U.S. dollar bills, I trimmed down to 6 3/8‘’ x 2 3/4‘’. This was the largest size I could get from this packaging. If your packaging is larger, 6 1/2‘’ x 2 7/8‘’ would be a great size too.

Step 2:
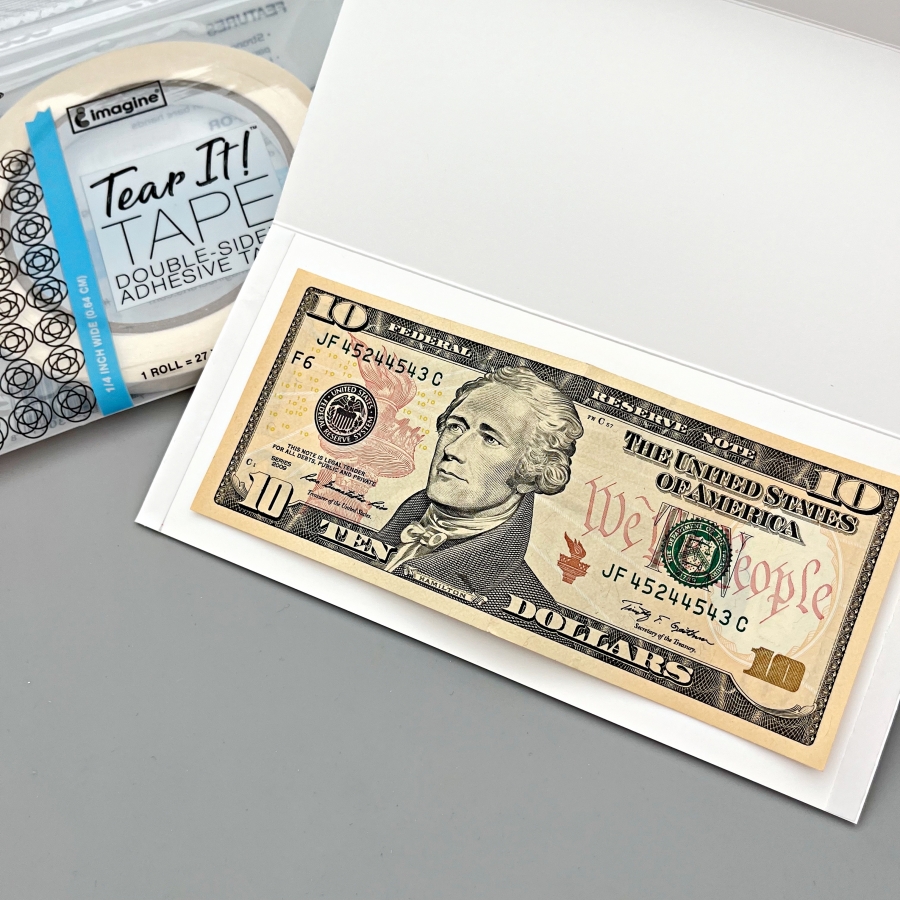
Cut and score a piece of white cardstock to create the envelope base. I started with a 7’’ x 7 1/2’’ piece of cardstock and scored at 3 5/16‘’ to create a 7’’ x 3 5/16‘’ envelope. This envelope also has a small flap closure but it sticks out a little bit. If you would like a larger flap that lays flatter, you could use a 7’’ x 8’’ piece of cardstock instead.
Step 3:
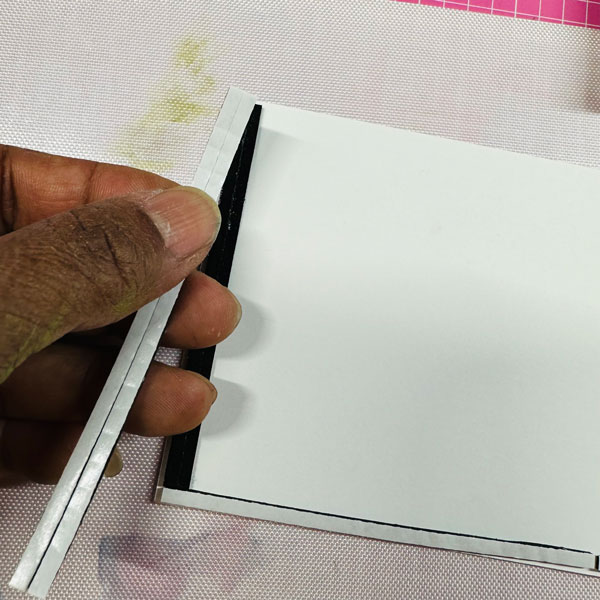
Apply Tear It Tape to both ends of the envelope and adhere together to form the envelope pocket.
Step 4:
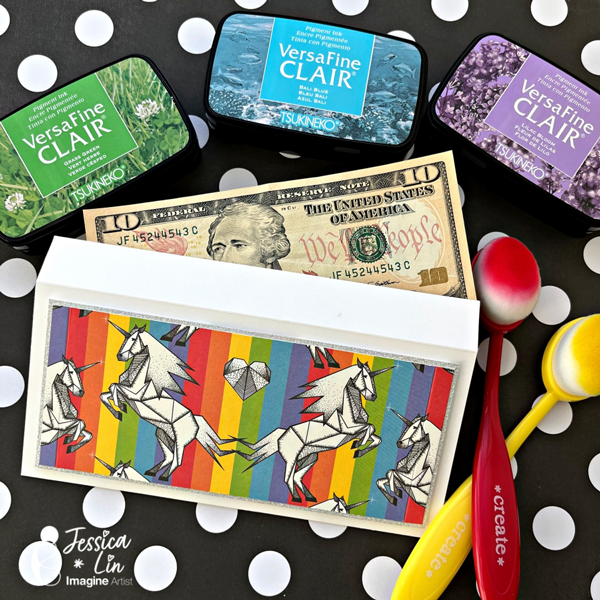
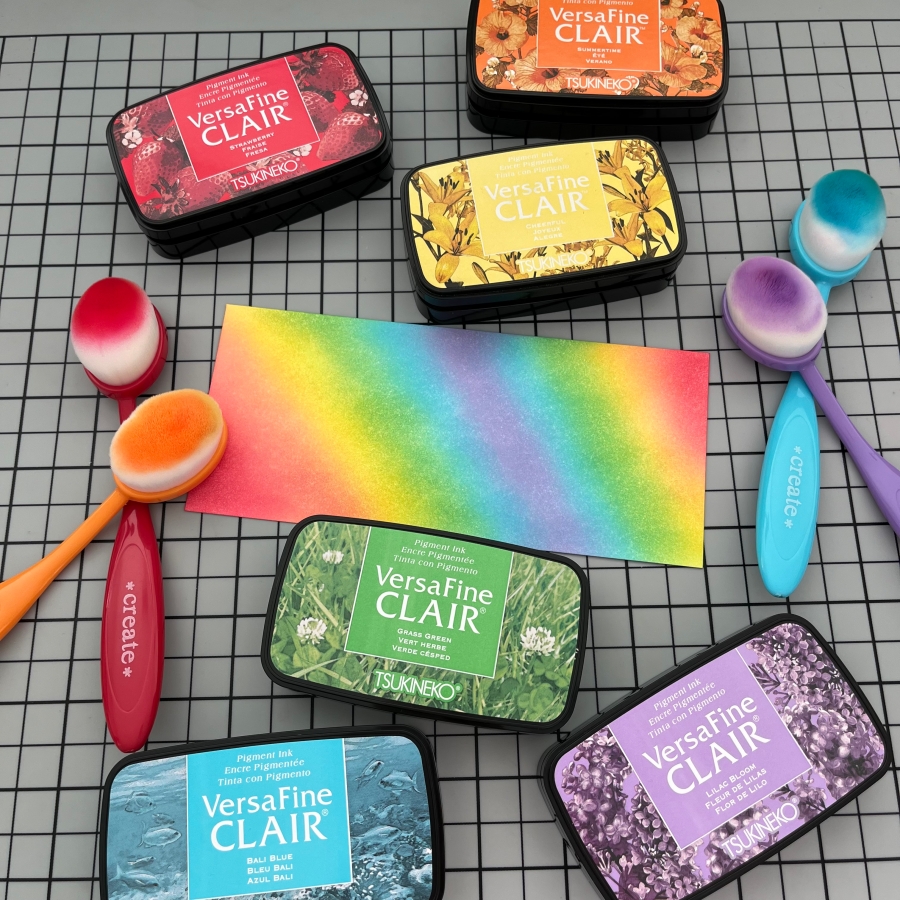
I decided to decorate the backside of the envelope as well. I ink blended a 6 3/4‘’ x 3’’ piece of cardstock with Strawberry, Summertime, Cheerful, Grass Green, Bali Blue, and Lilac Bloom VersaFine Clair inks. I love the newly released ink colors. They create such a vibrant rainbow gradient!
Step 5:
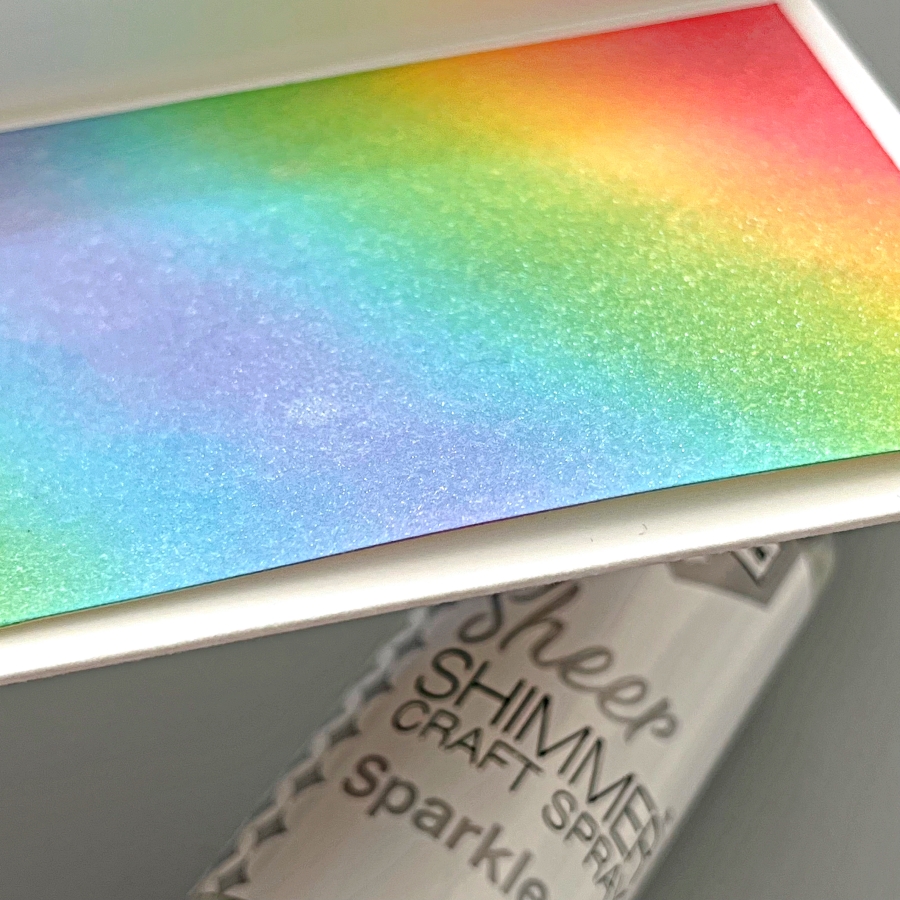
For additional shimmer and shine, generously spritz a layer of Sheer Shimmer Craft Spray (Sparkle) and let dry.
I hope you enjoyed this tutorial and would try upcycling pretty packaging in the future. Thank you so much for stopping by, and I’ll see you next time!
Imagine Supplies:
- VersaFine Clair – Strawberry, Summertime, Cheerful, Grass Green, Bali Blue, Lilac Bloom
- Sheer Shimmer Craft Spray – Sparkle
- Tear It! Tape
- StazOn Cleaner
- Craft Mat
Other Supplies:
- Paper Trimmer
- Color packaging or patterned paper
- White cardstock