
By Martha Lucia Gomez
Hello crafty friends! Today, I have a new tutorial to create backgrounds. On this opportunity I am using the Swipe Ink Technique. Basically, you swipe the ink pad over your cardstock but this time we are using Kaleidacolor Inks that has 5 different colors in one single ink pad or swipe.
Skill: Intermedia
Time: 60 minutes
Directions:

Step 1:
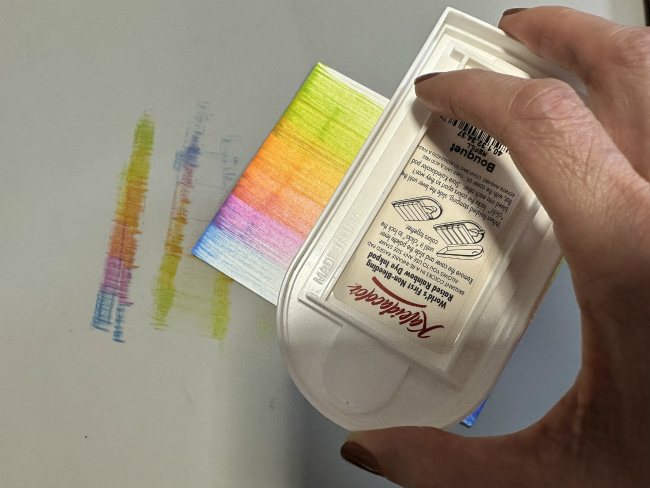
Pick your favorite Kaleidacolor Ink Pad. To make my project, I selected the Bouquet and white smooth cardstock.
Step 2:
Active your swipe putting together all the colors of your ink pad. Place the cardstock over the mat and softly swipe the ink over the paper without up your hand.
If you want, you can go from up to down in a single swipe or in any direction. In my sample, I stopped in the middle and turn around the cardstock to repeat the process and have the center of the cardstock clean or without color.
Let the ink dry naturally before continuing with the next steps or repeat the process to create your own layout.
Step 3:
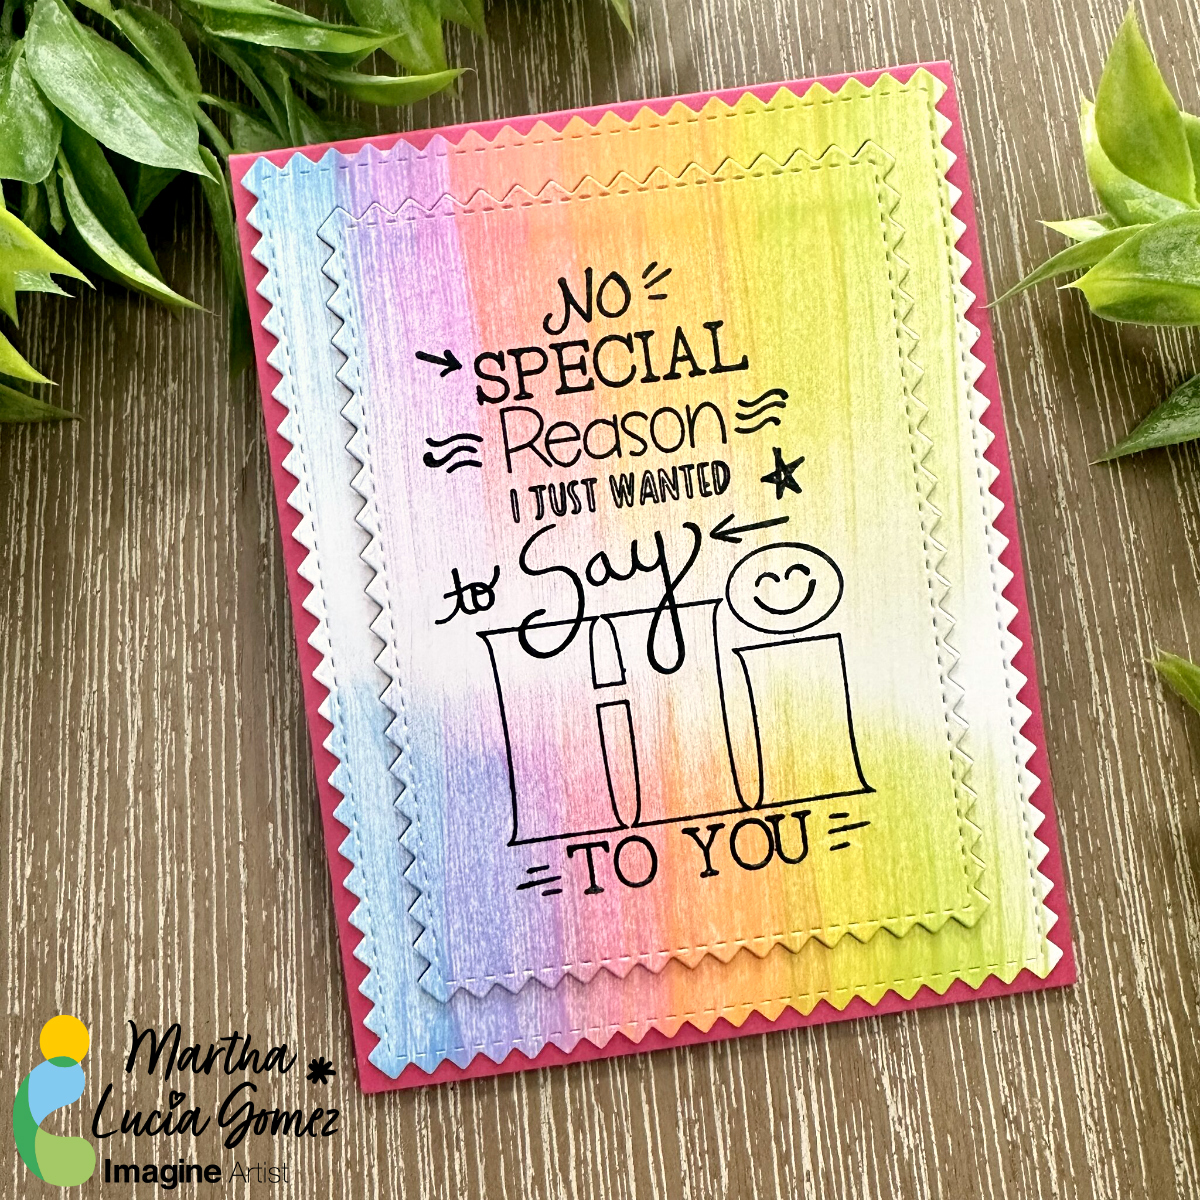
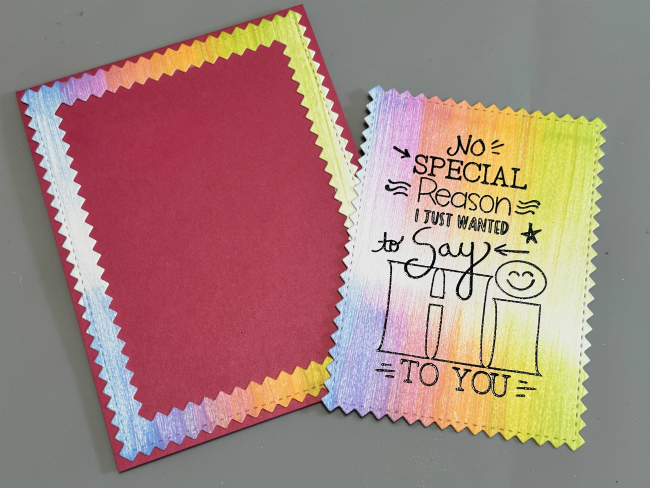
When the inked cardstock is totally dry, you can resize it or die cut It. Also, you can stamp over it, just like I made. I stamped a larger image over the center of the inked panel with VersaFine Clair Nocturne and heat embossed it with clear embossing powder. Then, I resized the layer with Zig Zag Stitched Rectangles.
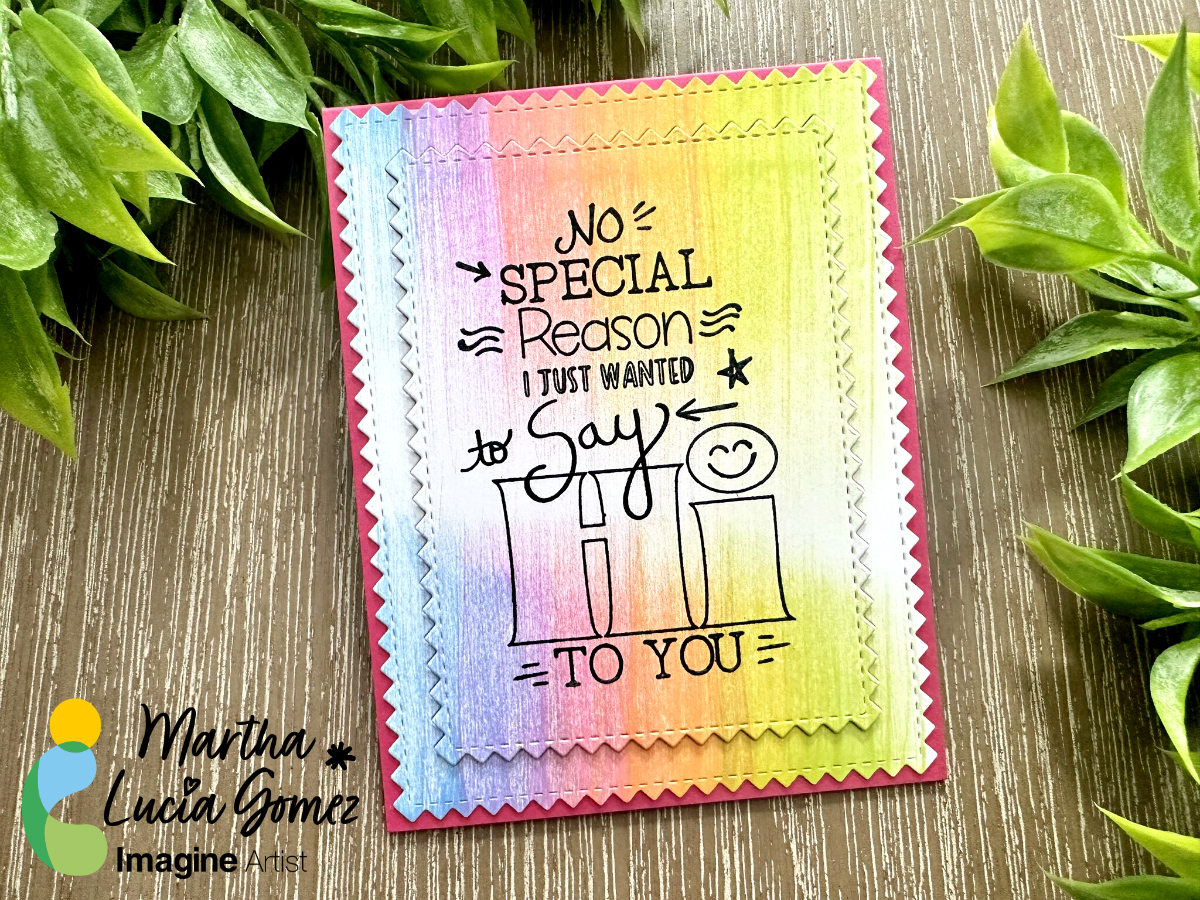
Step 4:
To add more interest to the card, I pasted the large frame with Tear It! Tape over the card base. Then, I pasted the small rectangle with crafty foam tape to have more dimension.

Thanks for stopping by and remember, you don’t need to create complicated projects. Just use the best inks and let your creativity shine!
Art Supplies:
Imagine:
Other:
- Melon Mambo and White Smooth Cardstock
- Die Cut Machine
- Zig Zag Stitched Die Cut Frames
- Crafty Foam Tape
