
By Helen Gullett
Hello hello hello crafty friends! Today, I have this Funky Card to share with you. Creating that funky background is super fun and easy. I totally had fun with some of the VersaColor ink pads!
Skill: Intermediate
Time: 30 minutes
Direction:
Step 1
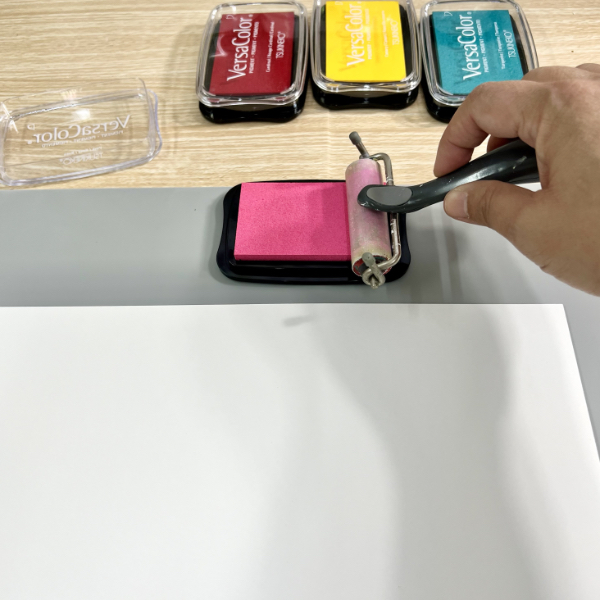
We will work on a whole piece of 8.5 inch x 11 inch heavyweight white cardstock. Pick 3 or 4 colors you want to use. Make sure the choice of colors won’t muddle when you mix them together.
Roll the mini brayer directly on the VersaColor ink pad several times.
Step 2
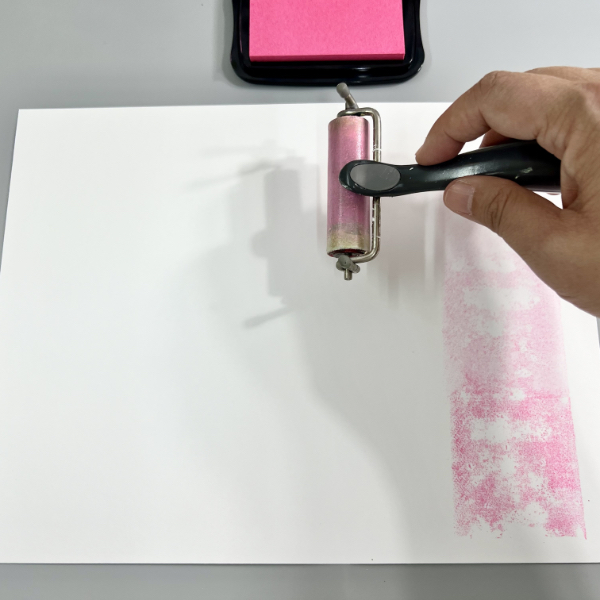
Roll the inked mini brayer on the white cardstock in any direction you want vertically and horizontally.
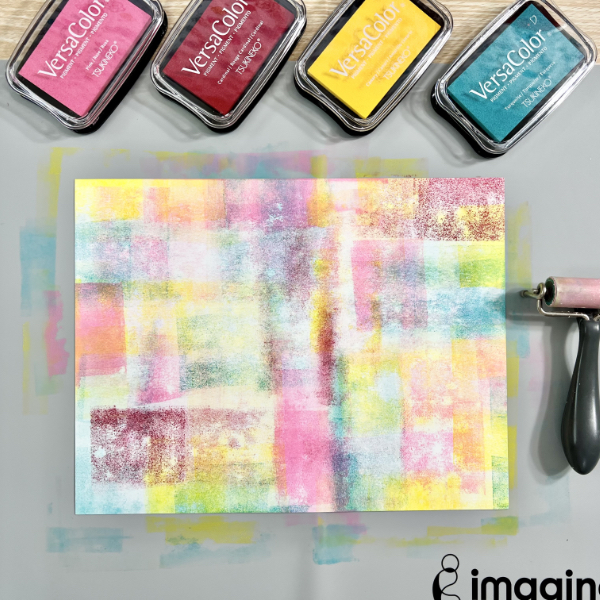
Do the step 1 and step 2 several times for each color you want to use for your background.
Step 3
After several times adding inks on the cardstock with a mini brayer, you can add more layer on top of the first one you did, or you can fill in the space as you want.
Use the Staz-On All-Purpose Stamp Cleaner and paper towel to clean the brayer.

Step 4
Next, pick a funky pattern background stamp to add texture on the inked cardstock.
Stamp the background stamp on it with VersaFine Clair Nocturne Ink Pad for contrast colors.
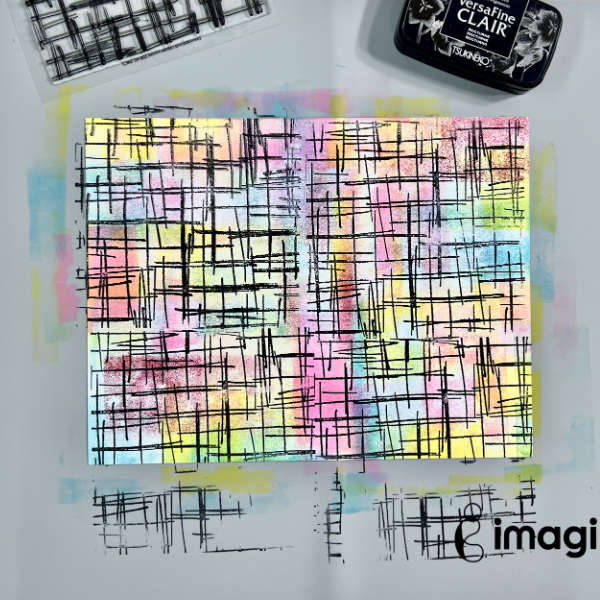
Step 5
Stamp it several times until you fill the whole cardstock. This will look very funky and messy but don’t worry you’ll find it will be fun to use it on project later.
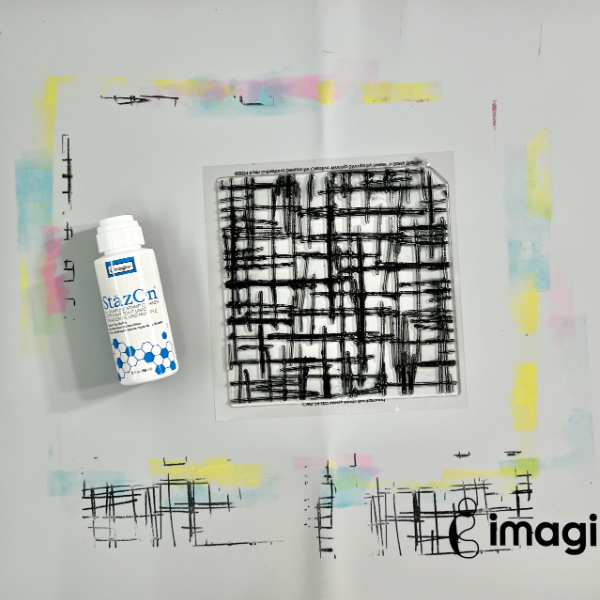
Step 6
After adding ink colors with mini brayer and stamping, the craft mat will look like in the picture above. Don’t panic! The inks will clean right off the mat with that amazing Staz-On All-Purpose Stamp Cleaner. Simply dab some of the cleaner on the mat and use paper towel to clean all the inks off. Repeat as needed.
Use the stamp cleaner also to clean ink off the background stamp, too.
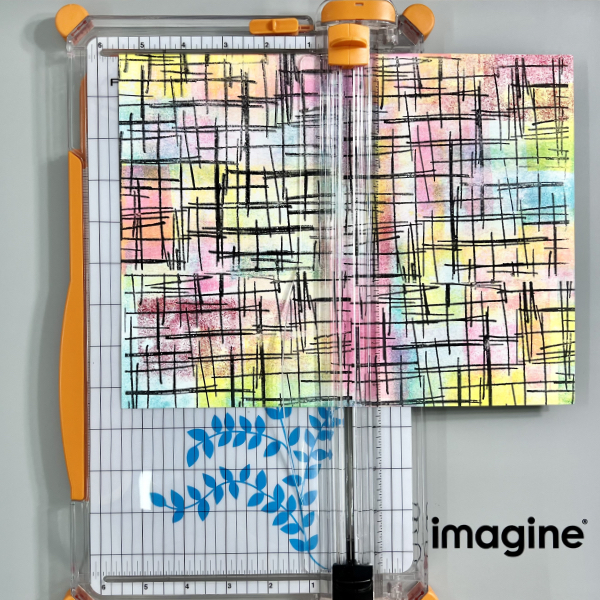
Step 7
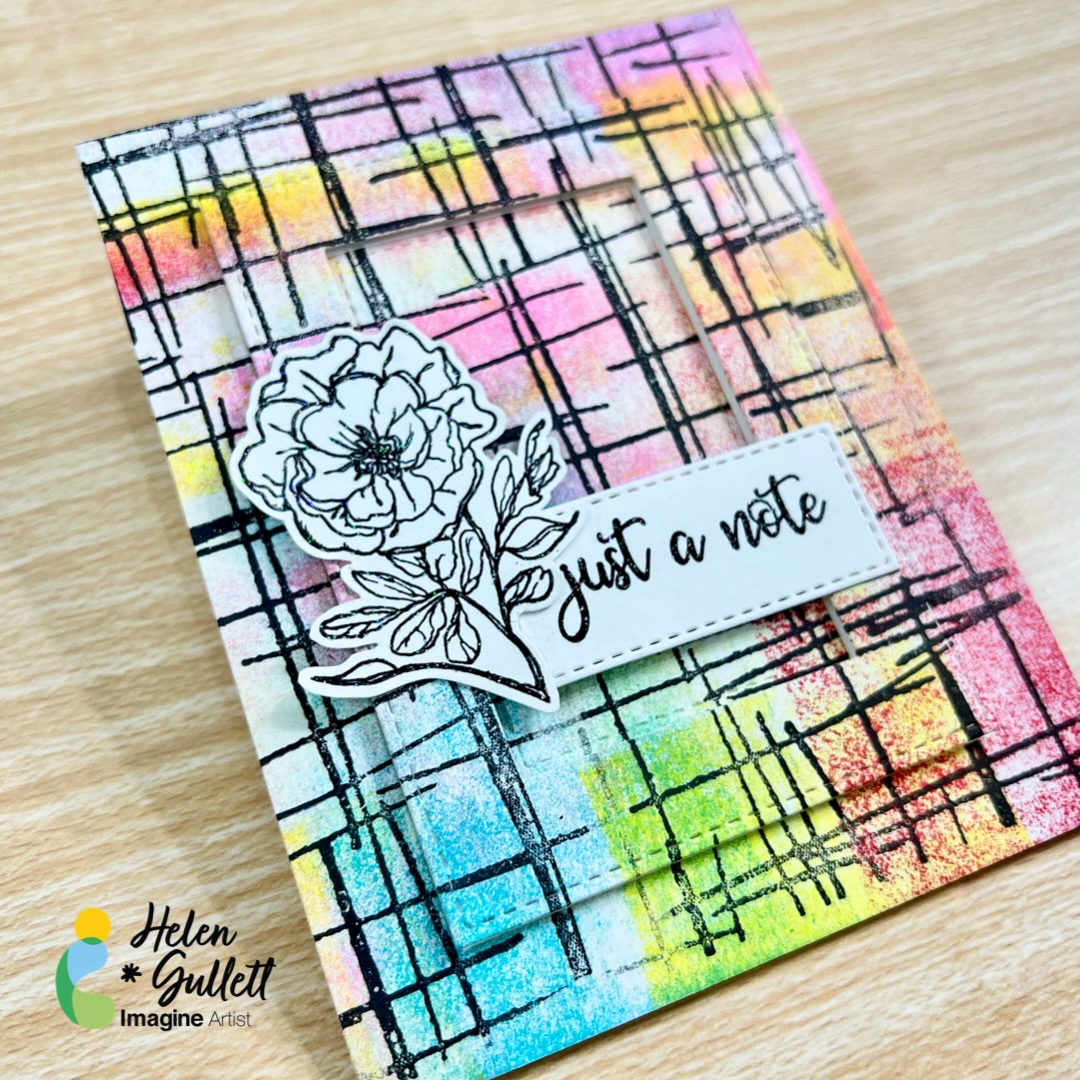
Next step, use the paper trimmer to trim cardstock into 4 – 4 ¼ inch x 5 ½ inch background panels.
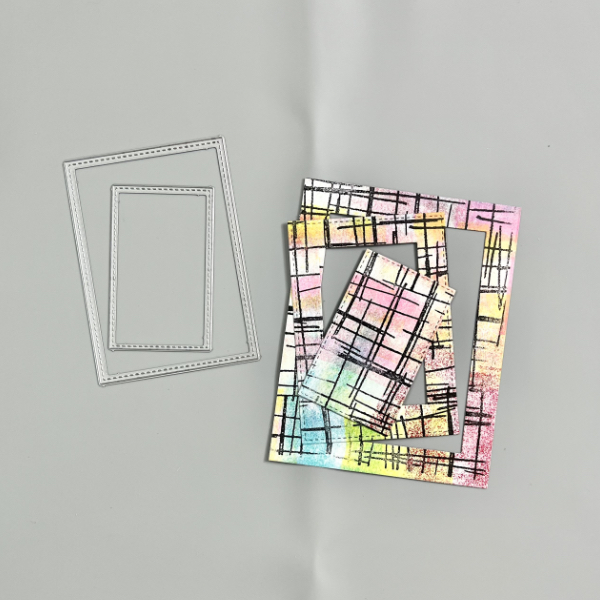
Step 8
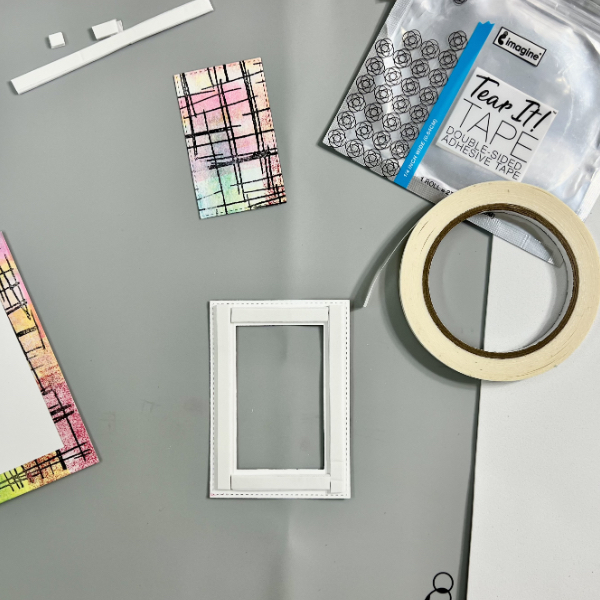
Cut one of the background panels using 2 sizes of rectangle dies.
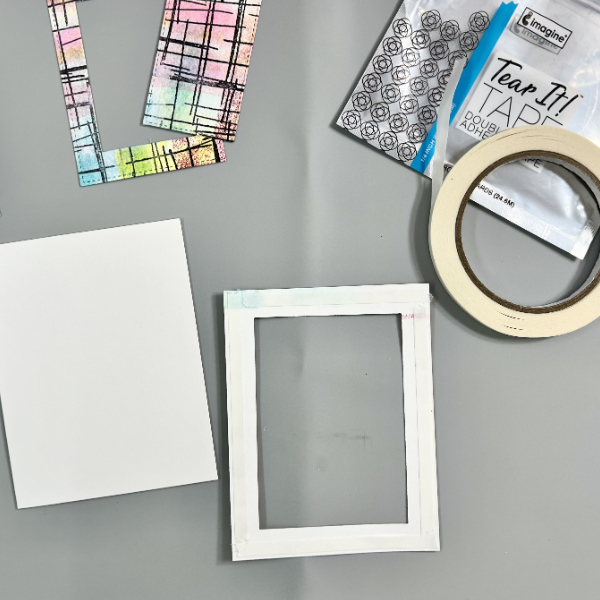
Step 9
Add some of the Tear It! Tape on the back of the largest frame. Peel off the backing and add the frame to an A4 card base (4 ¼ inch x 5 ½ inch card).
Step 10
Add some of the Tear It! Tape on thin fun foam to create some thin strips of 3D foam tape.
Add the foam tape on the second frame (the middle cut out), and add it to the card. Make sure the pattern matching with the first one on the card.
Final step for the background, add the last piece of the cut out in the middle of the card just with the Tear It! Tape.

Step 11
Stamp the flower on a piece of white cardstock with VersaFine Clair Nocturne Ink Pad using stamping tool or acrylic block.
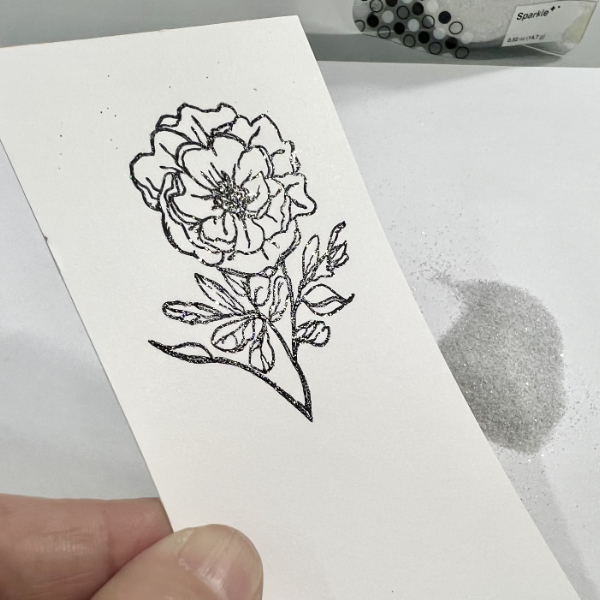
Step 12
Add some of the Sparkle Mboss Embossing Powder directly on the stamped image and heat it up with a craft heat gun. After embossing it, fussy cut the flower with micro-tip scissors (or use the matching die set if available for your stamp).
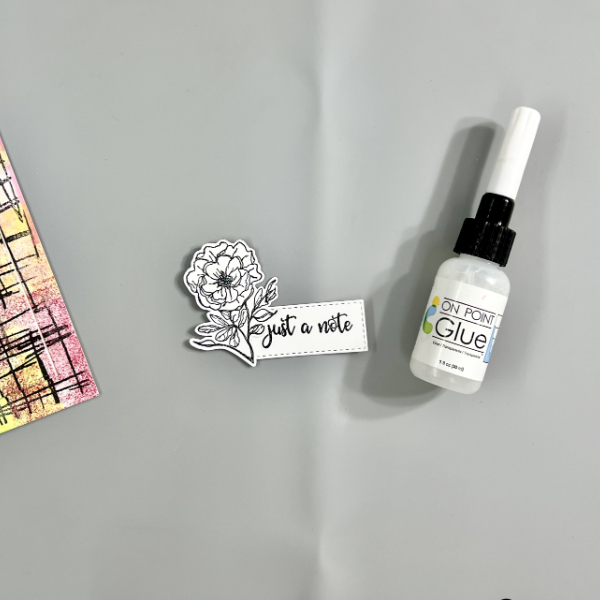
Repeat step 11 and step 12 for the sentiment. And then cut the sentiment with a label die (or you can just trim it with paper trimmer).
Step 13
Put together the flower and sentiment label with On Point Glue. Put a couple acrylic blocks on them and let the glue to dry.
After that, add them to the card with some of the fun foam in the middle and secure the edge on the raised frame with On Point Glue.
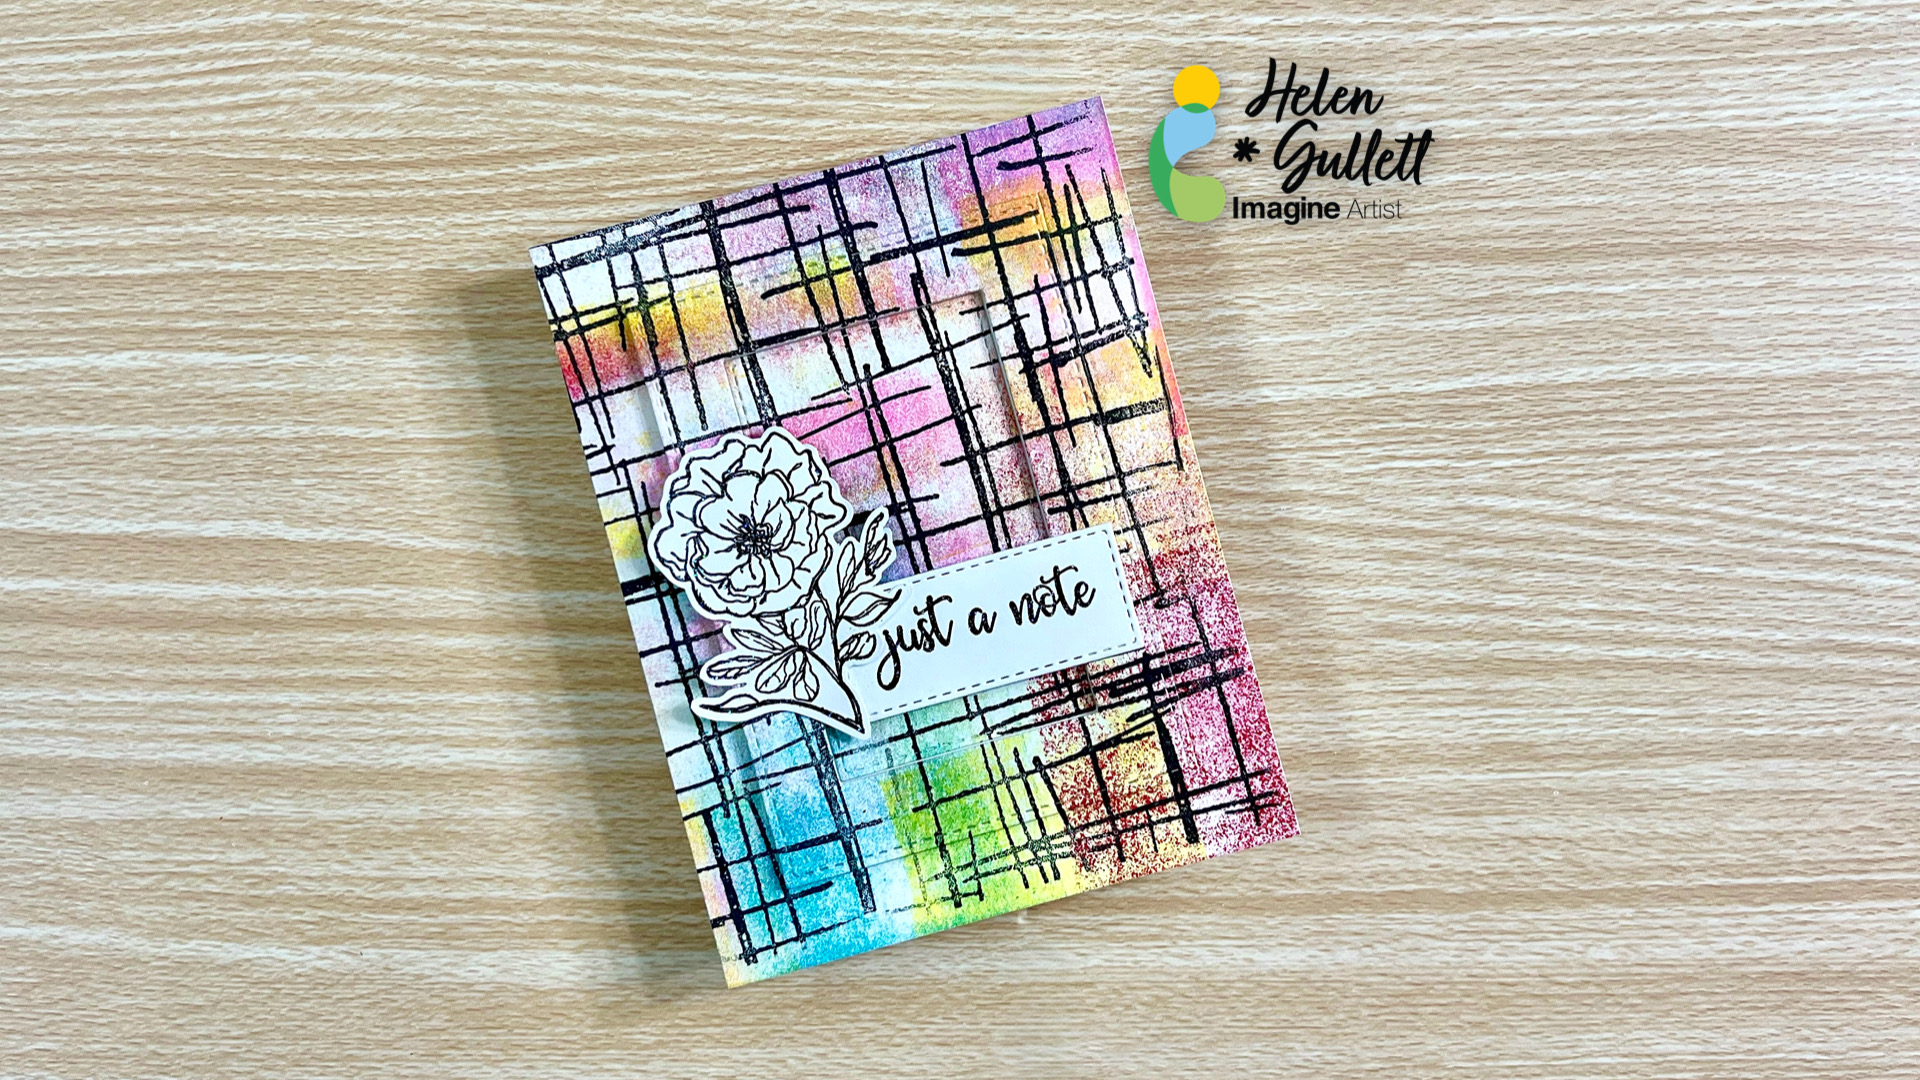
Here’s the finish card with some funky patterns and dimensions. Isn’t it fun? I hope you will give it a try and have fun creating your own funky background card.
Thank you so much for stopping by our blog today. Have a wonderful day!
Craft Supplies
Imagine Crafts:
- VersaColor Pink Ink Pad
- VersaColor Cardinal Ink Pad
- VersaColor Canary Ink Pad
- VersaColor Turquoise Ink Pad
- VersaFine Clair Nocturne
- Mboss Embossing Powder – Sparkle
- Tear It! Tape
- On Point Glue
- Staz-On All Purpose Stamp Cleaner
- Imagine Craft Mat
Others:
- Sweet ‘n Sassy Stamp – Dearest Friend Stamp Set
- Sweet ‘n Sassy Stamp – Courage Dear Heart Stamp Set
- Sweet ‘n Sassy Stamp – Messy Marks Background Stamp
- Sweet ‘ Sassy Stamp – Stitched Rectangle Dies
- Neenah Classic Crest White Cardstock 110lb
- Fiskar paper trimmer
- Gemini Junior die cutting machine
- MISTI stamping tool
- Micro-tip scissors
- White thin fun foam
- Mini Brayer
- Craft Heat Gun

Pingback: Funky Just A Note Card - Helen G. Designs