
By Kathi Rerek
Intro: Do you have passwords that continually need to be updated AND have problems remembering them? Do you write those letter-number-symbols somewhere, then end up with an overwritten mess?
Get an inexpensive memo book and use your inks, stamps, stencils, and dies to decorate it!
Skill Level: Intermediate
Time: 1.5 hours
Instructions:
Step 1:
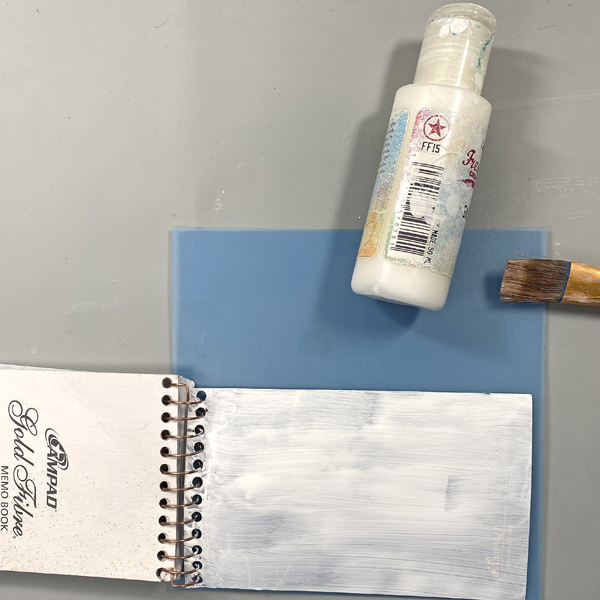
Use a paintbrush and Snowflake Fresco Finish Chalk Acrylic Paint to paint the front and back covers of the memo pad. You don’t have to be neat as brush strokes will only add texture to the project. You might need a second coat to cover the print on the back cover. Let dry, though this paint dries really quickly!
Step 2:
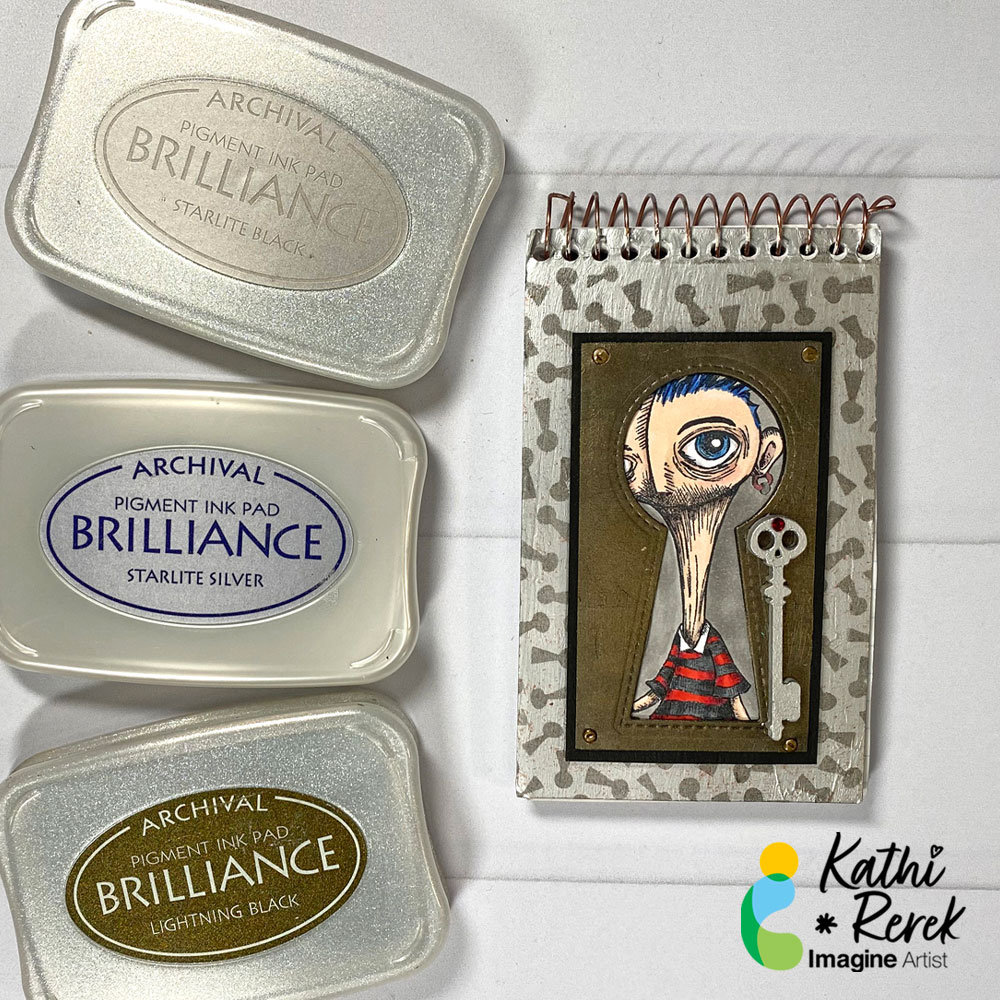
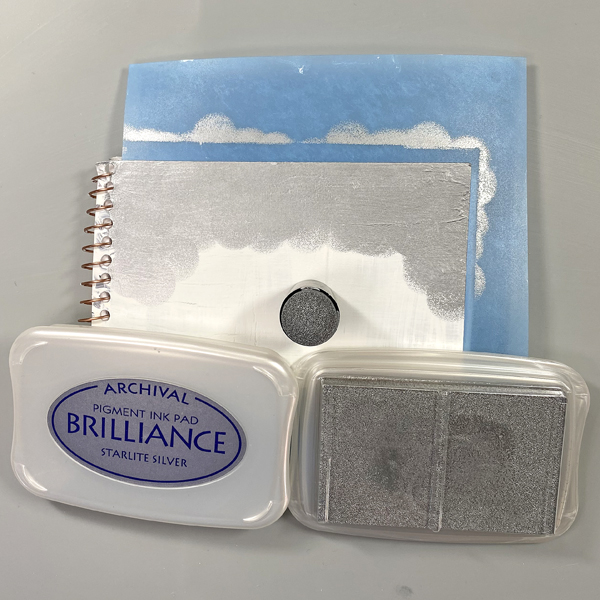
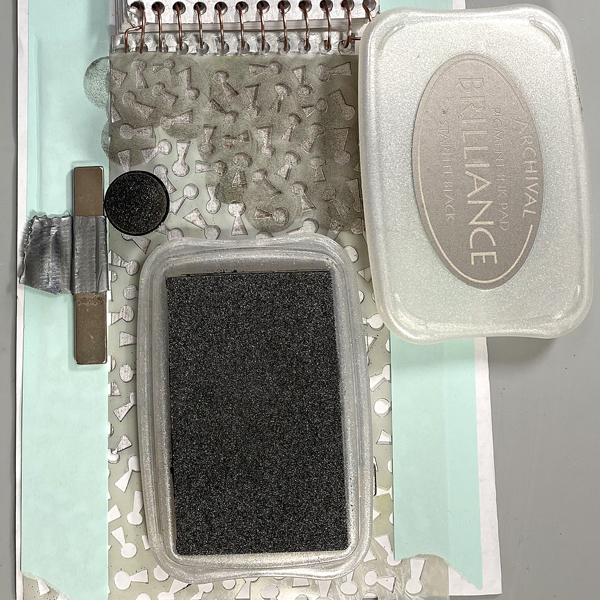
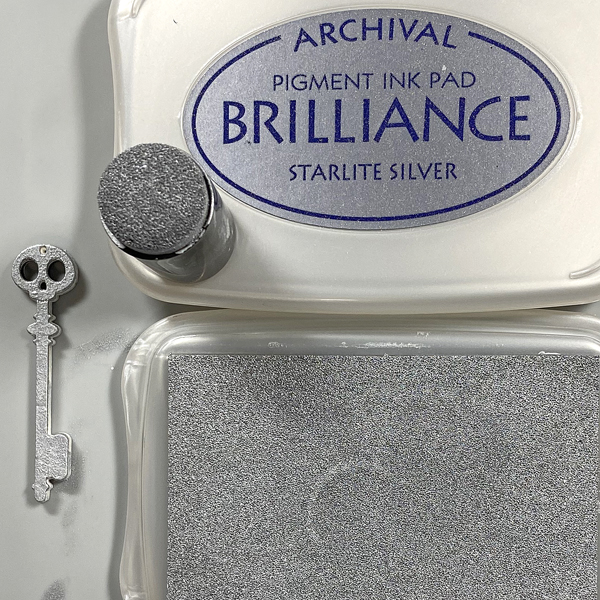
Use a Sponge Dauber to apply a Starlite Silver Brilliance ink to both the covers. Heat set.
Step 3:
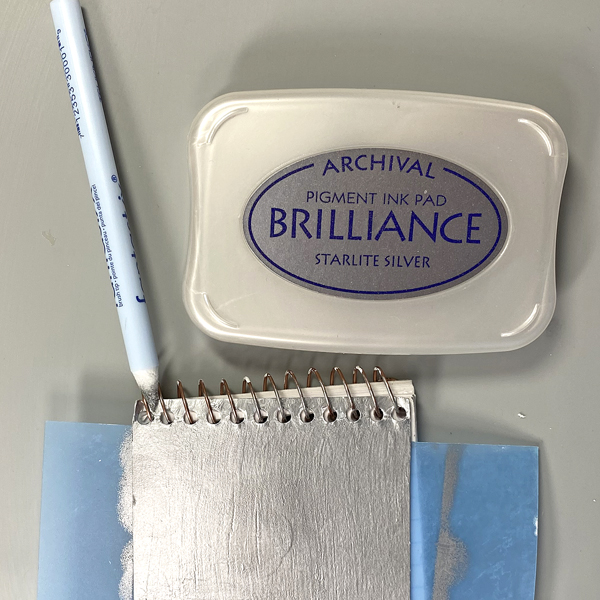
Use a Fantastix to apply Starlite Silver Brilliance ink around the binding rings of the pad.
Step 4:
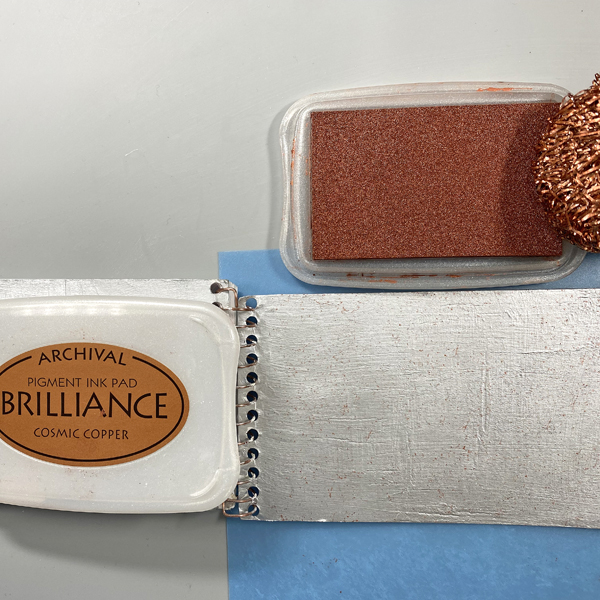
Use copper or steel wool pads to pounce Cosmic Copper Brilliance Ink spots and marks to both covers the pad. Heat set.
Step 5:
Place a magnet sheet under a piece of paper and set the pad’s front cover onto the paper. Place the Keyhole stencil over the notebook. Secure with magnets and/or low-tack tape. Use a Sponge Dauber to apply Starlite Black Brilliance Ink over the stencil onto the pad’s cover. Let sit for a few minutes and repeat the Ink stenciling. Remove the stencil and heat set the pad’s cover.
Step 6:
Use a Sponge Dauber to apply Starlite Silver Brilliance Ink to a small piece of black cardstock. Heat Set. Use the Keyhole Cutting Die to cut the inked cardstock. Sorry that there’s no photo.
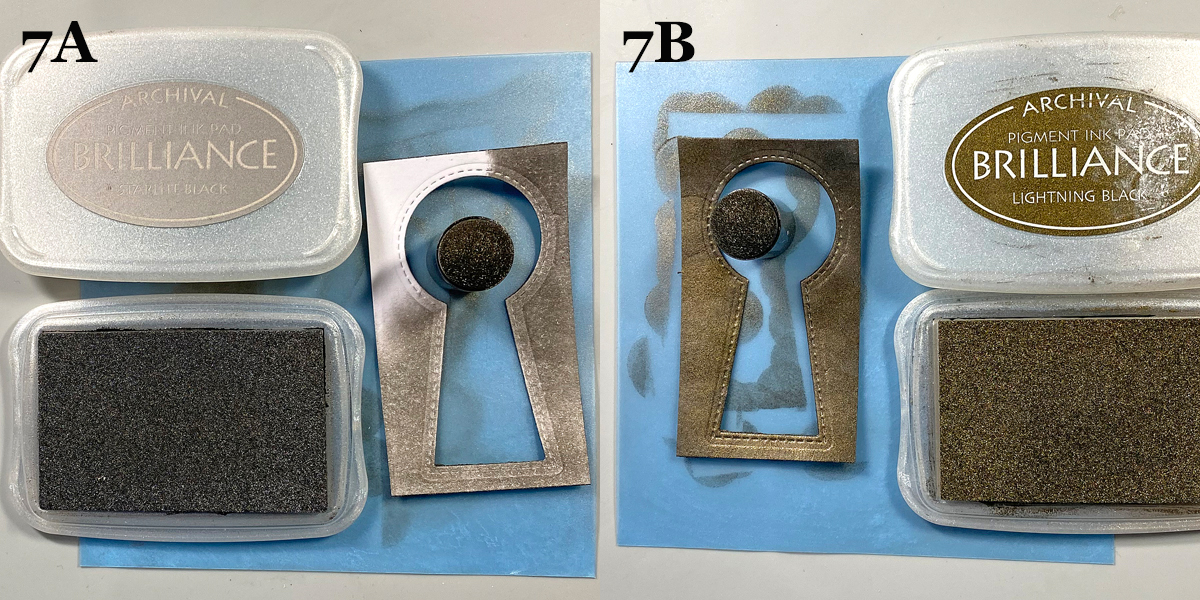
Steps 7A and 7B:
Use Starlite Black Brilliance Ink (7A) to add depth to the silver keyhole. Repeat with Lightning Black Brilliance Ink (7B).
Step 8:
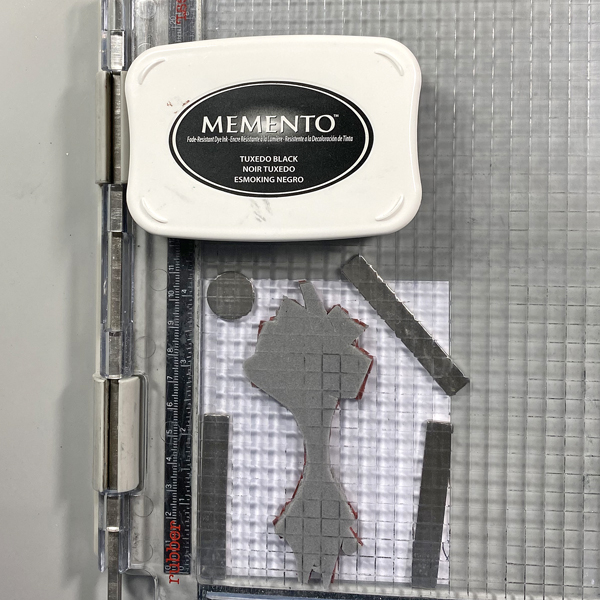
Use Tuxedo Black Memento Ink to stamp the Big Head/Big Eye image from the Humanoids Stamp Unmounted Rubber Stamp Set onto white cardstock.
Step 9:
Color the image panel with Copic markers. Sorry that there’s no photo!
Step 10:
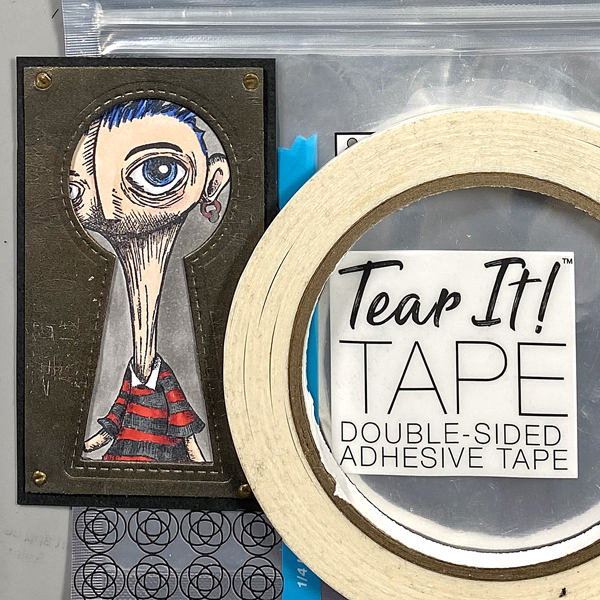
Use Tear It! Tape to adhere the colored image panel behind the opening in the keyhole. Add tiny screw-top brads to the each corner, then mat the keyhole rectangular image panel with black cardstock, cut slightly larger than the keyhole panel.
Step 11:
Use Snowflake Fresco Finish Chalk Acrylic Paint to paint the Skull Skeleton masonite key. Let dry, then use a Sponge Dauber to apply Starlite Silver Brilliance Ink to the key. Heat set.
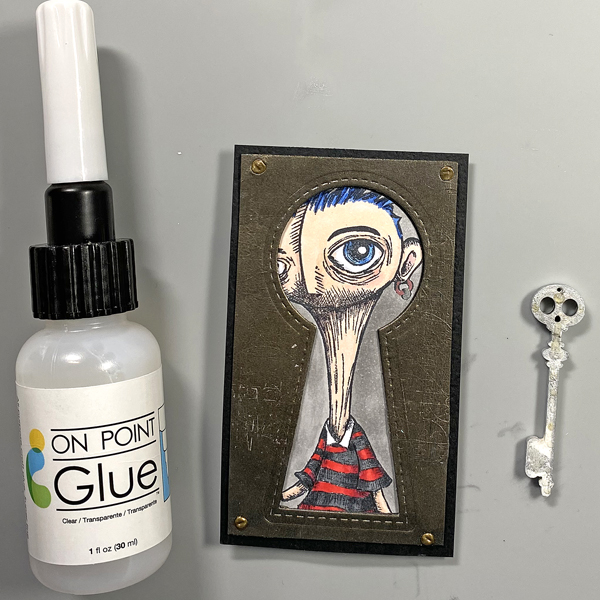
Step 12:
Use On Point Glue to adhere the key to the front of the keyhole image panel.
Step 13:
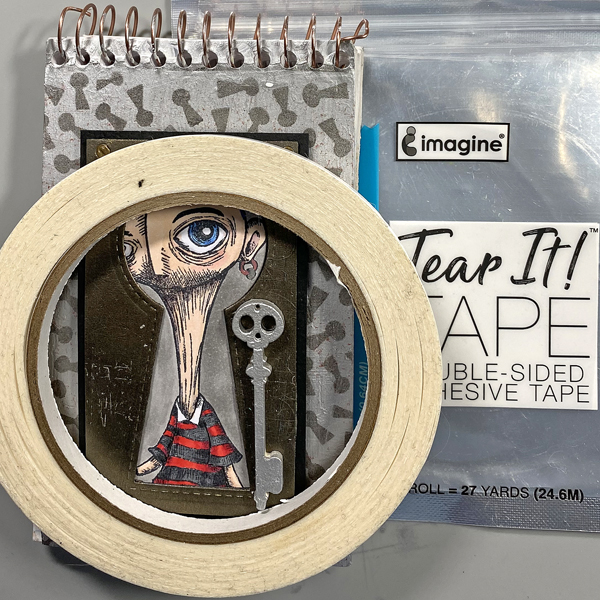
Use Tear-It! Tape to adhere the keyhole image panel to the front of the Password memo pad.
Imagine Crafts Supplies:
- Brilliance Inkpad – Starlite Silver
- Brilliance Inkpad – Starlite Black
- Brilliance Inkpad – Lightning Black
- Brilliance Inkpad – Cosmic Copper
- Memento Ink – Tuxedo Black
- Sponge Daubers
- Fantastix
- Tear It! Tape
- On Point Glue
- Craft Mat
Other Supplies:
- 140 lb. Mixed Media Paper by Strathmore
- 140 lb. Black Mixed Media Paper by Strathmore
- Snowflake Fresco Finish Chalk Acrylic Paint by PaperArtsy
- Keyhole Stencil – Source Unknown
- Lock and Key Die Die-namics Set by My Favorite Things
- Humanoids KTZ223 Red Rubber Unmounted Stamp Set by Katzelkraft
- Copic Markers
- Metallic Markers by Spectrum Noir
- Skull Skeleton Key Masonite Cut Outs by Coffee Break Designs/Retro Cafe Art
- Red Gemstone: Source Unknown
- Heat Gun
- Stamping Platform by Tonic Studios
