
By Anna Escalada York
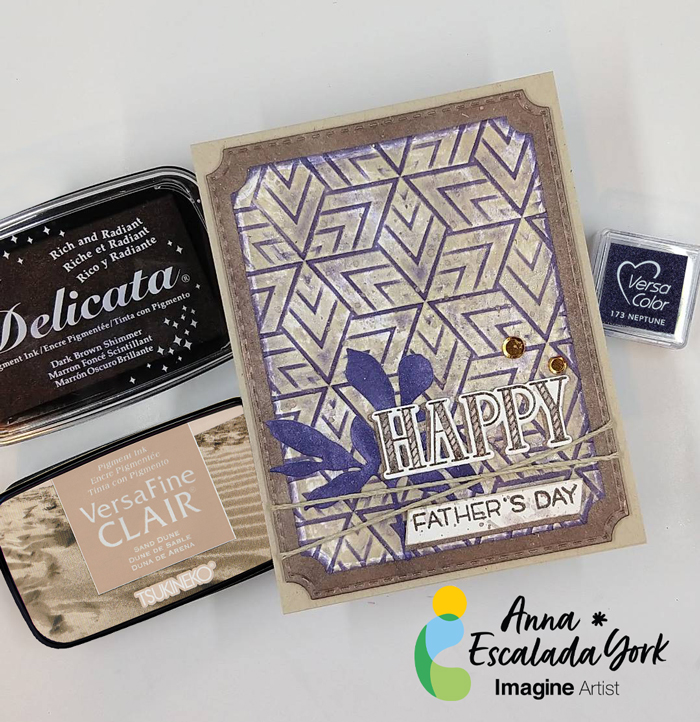
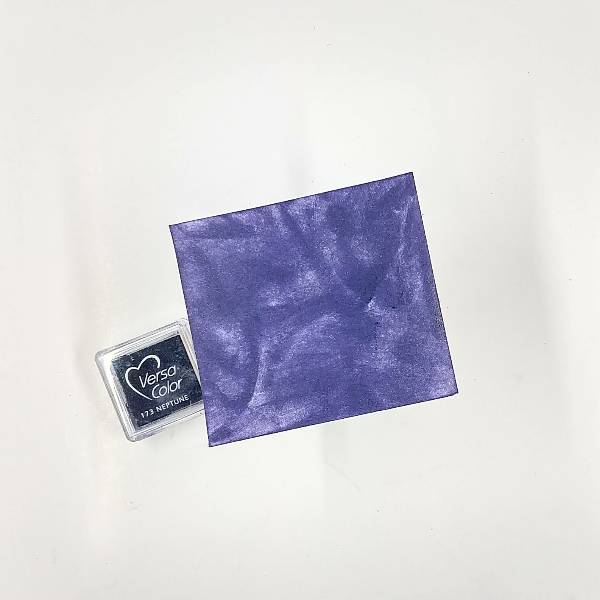
I wanted to make my Father-In-Law’s Father’s Day Card with a variety of browns and a pop of another color. So I picked Neptune VersaColor ink for a pop of color on the monochromatic background.
Skill: Intermediate
Time: 1.5 hours
Directions:
Step 1:
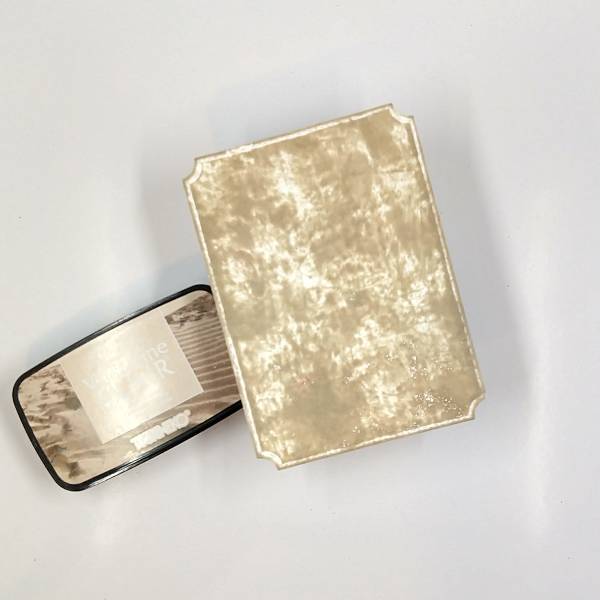
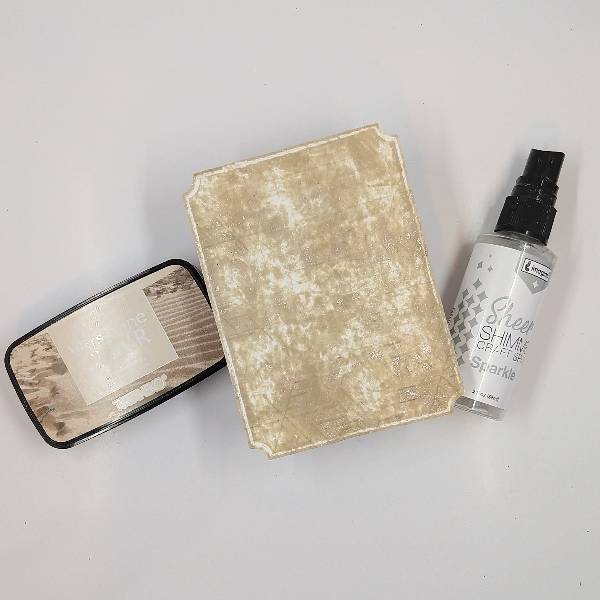
Die cut a piece of watercolor paper with the second-largest die in an A2-sized die set. Press a Sand Dune VersaFine Clair Ink onto the watercolor panel.
Step 2:
Spray Sparkle Sheer Shimmer Craft Spray onto an embossing folder and then emboss the Sand Dune colored panel by running it through a die cutting machine between the two sides of the embossing folder. Allow the panel to dry.
Step 3:
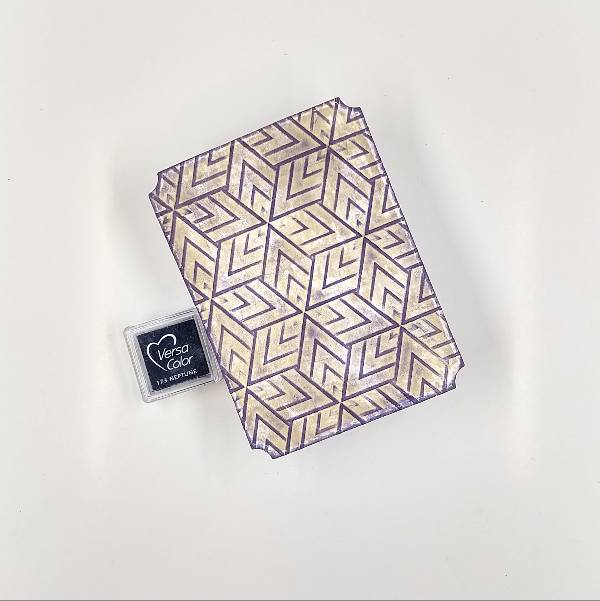
Glide a Neptune VersaColor ink across the panel. The raised (embossed) parts of the panel will be colored with the Neptune ink, and the debossed parts of the panel will stay the Sand Dune color. Then run the Neptune VersaColor pad across the edges of the panel to color the border of the panel as well.
Step 4:
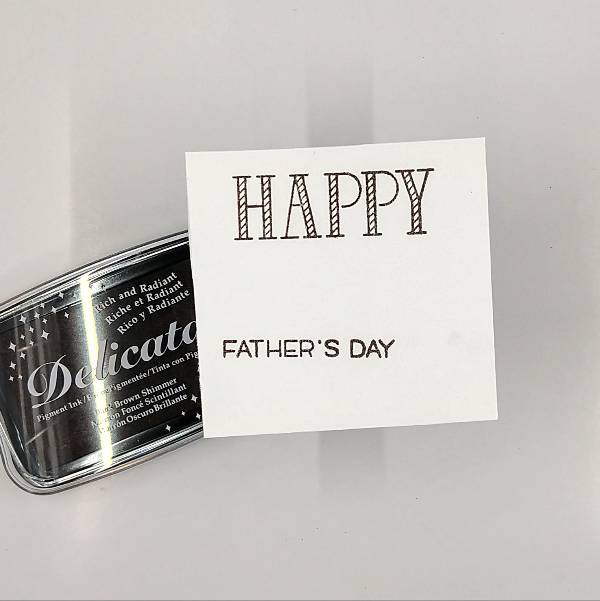
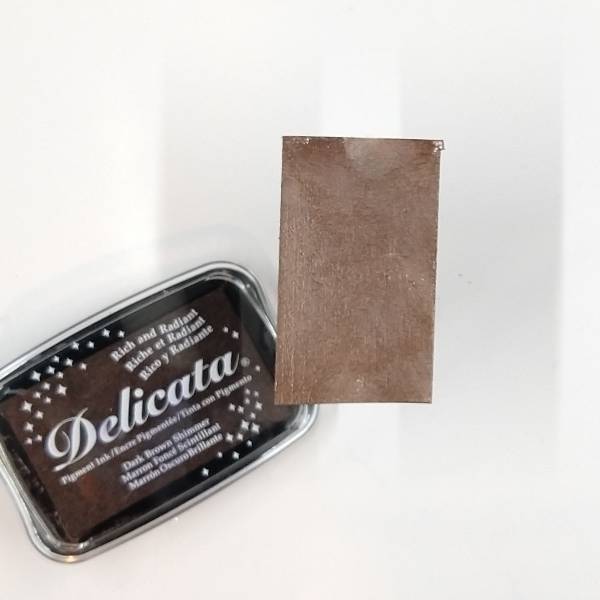
Stamp the card’s sentiments (both the larger “happy” and the “Father’s Day” subsentiment) on another piece of watercolor paper with Dark Brown Shimmer Delicata ink and then heat emboss both of them with clear embossing powder. Set this aside as well.
Step 5:
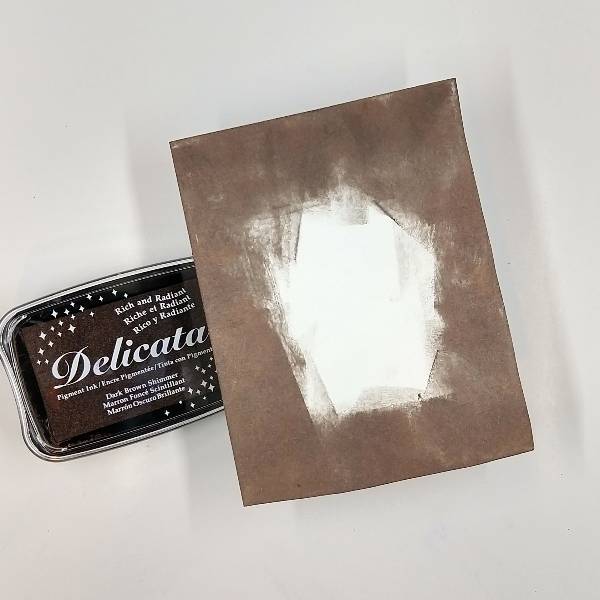
Press the Dark Brown Shimmer Delicata Ink Pad onto the edges of a watercolor panel until achieving a thick, dark brown border. This panel will become the matte layer of the card.
Step 6:
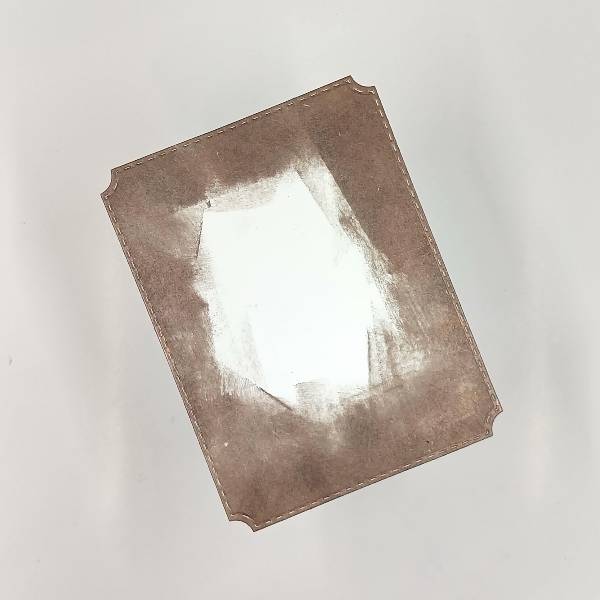
Using the largest die from the A2-sized die set, die cut the dark brown panel . Glue the two panels together and set aside.
Step 7:
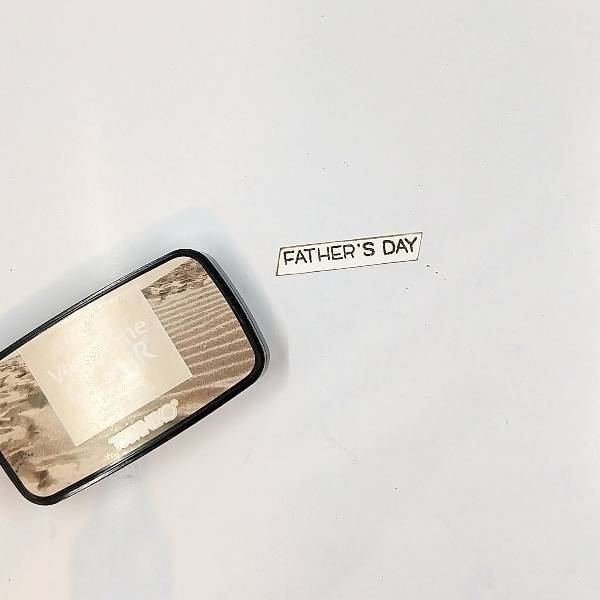
Trim the sub-sentiment with a paper trimmer. Press the edges of the sentiment strip into the Sand Dune VersaFine Clair ink pad and set the sentiment strip aside to dry.
Steps 8 and 9:
Press the Dark Brown Shimmer Delicata ink pad onto another small piece of watercolor paper.
Not pictured: Die cut the larger “Happy” sentiment from step 4 with the corresponding die. Then die cut a piece of the Dark Brown Shimmer colored watercolor paper with the same die to create two layers of the die cut.

Step 10:
Glue the two die cut sentiment layers together, with the dark brown layer peeking out on the left side of the stamped (top) layer. Using some of the remaining dark brown watercolor paper from the last step, cut a thin strip to glue on the bottom of the sub sentiment. Glue the thin brown strip behind the sub sentiment as well as some scrap cardstock to make the sub sentiment three layers deep for strength and dimension. Set them both aside.

Step 11:
Press the Dark Brown Shimmer Delicata ink pad onto a piece of acetate packaging and mix with water. Splatter the panels and the sub sentiment with the dark brown splatter. Paint the large “happy” sentiment letters with some of the remaining brown-tinted water. Set it all aside to dry.
Step 12:
Press a Neptune VersaColor ink pad onto another small piece of watercolor paper. Set it asde for the ink to dry.

Step 13:
Die cut the Neptune-colored watercolor paper with a leaf die.
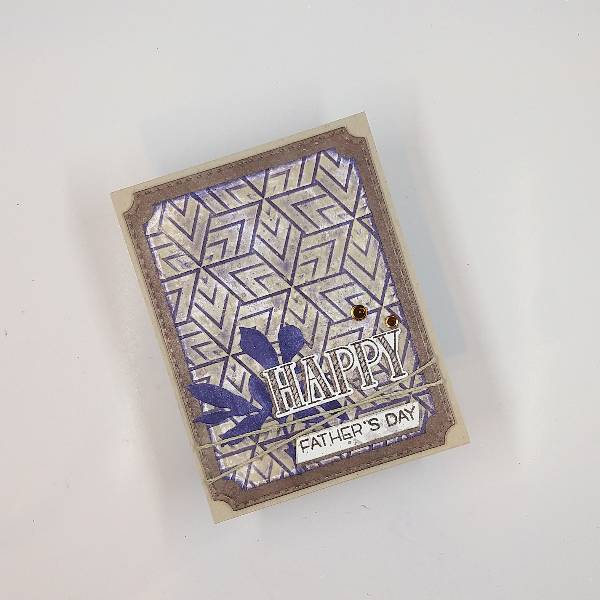
Step 14:
Assemble the card. If desired, add some twine and attach to the back of the card panels with washi tape and then add foam tape on the back so the card base will lay flat when attached to the kraft A2-sized card base. Then glue some brass-colored sequins near the sentiment to finish the card.
Art Supplies
Imagine
• Delicata Pigment Ink – Dark Brown Shimmer
• Sheer Shimmer Craft Spray – Sparkle VersaColor Ink – Neptune
• VersaFine Clair Ink – Sand Dune
Other
• Altenew – foam tape
• Altenew – embossing folder – Illusion Triangles Altenew – die set – Just Leaves
• Catherine Pooler – sequin mix – Bogotá Lawn Fawn – die set – Happy Happy Happy
• Lawn Fawn – stamp set – Happy Happy Happy Pink & Main – die set – Notched Corner
• A2-sized kraft card base Clear Embossing Powder Washi tape
• Watercolor paper Die cutting machine Twine
• Scissors Glue
