
By Helen Gullett
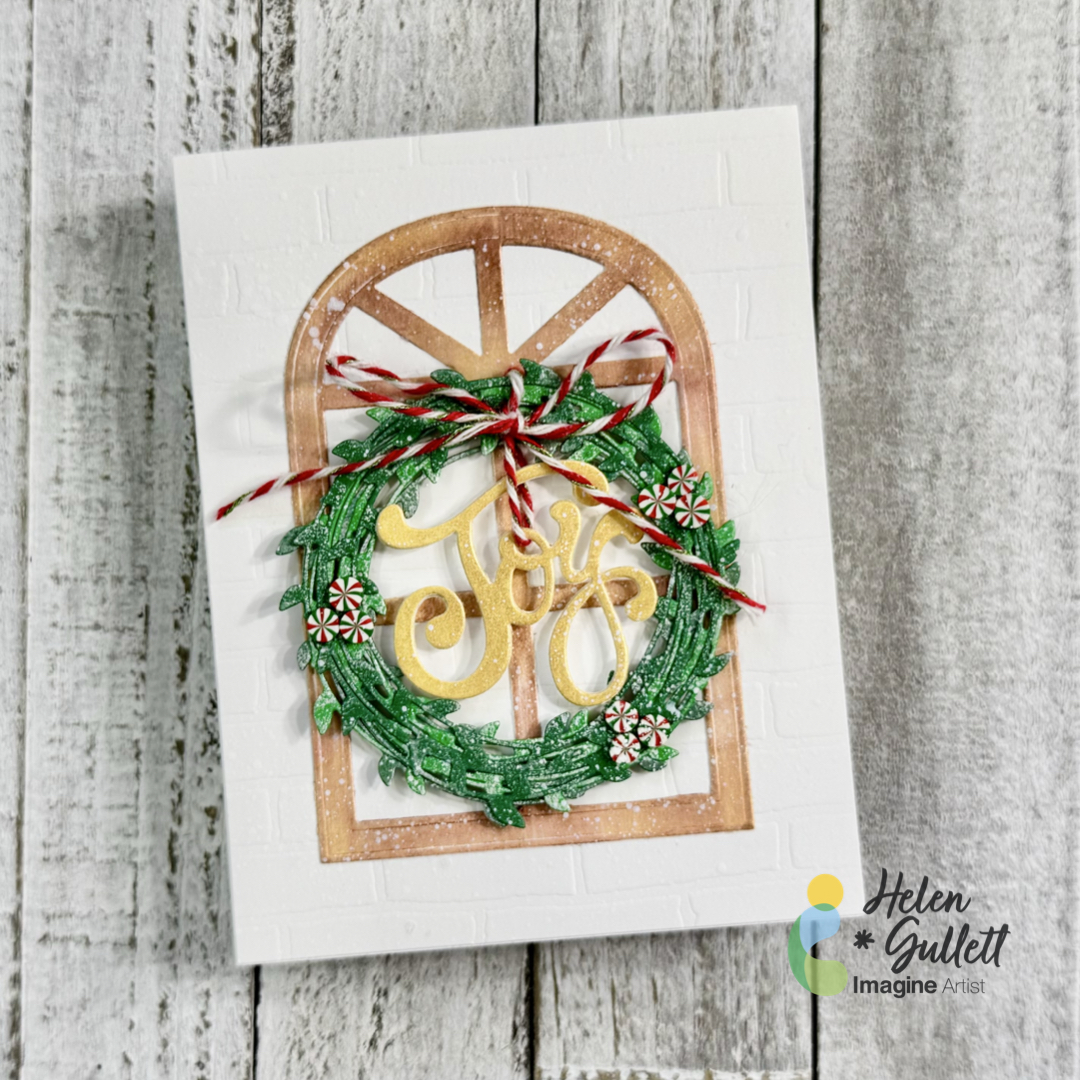
Hello crafty friends! If you ask me if we could start making Christmas projects in July, I would say the sooner the better. One of the ways to share the joy of the Holiday is by sending handmade Christmas cards. Today, I have this no-stamping Christmas card idea to share with you all. Yes… it is a no-stamping card, all die cuts. To add extra shimmer to the die cuts, I use Brilliance Dew Drop inks today. So, let’s turn on the Christmas music and get crafting!
Skill: Intermediate
Time: 20-30 minutes
Direction:
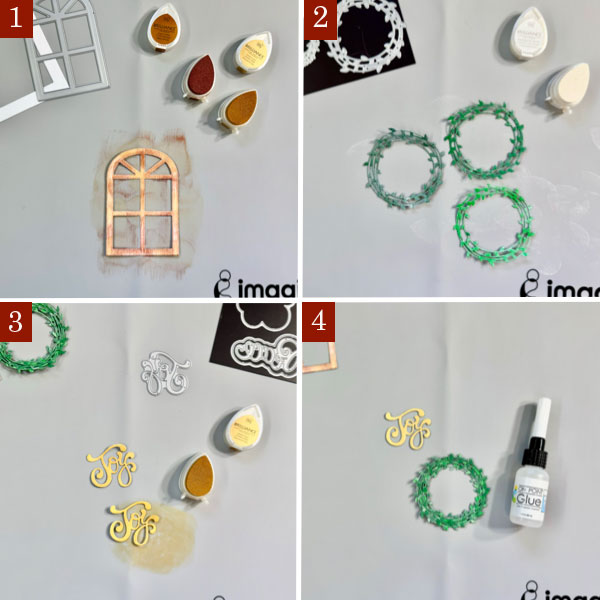
Step 1
Cut a heavyweight white cardstock (110 lb) to make the A2 card base in 4.25 inch x 5.5 inch dimension. Set a side.
Cut out a piece of white cardstock with the Arched Window die with the die cutting machine.
Randomly dab some of the Cosmic Cooper Brilliance ink and Galaxy Gold ink on the window to cover it. Then set it aside to dry or you can use a craft heat gun to speed up the drying time.
Step 2
Cut out 2 or 3 shades of green cardstocks with the wreath die with the die cutting machine.
Randomly dab some of the Moonlight White Brilliance ink on each of the wreaths to give them a snowy effect. Then set them aside to dry or you can use a craft heat gun to speed up the drying time.
Step 3
Cut out another white cardstock with the Joy word die using the die cutting machine twice. You can cut out 3-4 times to create a thicker word chipboard.
Cover the word diecuts with some of the Galaxy Gold ink to give them gold color. Then set them aside to dry or you can use a craft heat gun to speed up the drying time.
Step 4
Put together the wreath diecuts with some of the On Point Glue to become a one thicker wreath. Put a heavy object (I used a large acrylic stamping block) on them until the glue dries permanently in a couple minutes.
Do the same way with the Joy word diecuts to create the word chipboard.
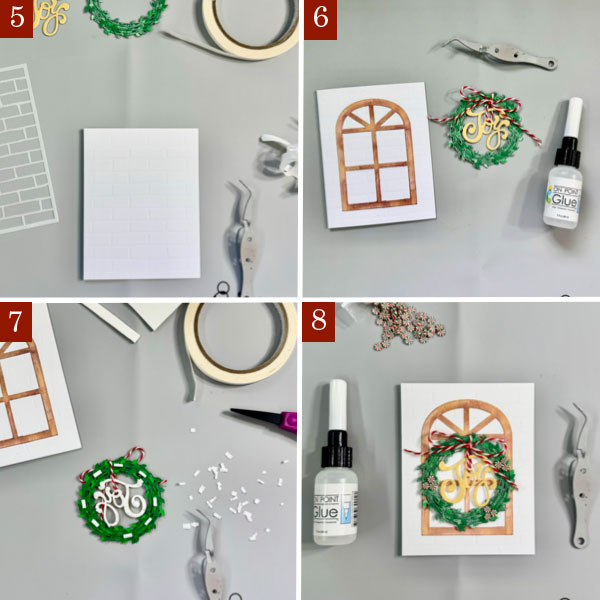
Step 5
I embossed a piece of 4.25 inch x 5.5 inch white cardstock using the Brick Wall stencil. If you have a similar background embossing folder, you can use it, too.
Add the embossed background panel to the card base with some of the Tear It! Tape.
Step 6
Add the arched window to the card with On Point Glue, add a heavy object on it (or a large acrylic stamping block) until the glue dries permanently.
Add the word chipboard to the wreath with some baker’s twine to make it look like hanging down in the middle of the wreath. Tie up the twine into a bow and secure it with a dab of On Point Glue. Put a heavy object (or a larger acrylic stamping block) on it so the twine stays in place until the glue dries permanently.
Step 7
Cut a couple thin strips out of the thin white fun foam (about ¼ inch wide) and add some of the Tear It! Tape to them to create the foam tape.
Cut the foam tape into small pieces and add them at the back of the wreath. Remove the backing of the foam tapes and add the wreath to the card.
Step 8
Decorate the wreath with some of the Peppermint clay embellishments by adding them to the wreath with some of the On Point Glue.
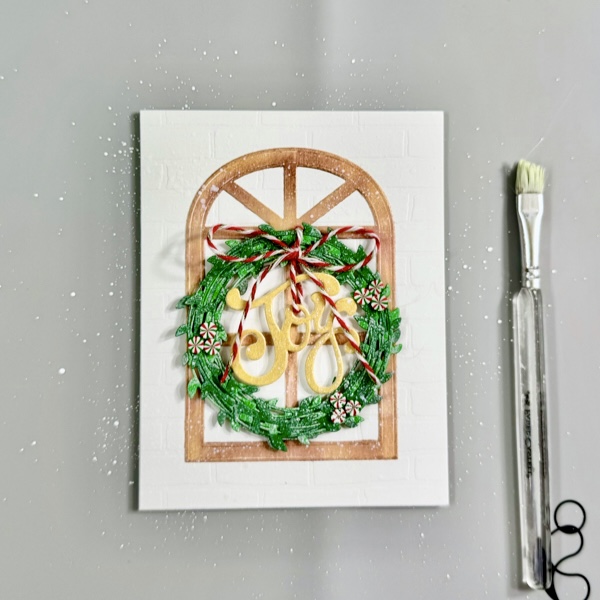
Step 9
On the craft mat, mix a small amount of white acrylic paint with some water.
Add some of white paint splatters to the card using brush for more texture and snowy look.
Dry the whole card with a craft heat gun.
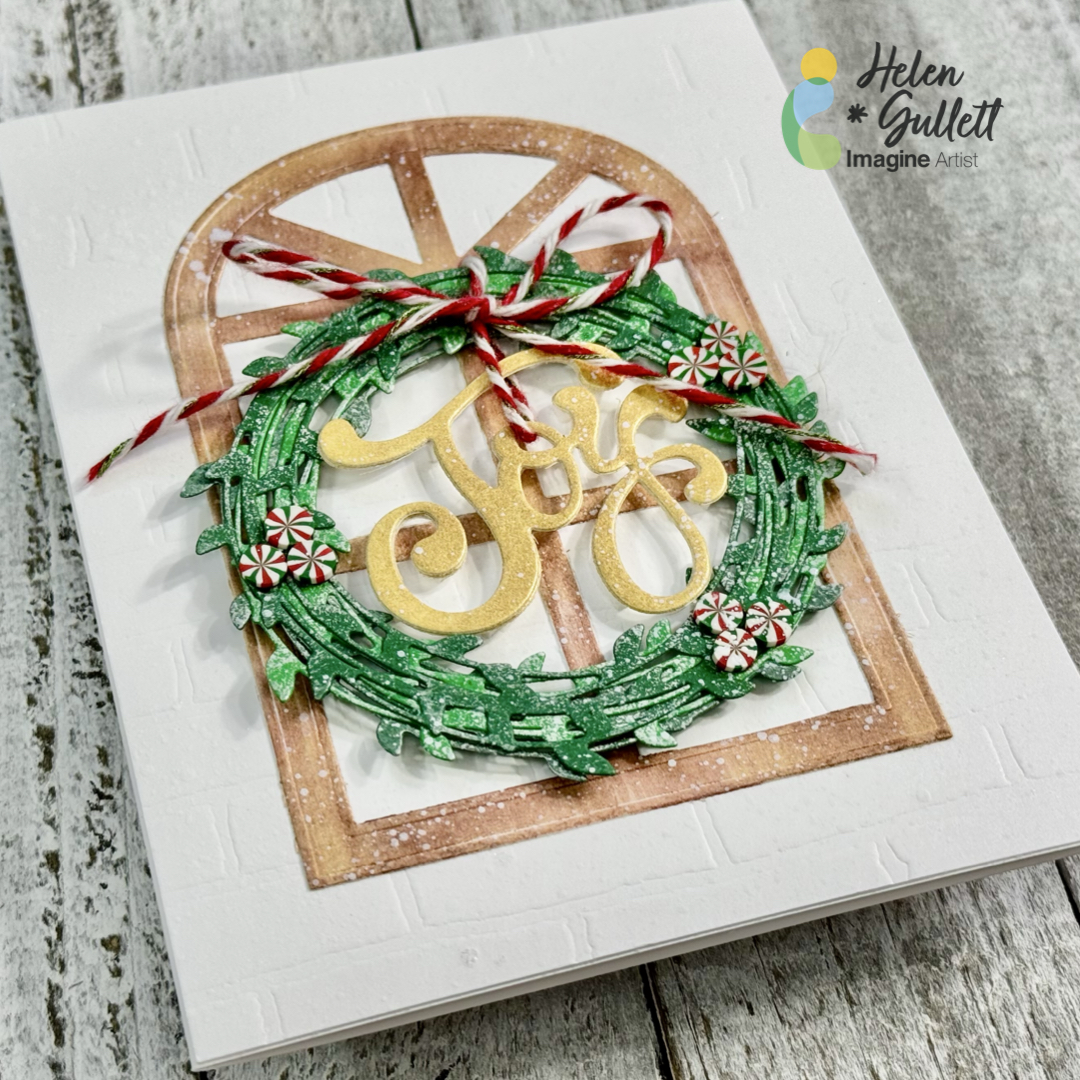
I love how this no-stamping Christmas card turned out and I hope you do, too. I plan to make more of this card to send them out to families and friends later.
Thank you so much for stopping by our blog today. Have a wonderful day!
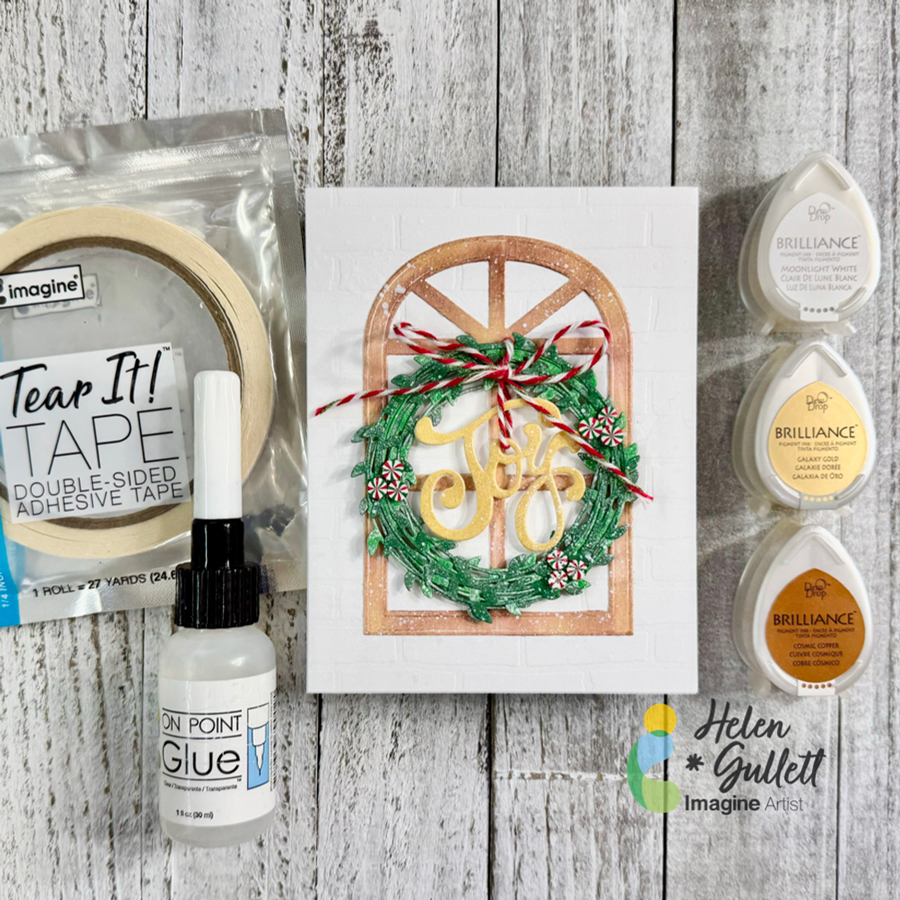
Craft Supplies
Imagine Crafts:
- Brilliance Dew Drop (Moonlight White, Galaxy Gold, Cosmic Copper)
- On Point Glue
- Tear It! Tape
- Imagine Craft Mat
- Staz-On All Purpose Stamp Cleaner
Others:
- Lovely Wreaths Die Set (Creative Worship Stamps)
- Arched Window Die Set (Creative Worship Stamps)
- Peace & Joy Word Die Set (Creative Worship Stamps)
- Brick Wall Stencil (Creative Worship Stamps)
- Peppermint clay Embellishments (Twiddler’s Nook)
- Thin fun foam
- Bakers Twine (Christmas colors)
- White Cardstock
- Green Cardstock (optional: 2 colors)
- White acrylic paint
- Die Cutting Machine
- Twizzers
- Non-stick scissors
- Craft heat gun
- Paper Towel / baby wipes
