
By Kathi Rerek
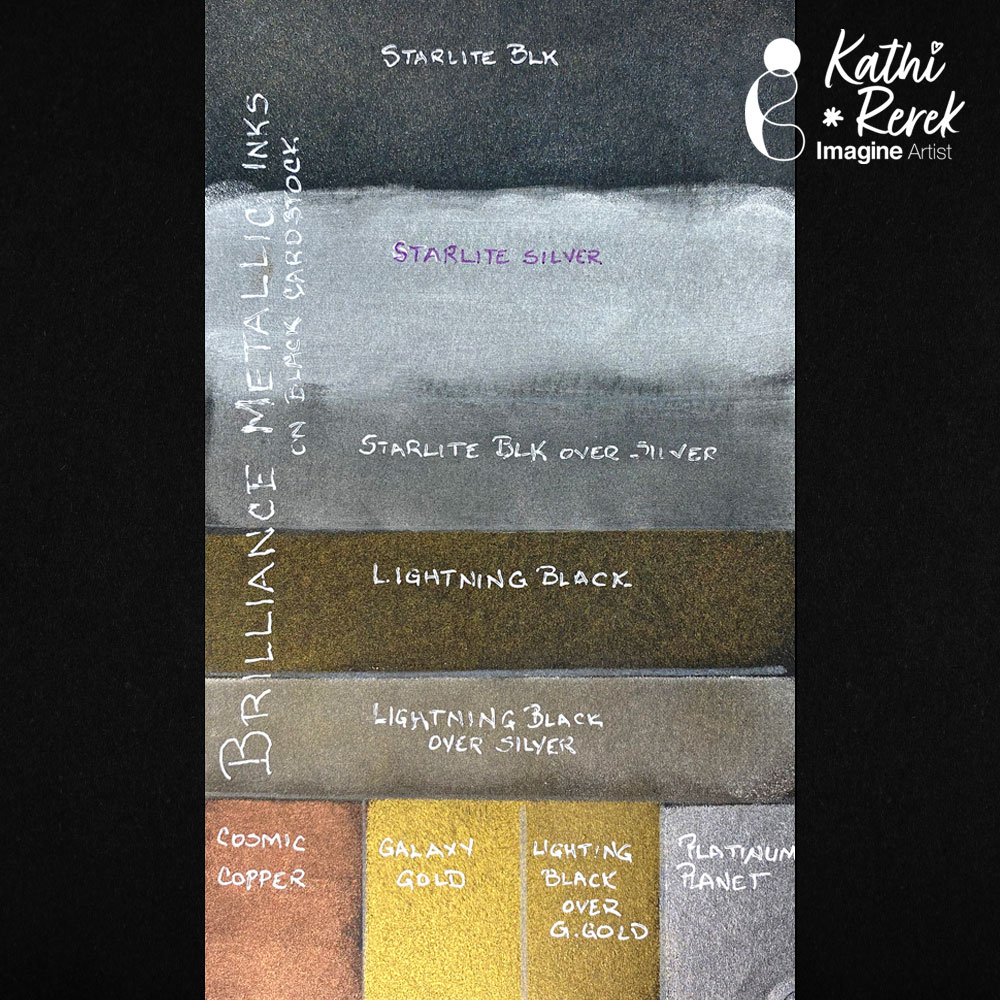
I recently shared a project using rich Brilliance Pigment Inks and a friend asked how they looked on black cardstock. I decided that it was a great idea to swatch them so that I’d have a reference.
Skill Level: Beginner
Time: 30 minutes
Instructions:
I had a scrap of black mixed media cardstock leftover from a project. I used a Sponge Dauber or foam applicator to apply the inks singly or in combination onto black cardstock, then labeled them with a white gel pen and/or a purple Sharpie pen when the white didn’t show on the silver. I heat set after each application to avoid contaminating my ink pads.
Notes and Observations about Brilliance Ink:
- Re-applying another layer of ink after heat setting intensified the opacity and metallic properties of the ink on black cardstock. I’d imagine building up several layers would continue to enhance the inks.
- The bottom right hand corner of the cardstock was smashed. Applying metallic ink over the crush mark emphasized that textural component! Cool!
- I applied Starlite Silver and Starlite Black Inks to a Gel Press with a brayer, then pulled a print with black cardstock, which resulted in a lovely silvery mottled metallic finish. Again, a second layer of ink deepened the silver and improved the coverage.
- FYI: You can apply Brilliance Metallic inks over white chalk finish acrylic paint and over white gesso, which means you can use it on a variety of surfaces. I have not tried Metallic Brilliance Inks over transparent and/or black gesso or Matte Medium. Those will be experiments for another day.
- Lastly, VersaMagic Inks can be applied over the Brilliance Metallic Inks and yield a nice matte finish.
Imagine Supplies:
- Brilliance Ink – Starlite Black
- Brilliance Ink – Starlite Silver
- Brilliance Ink – Lightning Black
- Brilliance Ink – Cosmic Copper
- Brilliance Ink – Galaxy Gold
- Brilliance Ink – Platinum Planet
- Sponge Daubers
Other Supplies:
- 140 lb. Black Mixed Media Paper by Strathmore
- Premier Ink Blending Tools by Hunkydory Crafts
- Premier Ink Blending Sponges by Hunkydory Crafts
- White Gelly Roll Gel Pen by Sakura of America

