Beginner Guide: Using Stamps & Stencils on Fabric with VersaCraft and Fabrico

by Nicole Watt

Join Nicole as she shows you how to use stencils and stamps on fabric! Using VersaCraft Inks and Fabrico Markers will have you looking at your stamping and crafting supplies in a whole new way.

Skill: Beginner
Time: Varies

Directions

Sponge Daubers

Other

  • Altenew – Flowering Cistus Stamps 
  • A Colorful Life Designs – 50 Shades Stencil 
  • Honey Bee – Brilliant Day Stamps 
  • My Sweet Petunia – Misti Stamp Positioner 
  • Fabric of Choice – Nicole uses t-shirt material


See How to Achieve Bliss with All-Purpose Ink and Embroidery

by Iris Rodriguez

See How to Achieve Bliss with All-Purpose Ink and Embroidery

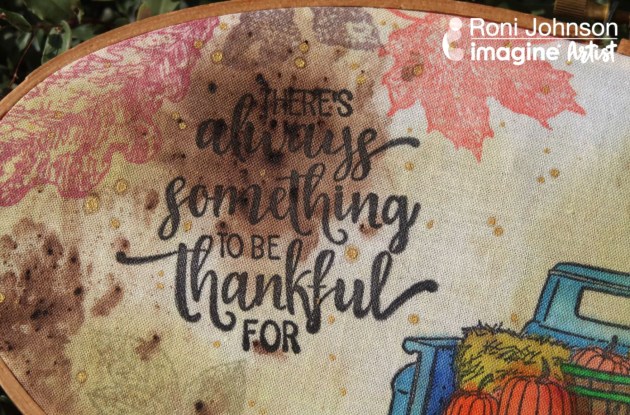
I have a confession. I am not a sewing person, whatsoever. However, I do like textile arts and a friend, who destashed her crafting supplies, gave me a gallon bag of embroidery thread. Well, it was time to challenge myself with an embroidery project. I made this wall hanging using All-Purpose Inks to color the plain fabric and stitch some whimsical stitches.

Skill: Advanced
Time: 2-4 hours


Step 1

For this project, you will need fabric for embroidery. You have several options of fabric that will work; 100% cotton; linen, muslin or specialized needlework linen. I bought a piece of 100% cotton remnant from my local fabric store. You will also need embroidery hoops and thread. Fasten the fabric to the hoops.


Step 2

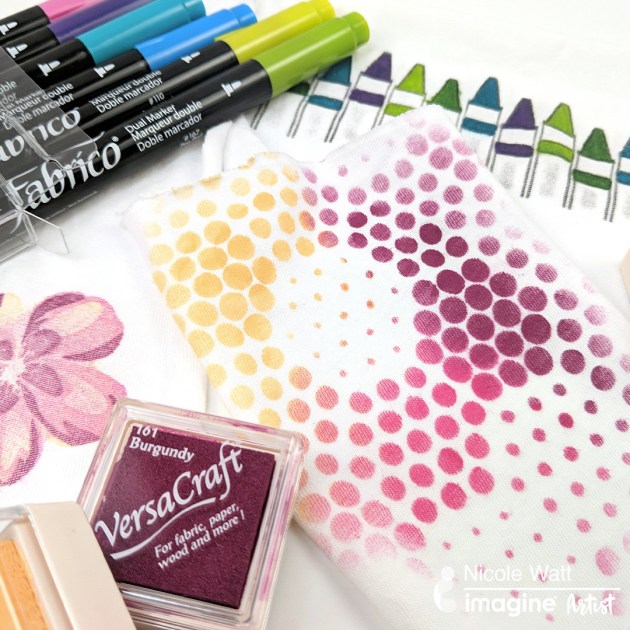
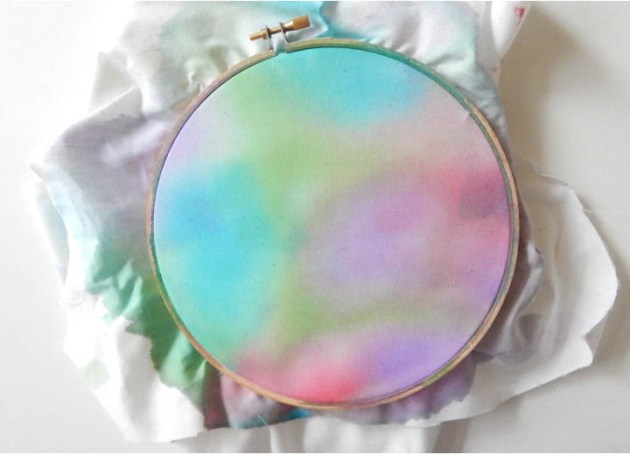
Spray water on the fabric. Place a small drop of Red Delicious All-Purpose ink.


Step 3

Spray water onto the drop of the All-Purpose ink. The color will spread out, creating cool effects and shapes.


Step 4

Repeat Step 3 with the rest of the All-Purpose Inks; Thyme, Wisteria, Blue Lagoon. Allow the project to dry. You can allow it to dry naturally or dry with an iron to speed up the process. At this point, you will find that the colors are lighter than when the fabric was wet. You can darken the color by adding more ink.


Step 5

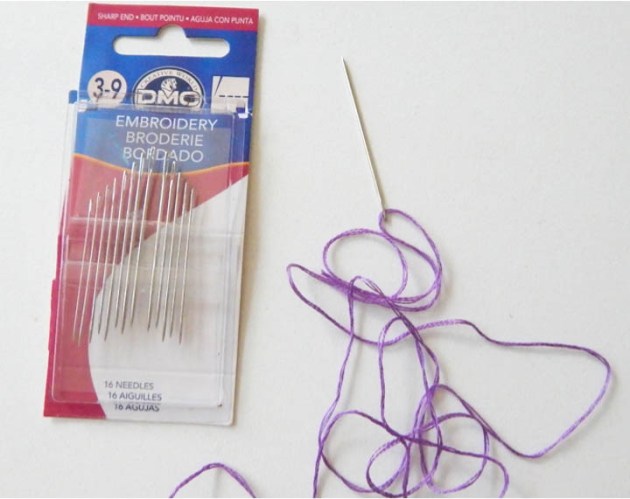
Determine the embroidery thread you will use. I like to use a contrasting color.


Step 6

Use embroidery needles for your project. They are designed with wider holes than a regular needle.


Step 7

Embroider onto the fabric. If you are not familiar with embroidery stitching techniques as was the case with me. The internet is an excellent resource; do a general search, Pinterest has great pics of stitches and mini visual tutorials, YouTube has stitching videos as well. Above I choose some simple star and X-shape patterns. If you wish to add lettering or an image, it helps if you have a guide. Use a regular pencil to mark up the fabric. Stitch over the pencil mark.


Step 8

No matter the stitch you use, you must make a knot in the back when you are finished with a segment. Add different stitch types for added variation. Once you are finished. Cut the excess fabric. Glue the excess fabric onto the hoop.

Supplies

Imagine
Other
  • Fabric for embroidery; 100% cotton, linen, or muslin
  • Embroidery Thread
  • Embroidery Hoops
  • Embroidery Needles

Learn How to Color and Stamp on Fabric for a Harvest Fall Theme

by Roni Johnson

Learn How to Color and Stamp on Fabric for a Harvest Fall Theme

I love making new home décor items with the changing season. Here in Indiana we are saying goodbye to summer and welcoming in autumn. This is my favorite time of the year so I always look forward to Fall crafts. I thought it would be fun to create a piece of embroidery hoop art by dying and stamping a piece of linen I had in my stash. Enjoy!

Skill: Intermediate
Time: 90 minutes

Directions


Step 1

Gather your supplies; make sure the piece of fabric extends approximately 2” on all sides of the embroidery hoop. This will give you enough material to secure it to the hoop once completed. Spritz the cloth with a bit of water to dampen. Sprinkle the damp fabric with Walnut Ink Crystals around the edges. I held the embroidery hoop over the cloth while I sprinkled the crystals to make sure they were where I wanted them to be. Spray Willow Walnut Ink Spray here and there over the panel. Let the fabric dry completely before moving onto the next step.


Step 2

Secure the cloth in a stamp positioning tool. I used both magnets and washi tape to hold it in place. Stamp the desired image(s) using Memento Luxe Tuxedo Black ink, stamp a second and third time if necessary to get a deep rich image on the fabric. I also stamped several leaves using other colors of Memento Luxe ink around the edge of the panel while it was still secured in the stamp positioning tool.


Step 3

Watercolor the image using All-Purpose Ink and a water brush or paintbrush, you may want your heat tool handy to help dry each area before moving onto the next. Continue coloring until you are satisfied with the image. Iron the entire panel to set the inks on the fabric.


Step 4

Secure the fabric in the embroidery hoop; trim off the excess fabric leaving approximately 1” material to wrap around the hoop and secure to the back using hot glue. Stretch the fabric tightly as you secure it to the back of the hoop.


Step 5

Use a Fantstix to apply dots of Vegas Gold All-Purpose Ink over the canvas for an extra bit of sparkle.

Supplies

Imagine
Other
  • Unity Stamp Co – Bountiful Haul (truck), Faith, Family & Fall (sentiment)
  • Joy Clair – Hello Autumn (leaves)
  • Fabric
  • Embroidery Hoop
  • Heat Tool
  • Iron
  • Hot Glue/Gun

Make an Easy Fabric Necklace with All-Purpose Ink

by Kyriakos Pachadiroglou

Make an Easy Fabric Necklace with All-Purpose Ink

Make your own fabric cords necklace colored with All-Purpose Ink. The fabric creates a distressed look while the square metal piece creates a modern look. The added shine will catch the eye with a piece of Sheet Metal that works a buckle to hold the fabric stripes and connects them with the wax cord of the rest of the necklace. This is a super fun craft project but also will make a beautiful gift or fashion statement!

Skill: Advanced
Time: 1 hour

Directions


Step 1

On a 14 inch-long piece of fabric mark triangles with a base of 1 ½ in. Cut 3 of them.


Step 2

Color the stripes with the All-Purpose Ink and a medium paintbrush making large strokes. No need to fully cover the fabric. Let the paint dries or use a heat tool. Iron the fabric to set the paint.


Step 3

Use a sponge dauber and the Memento Luxe in Rhubarb stalk to make a deeper red shade, fading the lightness of the red paint. Iron the fabric to set the ink.


Step 4

Using a thin stick start wrapping the fabric stripe, beginning of the base. Use fabric glue on the edge to set it and move further. Continue with all three.


Step 5

Cut in half a Sheet Metal ATC card and punch the corners with a round corner punch.


Step 6

Use a metallic ruler or something steady and thin to nicely fold in half the Sheet Metal piece.


Step 7

Glue the wider edges of the fabric cords between the Sheet Metal piece, making sure that they don’t reach the deep end of it.


Step 8

Loosely braid the fabric cords at the beginning of them. Attach a flat jewelry end cap on the other side (at this point you can trim to the desired length).


Step 9

Pass through the Sheet Metal piece 4 pieces of a waxed black cord 4 inches in length. Add a cap and lobster lock and you are finished.

For more tips on jewelry making please see Kyriakos’ tutorial.

Supplies

Imagine
Other
  • Lightweight cotton fabric
  • Fabric glue
  • Round corner punch
  • Metallic ruler
  • Jewelry supplies – end caps, lobster locks
  • 1mm black waxed cord