
by Kyriakos Pachadiroglou
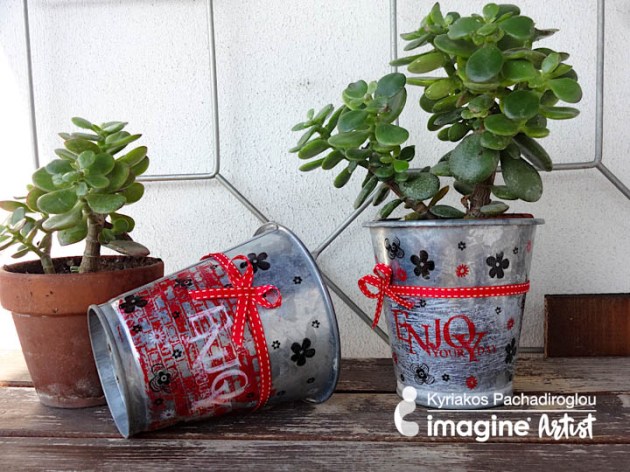
Today, I have created an easy and fun project to decorate tin flower pots to welcome spring, using the new StazOn Pigment ink pads and a couple of acrylic stamps. This also makes a nice project to use on making small Easter themed tin buckets to give as gifts.
Skill: Beginner
Time: 30 minutes
Directions
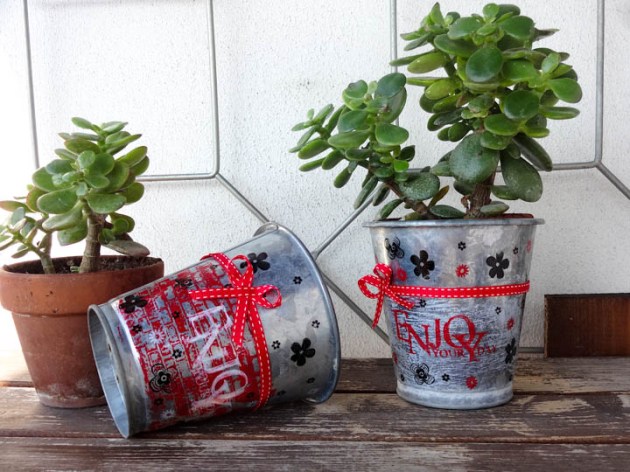
Step 1
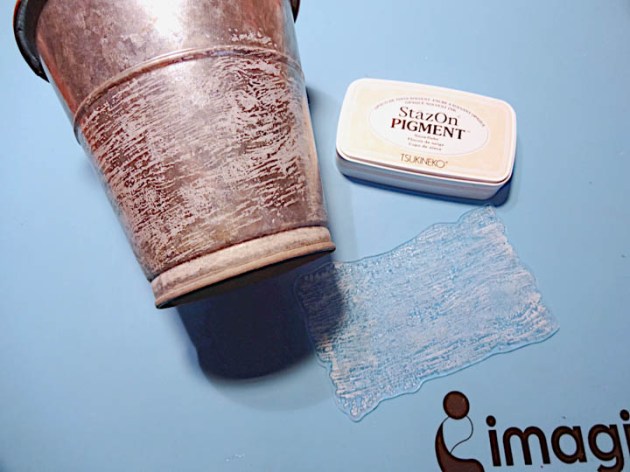
Clean well the surface of the flower pots. Stamp with the brick wood stamps using the StazOn Pigment Snowflake and Passion Red ink pads to cover around and about ¾ of the height of the flower pots.

Step 2
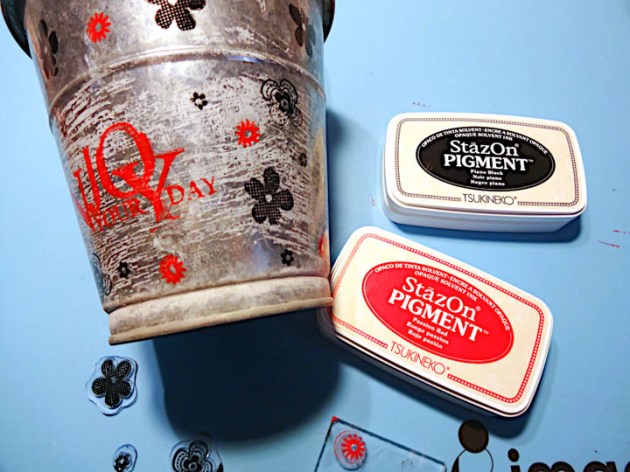
Stamp the quote stamp using the same StazOn Pigment ink pads but the opposite color used earlier.
Step 3
Use various sizes of flower stamps to cover flower pots, adding the StazOn Pigment Piano Black too.
Step 4
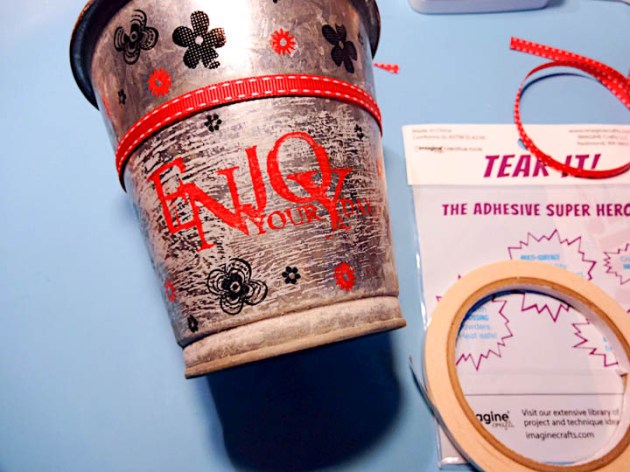
Place Tear It! Tape on the end of the brick and wood stamps used as background designs and set the ribbon.
Supplies
Imagine
- StazOn Pigment Inkpad – Snowflake, Passion Red, Piano Black
- Tear It! Tape
Other
- Tin flower pots
- Viva decor – Brick and wood stamps
- Quote stamps
- Flower stamps
- Red ribbon


