
by Elina Stromberg
Layered stamps continue to be popular and many of us have come across lovely layered flower images by various manufacturers. This beautifully layered marble stamp set by Waffle Flower is a great addition to your stamp collection; there are not that many-layered background images available in the market, and the versatility of this set is simply amazing!
Before starting I suggest you try the stamps on a piece of scrap paper. Layering is not difficult at all, and you will soon learn which spots on the images to use as your positioning marks. A stamping tool like Misti is not needed as you will easily see the inked pattern through the clear stamp. In addition, when playing with a natural pattern the layers do not need to be perfect and inaccuracy is allowed!
Waffle Flower has published a video that includes great tips for using this set. Take a look at the video in YouTube and have fun!
Skill: Beginner
Time: 1.5 hours
Directions
Step 1
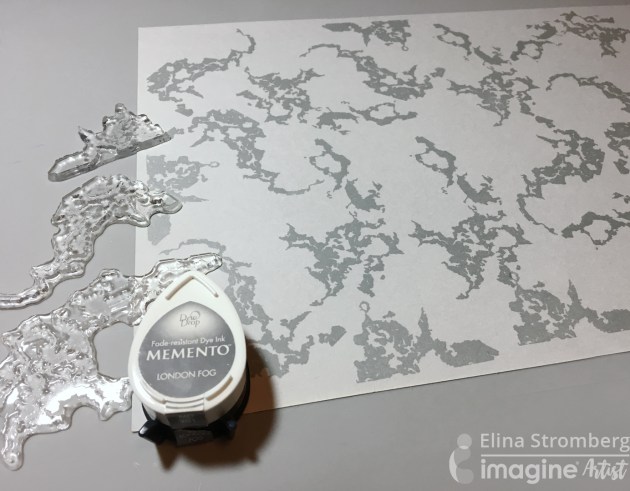
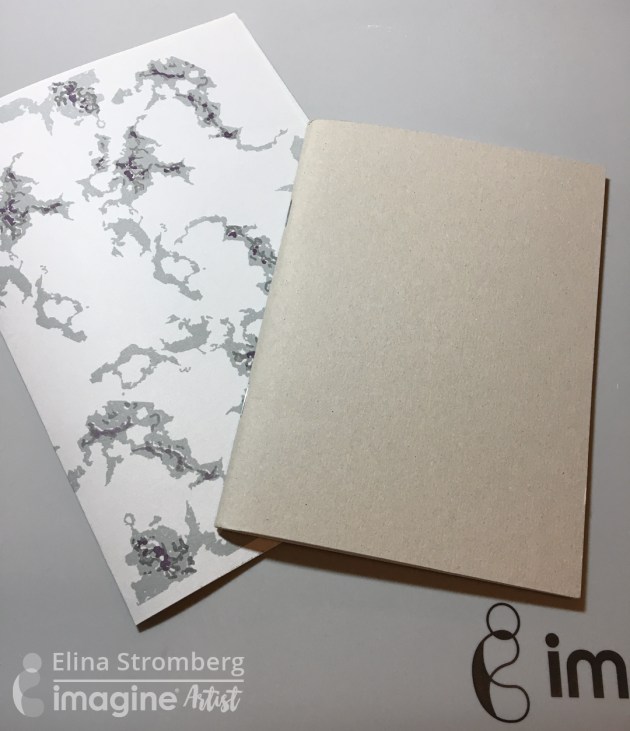
Take a sheet of cardstock in your preferred color and choose three stamping inks to match the background paper. As suggested on the stamp package the first layer is stamped with the lightest color, then moving towards darker colors on layers 2 and 3. Stamp first layer of the marble background, starting with number one images of each set (stamps A1, B1 and C1). I chose a gray tone color palette, so I used grey ‘London Fog’ Memento ink for my first layer.
Step 2
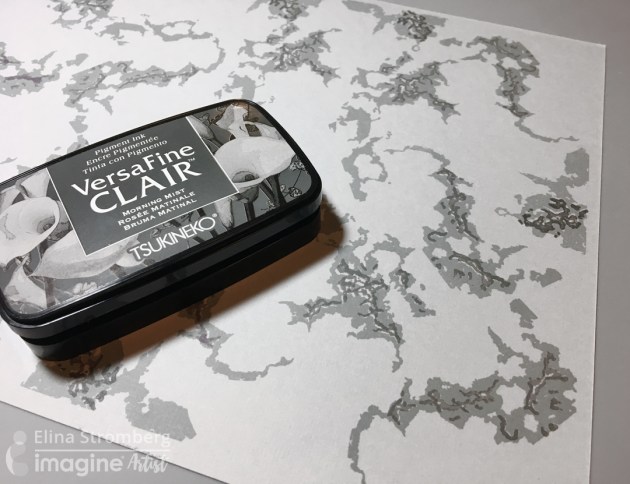
Stamp second layer of images (stamps A2, B2 and C2). I used a bit darker grey (VersaFine Clair ‘Morning Mist’).
Step 3
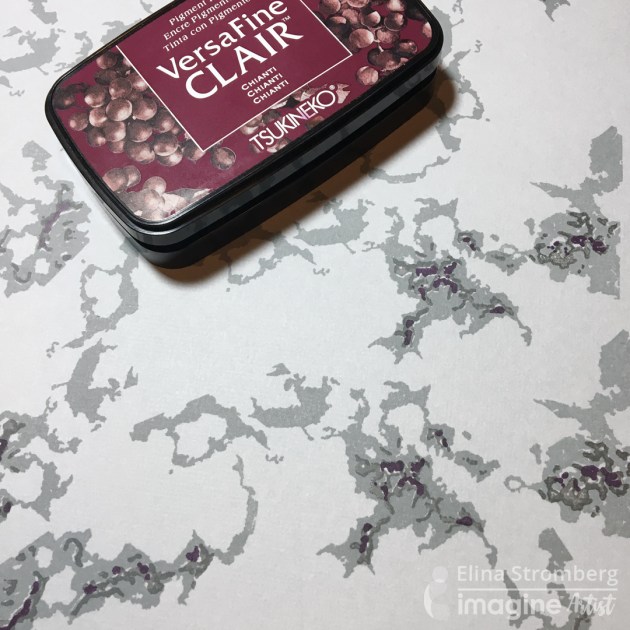
Stamp the final layer (stamps A3, B3 and C3). To add a hint of color on my gray background I chose beautiful red VersaFine Clair in Chianti for stamping.
Step 4
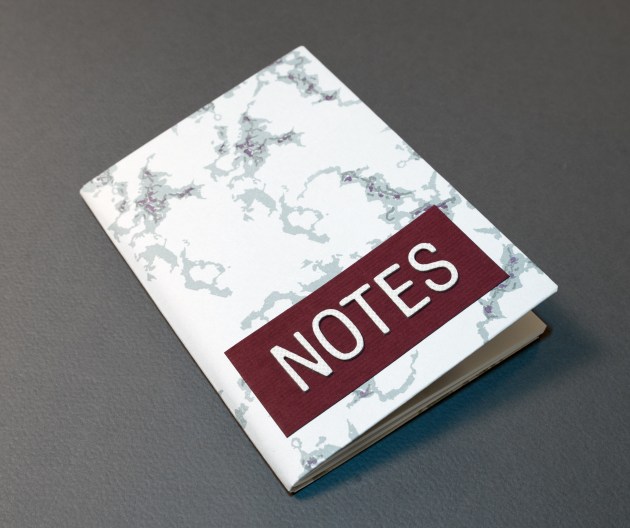
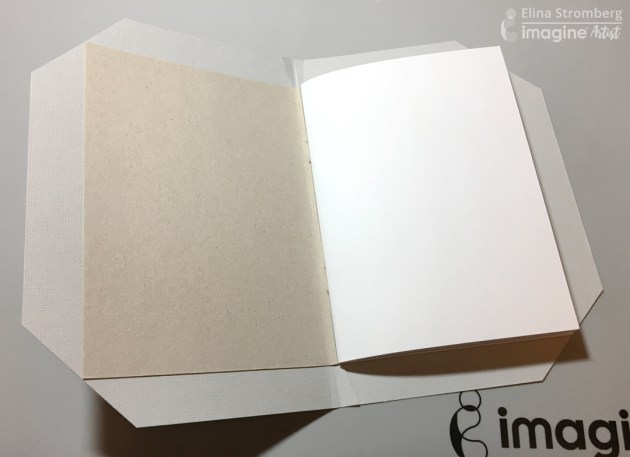
Cover the notebook with the marble patterned paper. Before gluing down the paper fold it to half for aligning the back of the notebook with the center of the paper. Trim off the corners of the background paper. Fold inwards and glue on the notebook.
Step 5
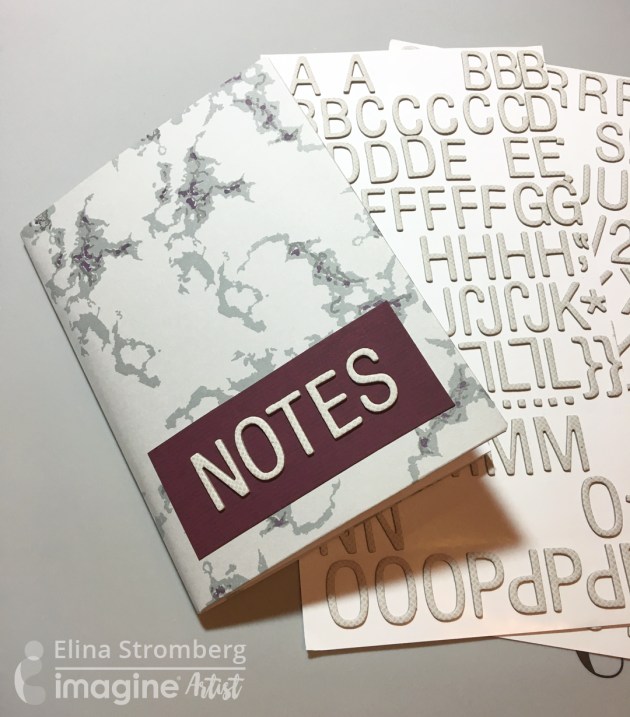
Glue a (burgundy colored) panel on the notebook front and write a title with letter stickers. Enjoy your beautiful notebook!
Tip: Some new clear/photopolymer stamps may resist water-based inks when used for the first time. You may experience that the ink clusters into tiny bubbles on the stamp giving you a splotchy image. If this happens here’s an easy tip for gently prepping your stamps: Ink the stamp with clear VersaMark ink. Press the stamp on the palm of your hand. Ink with water-based Memento ink, stamp, and enjoy your lovely crispy image!
Left: Before prepping. Right: After prepping
Supplies
Imagine
- Memento Inkpad – London Fog
- VersaFine Clair Inkpad – Morning Mist, Chianti
- VersaMark Inkpad
- Craft Mat
Other
- Waffle Flower Stamps – Layering Marble
- Acrylic block
- Notebook
- Glue
- Paper trimmer
- Scissors
- Cardstock – Grey, Burgundy
- American Craft – Letter stickers

The marble effect is so lovely, thanks for sharing this easy technique.
LikeLike