

By Ceil Pritchett
Hello crafty friends, today I am sharing a spring card using a couple of blending techniques, one with Fabrico markers and one with the VersaMagic Dew Drops.
I was so happy for spring to finally arrive. I live in the mountains and even though it is officially spring, sometimes we still get snow in April.
Skill: Intermediate to Advanced
Time: 45 minutes to an hour
Directions:
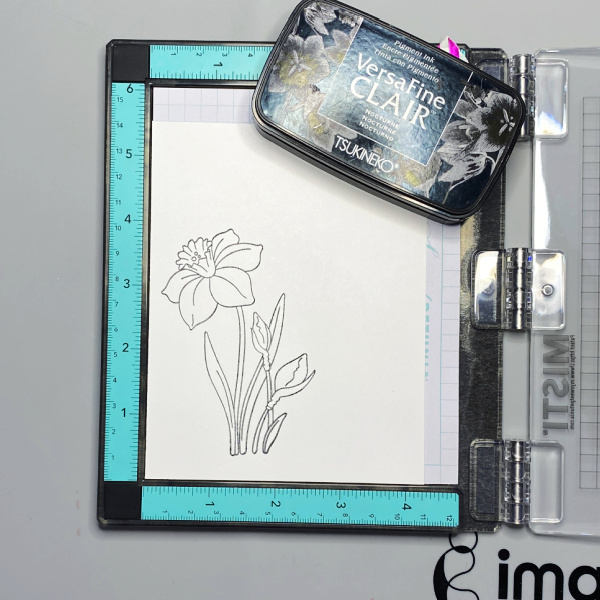
Step 1
Place a piece of white cardstock in the corner of a stamping platform and use Nocturne VersaFine Clair to add ink to the stamp.
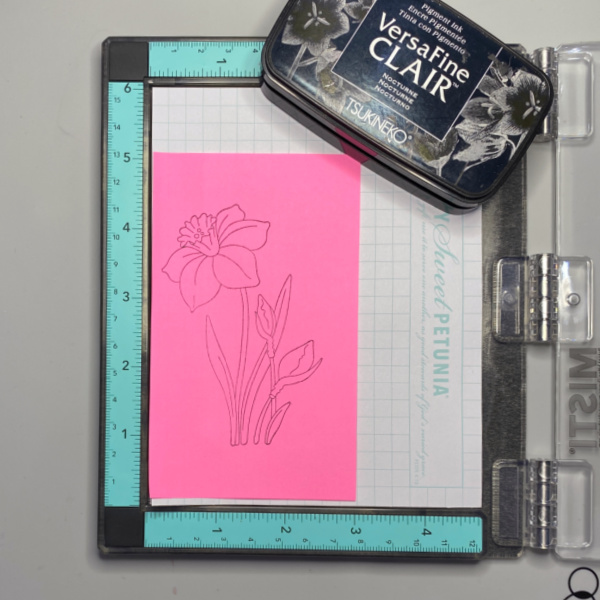
Step 2
Stamp the image on a post-it note or masking paper using Nocturne VersaFine Claire ink, then fussy cut out the image.
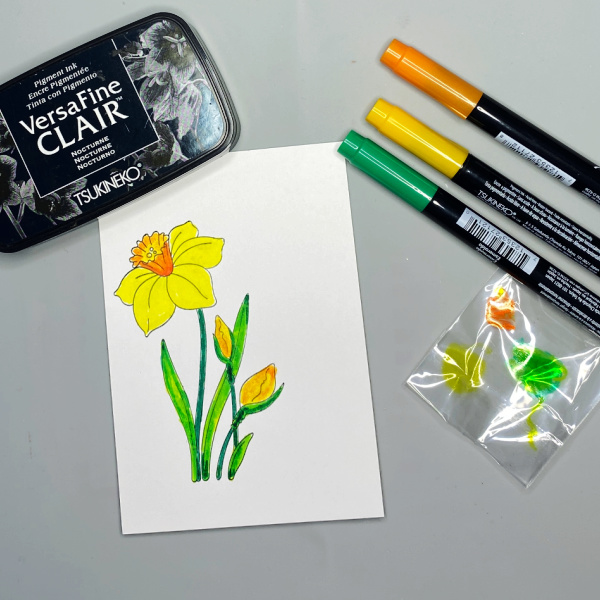
Step 3
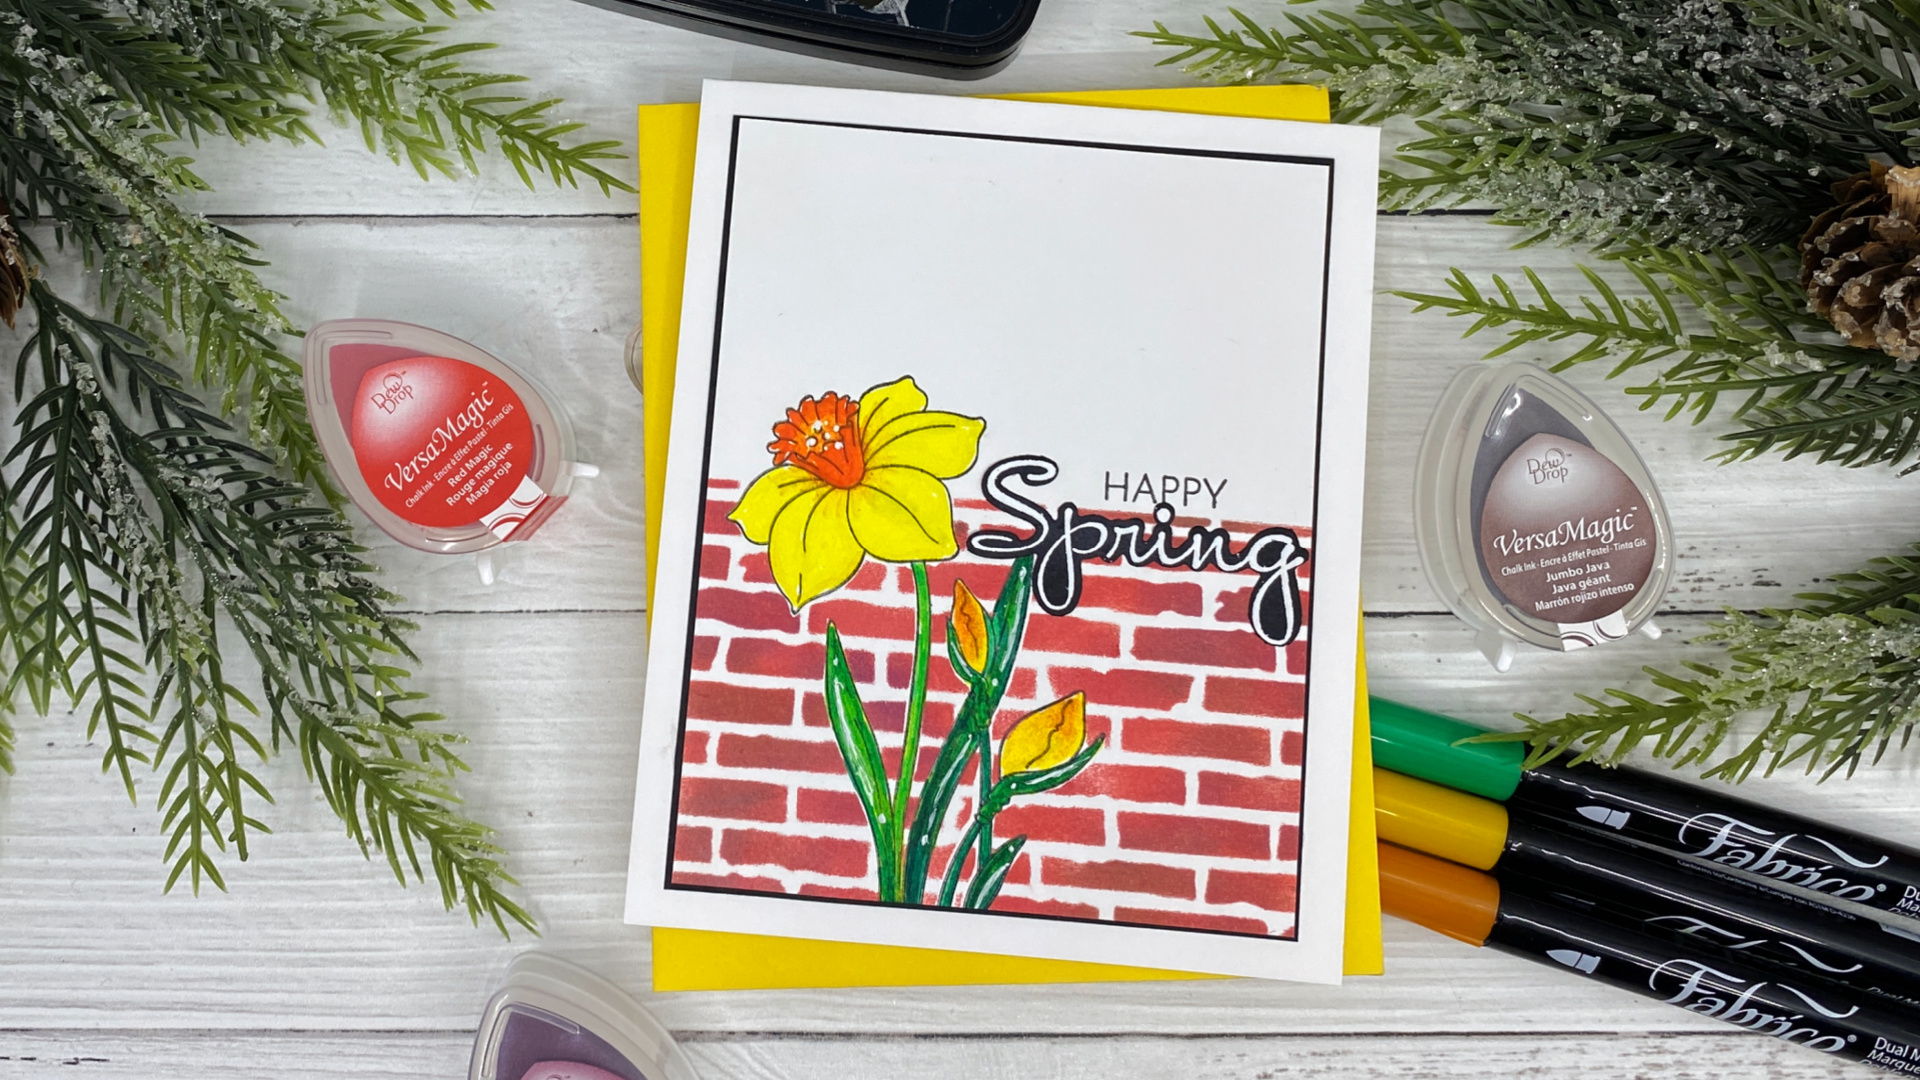
Color the image using Fabrico markers. You can blend the colors using a piece of acetate as shown in the picture. The green marker I used is Emerald. I created a lighter green by scribbling some green on the piece of acetate and then picked it up with the yellow marker, creating a yellow green color. I also created a lighter orange by scribbling orange on the piece of acetate and then picking it up with the yellow marker. This doesn’t in any way contaminate your markers, all you do after you finish blending is scribble on a regular piece of paper until you get the true color back.

Step 4
Using the mask you created earlier, cover the daffodil image that you colored and then add the stencil over it. You will also need to mask off the top portion of your panel as well to keep it clean while you ink blend over the stencil. I used three different colors of VersaMagic Dew drops to give the bricks a more realistic look. They are listed below. I love how well the VersaMagic chalk inks blend together.

Step 5
Remove the stencil and mask from the panel and cut it down to 3.78 xX 4.78
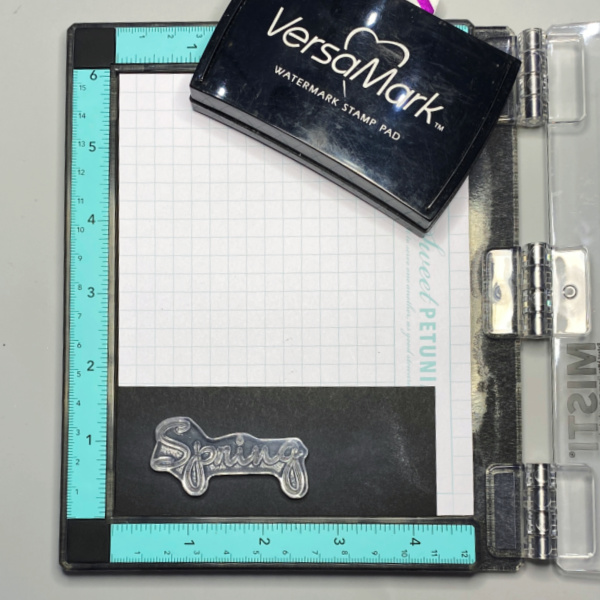
Step 6
Insert a piece of black cardstock into the corner of a stamping platform and use an anti-static tool to prep surface. Stamp the sentiment using VersaMark ink and heat emboss it with MBoss White Embossing Powder, then cut it out with the coordinating die.
Stamp the sentiment “happy” directly on the card front and add the embossed sentiment below it.
Step 7
Assemble your card by adhering the front panel to a black panel cut to 3.75 X 5 using On Point Glue and then adhering it to a card base cut to 4.25 X 11, scored at 5.5
I hop you will give these techniques a try. Thank you for stopping by our blog today. Until the next time, stay crafty!
Supply List
Imagine Crafts:
VersaFine Clair – Nocturne
Fabrico Dual Marker -#112 Tangerine
Fabrico Dual Marker – #111 Lemon Yellow
Fabrico Dual Marker – #121 Emerald
VersaMagic Dew Drop – Red Magic
VersaMagic Dew Drop – Perfect Plumeria
VersaMagic Dew Drop – Jumbo Java
VersaMark Watermark Ink
MBoss White Embossing Powder
Sponge Daubers
On Point Glue
Other Products:
Daffodil Stamp Set + Dies – The Rabbit Hole Designs
Back Ally Stencil – The Rabbit Hole Designs
Teal Mini MISTI
Hero Arts Pitch Black Cardstock
Neenah Classic Solar White 120lb Cardstock – card base
Neenah Classic Solar White 80lb – Cardstock panel
