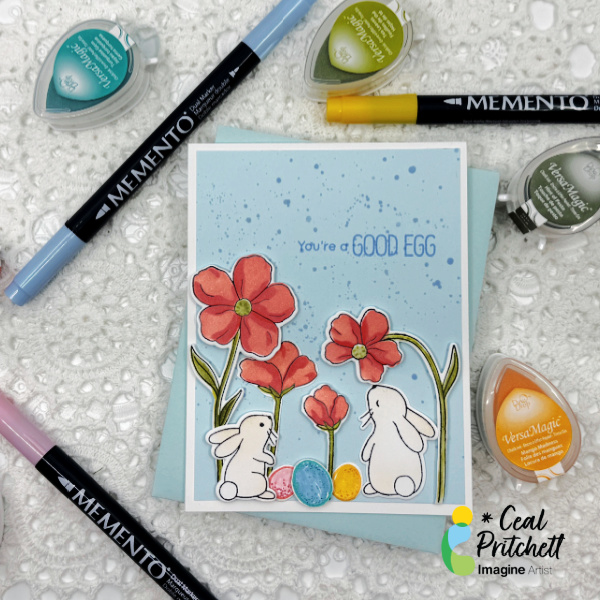
It’s Ceal, here. Today I am sharing how to make this cute Easter card. I love the elements to this card; the flowers are gorgeous, and the bunnies are super cute. You could leave off the eggs and easter sentiment and it becomes a spring card.
Skill: Intermediate to Advanced Time: 45 Minutes
Directions:
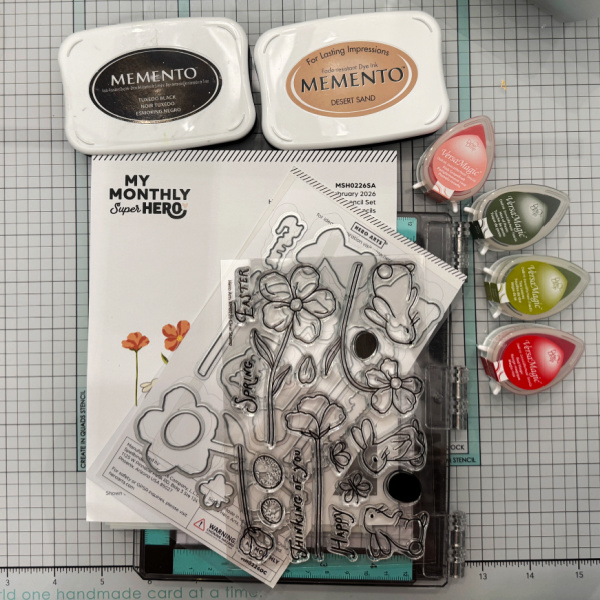
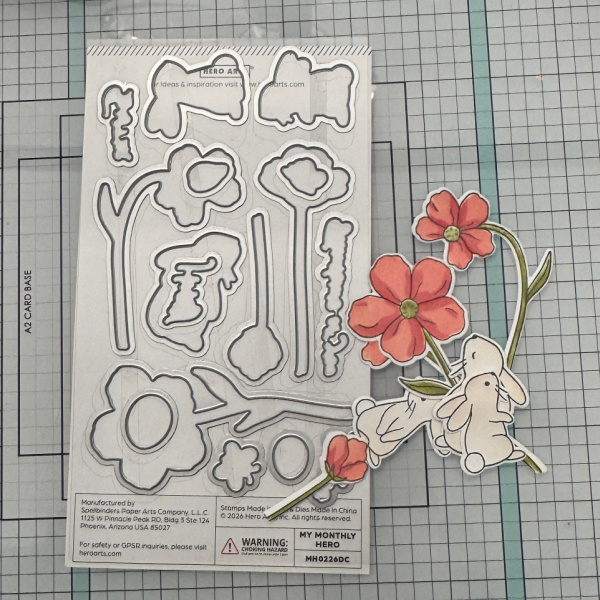
Gather your supplies. To make this card you will need a stamp set that has bunnies, eggs and flowers, along with coordinating dies. Several colors of inks, some markers and a re-inker.
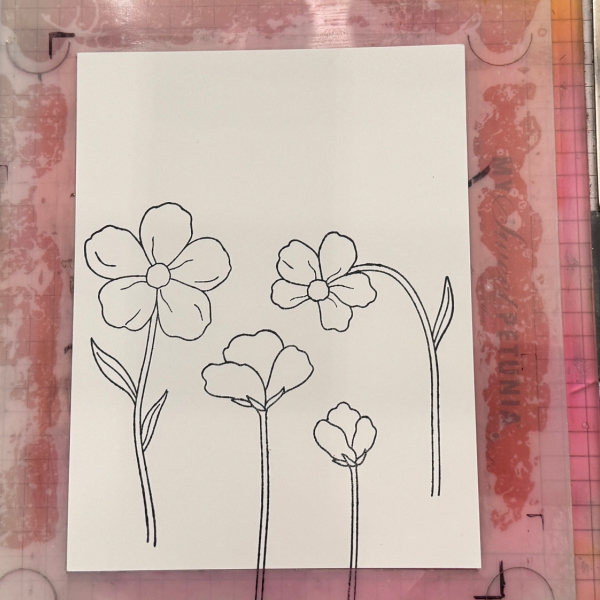
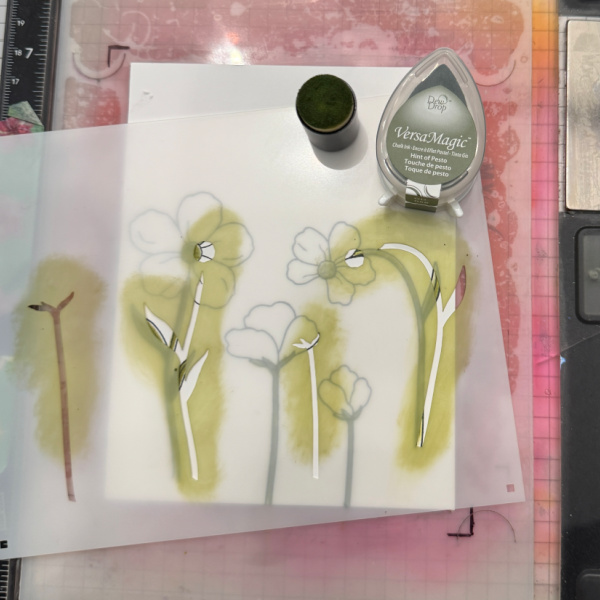
Step 1: Stamp the flowers in a black ink. I used Memento Tuxedo Black
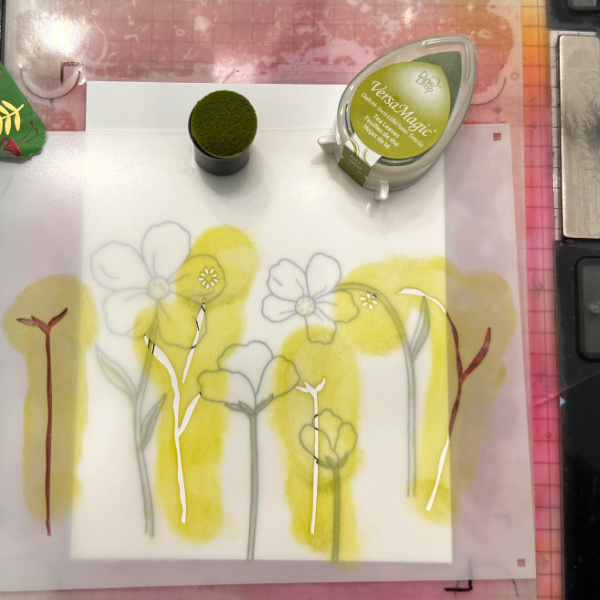
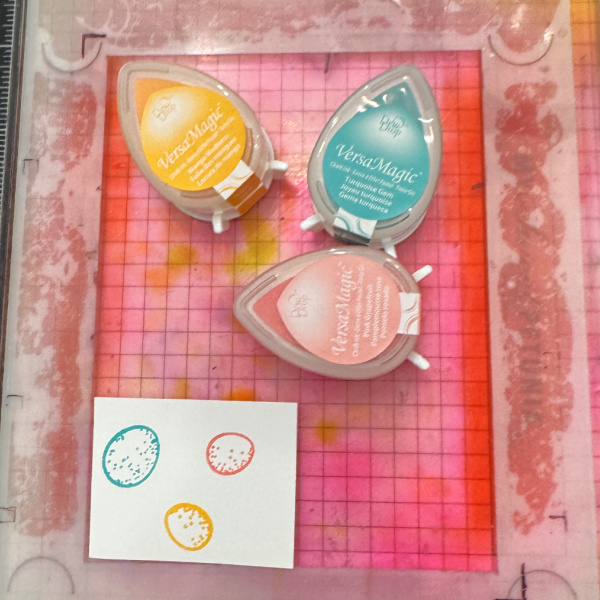
Step 2: Color the flowers using the coordinating stencils. Stencil one is a light green. I used VersaMagic Tea Leaves
Step 2a Stencil two is a darker green. I used VersaMagic Touch of Pesto
Step 2b:
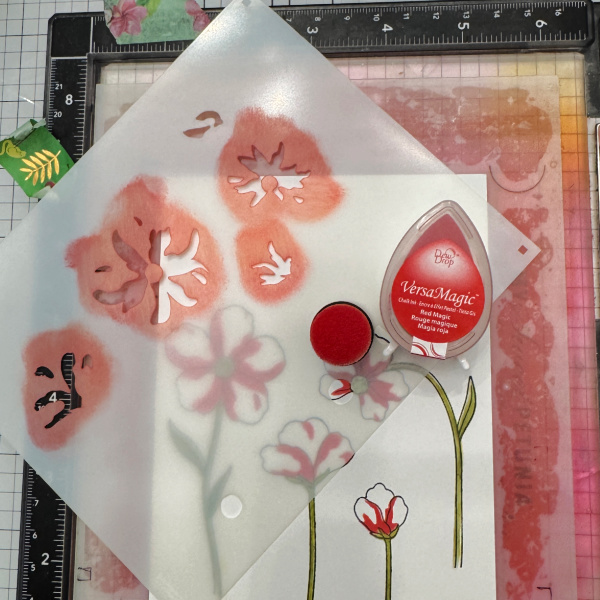
Stencil three is a dark red. I used VersaMagic Red Magic.
Step 2c: Stencil four is a peachy pink. I used VersaMagic Pink Grapfruit
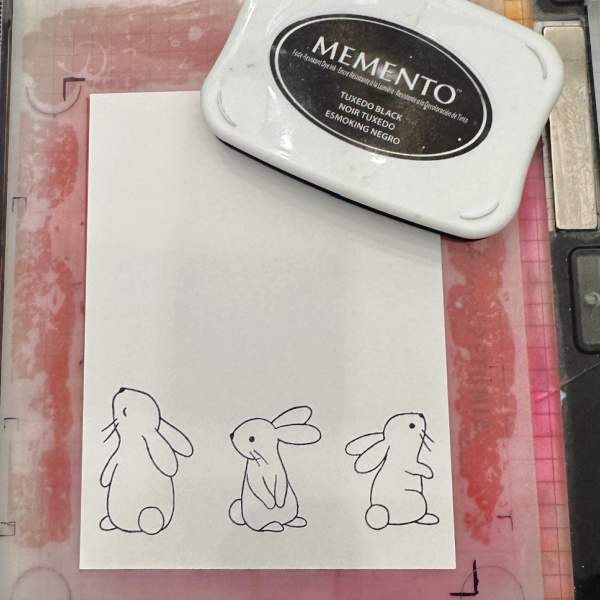
Step 3: Stamp the bunnies using a black ink. I used Memento Tuxedo Black.
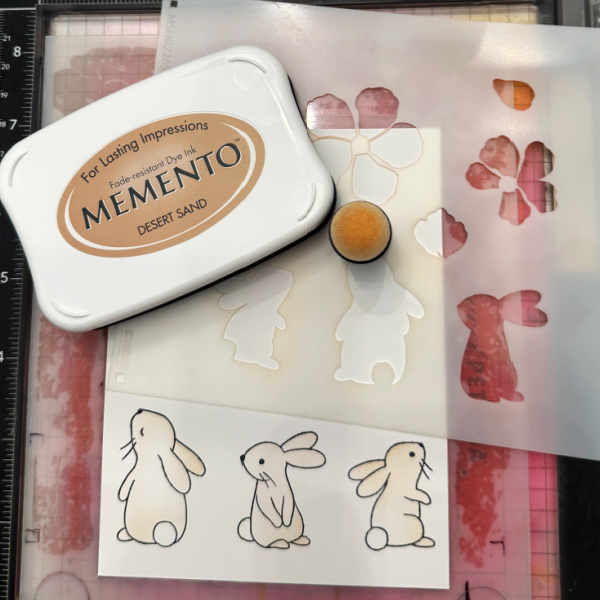
Step 4: Using the coordinating stencil color the bunnies a light brown. I used Memento Desert Sand.
Step 5: Cut a panel of light blue cardstock 5.25 x 4. Using a paint brush and a re-inker splatter the panel with a light blue ink. I used Memento Summer Sky.
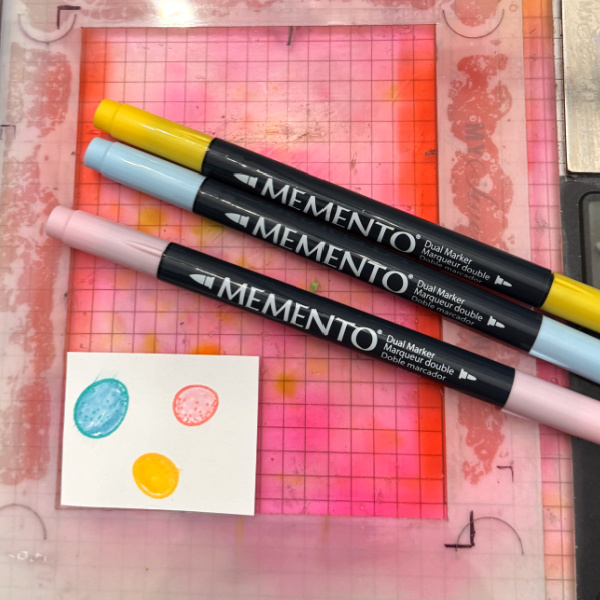
Step 6: Stamp the eggs in colored inks. I used VersaMagic Mango Madness, Turquoise Gem and Pink Grapefruit.
Step 7: Color in the eggs with markers. I used Memento markers in Dandelion, Summer Sky and Angel Pink
Step 8: Cut out all the elements and arrange them as you wish on the blue panel, stamp the greeting on the panel and then finish the card by adhering the panel to the base.
Craft Supplies:
Imagine Products:
• VersaMagic Dew Drops – Red Magic – Pink Grapefruit – Mango Madness – Turquoise Gem – Tea Leaves – Hint of Pesto
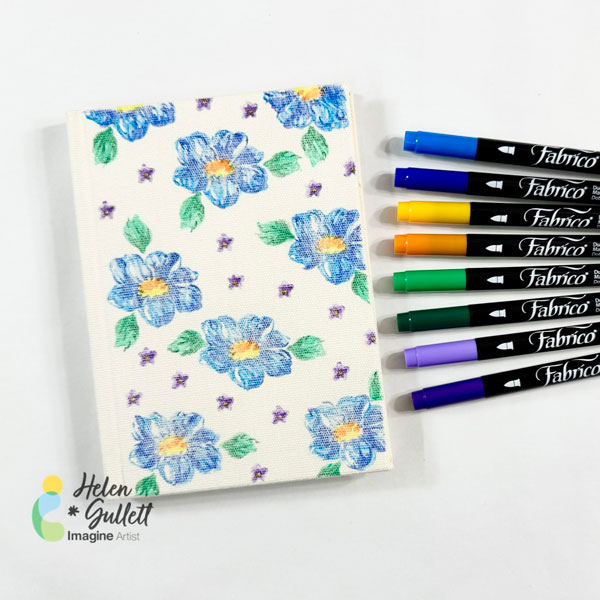
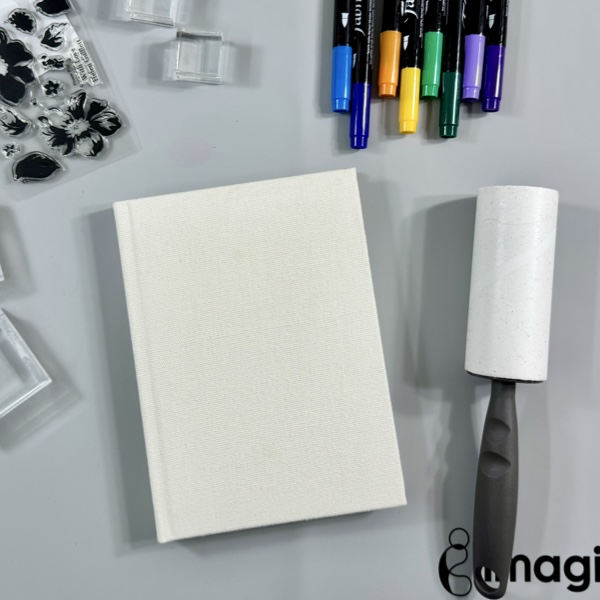
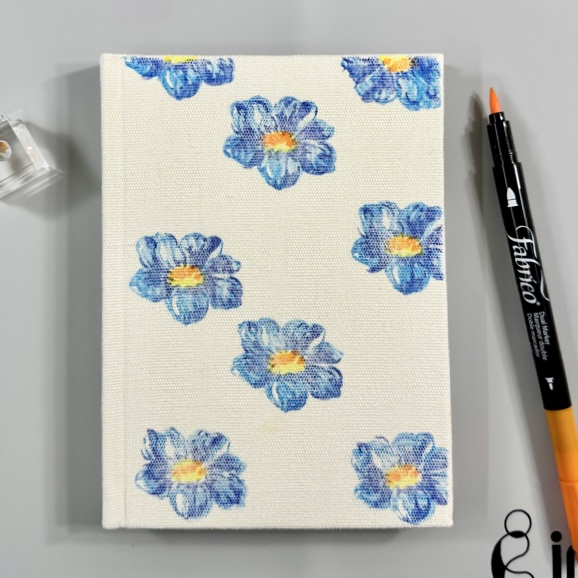
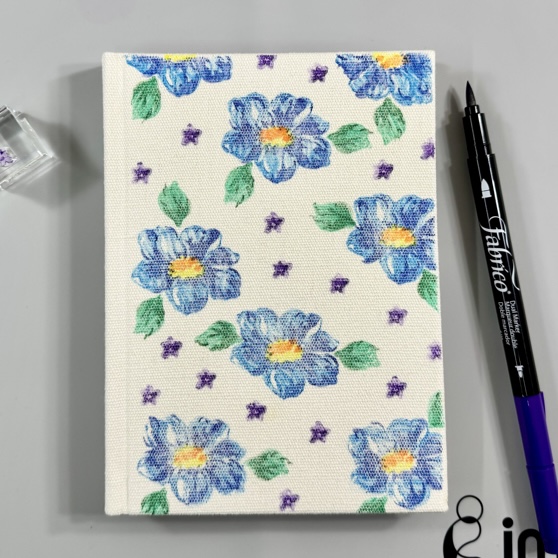
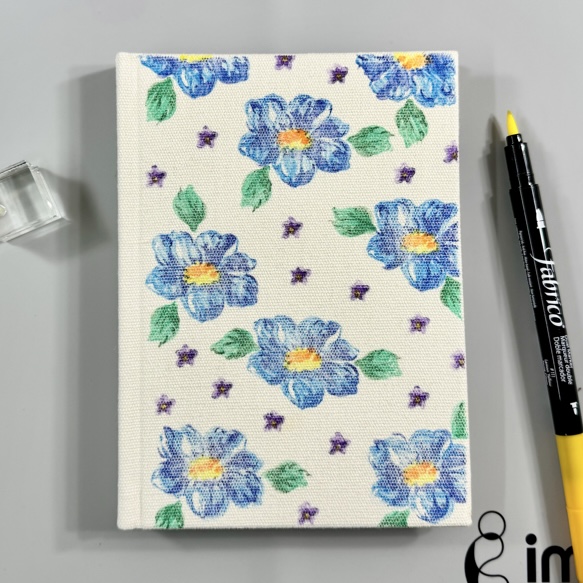
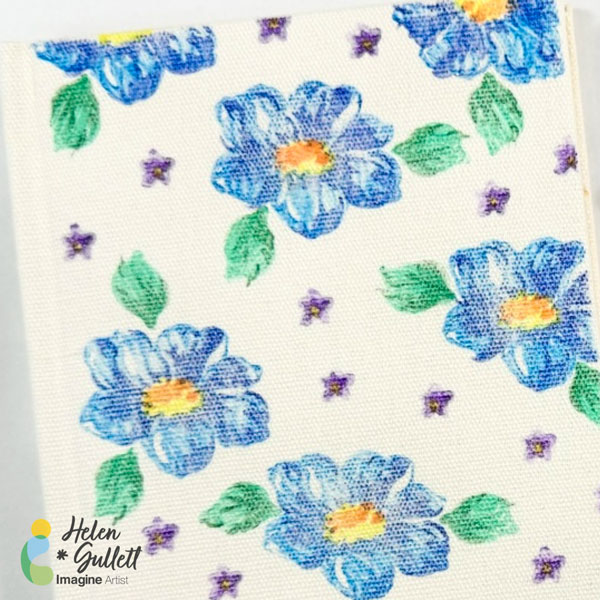
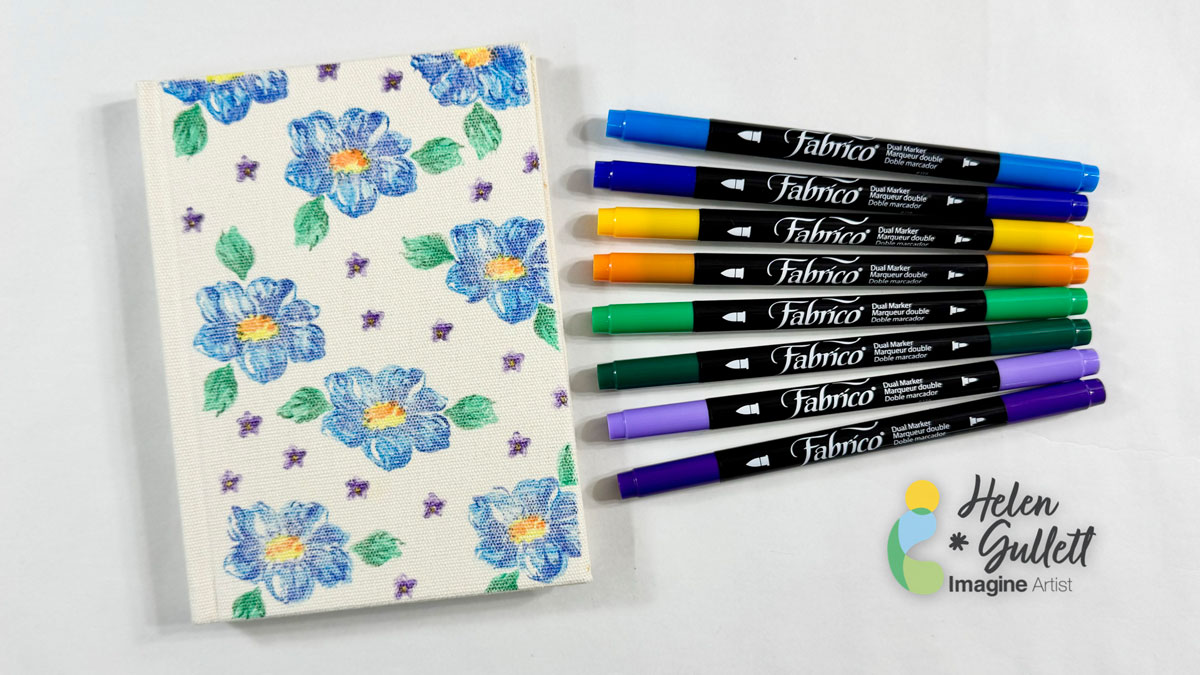
~ Hello crafty friends! Every year, I would need a new journal to start the new year and this time I got a new blank canvas journal that I wanted to personalize. So today, I wanna share with you how to personalize your own canvas journal. It is very easy and fun for sure.
Let’s get crafting!
Skill: Beginner Time: 15 minutes
Direction:
Step 1
Get the blank canvas journal out of its plastic packaging and then use a link roller to clean the canvas cover well from dust, lint, and threads. This step to make the next stamping steps easier and nothing would get stuck on your stamp later.
Step 2
I worked with a layer stamp set, you can use any stamp set you want to personalize your canvas journal.
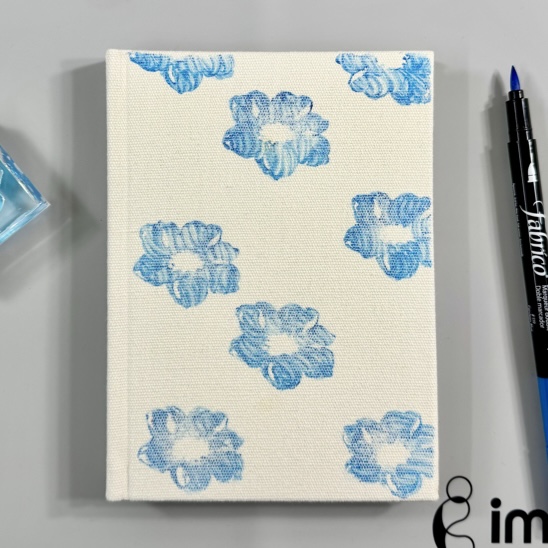
The first step is stamping the first base layer of the big flower. Put the flower stamp on a stamping acrylic block, and then cover it with some ink using the Cerulean Blue Fabrico Marker. Then stamp it on the canvas cover. Make sure to press it down strongly and evenly, do not wiggle it around to get a good impression on canvas.
Repeat the stamping until you cover the whole canvas journal cover.
Step 3
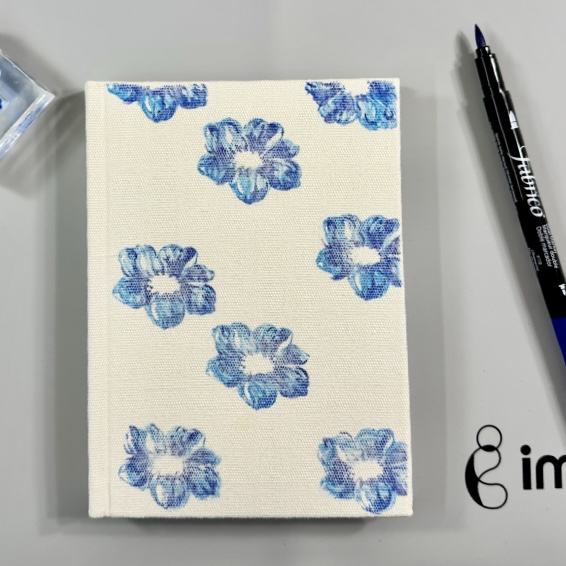
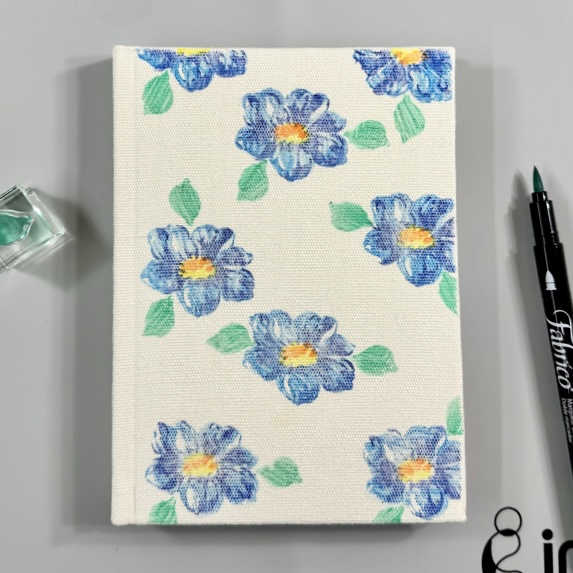
To stamp the second layer of the flower, put the flower stamp on a stamping acrylic block, and then pick a second darker color. I used the Ultramarine Fabrico Marker. Cover the whole stamp with the ink and then stamp it on the canvas cover. Make sure to press it down strongly and evenly, do not wiggle it around to get a good impression on canvas.
Repeat the stamping until all flowers are stamped with the second layer image.
Step 4
Next, stamp the middle part of the flower. Put the base layer (solid) of the middle part of the flower stamp on a stamping acrylic block, and then cover it with some ink using the Lemon Yellow Fabrico Marker. Then line it up in the middle of the flower, and stamp.
Make sure to press it down strongly and evenly, do not wiggle it around to get a good impression on canvas.
Repeat the stamping until you cover the whole canvas journal cover.
Step 5
Then, grab the second layer of the middle part of the flower and put it on a stamping acrylic block. Use the Tangerine Fabrico Marker to stamp it on top of the base layer.
Make sure to press it down strongly and evenly, do not wiggle it around to get a good impression on canvas.
Repeat the stamping until you fill all the flowers.
Step 6
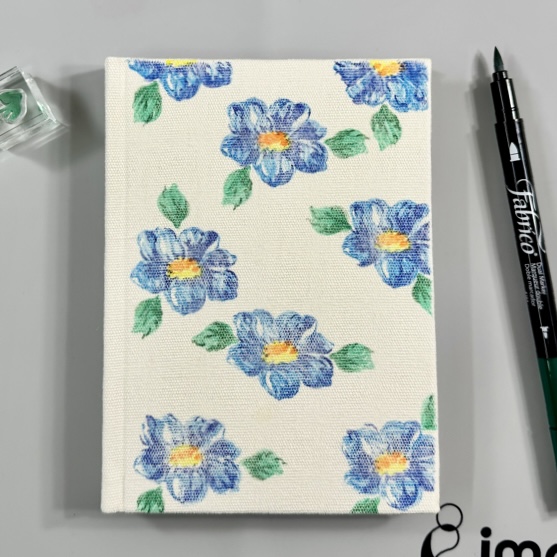
Use the Emerald Fabrico Marker to stamp the first base layer of the leaf.
Put the leaf stamp on a stamping acrylic block, cover it with some ink, and then stamp it on around the flower as many as you want.
Make sure to press it down strongly and evenly, do not wiggle it around to get a good impression on canvas.
Repeat the stamping step until you like how it looks.
Step 7
For the second layer of the leaf, I use the Forest Fabrico Marker.
Put the stamp on a stamping acrylic block, cover it with some ink, and then stamp it on each leaf.
Make sure it lines up with the base image first, and then press it down strongly and evenly, do not wiggle it around to get a good impression on canvas.
Repeat the stamping step until all leaves are stamped.
Step 8
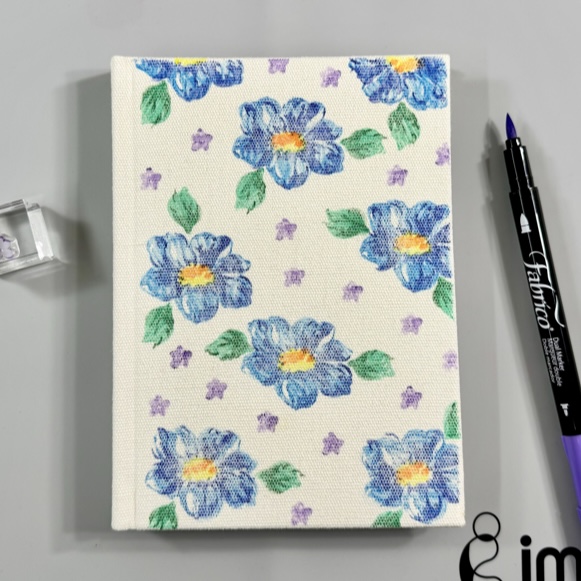
Now stamping the tiny flowers to fill in the empty spaces.
Put the base layer of the tiny flower stamp on a small stamping acrylic block, cover it with some ink using the Wisteria Fabrico Marker, and then stamp it until it fills out the empty spaces on the cover.
Make sure to press it down strongly and evenly, do not wiggle it around to get a good impression on canvas. Repeat the stamping step.
Step 9
Next is to stamp the second layer of the tiny flower. Put it on a small stamping acrylic block, cover it with some ink using the Peony Purple Fabrico Marker, and then stamp it until all second layers of the tiny flower are stamped.
Make sure to press it down strongly and evenly, do not wiggle it around to get a good impression on canvas. Repeat the stamping step.
Step 10
Last step of this process is stamping the middle part of the tiny flower.
Put the stamp on a small stamping acrylic block, cover it with some ink using the Lemon Yellow Fabrico Marker, and then stamp it on all the tiny flowers.
Make sure to press it down strongly and evenly, do not wiggle it around to get a good impression on canvas. Repeat the stamping step.
If you want, you can use a craft iron to heat set the ink to the canvas. But without ironing, the ink will dry permanently in 24 hours (do not get it wet).
Being able to personalize our own canvas journal is a fun project and also, you can make it for gifting, too.
I hope you will give this technique a try and play around with different colors. Thanks so much for stopping by our blog today.
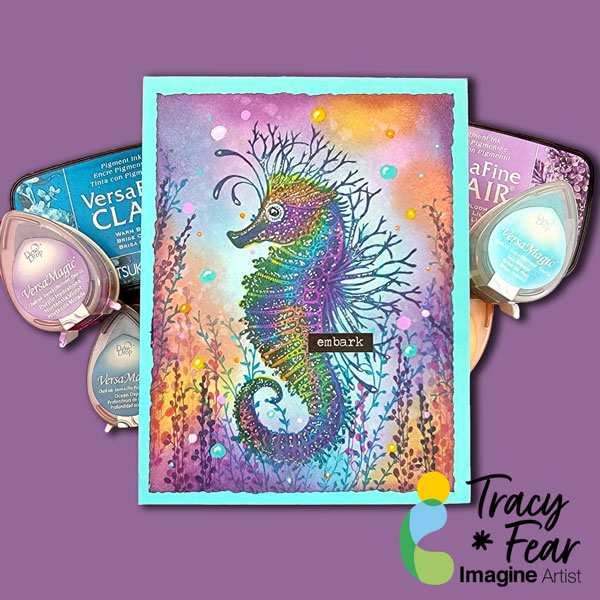
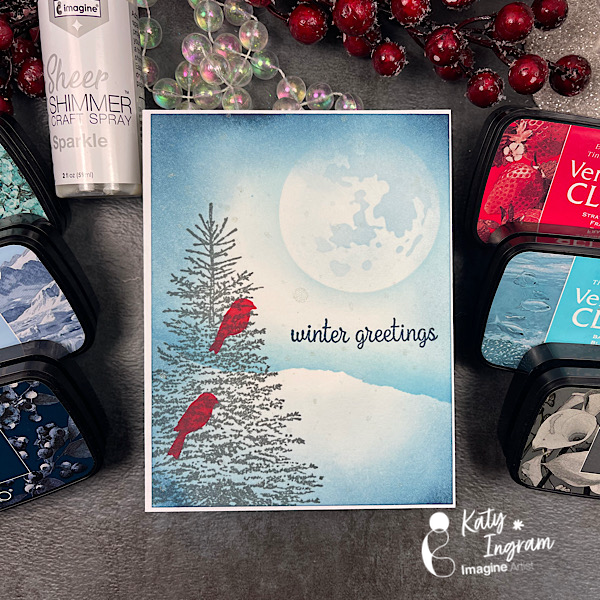
Hello Friends! Katy here with my latest video using a color palette of blue and gray VersaFine Clair inks to create a simple winter scene. This design is great for winter birthday cards or simple greetings. Video has all the details. Thanks for watching.
Strathmore 500 Series Hot Pressed Watercolor Paper 100 lb Cardstock Penny Black Winter Tree Stamp Penny Black Seasons Marvel Stamp Set Hero Arts CM308 Stacking Snowflakes Blending Brushes Tim Holtz Moon Mask
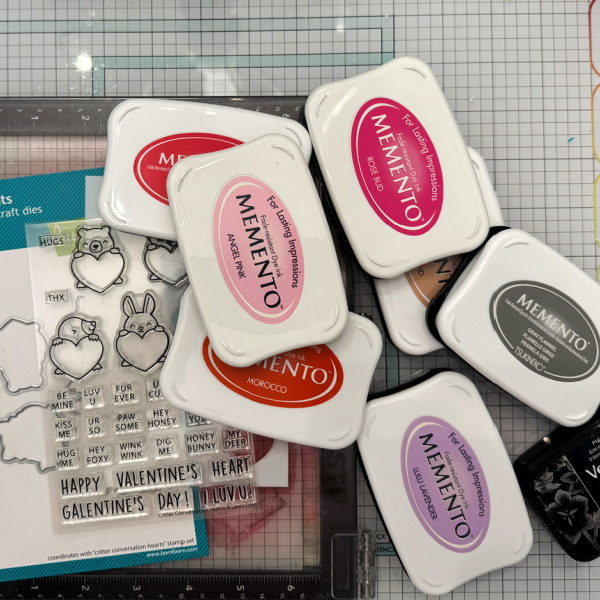
Hello everyone! Today I am sharing how I made this filmstrip valentines card using some Memento inks.
Skill: Intermediate Time: 1 hour
Directions:
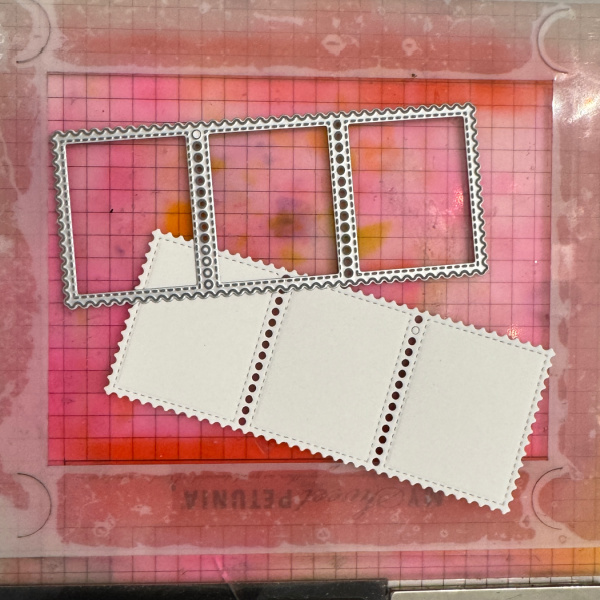
Gather your supplies. To make this card, you will need a valentines set (preferably with small images to fit in the film strip), a film/postage strip die, and sereral colors of ink.
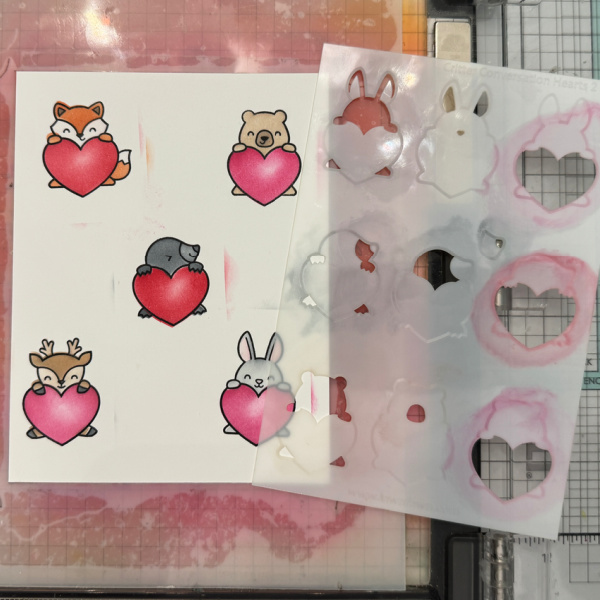
I started with a white top folding A2 card base and a white panel for the images. I used a set from Lawn Fawn that has coordinating stamp, coloring stencils and dies. I used Memento inks in several colors to color the images and a stamp/film strip die.
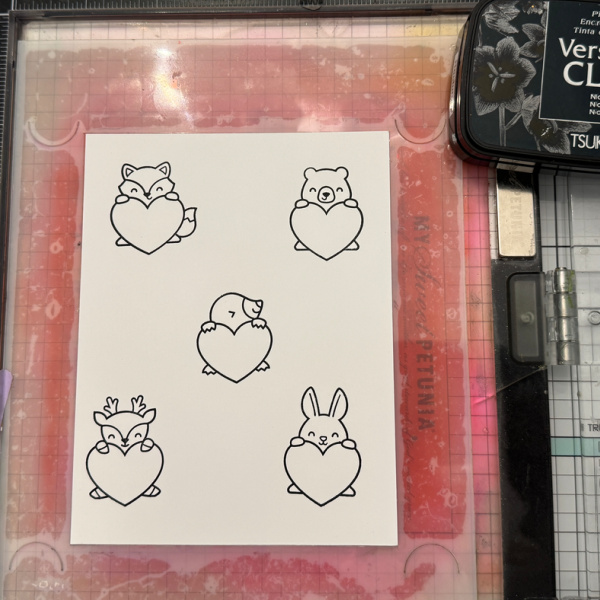
Step 1: Stamp the images in VersaFine Nocturne ink on a panel of white cardstock.
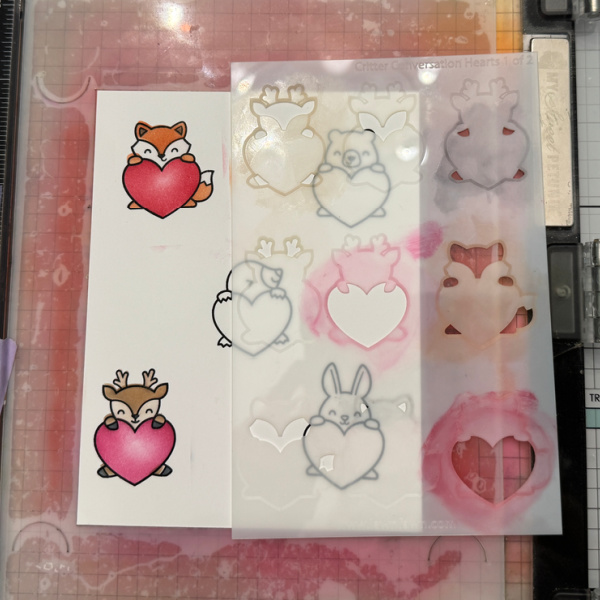
Step 2: Using stencil No. 1, color the images in the desired colors. I used Morocco for the fox and Desert Sand for the deer.
Step 3: Using stencil No. 2, color the remaining images in the desired color. I used Desert Sand for the bear and Gray Flannel for the seal and Bunny just heavier handed on the seal. I used Angel Pink for the ears.
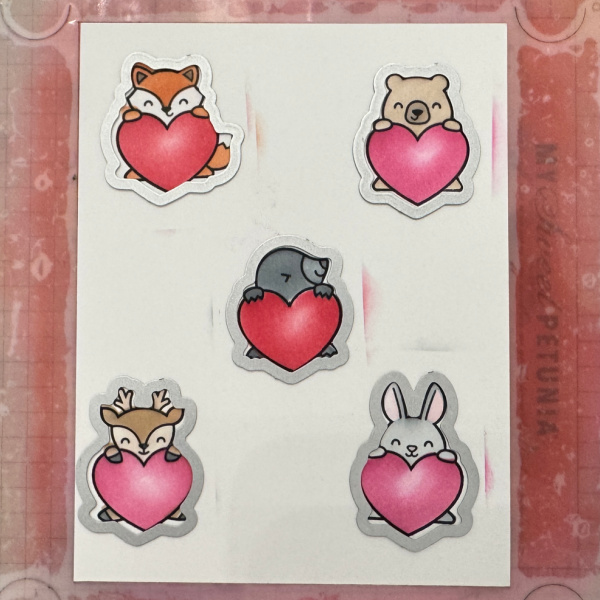
Step 4: Using the coordinating dies and a die cutting machine, cut out the images.
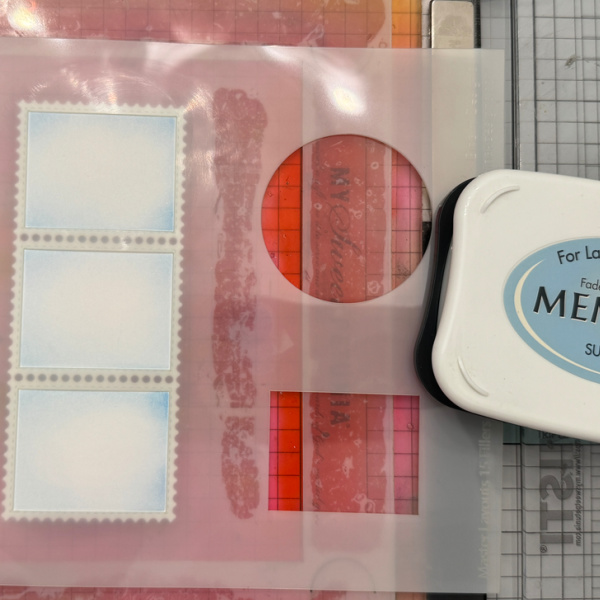
Step 5: Cut out the postage/film strip and then color with coordinating stencil. I used Summer Sky.
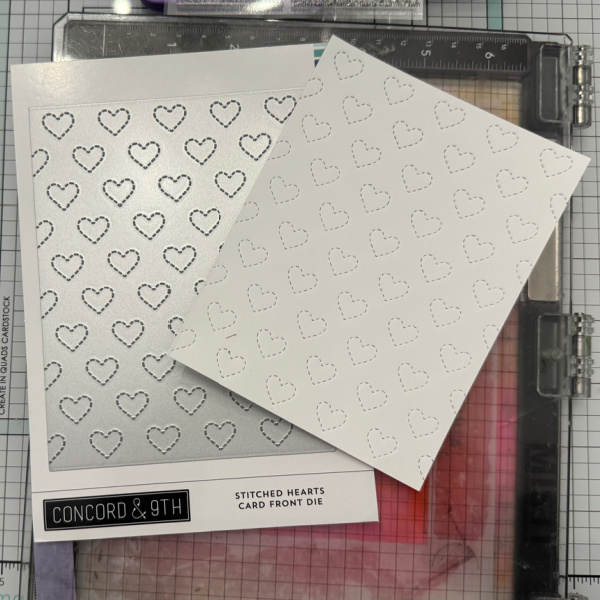
Step 6: Cut out a background using a heart cover plate.
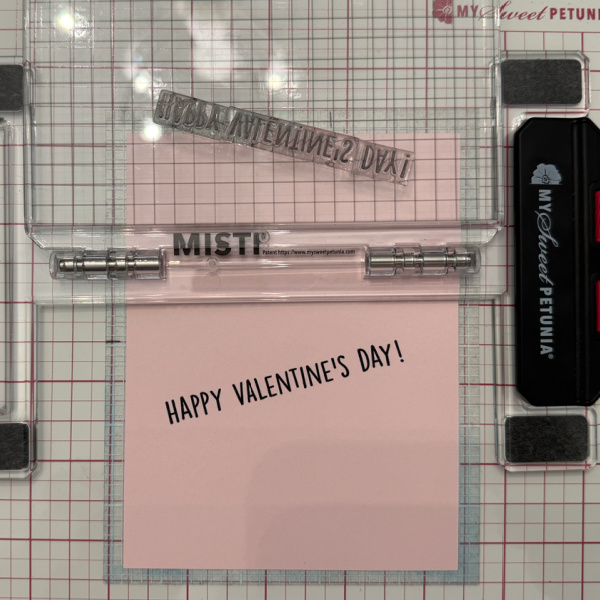
Step 7: Stamp the greeting and then cut down at an angle. Put all the elements together on the card base.
The postage/film strip will hang over a little and will need to be trimmed. You can prevent this by madding a horizontal card rather than a vertical one.
Other Products Used Simon Hurley Very Berry Stencil Set Berry Best Stamp and Coordinating Dies Stellar paste in Black Widow Lunar Paste in Later Gator PVA Adhesive Ink blending brushes