Watercolor Card for Mom Using VersaColor

By Helen Gullett

Hello crafty friends! Today, I wanna share with you a fun technique to make a card for a mom. We are going to do some watercoloring with VersaColor ink pads and also heat-embossing technique. So… Let’s get some ink pads and watercoloring together!

Skill: Beginner
Time: 15-20 minutes

Direction:

Step 1
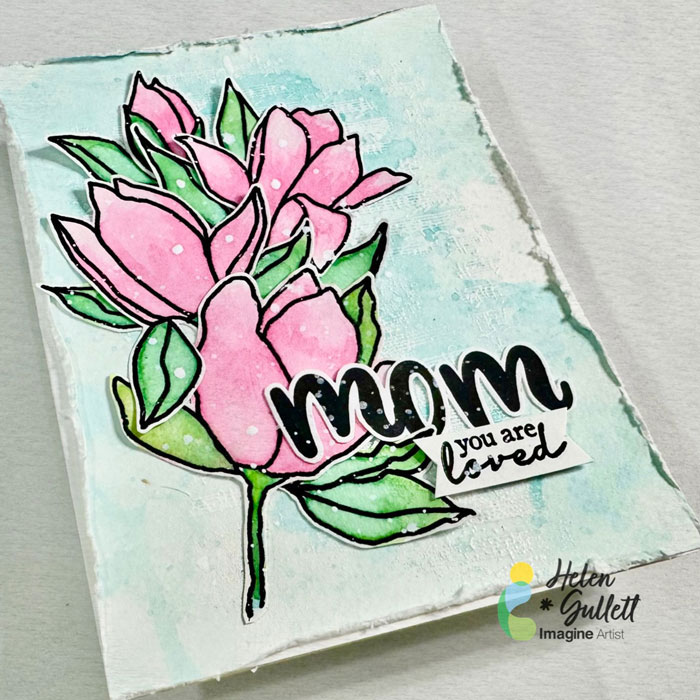
Cut out a piece of watercolor cardstock (or mixed media paper would work, too) into a 4.25 inch x 5.5 inch card panel. Prep the background watercolor cardstock panel with some anti-static embossing powder. Then, stamp the music sheet background stamp with VersaMark ink pad randomly on it, and add some of the white opaque embossing powder. Heat the embossing powder with a craft heat gun.
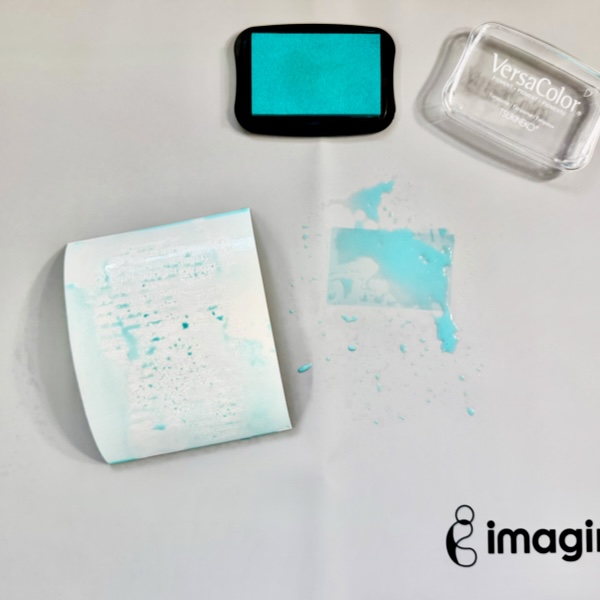
Step 2
Dab some inks of the VersaColor Turquoise ink pad on the craft mat and then spray with some water. Smoosh the watercolor panel into the ink on the craft mat, dry the ink, and repeat the smooshing and drying the ink as needed.
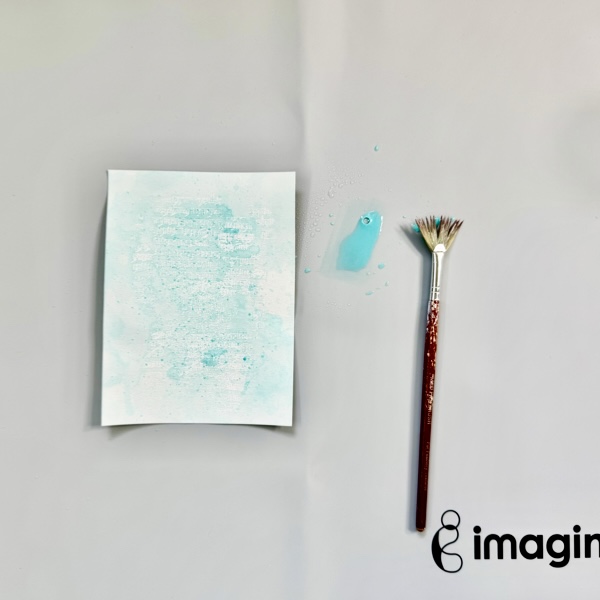
Step 3
Add some ink splatter on the background panel with a fan paint brush, and dry it with a craft heat gun.
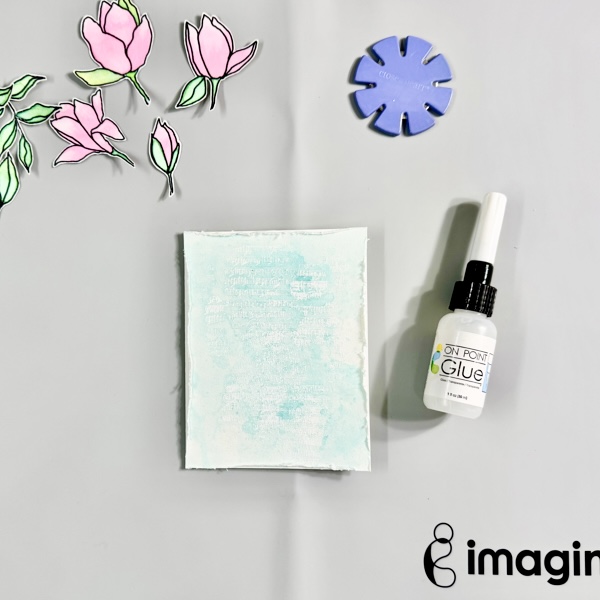
Step 4
Distress the edges of the background panel with a distress tool or you can use scissors for this distress technique.

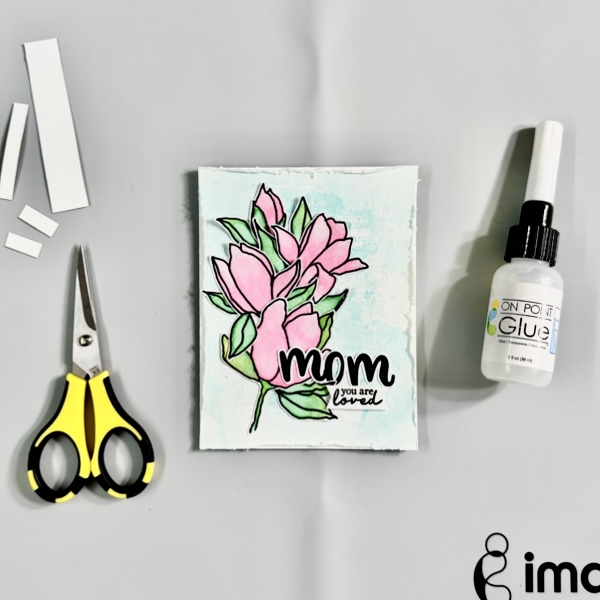
Add the background panel to the card base with On Point Glue.

Step 5
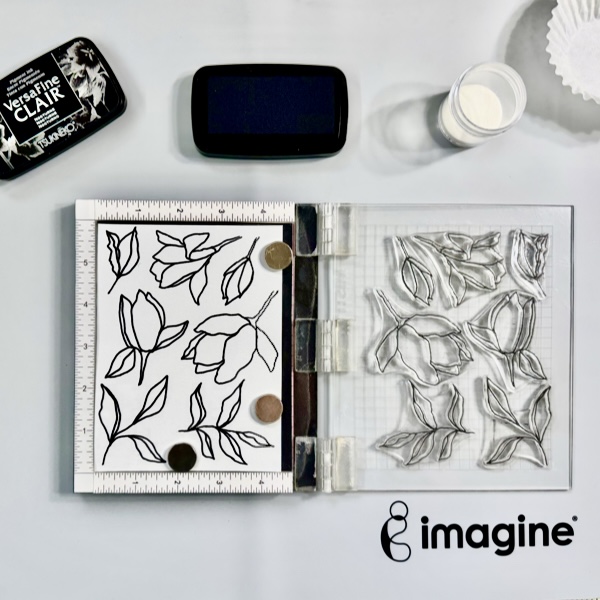
Stamp the magnolia and leaf  images on another piece of watercolor cardstock with the VersaFine Clair Nocturne using the stamping tool. Repeat the stamping if needed.

Add some of the clear embossing powder on the stamped images while the ink is still wet and then heat it with a craft heat gun.
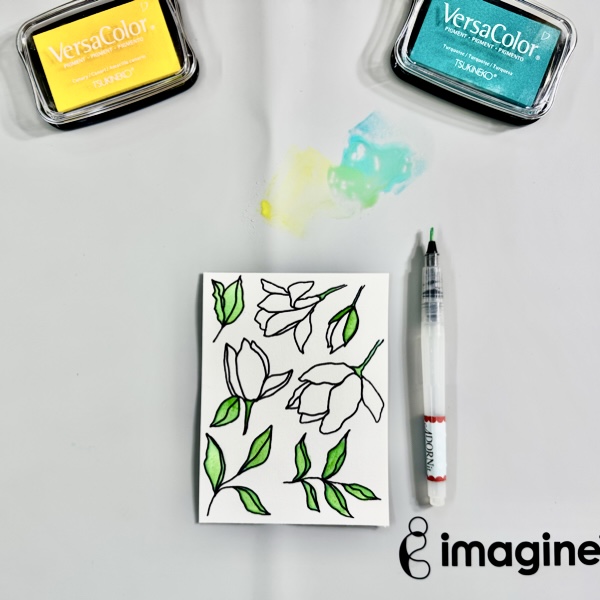
Step 6
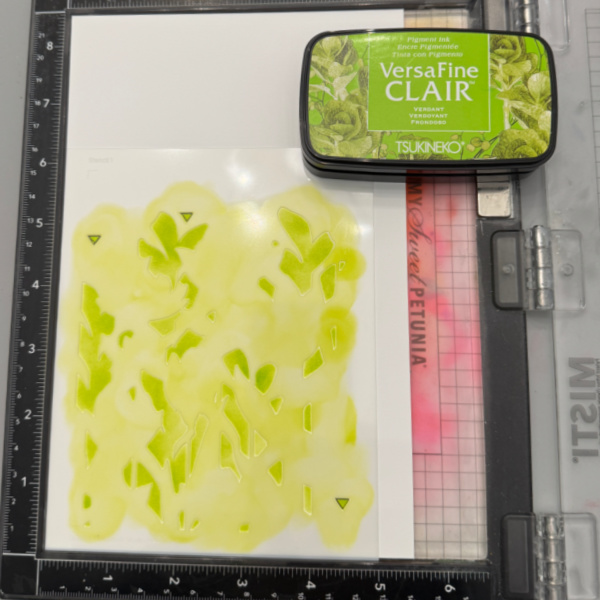
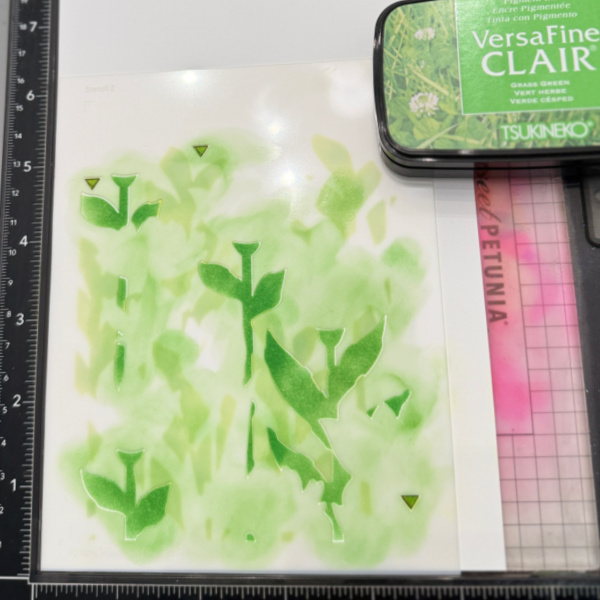
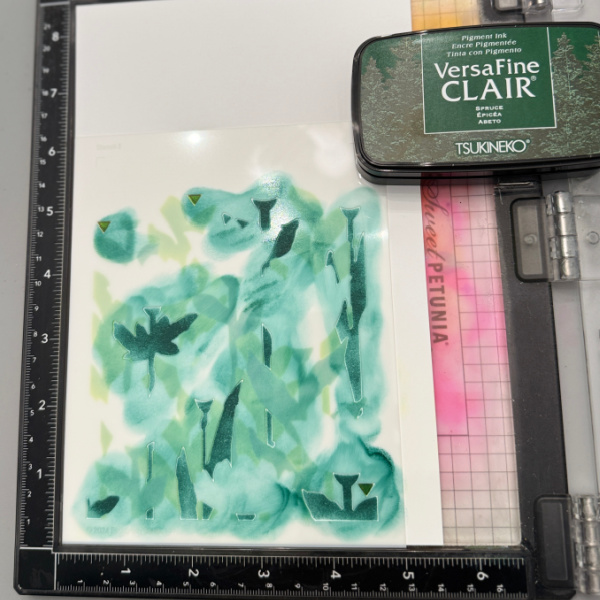
On the craft mat, dab some inks of the VersaColor Canary ink pad and VersaColor Turquoise ink pad, and then spray them with some water. And then, color the leaves and branches with the watercolor inks. Set aside to dry or dry it with a craft heat gun.
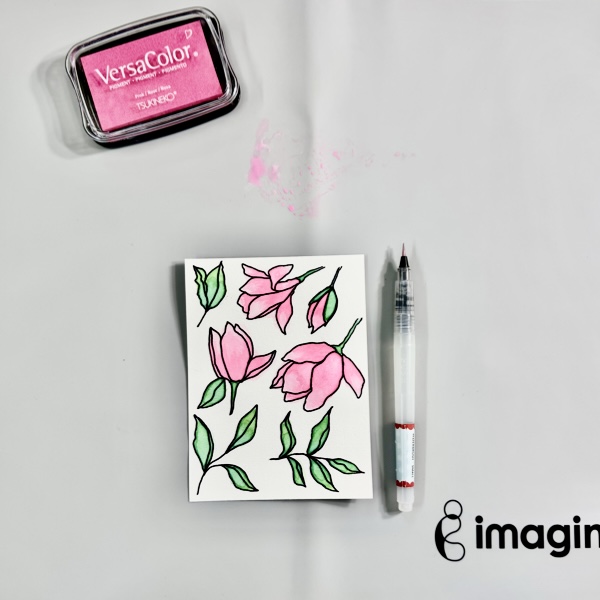
Step 7
Dab some of the ink of the VersaColor Pink ink pad on the craft mat and spray it with some water. Then, color the magnolia flowers and set aside to dry or dry it with a craft heat gun.
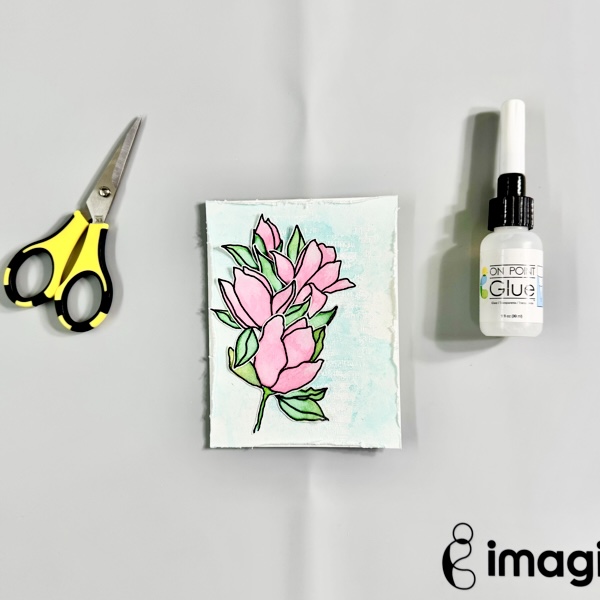
Step 8
When all the watercolor images dried well, fussy cut them with micro-tip scissors. Add them to the card with On Point Glue.
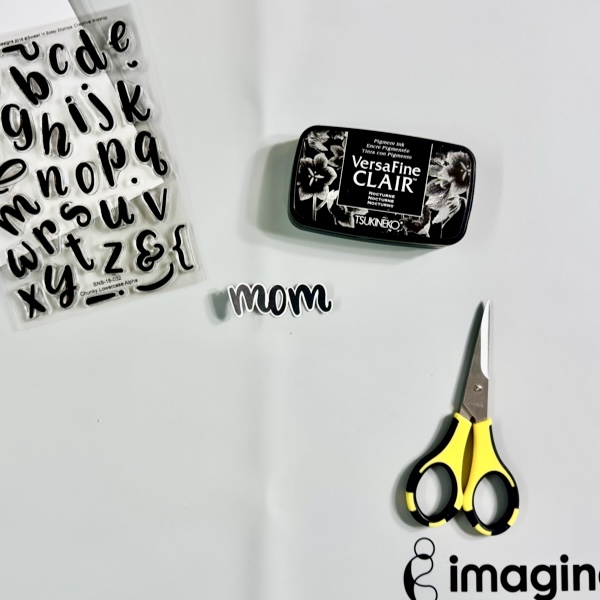
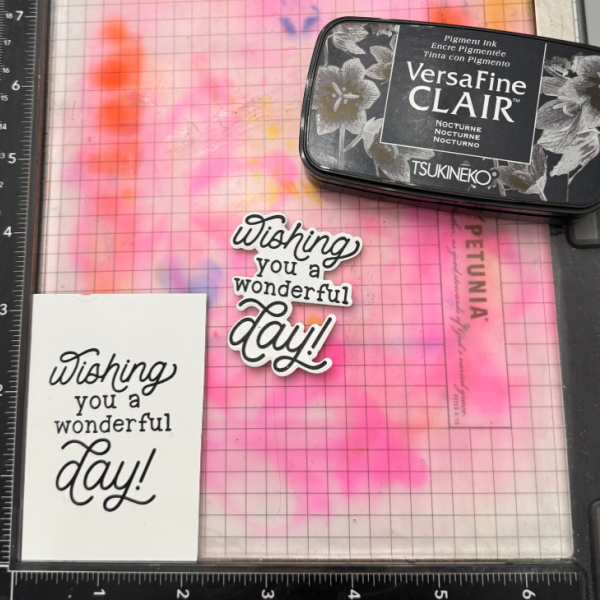
Step 9
Stamp the letters m-o-m on a piece of white cardstock with VersaFine Clair Nocturne. Dry the stamped word MOM with a craft heat gun and then fussy cut it with micro-tip scissors.

Step 10
On the white cardstock, stamp also the second sentiment with VersaFine Clair Nocturne, dry the ink with a craft heat gun, and then trim it into a sentiment label.

Step 11
Add the word MOM on the card with On Point Glue.

Cut out 3-4 strips of white cardstock smaller than the second sentiment label, add them on the back of the sentiment label with On Point Glue, this will add an extra dimension to the sentiment that is not as thick as foam tape. Add the sentiment to the card with On Point Glue.
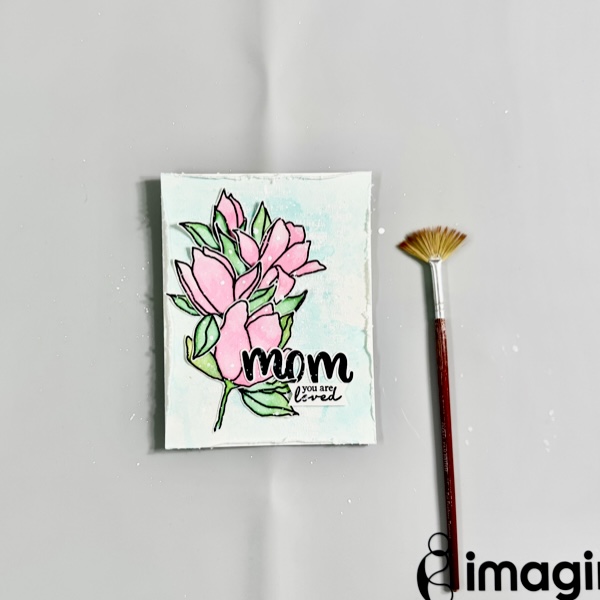
Step 12
Final step, to add extra texture to the background by adding some white paint splatters. Mix a little bit of white acrylic paint with water on the craft mat, pick it up with a fan paint brush, and then splat some of the paint to the card.

Dry the splatter paint with a craft heat gun.

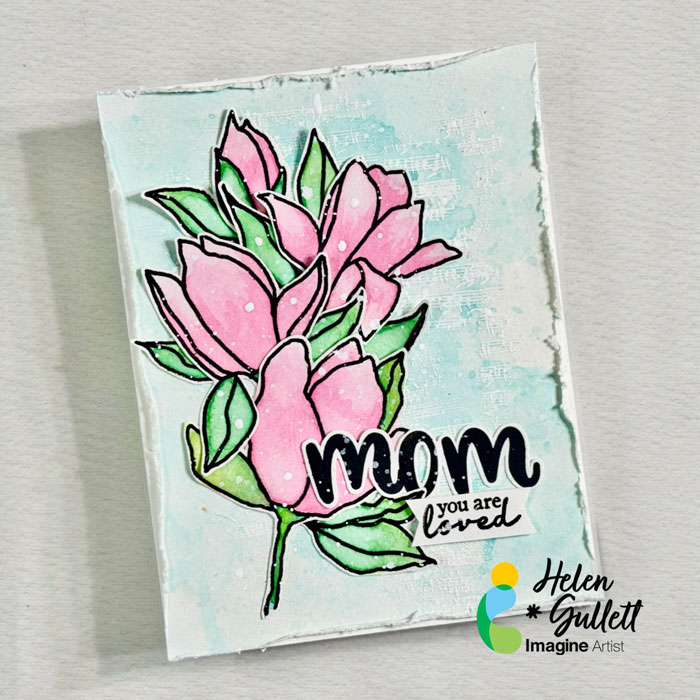
This simple mixed media card is done. I love how it turns out and hopefully you do, too. I like how VersaColor ink pads are not just for stamping but also work as a watercoloring medium.
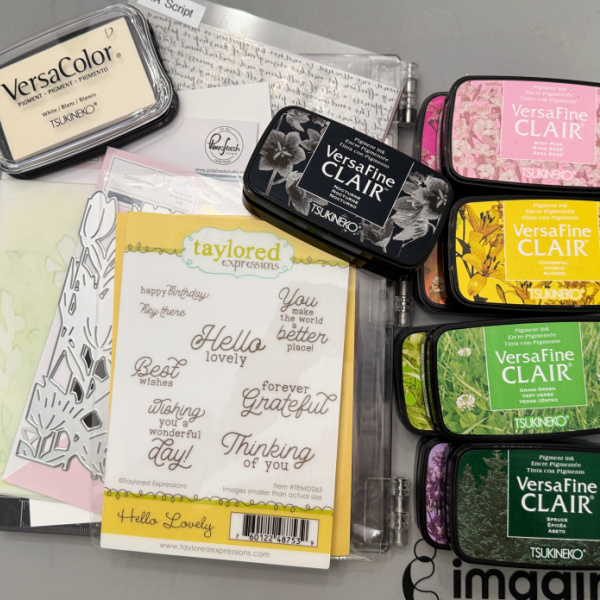
Craft Supplies

Imagine Crafts:

Others:

  • Mindful Magnolias Clear Stamp Set (Creative Worship Stamps)
  • Dearest Friend Clear Stamp Set (Creative Worship Stamps)
  • Vintage Sheet Music Tile Clear Stamp Set (Creative Worship Stamps)
  • Chunky Lowercase Alpha Clear Stamp Set (Creative Worship Stamps)
  • White Opaque Embossing Powder
  • Clear Embossing Powder
  • Neenah Solar White Cardstock 80 lb
  • Fan paint brush
  • Stamping tool
  • Micro-tip scissors
  • Paper trimmer
  • Distresser Tool
  • Bone Folder
  • Bottle Sprayer / Mister Bottle
  • Paper Towel

Simple Ink Swiping Technique For Quick Backgrounds

By Katy Ingram

Hello friends, Katy here and in today’s video tutorial, I’m going to show you how to make a quick background using Memento inks and Sheer Shimmer Spray. Todays project is for Mother’s Day, but it can lend itself to Many different sentiments. Listed below are products I used in todays video including some Affiliate links at no additional cost to you. l thank you for using those links and supporting my work.

Skill: Beginner
Time: 20 minutes

Art Supplies

Imagine

• VersaFine Clair Ink Pad – Nocturne
• Sheer Shimmer Spray – Sparkle

Other

  • Simon Says Stamp – Devine Peony- Die
  • Hammermill – 100 lb cardstock
  • Linen Pearl Cardstock
  • Black 100 lb Cardstock
  • 1/2 inch double sided adhesive
  • 6 inch double sided adhesive
  • The Greetery Stamp Set – To Mom With Love
  • The Greetery Die Set – To Mom With Love

Mother’s Day Card Using Stencils

By Ceil Pritchett

Hello crafty friends!
It’s Ceal, here. Today I will show you how to create a Mother’s Day card with you that uses several layers of stenciling, some stamping and then die cut out.  This card can also be used for other occasions because the “Happy Mother’s Day” greeting is on the inside.

Skill Level: Intermediate to Advanced
Time: 45 mins to an hour

Directions:

Gather your supplies. You will need cardstock, a layering stencil (Pinkfresh Studio used here) Coordinating Dies, several colors of ink (listed below) and a sentiment stamp set (Taylored Expressions used here).

Step 1:
Lay stencil one over a piece of cardstock cut to 5.5 x 8.5 and blend VersaFine Clair Verdant ink over it. Remove and clean stencil.

A little tip for you, I place mine in the corner of the Misti so I will be placing all of them in the same place. This set also has alignment guides which are triangles, be sure to add ink to them.

Step 2:
Lay stencil 2 over the cardstock, lining up the triangle placement guides and blend VersaFine Clair Grass Green over it. Remover stencil and clean it.

Step 3:
Lay stencil 3 over the cardstock, lining up the triangles and blend VersaFine Clair Spruce over it. Remove stencil and clean it.

Step 4:
This step starts the flowers. Lay stencil 4 over the cardstock and blend VersaFine Clair Baby Pink over the open flowers. This photo shows the triangles that are used to align the stencils. Remove stencil and clean it.

Step 5:
Lay stencil 5 over the cardstock, lining up the triangles and blend VersaFine Clair Charming pink over open spaces on the pink flowers and VersaFine Clair Lilac Bloom over the other open spaces. Remove and clean the stencil.

**I forgot to take a photo of the Lilac Bloom, but you can see it below.

Step 6:
Lay Stencil 6 over the cardstock and blend VersaFine Clair Cheerful and VersaFine Clair Summertime inks over the open flowers. Remove and clean the stencil.

Step 7:
Lay stencil 7 over the cardstock and blend VersaFine Clair Charming Pink in the open spaces. Remove and clean the stencil.

This photo is showing the alignment triangles I have been referring to. For the next step you will need to know where they are.

Step 8:
Lay the coordinating die over the flowers lining up the triangles as pictured above. Tape it down so it doesn’t move and run it through the die cutting machine.  This also adds the texture to the flowers.

Step 9:
Cut a piece of kraft cardstock to A2 size 4.25 x 5.5.  Ink up a script stamp with VersaColor White and lay the kraft panel over the ink and rub across with your hand.

Step 10:
Stamp the sentiment and cut it out multiple times for dimension.
Adhere the kraft panel to an A2 white card base. Add the floral panel and then the sentiment. Also stamp a sentiment on the inside.

Supply list:

Imagine Products:

VersaFine Clair:

• VersaFine Clair: Nocturne
• VersaFine Clair: Baby Pink
• VersaFine Clair: Charming Pink
• VersaFine Clair: Summertime
• VersaFine Clair: Cheerful
• VersaFine Clair: Verdant
• VersaFine Clair: Grass Green
• VersaFine Clair: Spruce
• VersaFine Clair: Lilac Bloom
• VersaColor: White
• On Point Glue

Other Supplies:

• White Cardstock: Concord & 9th
• Wheat cardstock: Concord & 9th
• Floral Field Stencils: Pinkfresh Studio
• Floral Field Die: Pinkfresh Studio
• Hello Lovely stamp set: Taylored Expressions
• Hello Lovely Dies: Taylored Expressions
• Script Stamp: Hero Arts
• Penned Pretty stamp set.
• Misti: My Sweet Petunia
• Grip Mat: Waffle Flower

Painting with VersaFine Clair Inks | Mother’s Day Card

By Tracy Fear

Hello Friends! Tracy here and today I am excited to share this beautiful card for Mother’s Day “painted” with VersaFine Clair Inks!

In today’s video tutorial I am sharing how I use VersaFine Clair inks on watercolor paper with stamping and ink painting showing how to take your ink use to next level then we enhance our flowers with a little bit of shaping!

Skill: Intermediate, Advanced
Time: 1 hour

Art Supplies

Imagine:

VersaFine Clair
https://www.imaginecrafts.com/versafine-clair

VersaFine Clair – Baby Pink 
VersaFine Clair – Charming Pink
VersaFine Clair – Chianti
VersaFine Clair – Summertime
VersaFine Clair – Fallen Leaves
VersaFine Clair – Spruce
VersaFine – Green Oasis
VersaFine Clair – Grass Green

Other Products Used:
Stamps – Simon Hurley Heartfelt Blooms
Mini Misti stamping Platform
Tim Holtz Watercolor Paper
Variety of small brushes
Brutus Monroe | Flat Back Crystals – Violet Crystal
Black .01 Micron Pen
White card stock for card base
Eggplant Cardstock embossed with embossing folder from my stash
Sizzix Making Tool – Paper Sculpting Kit
Brutus Monroe – Alabaster Embossing Powder
Nuvo Glitter Gloss Brush