by Elina Stromberg

Scrapbooking is my favorite way to unwind. I love patterned papers, simple layouts, and combining ready-made embellishments with decoration elements I’ve made myself. For this scrapbook layout, you only need two sheets of patterned paper, scrap pieces of solid color papers, a few stamps, and your favorite inks, letter stickers, leftover pieces of chipboards and a mix of any ready-made embellishments you have available at arm’s reach. The center of your layout is your favorite photo, a memory you want to cherish and keep for the years to come!
Skill: Intermediate
Time: 1 hour
Directions

Step 1
Attach a strip of washi tape or a strip of patterned paper on the left side of your background paper. The grid side of Imagine’s Craft Mat will help you in aligning the long strip. Glue a panel of patterned paper on the left side of the strip, partly covering it.

Step 2
Stamp patterns on the background around the area where you want to place your photo. Use the lightest color for the largest patterns and add smaller highlights with darker colors on top. On this layout, I continued the triangle pattern on the stamped areas; I often get inspired by the patterns on the paper I decide to use and like to replicate similar images elsewhere on the project. You may spot the triangle shape also in larger sizes on this layout; I had a couple of triangle-shaped transparencies I included on the page.

Step 3
Stamp and fussy-cut embellishments. Combine your DIY decorations with ready-made stickers, die-cuts, and chipboards. Feel free to mix and match embellishments of various types and styles! Layer embellishments and use them in clusters. Don’t try to cover the entire page but leave some areas undecorated.
Step 4
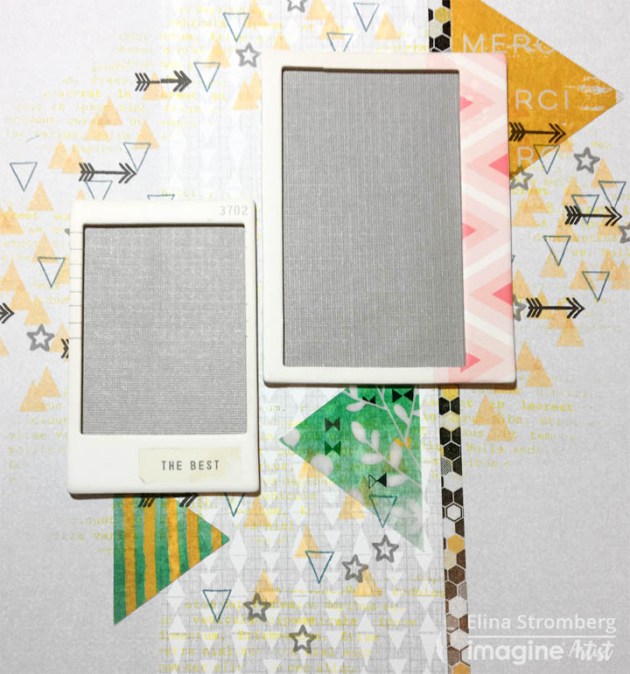
Highlight your photo: Mat the photo on a piece of white cardstock. Layer pieces of solid color or patterned papers underneath it or use ready-made chipboard frames for lifting the photo from the layout background. On this layout, the background color was quite light, and for making the photo really pop I backed the chipboard frames with a darker grey color paper. For attaching the photo on the layout, I used foam stickers.

Step 5
Adding a hint of white and/or black will brighten all the other colors. I added black by stamping small black arrows on the background and white by highlighting the stamped embellishments and parts of the stamped background patterns with a white gel pen.

Step 6
Sometimes it may be tricky to align the letter stickers on the layout. A long ruler and the grid pattern on the Craft Mat will be of great help! If you want the title word to end close to your main photo, start writing it from the end. This way you will manage the positioning of the complete word more easily!
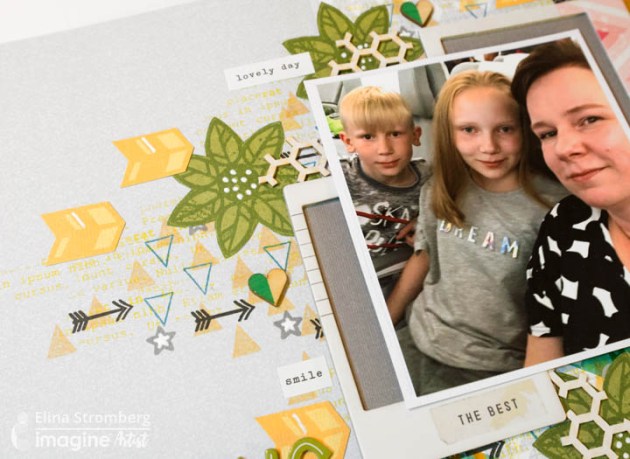
Here are some additional close-ups from the finished page:

Supplies
Imagine
- Memento Inkpad – Bamboo Leaves, Cantaloupe
- VersaFine Clair Inkpad – Cheerful, Summertime, Warm Breeze, Nocturne
- Craft Mat
Other
- Patterned papers in size 12”x12”
- Photo
- Washi tape with honeycomb pattern
- Cardstock – green, yellow, white and dark grey
- American Crafts – Letter stickers
- Stamps: Carabelle Studio: Mixed Media Flowers #1. Studio Calico: Arrows, triangles, stars. Wycinanka: Lorem Ipsum
- Embellishments: Wooden hearts – Pinkfresh Studio, Felicity – Chipboard frames, Heidi Swapp - Triangle-shaped transparencies , White sentiment stickers , Leftover pieces of honeycomb chipboards
- White gel pen
- Foam stickers
- Glue