Create Easy Heat Embossed Ink Blended Backgrounds for Stunning Notecards

by Lisa Mensing

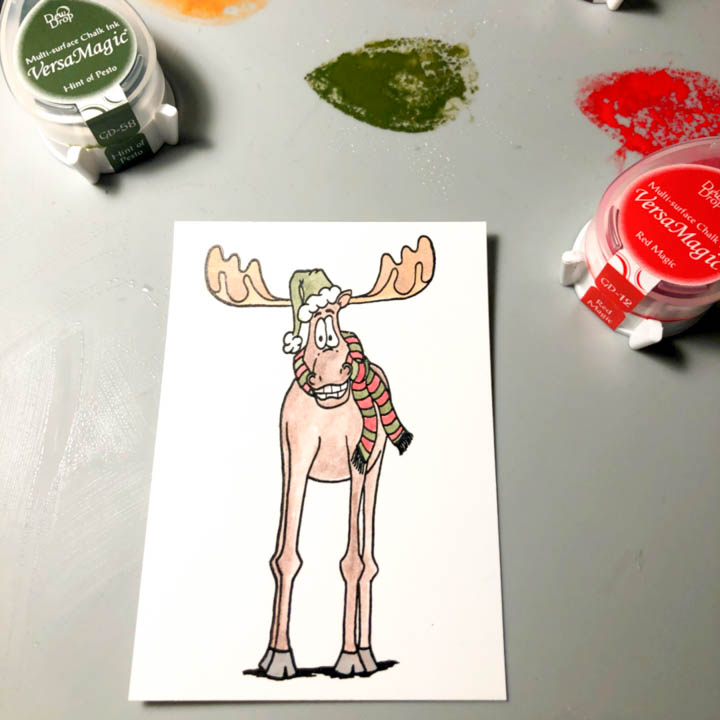
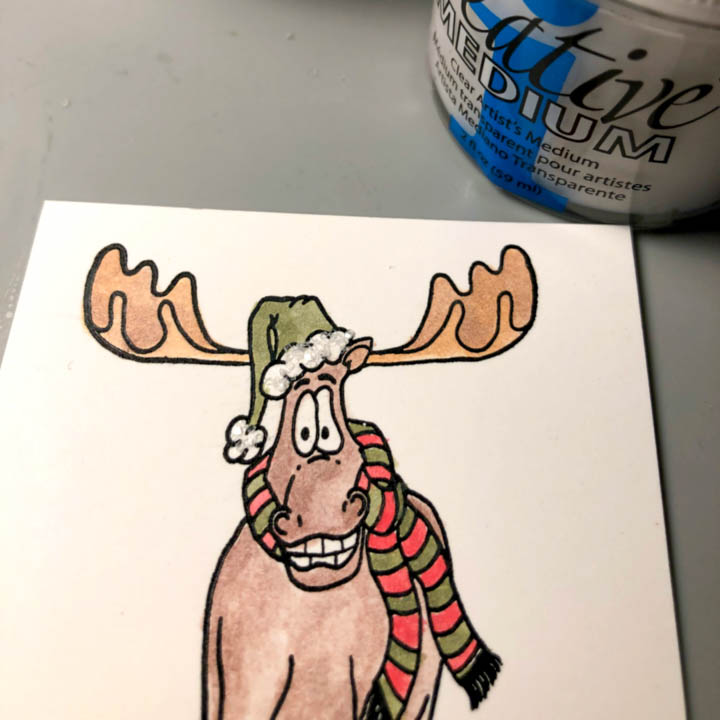
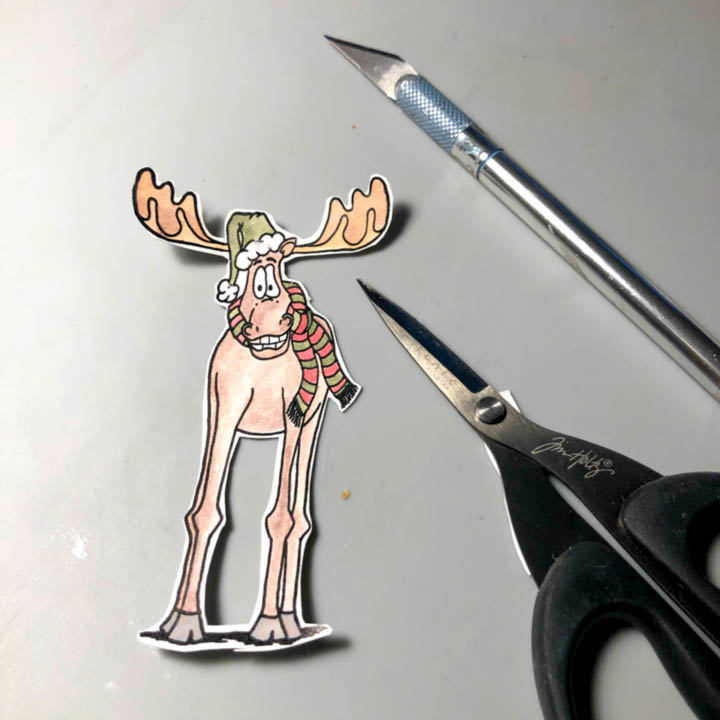
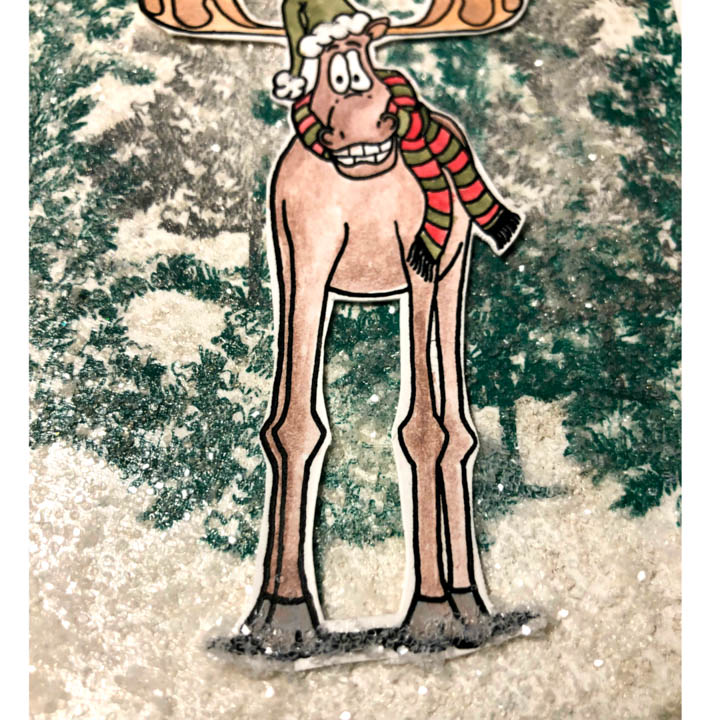
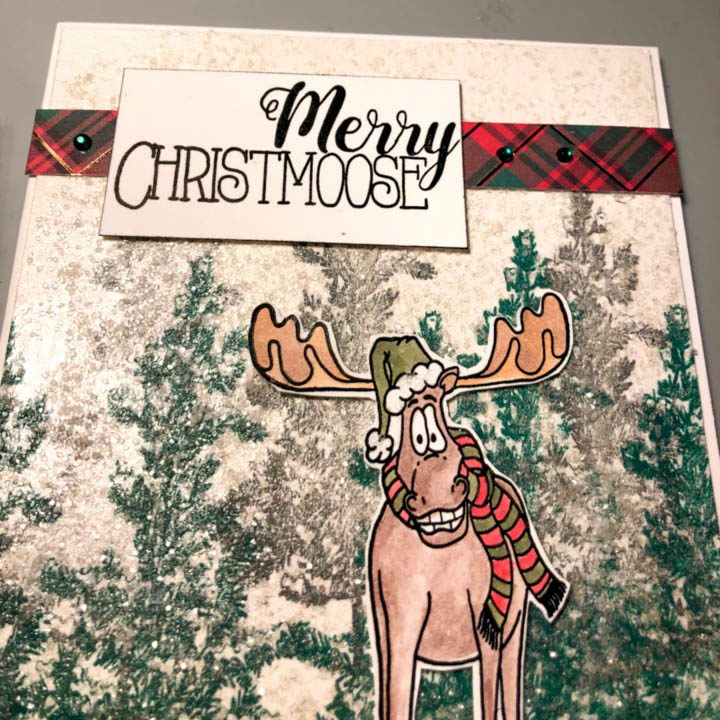
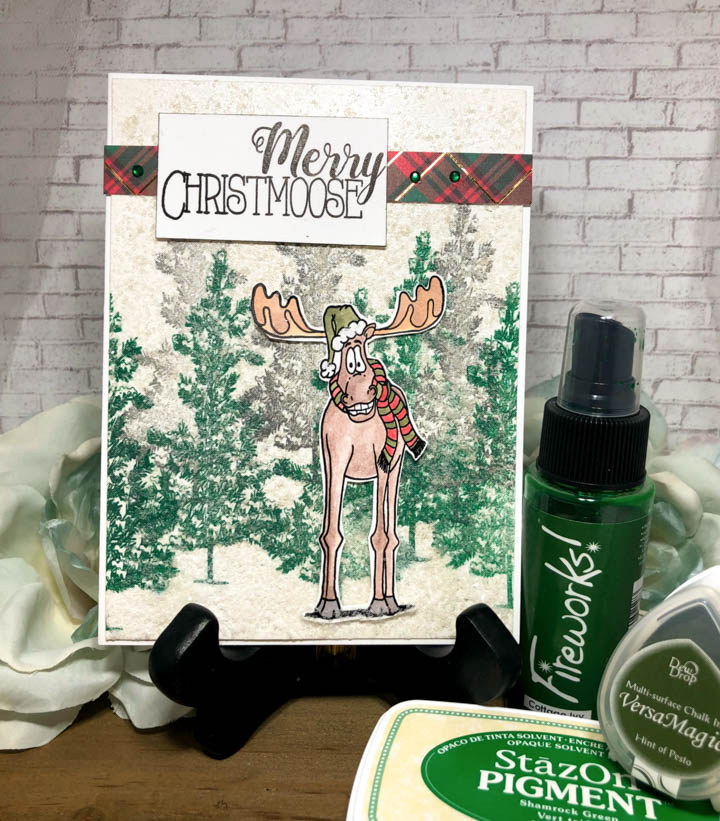
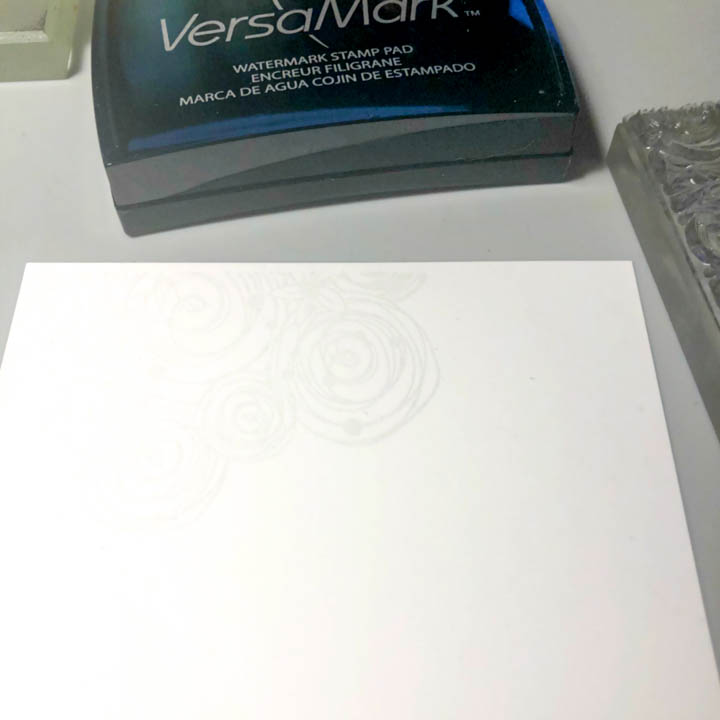
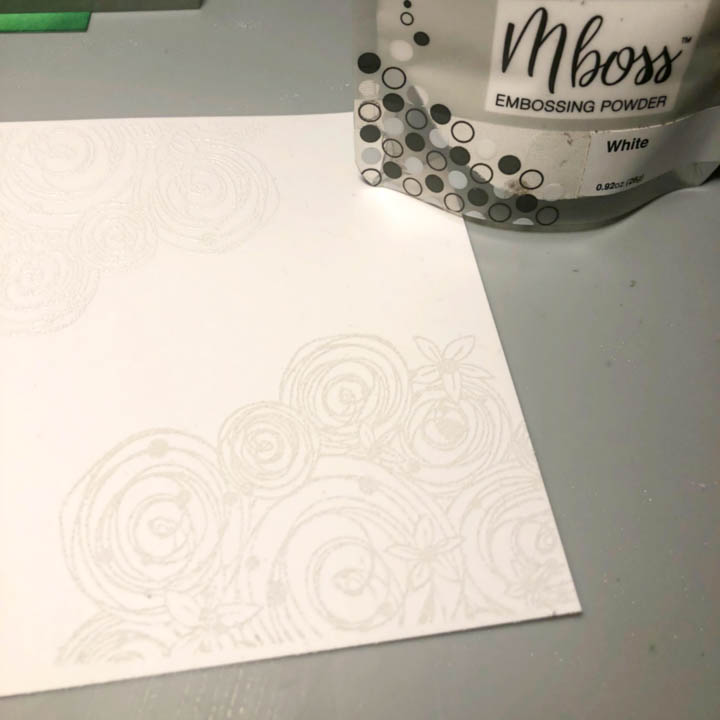
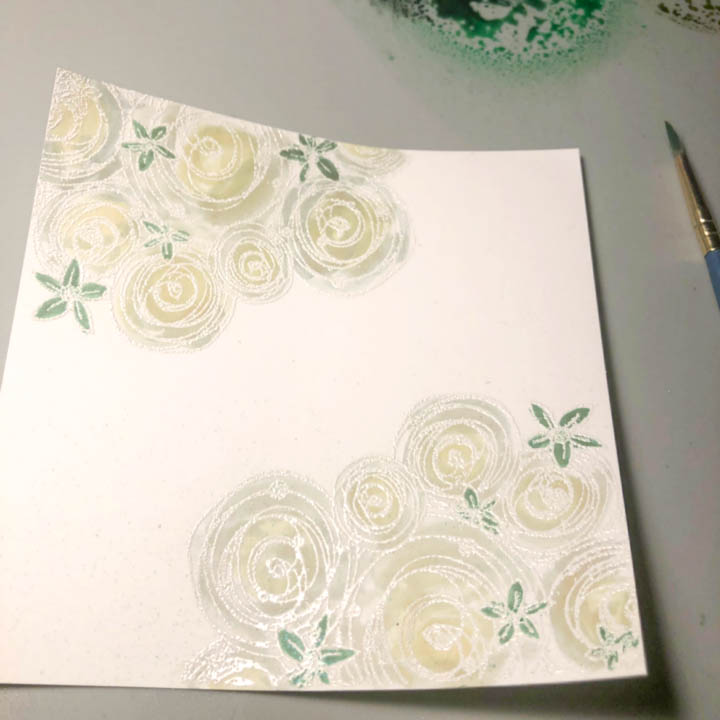
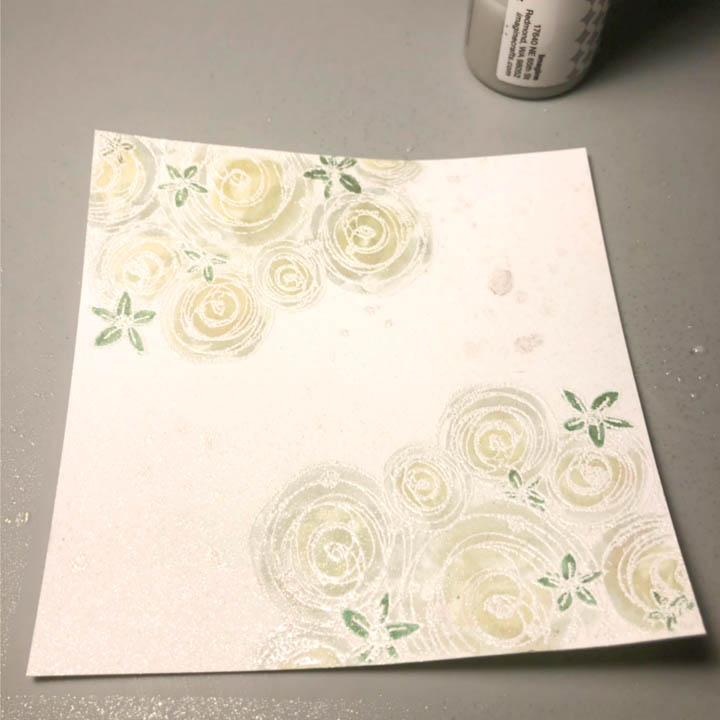
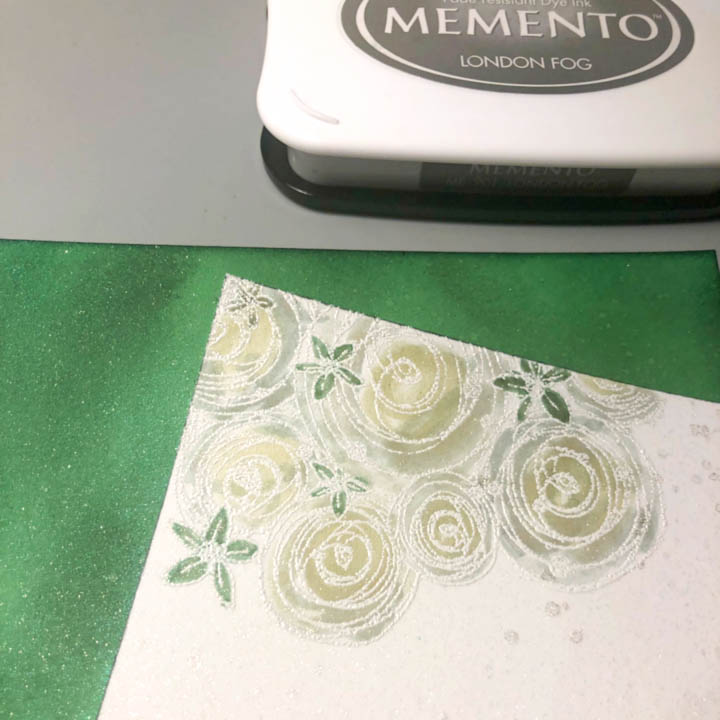
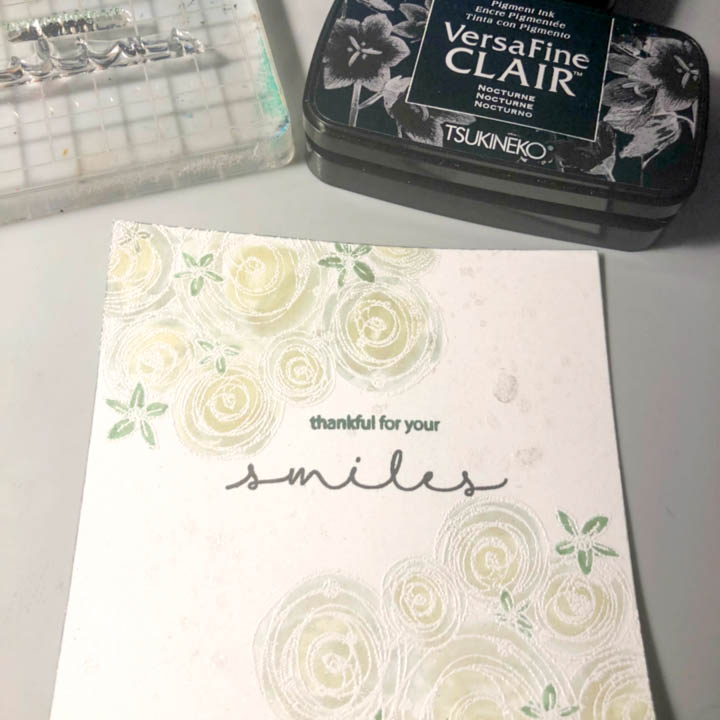
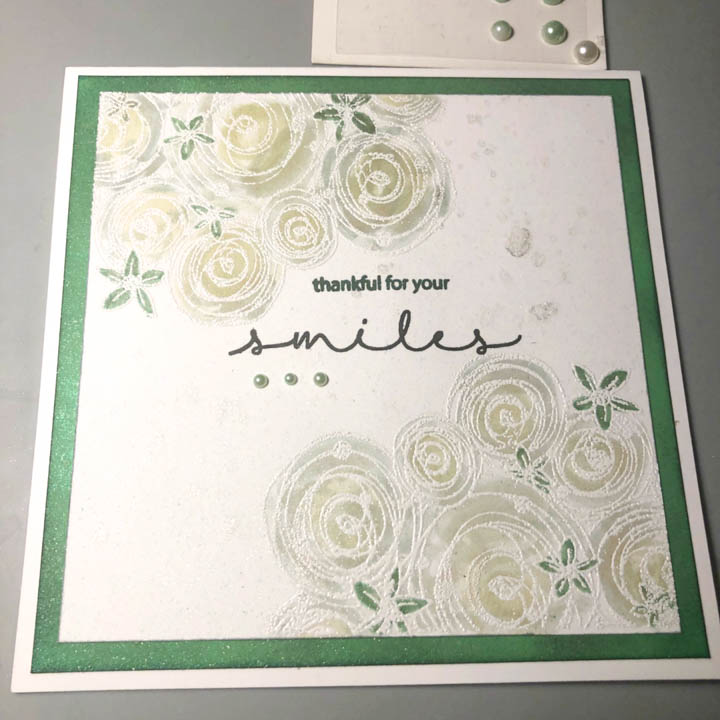
In this video, I’m heat embossing and doing a little ink blending today to create this fun take on a notecard, pun intended. I always like to keep note cards around especially this time of the year when a lot of people experience the after-holiday “blahs”.I think it’s nice to send them a little note reminding them that their not alone and I’m thinking about them. I’m going to get started by sharing a few of the products I’m using and a reference guide before I jump into making this card.

Surface Compatibility Chart

Skill: Intermediate
Time: 30-45 minutes

Directions

Supplies

Imagine 
Other 
  • MFT Musical Notes Background
  • White Cardstock
  • Gold Confetti Sequins
  • Gold Glitter Paper
  • Casual Fridays Heart Note Fri-Dies
  • Strathmore Laser Transculent Vellum
  • Gina K Tranquil Teal Cardstock

Create Inspiring ATCs using a Quick Watercolor Background Technique

by Lori Warren

Spice up your card giving this year by including an inspiration ATC with the cards you send.  Create these ATCs with Club Scrap’s Lavender Fields stamp set along with VersaMagic, VersaColor and VersaFine Clair ink. Your friends and family will be really impressed to receive these little inspiring works of art.

Skill: Intermediate
Time: 30 minutes + dry time

Directions

Supplies

Imagine
Other
  • Club Scrap – Lavender Fields stamp set
  • Cardstock – Black & White

Simple Candy Cane Backgrounds with Memento Ink

by Lindsay Adreon

Sometimes you just need a quick card or even a set of cards to give as a gift. This background is the perfect way to create those at this time of year! And all you need is cardstock, painter’s tape, and an ink pad!

Skill: Intermediate
Time: 15 minutes

Directions

Supplies

Imagine
Other
  • Painter’s Tape
  • Paper Trimmer
  • Waffle Flower Nesting Oval Die Set
  • Heffy Doodle Thanks Die

Create a Snowy Winter Scene Creative Medium and StazOn Pigment

by Lori Warren

Create a Snowy Winter Scene Creative Medium and StazOn Pigment

Create a Winter Wonderland background using Clear Artist Creative Medium, StazOn Pigment ink, and clear glitter. I love how the sparkly background shows off the Joy Clair Christmoose.

Skill: Intermediate
Time: 75 minute

Directions


Step 1

Stamp tree image (from the Joy Clair – Merry Christmoose set) onto a 4 ¾” x 4 ¾” card panel using StazOn ink. Stamp Koala Grey in the back and Shamrock Green in front.


Step 2

Once the ink dries, apply a coat of Clear Artist Creative Medium over card panel.


Step 3

Apply clear glitter over wet medium. Allow medium to dry.


Step 4

Spray panel with Sheer SHIMMER Craft Spray – Sparkle.


Step 5

Stamp Christmoose and Merry Christmoose saying onto a separate piece of white card stock.


Step 6

Trim saying to 2 ½” x 1 ¼” in size. Edge panel with StazOn Pigment – Piano Black.


Step 7

Apply VersaMagic ink directly to craft matte, add water and use wet ink as watercolors to paint the Christmoose image.


Step 8

Add Creative Medium to the fluff of the Christmoose’s hat, apply clear glitter.


Step 9

Fussy cut Christmoose.


Step 10

Apply more Creative Medium to bottom of the Christmoose’s feet, add glitter.


Step 11

Adhere panel to the card front. Cut a ½” by 4 ½” piece of decorative paper and adhere to top of the card.


Step 12

Adhere saying over a decorative strip of paper and embellish both sides with jewels.

Supplies

Imagine

Creative Artist Medium – Clear
StazOn Pigment Ink – Piano Black, Shamrock Green, Koala Grey
Sheer SHIMMER Craft Spray – Sparkle
VersaMagic Inkpad – Jumbo Java, Pumpkin Spice, Red Magic, Piano Black
Memento Ink – London Fog

Other

• Joy Clair Stamps– Merry Christmoose
• Cardstock – White
• Recollections – Fireside Paper pad
• Bo Bunny – Double Dot Jewels
• Paintbrush

Create Monochromatic Watercolor with Mboss Powder and VersaMagic

by Lori Warren

Create Monochromatic Watercolor with Mboss Powder and VersaMagic

A monochromatic color scheme can produce a lovely outcome; especially when framed with White MBoss Embossing powder.

Skill: Intermediate
Time: 60 minutes

Directions


Step 1

Color a 5” x 5” white cardstock panel with Fireworks! Cottage Ivy spray.


Step 2

Edge panel with VersaFine Clair Rain Forest.


Step 3

With a VersaMark Watermark stamp pad, stamp the floral image onto corners of a 4 ¾” x 4 ¾” white cardstock panel.


Step 4

Cover VersaMark stamped Image with White MBoss Embossing Powder and heat to set.


Step 5

Apply VersaMagic in Hint of Pesto to a craft mat, add water and use wet ink to color floral image (using a paintbrush).


Step 6

Spray panel with Sheer Shimmer Craft Spray in Sparkle. Allow drying.


Step 7

Edge panels with Memento Ink in London Fog.


Step 8

Stamp center of the panel with the sentiment using VersaFine Clair in Nocturne, Rain Forest.


Step 9

Layer panels onto a 5 ¼” x 5 ¼” card base and embellish with adhesive pearl.

Supplies

Imagine
Other
  • Joy Clair Stamps – Hugs and Smiles
  • Cardstock
  • Kaiser Craft – Adhesive Pearls in Ice Green
  • Acrylic Block
  • Paintbrush

See How to Create a Woodland Scene with No Line Watercolor

by Lindsay Adreon

See How to Create a Woodland Scene with No Line Watercolor

Watercolor is a struggle for me, not to mention no-line watercolor. Today, I wanted to share a really easy way to create the look of no-line watercolor with water-based Memento markers and Joy Clair Stamps! Anyone can do this!

Skill: Intermediate
Time: 45 minutes

Directions

Supplies

Imagine
Other