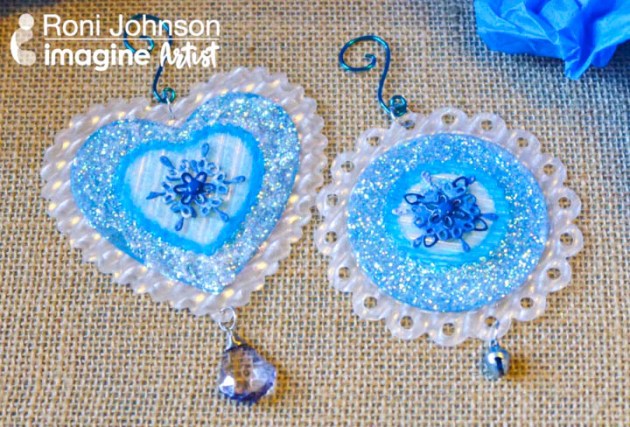
How to Use Many Types of Ink on Yupo Paper

by Roni Johnson

Completed love art piece on Yupo paper made with many types of Tsukineko inks.

Yupo is a polypropylene medium that can take all sorts of abuse and still come out looking great. Today I wanted to show you how easy it is to use with StazOn, Memento and VersaFine Clair inks with a couple of other mediums thrown in for fun. Today’s technique is only one of many different ways to use inks on Yupo paper. Experiment, have fun and if you don’t like it simply wipe it off and start over! This is a truly forgiving medium to work with.

Skill: Advanced
Time: 45minutes – 1-hour +dry time

Directions

Step 1

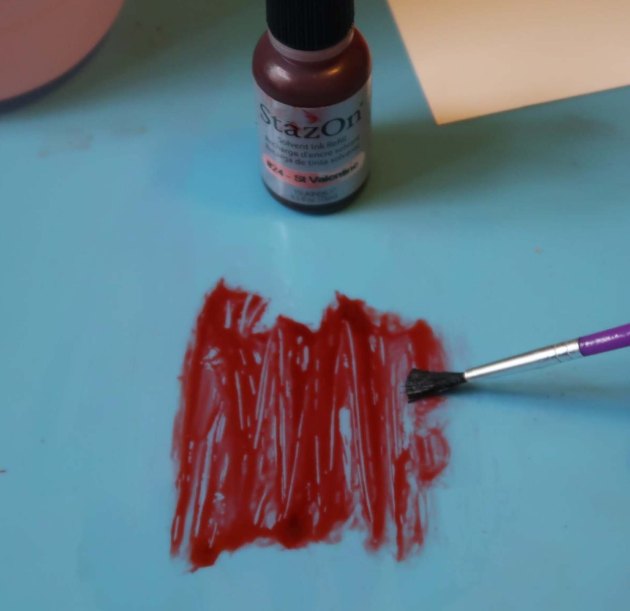
Use a paint brush to paint a layer of rubbing alcohol onto the craft mat.

Step 2

Add one drop of St. Valentine StazOn ink to the rubbing alcohol and slightly blend.

Step 3

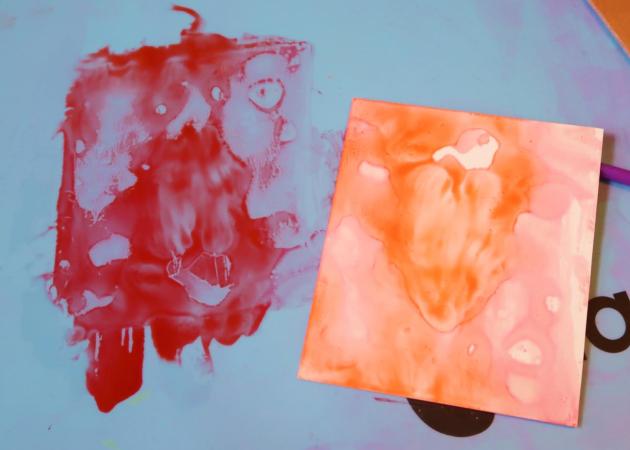
Press a piece of Yupo paper into the ink mixture and lift. Repeat this step with additional pieces of Yupo or plain cardstock to pick up the excess ink.

Step 4

Mix a drop of Rhubarb Stalk and rubbing alcohol on the craft mat.

Step 5

Pounce a piece of wadded up plastic into the ink mix.

Step 6

Pounce the inky plastic over the Yupo paper to create a variety of patterns.
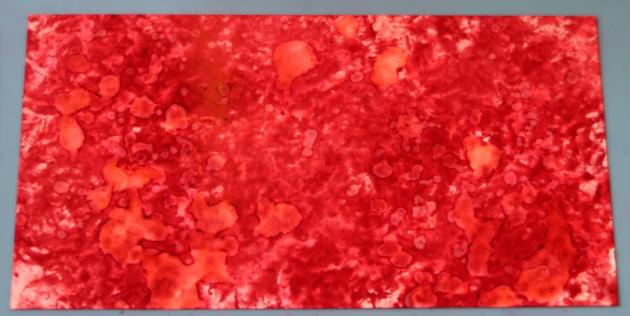
Step 7

Repeat steps 4 – 6 until you achieve the desired look. Try adding other ink colors for a bolder look. For my final result I used StazOn St Valentine, Claret and a touch of Gothic Purple as well as Memento Rhubarb Stalk Ink.

Step 7b (optional)

Flick rubbing alcohol over the Yupo to create additional depth and dimension.
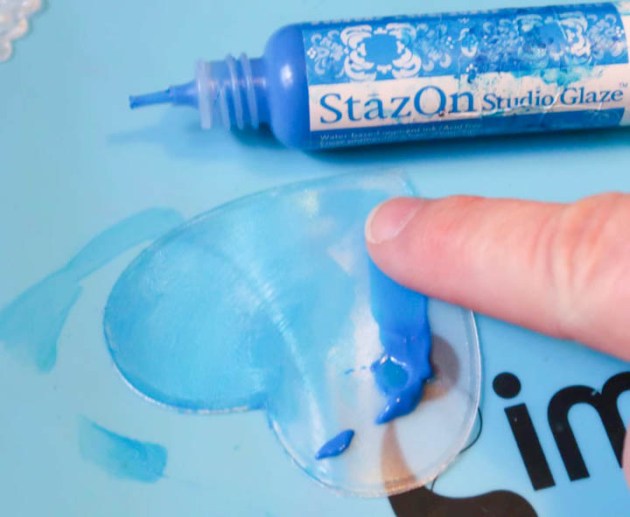
Step 8

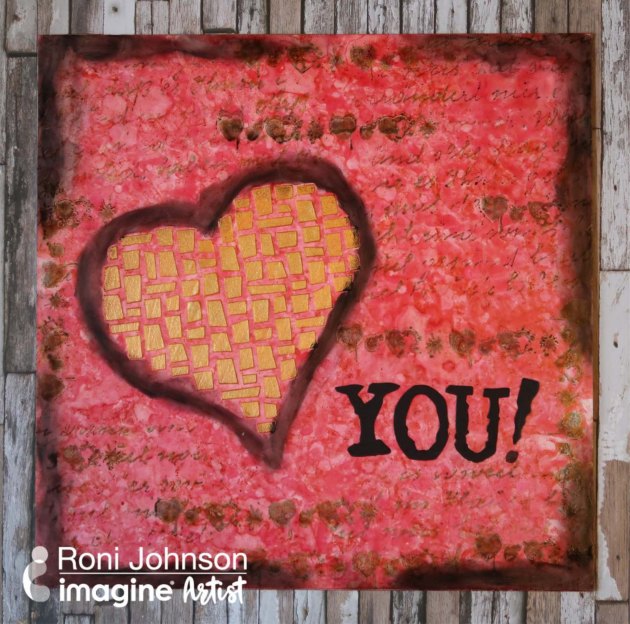
Spread Gold Metallic Creative Medium through a stencil using spatula palette knife.

Step 9

After the Creative Medium has dried, scribble around the heart and edge with a Marabu Art Crayon.

Step 10

Smudge the art crayon markings with your finger. Affix letters to the Yupo with On Point! Glue.

Step 11

Randomly stamp text and hearts over the Yupo canvas with VersaFine Clair Morning Mist ink.

Supplies

Imagine
Other
  • Yupo Paper
  • Rubbing Alcohol
  • Marabu Art Crayon
  • Rinea – Text Stamp
  • Joy Clair – Heart Stamp
  • Simon Says Stamp – Heart Stencil
  • Sizzix – Letters

Learn How To Make A Paper Flower Spring Card

by Elina Stromberg

Learn How To Make A Paper Flower Spring Card

Have you had a chance to try out the new Dewlets? Those little metal dies match perfectly with the size and shape of Dew Drops ink pads, providing you new possibilities for creative use of your favorite ink pads. Just stamp and die-cut a pile of drops in your favorite colors, and let the fun begin: You’ll be surprised how many different shapes you can make out of them! In this project, I created a spring theme flower card.

Skill: Beginner
Time: 1 hour

Directions


Step 1

Press the DewDrop ink pad on paper to create a drop shaped stamped image. The white paper will replicate the ink color as it is, but you can create exciting variations by using colored and/or patterned papers. Die-cut the drop images with a die-cutting machine, using Dewlets dies.


Step 2

Highlight the drop edges by painting them with a darker ink and a water brush. Let dry.


Step 3

Layer background paper(s) on a white card base using two-sided tape or glue.


Step 4

Assemble flowers. Cut flower stems from green paper. Glue on paper together with the flowers. Finish the project by decorating the flowers and leaves with a white gel pen. Optional: Add more contrast and shadowing with coloring pencils. Do not color the entire die-cut drop, but only add a hint of a darker shade on the edges.

Supplies

Imagine
Other
  • Card base – White
  • Patterned papers
  • Die-cutting machine
  • Water brush
  • Gel Pen
  • Glue or double-sided tape
  • Color pencils (optional)

Create a Bright and Beautiful Card Using the New Dewlets from Imagine

by Melissa Andrew

Create a Bright and Beautiful Card Using the New Dewlets from Imagine

In today’s video, I create a fun and colorful card using Imagine’s Fireworks Sprays and the new Dewlets. I love the adorable Dew Drop ink pads from Imagine and was inspired to create a fun rainbow raindrop theme card that reads You Color My World!

Skill: Beginner
Time: 1 hour

Directions

Supplies

Imagine

Dewlets

Imagine Craft Mat

Fireworks Shimmery Craft Spray Bahama Blue

Fireworks Shimmery Craft Spray in New Sprout

Fireworks Shimmery Craft Spray in Dandelion

Fireworks Shimmery Craft Spray in  Lady Bug

Fireworks Shimmery Craft Spray in Grape Jelly

VersaFine Clair in Nocturne

On Point Glue

Tear It! Tape

Other
  • Lawn Fawn – Color My World stamp set
  • Cardstock – white, black
  • Bristol Smooth Card
  • Die Cutting Machine
  • Heat Tool
  • Paper Towels
  • Paper Trimmer

Make A “Sending Good Vibes For 2019” New Years Card

by Iris Rodriguez

Make A "Sending Good Vibes For 2019" New Years Card

The New Year is upon us. Wow! Where does time go? As we think about our New Year’s resolutions and plans; don’t forget to send well wishes to friends and family with this easy, fun and whimsical card using a few supplies.

Skill: Beginner
Time: 30 minutes

Directions


Step 1

Spray Fireworks Shimmery Craft Spray in Lady Bug, Bamboo Leaves, Summer Breeze and Dandelion over a stencil. Set aside to dry.


Step 2

Stamp the New Years sentiment. Another option is to print a sentiment or favorite quote out. This is what I have done in this case. I downloaded a free Hippy font style from the internet, added to my Microsoft Office software. I then, cut the sentiment, darkened the edges with VersaFine Clair in Nocturne. Finally, I adhered the sentiment onto the card using On Point Glue and finished assembling the card.

Supplies

Imagine
Other
  • Watercolor paper
  • Sentiment stamp
  • DecoArt Americana Stencil

Learn How to Use Vertigo Surfaces to Create Ornaments

by Roni Johnson

Learn How to Use Vertigo Surfaces to Create Ornaments

It’s almost time to start decorating the Christmas tree and in preparation for this fun family event, I have started making new ornaments. Inspired by the color of the month – Frosted Blue – I thought it would be fun to create an ornament or two using Imagine’s Vertigo film paired with Imagine’s various mediums in lovely shades of blue.

Skill: Intermediate
Time: 30 minutes + dry time

Directions


Step 1

Die-cut 3 hearts in 3 different sizes of any given shape. I am using Xcut hearts both in scallop and plain. I used 3 different styles of Vertigo film – (large to small) – Prism, Taffeta and Tilted.


Step 2

Rub a thin layer of Blue Hawaii StazOn Studio Glaze over the medium size shape and let dry.


Step 3

Once the glaze has dried, spread a second layer of Cotton White Studio Glaze over Blue Hawaii. Sprinkle a generous layer of Iridescent White Flitter Flakes over the glaze. Let the glaze dry then shake off the loose flitter.


Step 4

Affix the medium size heart to the large heart.


Step 5

Rub Blue Hawaii StazOn Ink to the outer edges of the small heart.


Step 6

Sponge Paradise, Blue Belle and Medieval Blue VersaFine Clair ink on a piece of white cardstock.


Step 7

Die-cut several small snowflakes from the inked cardstock.


Step 8

Use a brad to attach desired snowflakes to the center of the ornament.


Step 9

Attach jump-rings and any additional embellishments as desired. Make a hanger for the ornament from blue wire using jewelry tools.

Supplies

Imagine
Other
  • Meyers Imports – Iridescent White Flitter Flakes
  • White Cardstock
  • Jewelry tools – wire, jump rings, pliers
  • Mini Bell
  • Decorative brad
  • Die-cut Machine

Learn How to Make a Silver Tree Christmas Card

by Iris Rodriguez

Learn How to Make a Silver Tree Christmas Card

Make minimalist, truly handmade Christmas card with IrRESISTibles Pico Embellishers. This texture medium fitted with a fine-tipped applicator makes it easy to draw a Christmas tree or any other Christmas/Holiday doodles. Simply add embellishments and stamp a sentiment to arrange a unique design.

Skill: Beginner
Time30 minutes

Directions


Step 1

Spray water on the watercolor paper. Spray Fireworks Craft Shimmery Sprays in Summer Sky then spray Danube Blue.


Step 2

Using VersaFine Clair in Blue Belle with the Jumbo Dauber ink the paper in random sections, and along the edges. Then ink with VersaMagic Cloud White.


Step 3

Draw the Christmas tree with the irRESISTible Pico Embellisher in Silver by drawing a series of connected swirls.

I decided to paint some of the rhinestones with the StazOn ink in Blue Hawaii
Step 4

I have to admit I wanted to add blue and clear rhinestones to the tree to make it look like ornaments. However, I did not have blue rhinestones. So I decided to paint some of the rhinestones with the StazOn ink in Blue Hawaii. StazOn is permanent ink and it won’t rub off.

Adhere the rhinestones with On Point Glue
Step 5

Adhere the rhinestones with On Point Glue. Stamp the sentiment and mount to the card base.

Supplies

Imagine
Other
  • Watercolor paper
  • Sentiment stamp
  • Rhinestones