How to Make a Shimmery Tag for a Celebration

By Alison Heikkila

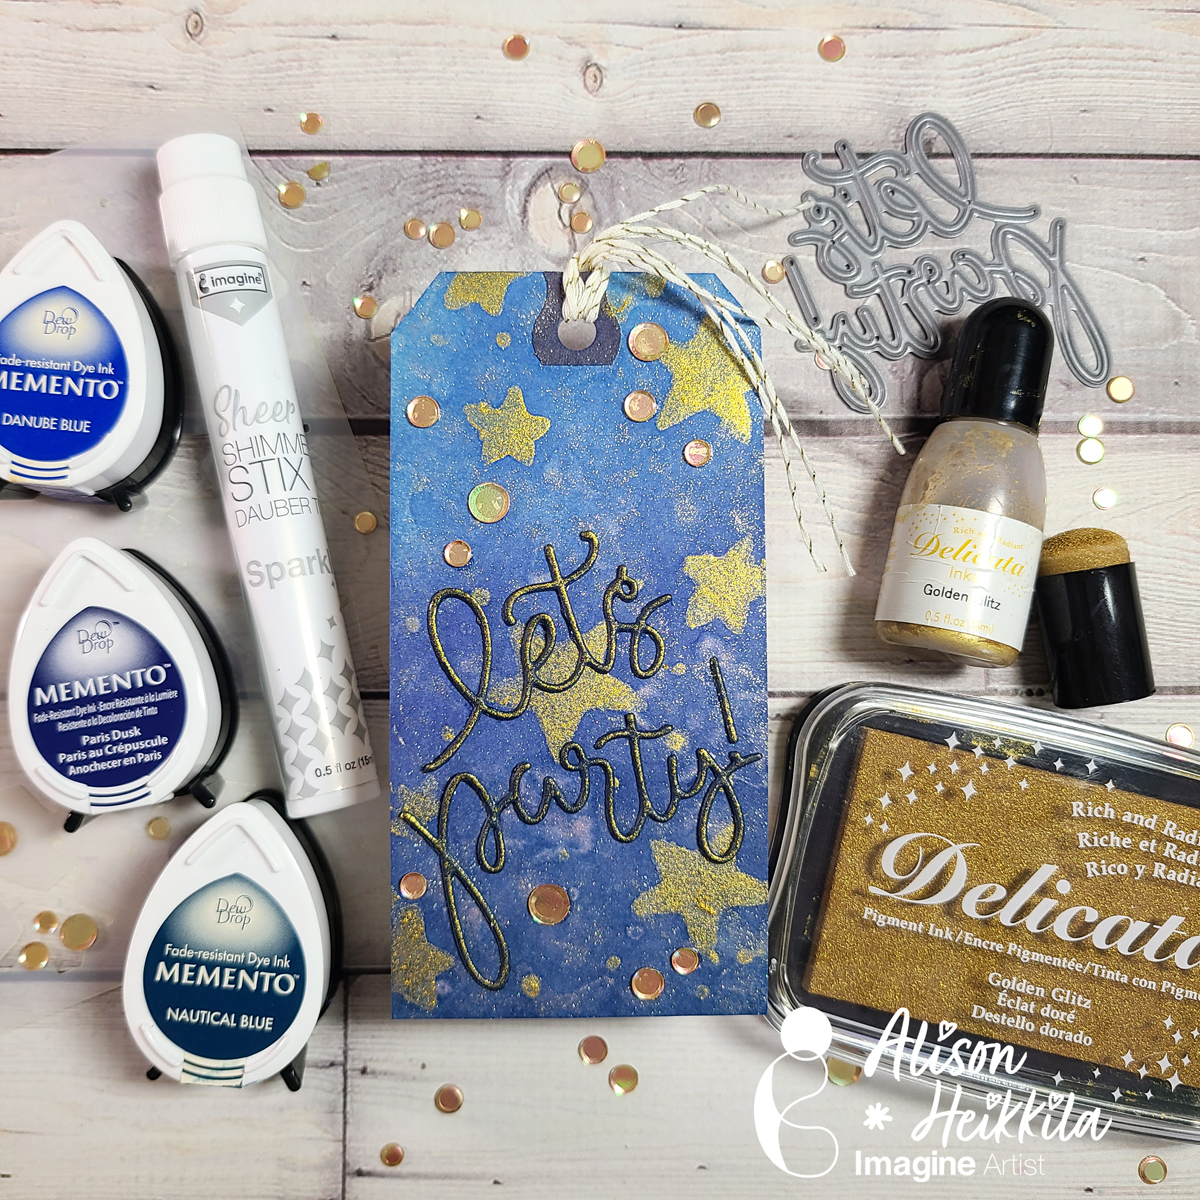
Hello! It’s Alison Heikkila and today we are going to be making a tag that can be used for any type of celebration. You can use this tag on a hostess gift, as an invitation, attached to a card or scrapbook page, etc. The tag is super shimmery and is really festive! You can change up the colors to suit your needs.

*Some affiliate links are used in this post. That means that if you shop through these links, I may receive a small compensation, at no cost to you. For more information, please see my Affiliates page, where I also have some coupon codes.

Skill Level: Intermediate
Time to Complete: 20 minutes
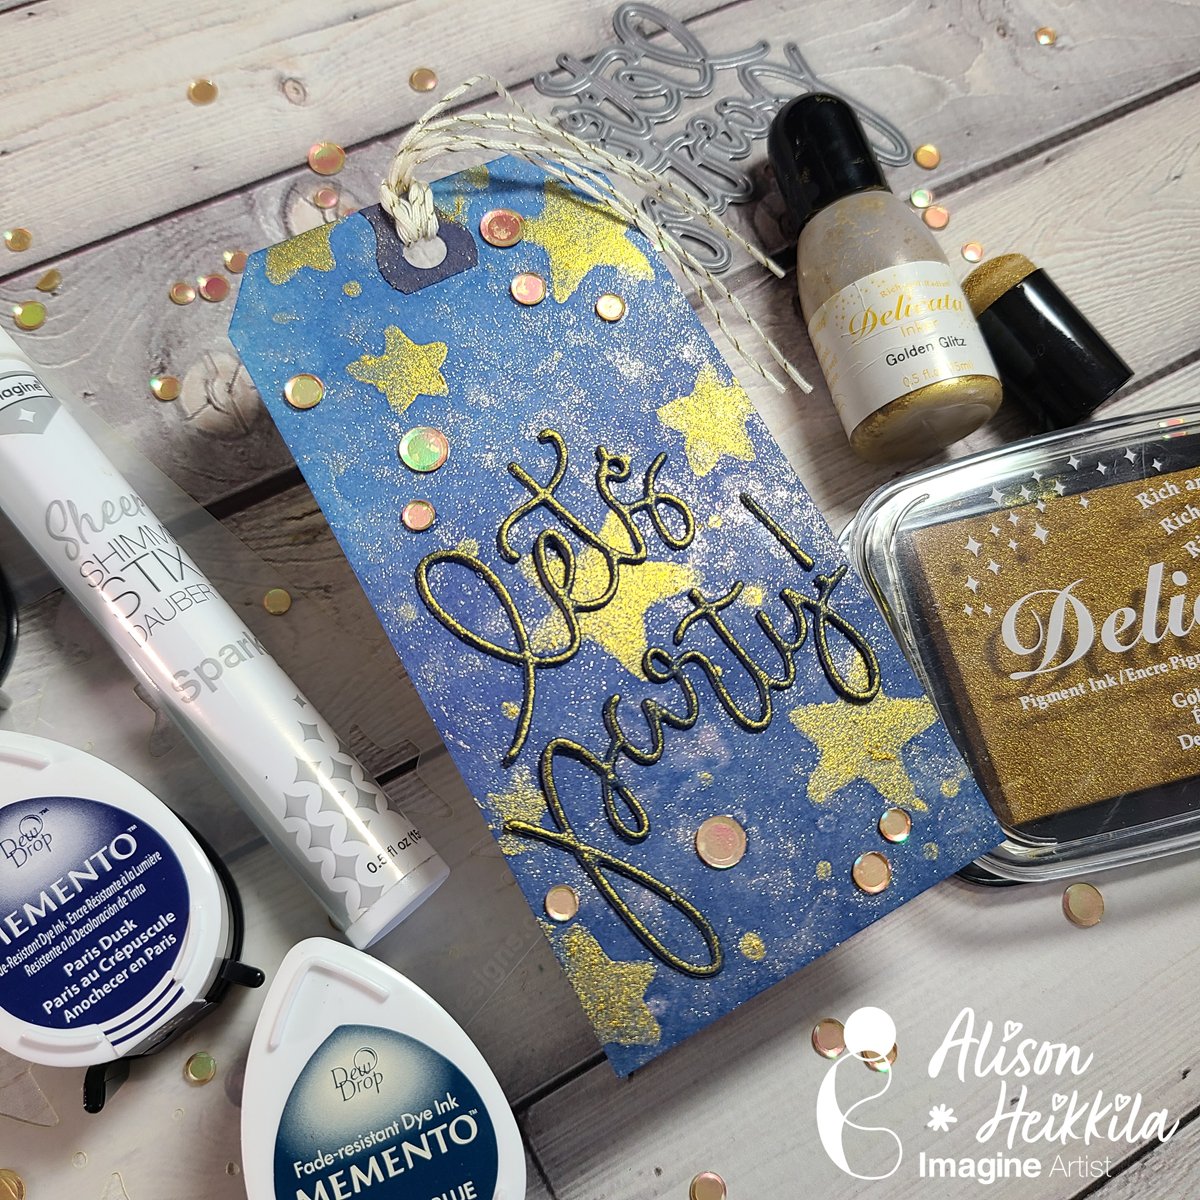
Supplies:
Imagine:
Danube Blue Memento Ink
Paris Dusk Memento Ink
Nautical Blue Memento Ink
Golden Glitz Delicata Ink
Golden Glitz Delicata Reinker
Sheer Shimmer Stix in Sparkle
Sponge Dauber
On Point Glue

Other:
Avery: Shipping Tag #11005- 4 3/4″ x 2 3/8″
A Colorful Life Designs: Night Sky Stencil
A Colorful Life Designs: Crystal Metallic Safari Card Bling
The Greetery: Pinwheel Party Die Set
Gel Press: 6×6 Plate
The Rabbit Hole Designs: Cotton Tail Blending Brush
Twiddler’s Nook: Skull Tray
Navy Blue Cardstock
Baker’s Twine or Ribbon

Learn How to Create Christmas Magic

by Kyriakos Pachadiroglou

Learn How to Create Christmas Magic

Share the magic of Christmas with silver embossed stars and feathers in a turquoise color. The interchange of stripes covered with Creative Medium and the stamped tracing paper with VersaColor add depth to the background and give a sense of a screen. The multiple layers of the Creative Medium used and then heated, create a rough texture on the paper.

Skill: Intermediate
Time: 1 hour

Directions


Step 1

Cover a piece of watercolor paper at least the size of the card will be used with Creative Medium Iridescent Turquoise. Use a heat tool to dry and overheat the paper. The Creative Medium will start making baubles. Repeat the process at least 3 times to give the surface a rough look.


Step 2

Cut stripes of the watercolor paper in various widths and in 6 inch long (one inch less than the card used here).


Step 3

Stamp the tracing paper with the swirls design of the stamp set and the VersaColor Turquoise ink.


Step 4

Cut strips of the stamped image in various widths and in 6 inch length.


Step 5

Use Tear It! Tape to set the watercolor and tracing paper stripes on the front of a card base.


Step 6

On a piece of watercolor paper, on the smooth side, color with the VersaColor Turquoise and Celadon ink pads.


Step 7

Stamp with VersaMark the same stamp design as above. Cover with Imagine silver embossing powder and heat set.


Step 8

Die cut stars in different sizes from the embossed paper.


Step 9

Make a circle of the craft wire, glue with hot glue and continue with the feathers.


Step 10

Use the On Point Glue to place the paper stars, while the main star, set it with some foam tape to raise from the front. Add rhinestones with the On Point Glue.


Step 11

Remove the words from the sticker and set them on a piece of tracing paper and then glue on the card.

Supplies

Imagine
Other
  • Tracing paper
  • Viva Decor – Peacock feathers stamp set
  • Star dies
  • Die cutting machine
  • Heat tool
  • Feathers
  • Jewelry wire
  • Rhinestones
  • Canson watercolor paper
  • Craft creations – Peel off stickers, Christmas words
  • Hot glue gun
  • Foam tape