
by Martha Lucia Gomez
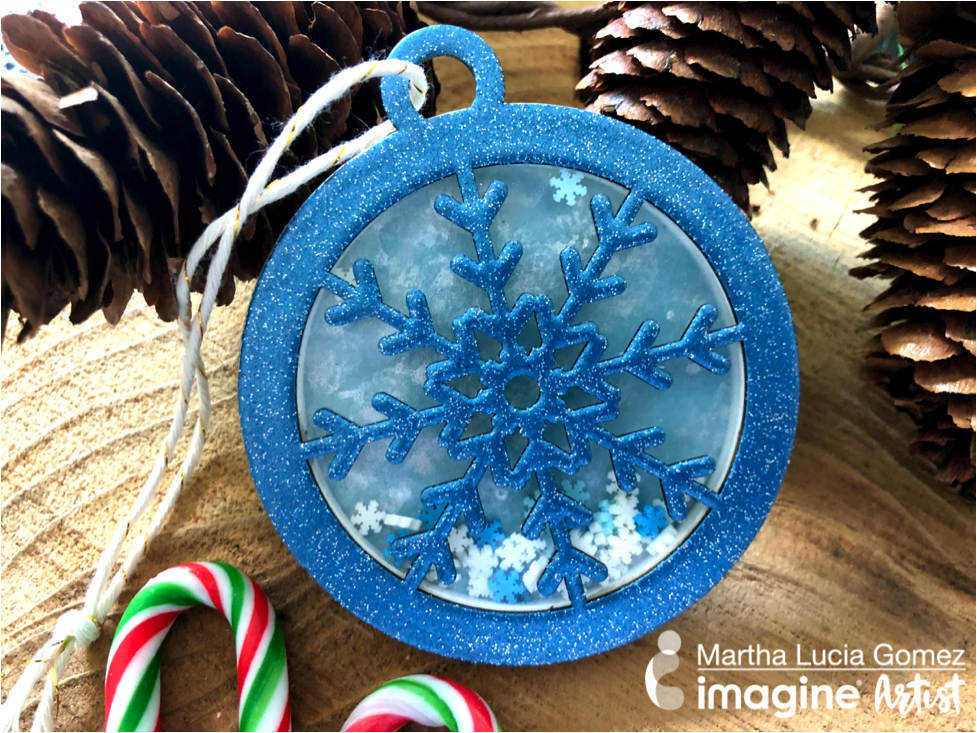
Hello crafty friends, Martha Lucia here! Today, I am sharing a snowflake shaker ornament that you can use to decorate your gifts and/or Christmas tree. To create this, I am using a shaker dimension set with a snowflake design, VersaMark Clear Ink and Mboss Blue Icicle. Like this set came with a piece of acetate sheet to cover the free areas, I made it like a shaker piece adding some sprinkles.
Skill: Advanced
Time: 30 minutes
Directions

Step 1

Ink one of the sides of your or the ornament directly with the VersaMark Inkpad. Cover it with your selection of Mboss color. I used the Blue Icicle.

Step 2
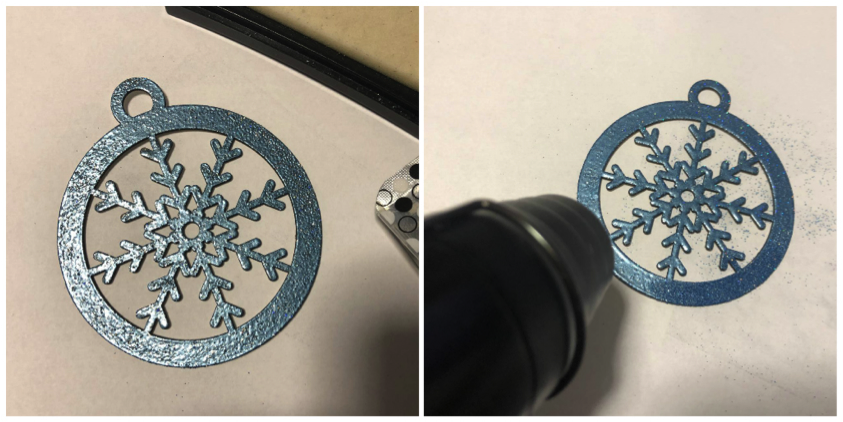
Melt the powder with the heat tool. And repeat the process twice or three times to give more dimension to your ornament.
Step 3
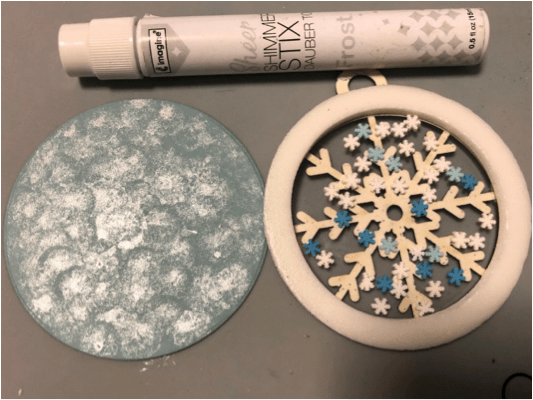
Cut a piece of card stock with the same shape or your ornament and apply over it some touches of Frost Sheer Shimmer Stix. Let the paper dry naturally.

Step 4
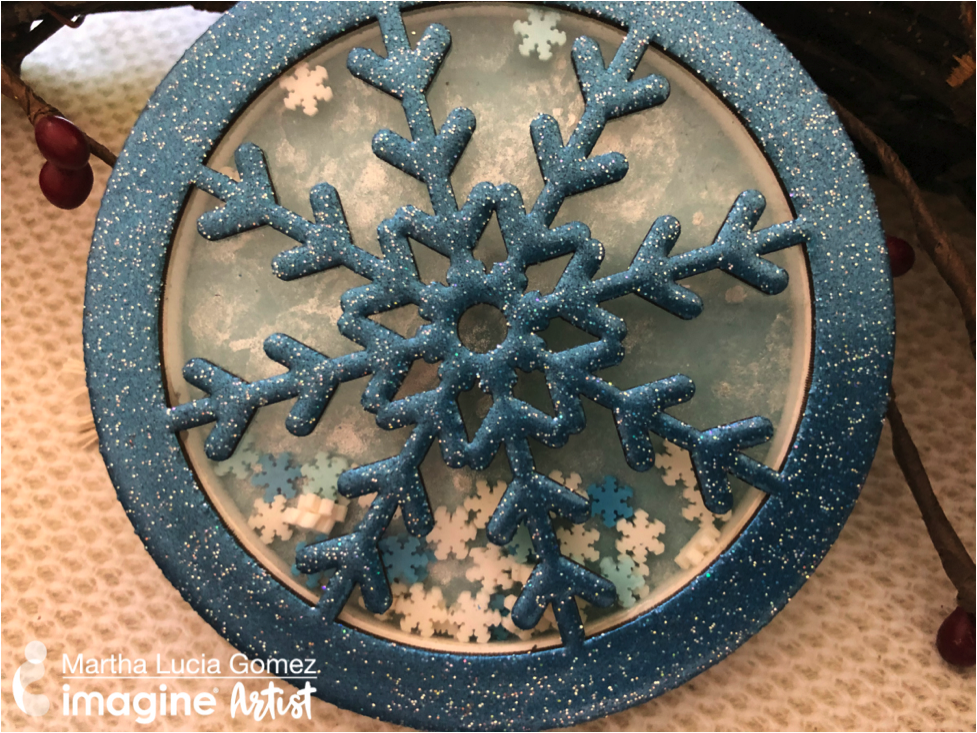
Paste the base shape or double-sided foam tape onto the inked shape. Add your fillers, it could be sequins, sprinkles, beads or whatever you want. Adhere the clear acetate on top with liquid glue and cover it with the embossed design. Finalize your ornament adding a tie or pasting it to your gift. You can try different designs and different colors of Mboss to add your personal touch! Thank you for stopping by and see you soon!
Supplies
Imagine
- VersaMark
- Mboss Embossing Powder – Blue Icicle
- Craft Mat
Other
- Snowflake Shaker Dimension Set by Kat Scrappiness
- Chipboard Ornament
- Cardstock
- Plastic
- Heat tool
- Coffee Filter
