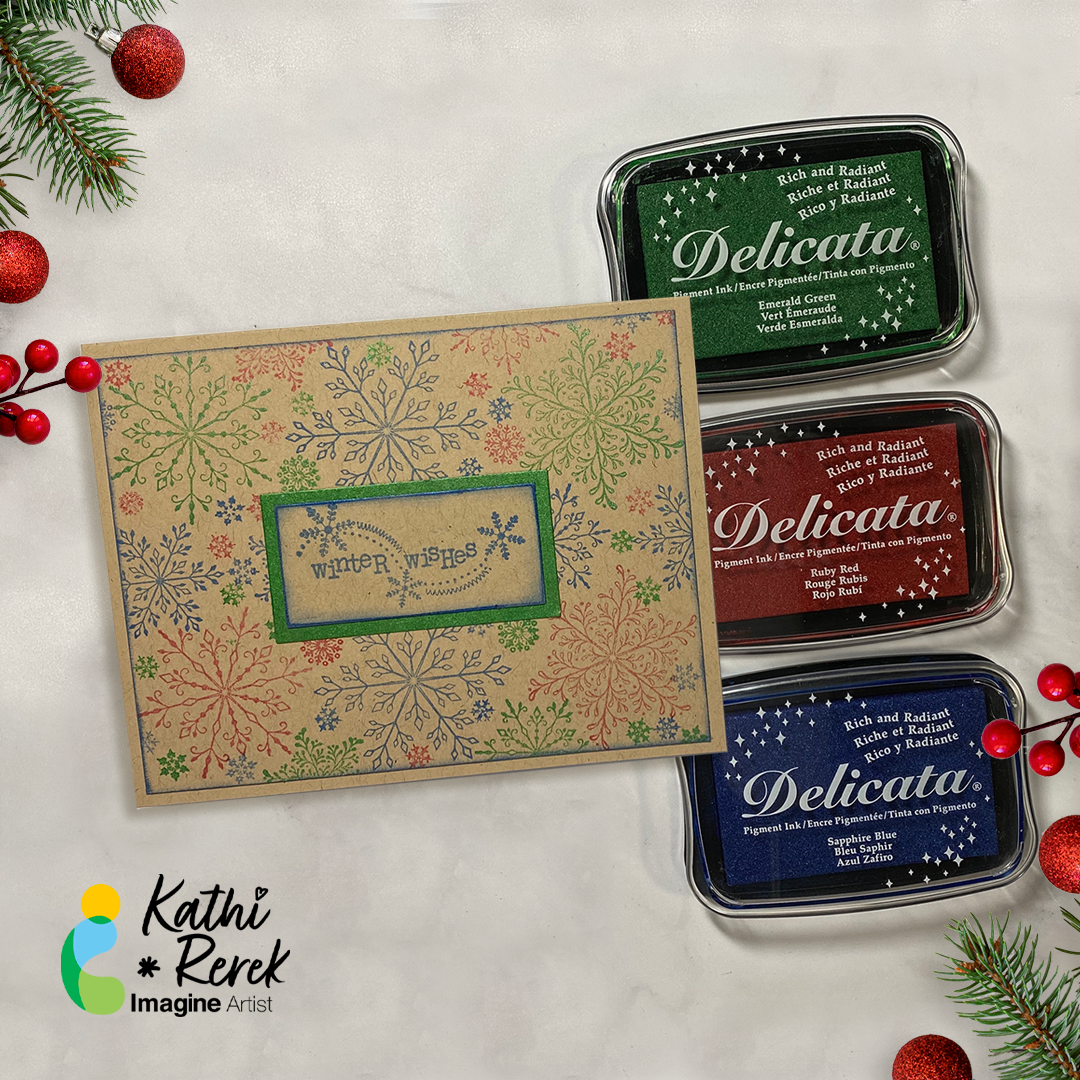
Hello friends! This is Linh (or LV Handcrafted on all the socials). Do you make a lot of holiday cards either to sell or to send out? Check out this fast and fun way to create 100% one-of-a-kind cards for the holidays. These are great for making cards in bulk for fairs, to donate or to send out!
Skill: Intermediate Time: 5-10 minutes (depends on how many you make)
Hello friends! This is Linh (or LV Handcrafted on all the socials). Do you make a lot of holiday cards either to sell or to send out? Check out this fast and fun way to create 100% one-of-a-kind cards for the holidays. These are great for making cards in bulk for fairs, to donate or to send out!
Skill Level: Beginner to Intermediate Time: 1 hour
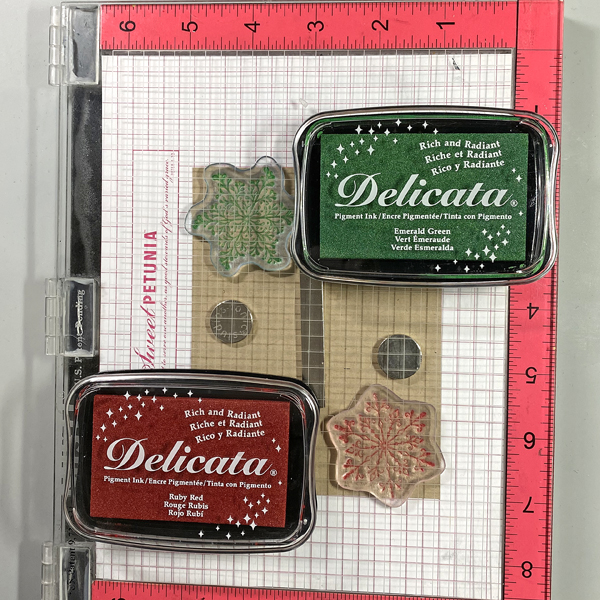
Step 1: Use magnets to secure a 4” x 5.25” piece of Kraft cardstock onto the base of a stamping platform.
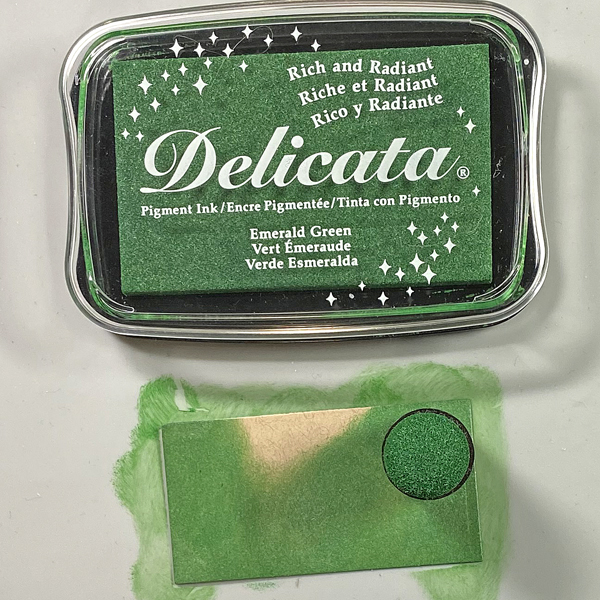
Position two snowflakes from the Snowflakes Large Clear Polymer Stamp Set so that one is facedown at the top left of the image panel and the other one is at the bottom right of the image panel. Ink the snowflake stamps with Emerald Green and Ruby Red Delicata Ink and stamp. Re-ink and stamp again if necessary to create good images. Clean and dry both stamps.
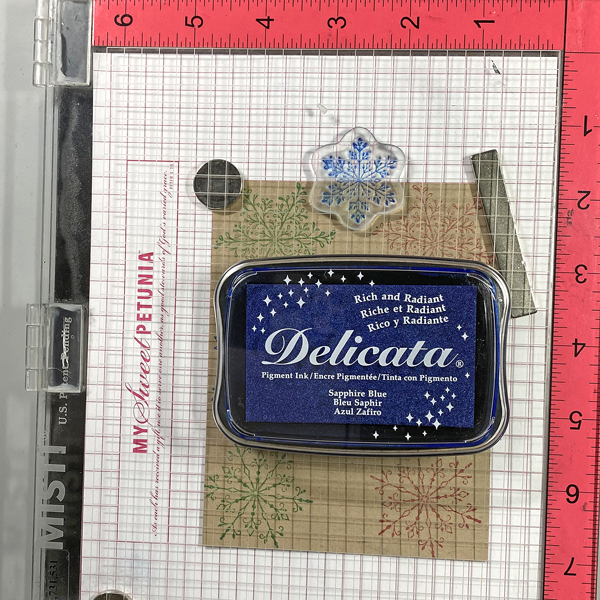
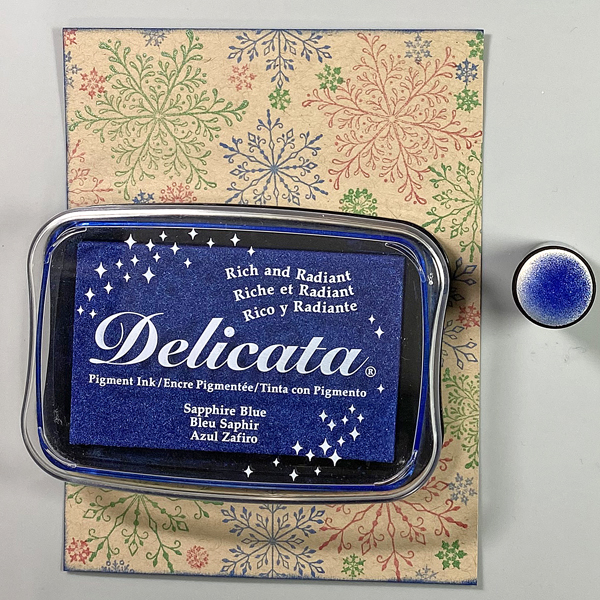
Step 2: Position the third snowflake stamp from the stamp set facedown between the stamped snowflakes on the image panel. Ink the stamp with Sapphire Blue Delicata Ink and stamp. Re-ink and stamp again if necessary to create a good impression. Clean and dry the stamp. Reposition the same stamp facedown on the other side of the image. Ink the stamp with Sapphire Blue Delicata Ink. Clean and dry the stamp.
Step 3: Position one of the snowflake stamps from the Snowflakes Small Clear Polymer Stamp Set facedown in the center top of the image panel. ink the stamp with Sapphire Blue Delicata Ink and stamp. Re-ink and stamp again if necessary to create a good impression. Clean and dry the stamp.
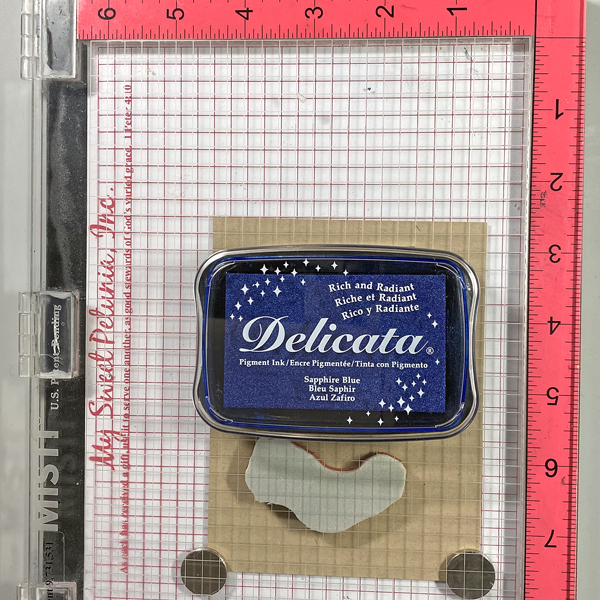
Continue the process of stamping snowflakes from the Snowflakes Small and the Snowflakes Clear Stamp sets with all three colors of Delicata Inks, taking care to clean and dry the stamps between colors. Heat set the image panel.
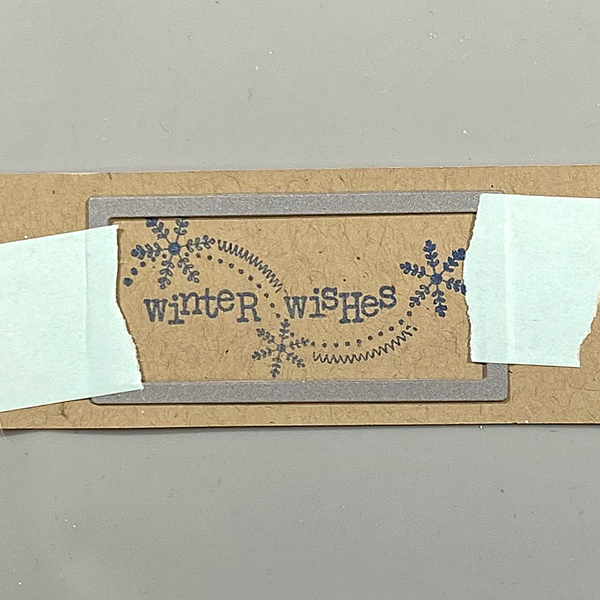
Step 4: Ink the sentiment stamp with Sapphire Blue Delicata ink and stamp onto a piece of Kraft cardstock.
Step 5: Use low-tack tape to secure a rectangle die to the sentiment strip. Run the sentiment strip through a die-cutting machine. Use a slightly larger rectangle die to cut a Kraft cardstock.
Step 6: Use a sponge dauber to apply Emerald Green Delicata Ink to the die-cut. Heat set.
Step 7: Use a Sponge Dauber to edge the snowflake stamped image panel. Heat set.
Step 8: Use Tear It! Tape to adhere the image panel to a Kraft A2 Card. Use Tear-It Tape to adhere the sentiment to finish the card.
Each year, Imagine selects talented artists for the Artist in Residence program. Our artists create exceptional projects with video tutorials posted on our YT channel and blog. Our team embodies a variety of different styles, from cards to dynamic 3D mixed media pieces.
Here’s a dramatic, yet quick and easy Season’s Greeting’s Card
Skill Level: Beginner to Intermediate Time: 1 hour
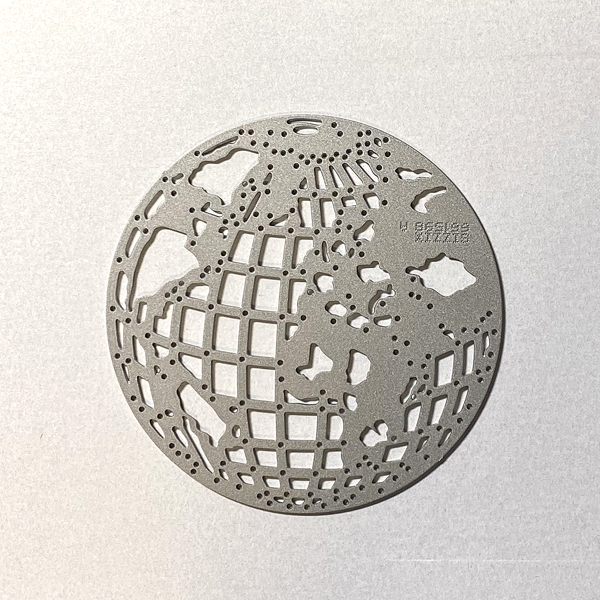
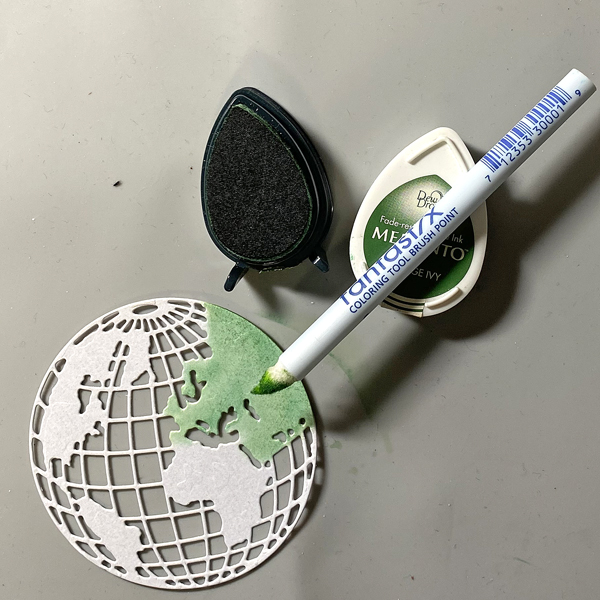
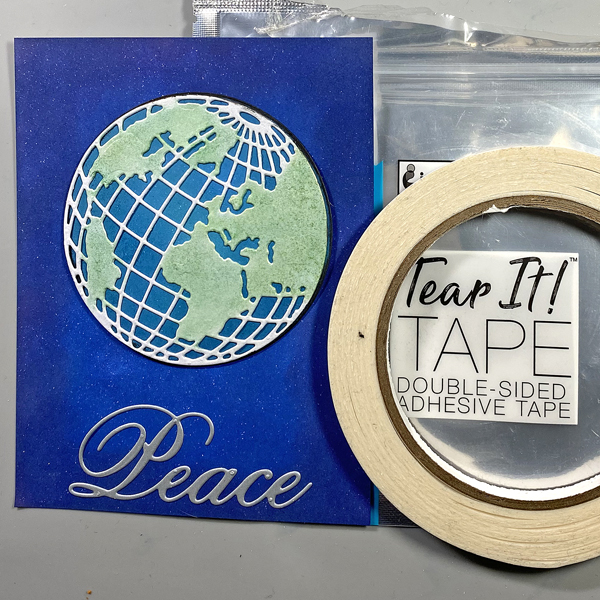
Step 1. Use the Mini Globe Thinlits cutting die to cut white metallic cardstock.
Step 2: Use a Fantastix to apply Cottage Ivy Memento ink to the land areas of the globe.
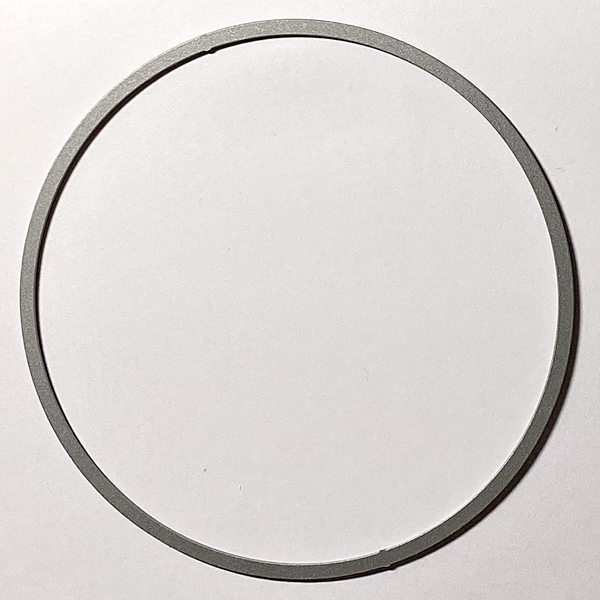
Step 3: Use a circle die to cut white cardstock.
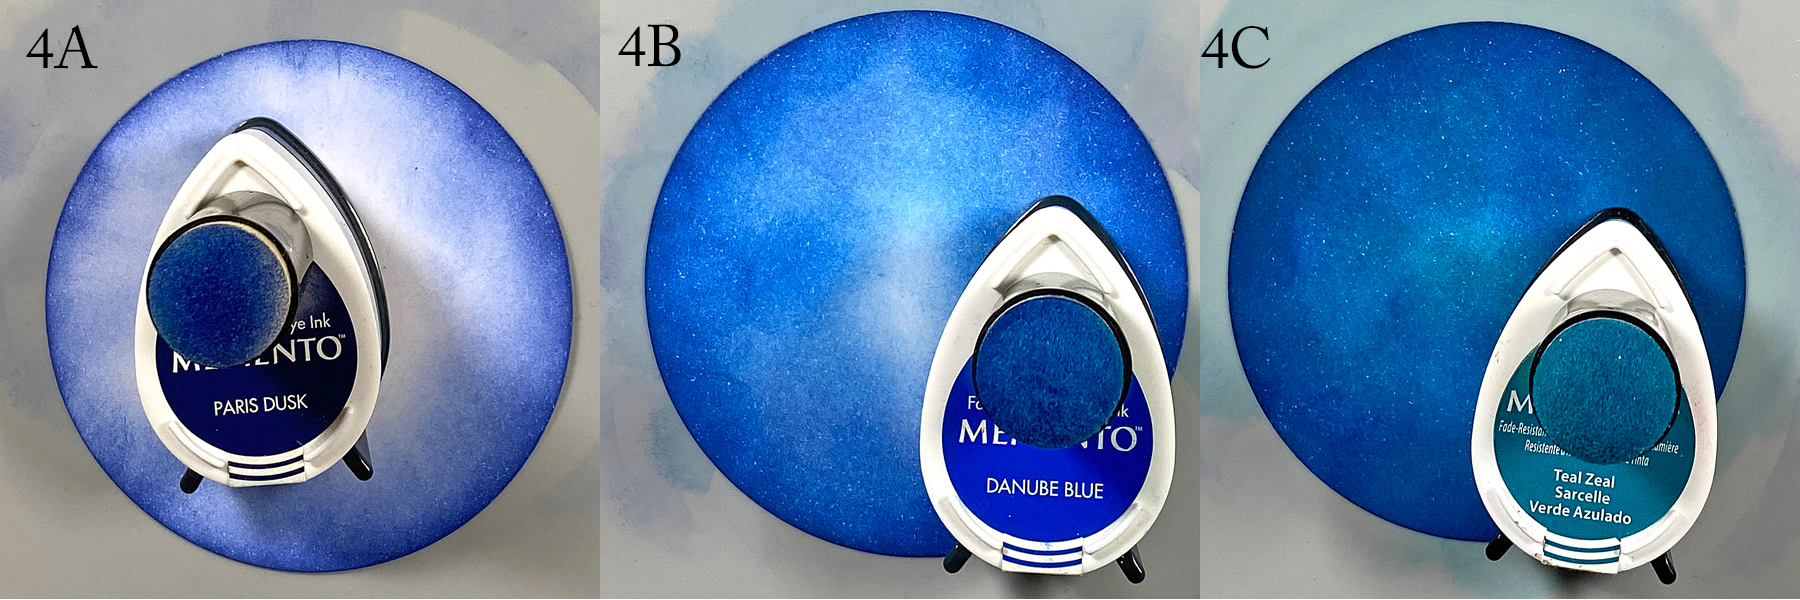
Step 4: Use a sponge dauber to apply Paris Dusk Memento Ink around the outside of the white circle die-cut. Use another sponge dauber to apply Danube Blue Memento Ink from the outside of the circle die-cut blending inwards. Use a third sponge dauber to apply Teal Zeal to the center of the die-cut, taking care to blend the inks together.
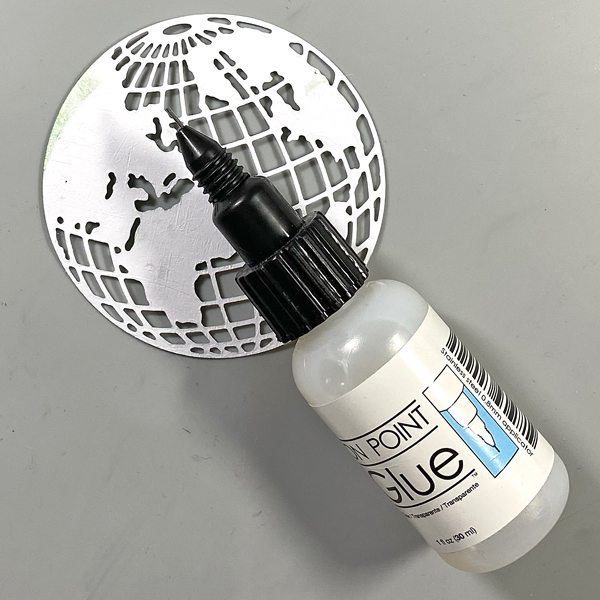
Step 5: Apply On Point Glue to the reverse of the glove, spread the glue with your finger, then adhere the globe to the inked circle. Set aside.
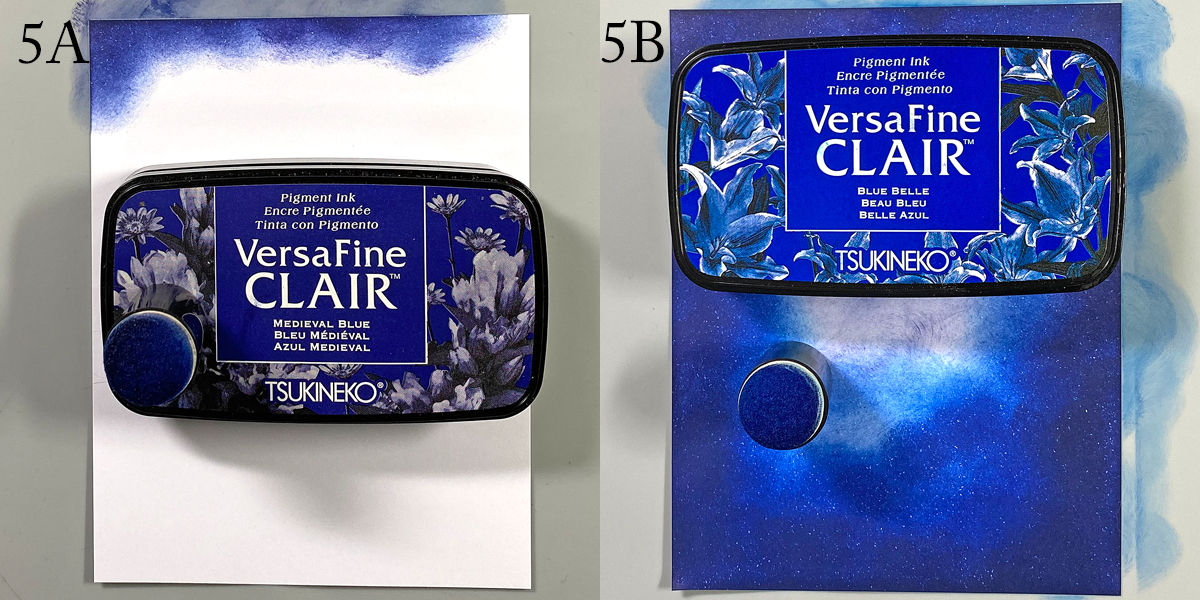
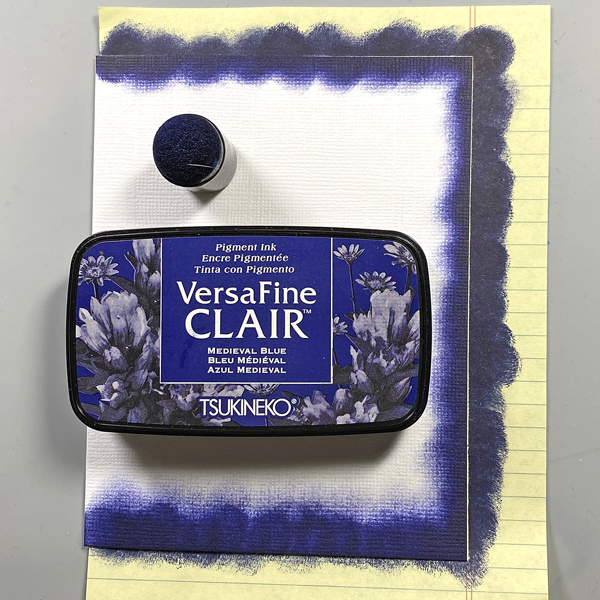
Step 6: Use a sponge dauber to apply Medieval Blue VersaFine Clair ink around the edges of a piece of 4” x 5.25” cardstock to create the image panel. Use a sponge dauber to apply Blue Belle VersaFine Clair ink from the center of the inked cardstock to the outside, taking care to blend the inks together. Heat set.
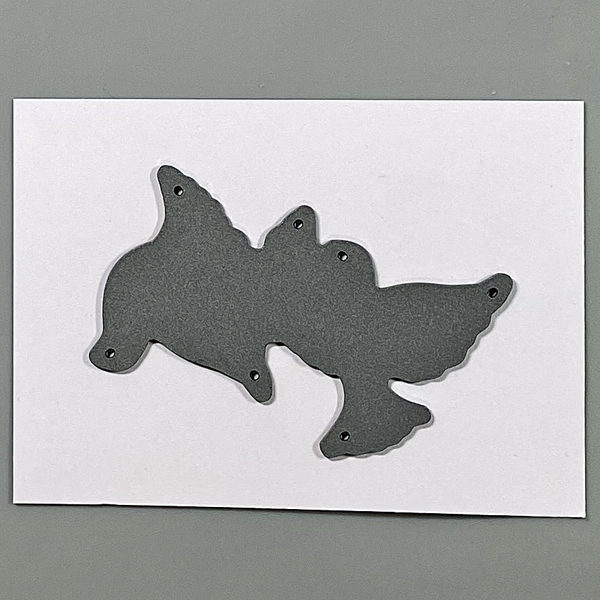
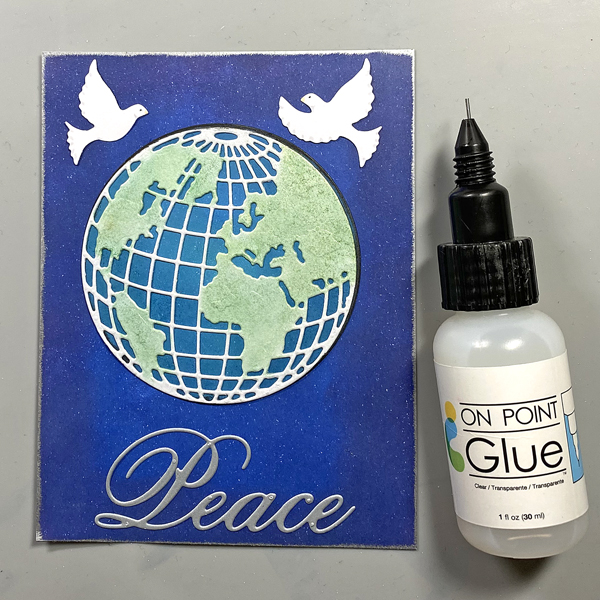
Step 7: Use the doves die to cut white cardstock. Use Copic markers to add details to the doves.
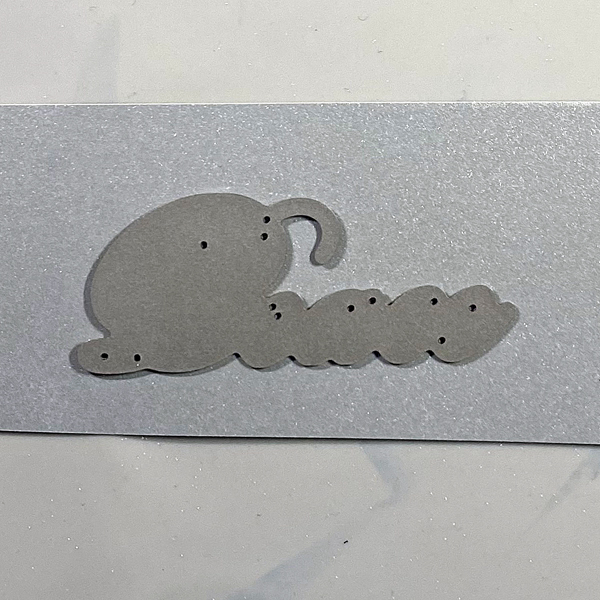
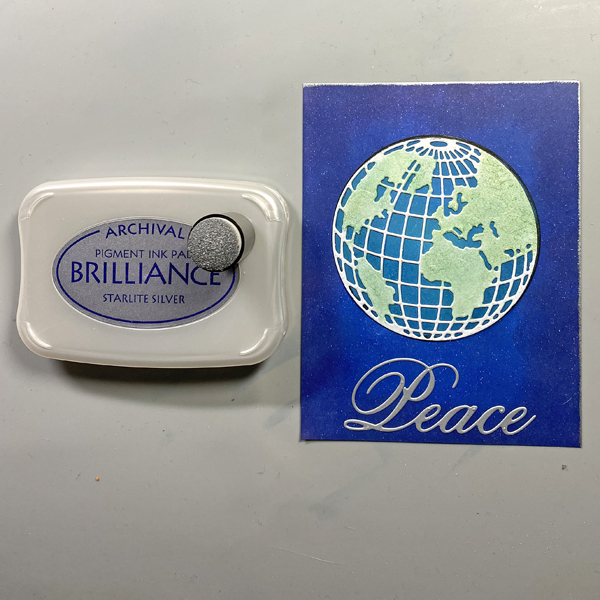
Step 8: Use the peace die to cut silver metallic cardstock and adhere to the base of the image panel.
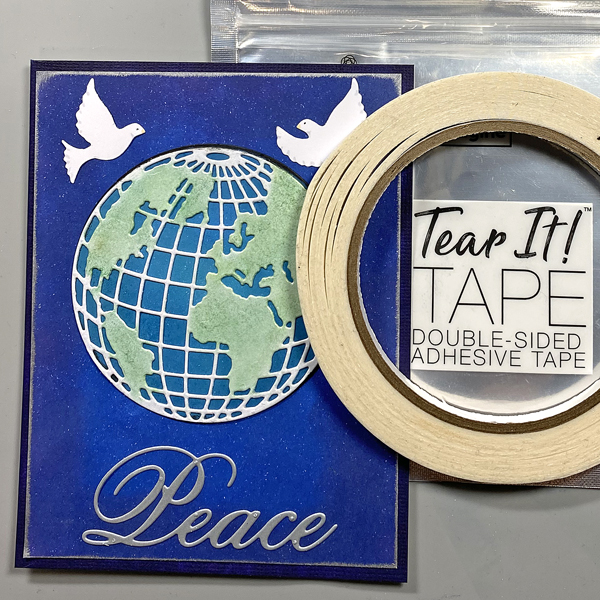
Step 9: Use Tear It! Tape to adhere the globe/circle combination to the card as shown.
Step 10: Edge the image panel with Starlite Silver Brilliance ink and a sponge dauber. Heat set.
Step 11: Use On Point Glue to adhere the doves to the image panel.
Step 12: Use a sponge dauber to apply Medieval blue to the perimeter of a 4.25” x 5.5” white card. Heat set.
Step 13: Use Tear It! Tape to adhere the image panel to the inked white card.
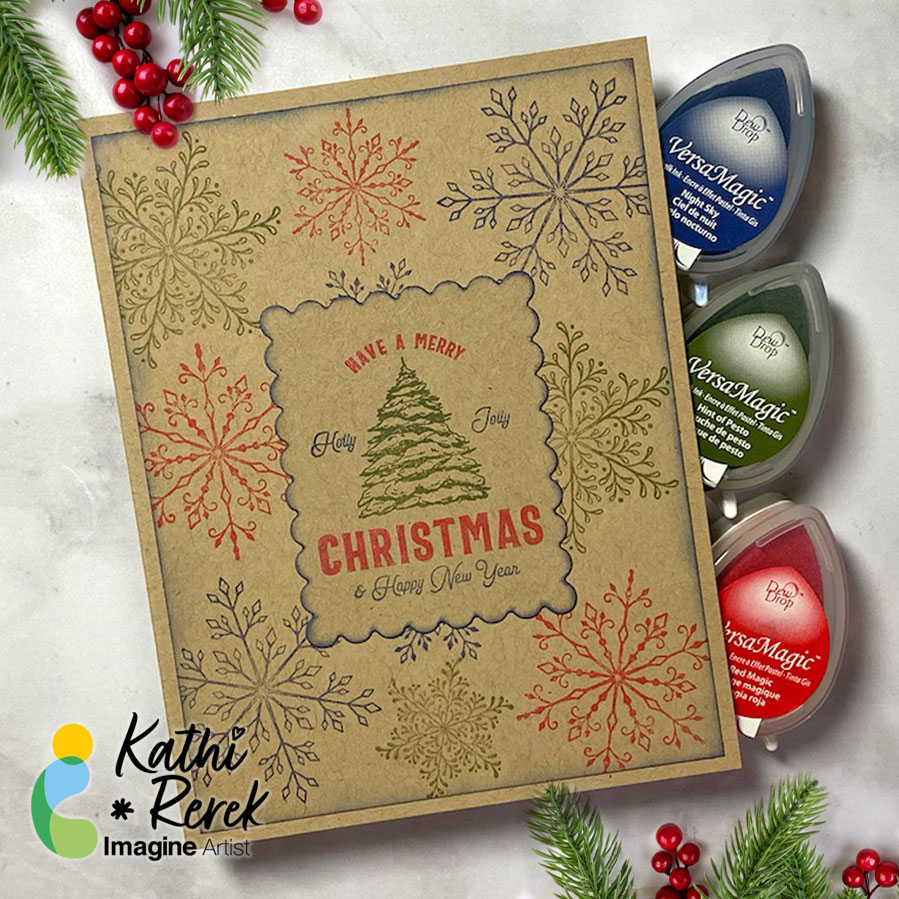
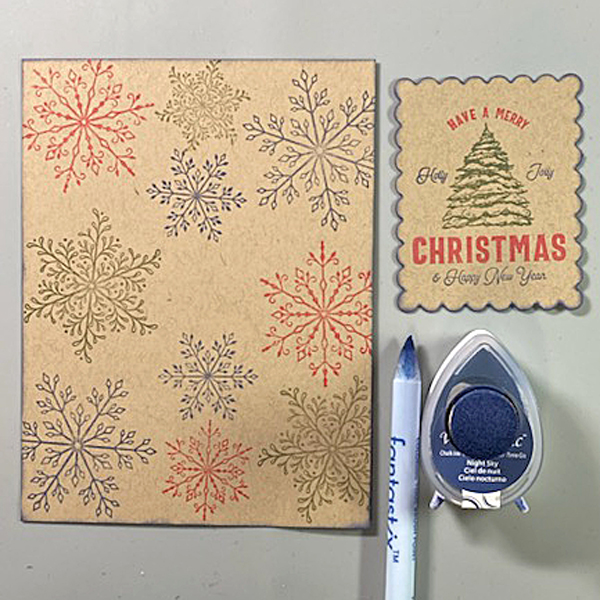
I recently saw a video on Unity Stamps’ Instagram that showed how to use colored inks to stamp snowflakes onto Kraft cardstock. I thought that it would be interesting to try VersaMagic Chalk Inks to see how it would work.
Skill Level: Beginner to Intermediate Time: 1 hour
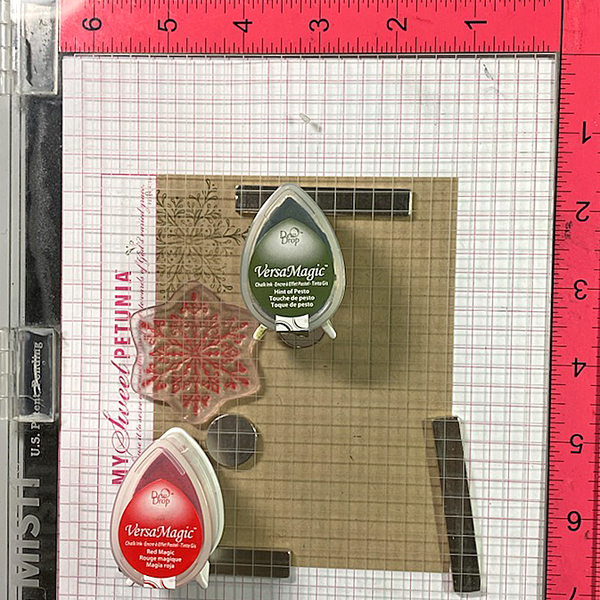
Step 1: Use magnets to secure a 4” x 5.25” piece of Kraft cardstock onto the base of a stamping platform.
Use Hint of Pesto to stamp the leafy snowflake from the Snowflakes Large Clear Polymer Stamp Set on the top left. Re-ink and stamp again if necessary to create good impression.
Position the spiky snowflake from the set facedown on the image panel below green-stamped snowflake. Use Red Magic VersaMagic ink to stamp the snowflake. Re-ink and stamp again if necessary to create good images. Clean and dry both stamps.
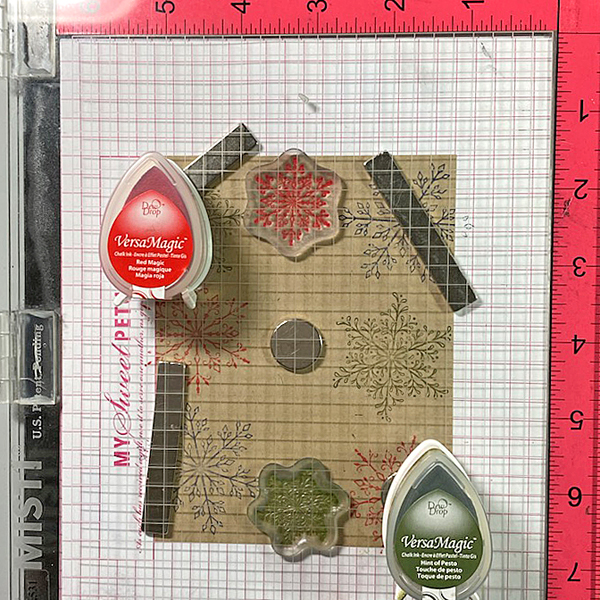
Step 2: Position the third snowflake stamp from the stamp set facedown on the bottom left of the image panel. Ink the stamp with Night Sky VersaMagic Ink and stamp. Re-ink and stamp again if necessary to create a good impression. Clean and dry the stamp.
Repeat Steps 1 and 2 along the right edge of the image panel as shown in the card photo above.
Step 3: Position one of the snowflake stamps from the Snowflakes Small Clear Polymer Stamp Set facedown in the center top of the image panel. ink the stamp with Red Magic VersaMatic Ink and stamp. Re-ink and stamp again if necessary to create a good impression. Clean and dry the stamp.
Continue the process of stamping snowflakes from the Snowflakes Small Stamp set with all three colors of VersaMagic Inks taking care to clean and dry the stamps between colors. Remove the image panel from the stamping panel and heat set.
Step 4: Secure a piece of Kraft cardstock to the base of the image panel. Position the Holiday Spruce Rubber Stamp face-down on the image panel. Press the platform’s lid onto the back of the stamp and lift.
Use Post-It Notes to cover all elements of the stamp except for the Christmas Tree. With the Post-It Notes in place, ink the stamp with Hint of Pesto VersaMagic Ink. Remove the Post-It Notes and stamp twice — once onto the image panel and once onto repositionable sticker paper. Fussy-cut the sticker paper version and place over the stamped tree on the image panel.
Use Post-It Notes to cover each element of the Holiday Spruce Rubber Stamp, ink with one of the the VersaMagic Inks, remove the Post-It Notes, and stamp.
Heat set when the image is completely stamped.
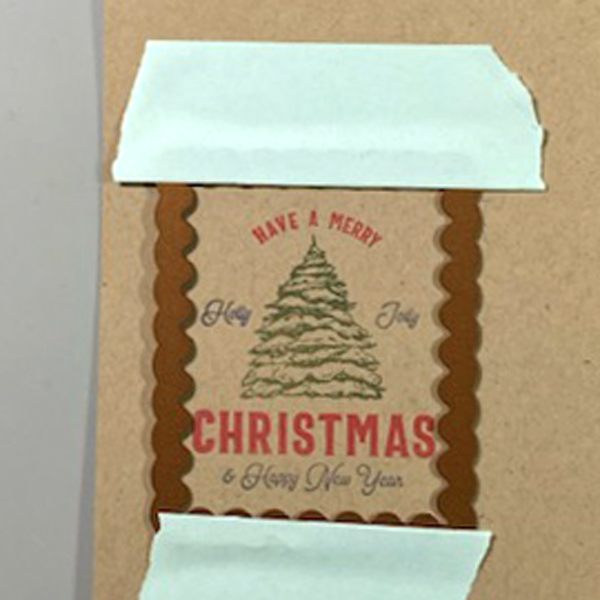
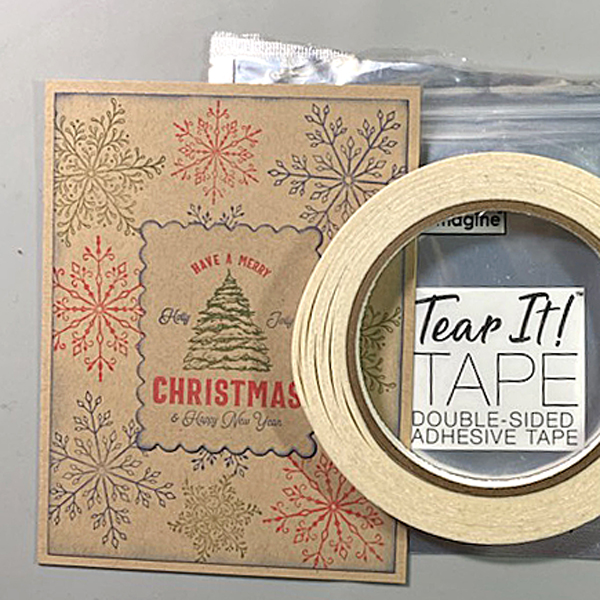
Step 5: Use low-tack tape to secure a scalloped rectangle die to the sentiment panel. Run the sentiment panel through a die-cutting machine.
Step 6: Use a sponge dauber and Night Sky VersaMagic Ink to edge both the image panel and the sentiment die-cut. Use a Fantastix to reach between the scallops! Heat set both panels.
Step 7: Use Tear It! Tape to adhere the image panel to a Kraft A2 Card. Use Tear-It Tape to adhere the sentiment die-cut to finish the card.